目录
1、 配置zabbix的yum源
2、下载zabbix-agent
3、配置zabbix-agent的配置文件
4、关闭防火墙,selinux
5、重启zabbix-agent
6、连通性测试,在zabbix-server服务器上面使用zabbix_get获取zabbix-agent服务器上的数据
7、在zabbix web端配置zabbix-agent所在的主机
1、添加主机
2、添加监控项
3、添加图形
4、再添加一个可用内存的监控项
5、根据创建的监控项创建一个触发器
8、为主机添加zabbix模板
我们已经在zabbix服务器上面部署了zabbix server,也成功监控了zabbix server本机上的一些数据,现在通过部署zabbix-agent来监控别的主机
1、 配置zabbix的yum源
rpm -ivh http://repo.zabbix.com/zabbix/4.0/rhel/7/x86_64/zabbix-release-4.0-1.el7.noarch.rpm执行结果:
[root@zabbix-agent yum.repos.d]# rpm -ivh http://repo.zabbix.com/zabbix/4.0/rhel/7/x86_64/zabbix-release-4.0-1.el7.noarch.rpm
获取http://repo.zabbix.com/zabbix/4.0/rhel/7/x86_64/zabbix-release-4.0-1.el7.noarch.rpm
警告:/var/tmp/rpm-tmp.msuGpK: 头V4 RSA/SHA512 Signature, 密钥 ID a14fe591: NOKEY
准备中...                          ################################# [100%]
正在升级/安装...
   1:zabbix-release-4.0-1.el7         ################################# [100%]
[root@zabbix-agent yum.repos.d]# ls
CentOS-Base.repo  CentOS-Debuginfo.repo  CentOS-Media.repo    CentOS-Vault.repo          zabbix.repo
CentOS-CR.repo    CentOS-fasttrack.repo  CentOS-Sources.repo  CentOS-x86_64-kernel.repo
#########################################################################
2、下载zabbix-agent
yum install zabbix-agent -y
执行结果:
[root@zabbix-agent yum.repos.d]# yum install zabbix-agent -y
已加载插件:fastestmirror
Loading mirror speeds from cached hostfile
 * base: mirrors.bupt.edu.cn
 * extras: mirrors.bupt.edu.cn
 * updates: mirrors.bfsu.edu.cn
zabbix                                                                                           | 2.9 kB  00:00:00
zabbix-non-supported                                                                             | 2.9 kB  00:00:00
zabbix-non-supported/x86_64/pr FAILED                                                 ]  21 kB/s | 117 kB  00:00:09 ETA
http://repo.zabbix.com/non-supported/rhel/7/x86_64/repodata/4ff39c776cba1953bdc6df66cdcc08ff9b7613aeb3bb9ef006a45c635189902c-primary.sqlite.bz2: [Errno 14] curl#6 - "Could not resolve host: repo.zabbix.com; Unknown error"
正在尝试其它镜像。
(1/2): zabbix/x86_64/primary_db                                                                  | 302 kB  00:00:13
zabbix-non-supported/x86_64/primary_db                                                           | 3.7 kB  00:00:00
正在解决依赖关系
--> 正在检查事务
---> 软件包 zabbix-agent.x86_64.0.4.0.44-1.el7 将被 安装
--> 解决依赖关系完成

依赖关系解决

========================================================================================================================
 Package                        架构                     版本                            源                        大小
========================================================================================================================
正在安装:
 zabbix-agent                   x86_64                   4.0.44-1.el7                    zabbix                   431 k

事务概要
========================================================================================================================
安装  1 软件包

总下载量:431 k
安装大小:1.7 M
Downloading packages:
警告:/var/cache/yum/x86_64/7/zabbix/packages/zabbix-agent-4.0.44-1.el7.x86_64.rpm: 头V4 RSA/SHA512 Signature, 密钥 ID a14fe591: NOKEY
zabbix-agent-4.0.44-1.el7.x86_64.rpm 的公钥尚未安装
zabbix-agent-4.0.44-1.el7.x86_64.rpm                                                             | 431 kB  00:00:03
从 file:///etc/pki/rpm-gpg/RPM-GPG-KEY-ZABBIX-A14FE591 检索密钥
导入 GPG key 0xA14FE591:
 用户ID     : "Zabbix LLC <packager@zabbix.com>"
 指纹       : a184 8f53 52d0 22b9 471d 83d0 082a b56b a14f e591
 软件包     : zabbix-release-4.0-1.el7.noarch (installed)
 来自       : /etc/pki/rpm-gpg/RPM-GPG-KEY-ZABBIX-A14FE591
Running transaction check
Running transaction test
Transaction test succeeded
Running transaction
警告:RPM 数据库已被非 yum 程序修改。
  正在安装    : zabbix-agent-4.0.44-1.el7.x86_64                                                                    1/1
  验证中      : zabbix-agent-4.0.44-1.el7.x86_64                                                                    1/1

已安装:
  zabbix-agent.x86_64 0:4.0.44-1.el7

完毕!
#########################################################################
3、配置zabbix-agent的配置文件
[root@zabbix-agent zabbix]# cat /etc/zabbix/zabbix_agentd.conf
PidFile=/var/run/zabbix/zabbix_agentd.pid
LogFile=/var/log/zabbix/zabbix_agentd.log
# 日志级别
DebugLevel=3
LogFileSize=0
# zabbix-server的地址
Server=192.168.20.10
ListenPort=10050
# 监听的机器ip
ListenIP=192.168.20.11
ServerActive=192.168.20.10
Hostname=192.168.20.11
Include=/etc/zabbix/zabbix_agentd.d/*.conf
#########################################################################
4、关闭防火墙,selinux
[root@zabbix-agent zabbix]# systemctl disable firewalld
Removed symlink /etc/systemd/system/multi-user.target.wants/firewalld.service.
Removed symlink /etc/systemd/system/dbus-org.fedoraproject.FirewallD1.service.
[root@zabbix-agent zabbix]# service firewalld stop
Redirecting to /bin/systemctl stop firewalld.service
[root@zabbix-agent zabbix]# setenforce 0
#########################################################################
5、重启zabbix-agent
[root@zabbix-agent zabbix]# systemctl enable zabbix-agent
Created symlink from /etc/systemd/system/multi-user.target.wants/zabbix-agent.service to /usr/lib/systemd/system/zabbix-agent.service.
[root@zabbix-agent zabbix]# systemctl start zabbix-agent
[root@zabbix-agent zabbix]# ps -ef | grep zabbix
zabbix     2087      1  0 14:46 ?        00:00:00 /usr/sbin/zabbix_agentd -c /etc/zabbix/zabbix_agentd.conf
zabbix     2088   2087  0 14:46 ?        00:00:00 /usr/sbin/zabbix_agentd: collector [idle 1 sec]
zabbix     2089   2087  0 14:46 ?        00:00:00 /usr/sbin/zabbix_agentd: listener #1 [waiting for connection]
zabbix     2090   2087  0 14:46 ?        00:00:00 /usr/sbin/zabbix_agentd: listener #2 [waiting for connection]
zabbix     2091   2087  0 14:46 ?        00:00:00 /usr/sbin/zabbix_agentd: listener #3 [waiting for connection]
zabbix     2092   2087  0 14:46 ?        00:00:00 /usr/sbin/zabbix_agentd: active checks #1 [idle 1 sec]
root       2131   1979  0 14:48 pts/0    00:00:00 grep --color=auto zabbix
#########################################################################
6、连通性测试,在zabbix-server服务器上面使用zabbix_get获取zabbix-agent服务器上的数据
[root@zabbix-server zabbix]# /usr/bin/zabbix_get -s 192.168.20.11 -p 10050 -k "system.cpu.load[all,avg1]"
0.000000
[root@zabbix-server zabbix]# /usr/bin/zabbix_get -s 192.168.20.11 -p 10050 -k "system.hostname"
zabbix-agent
[root@zabbix-server zabbix]# /usr/bin/zabbix_get -s 192.168.20.11 -p 10050 -k "system.uname"
Linux zabbix-agent 3.10.0-1160.el7.x86_64 #1 SMP Mon Oct 19 16:18:59 UTC 2020 x86_64
#########################################################################
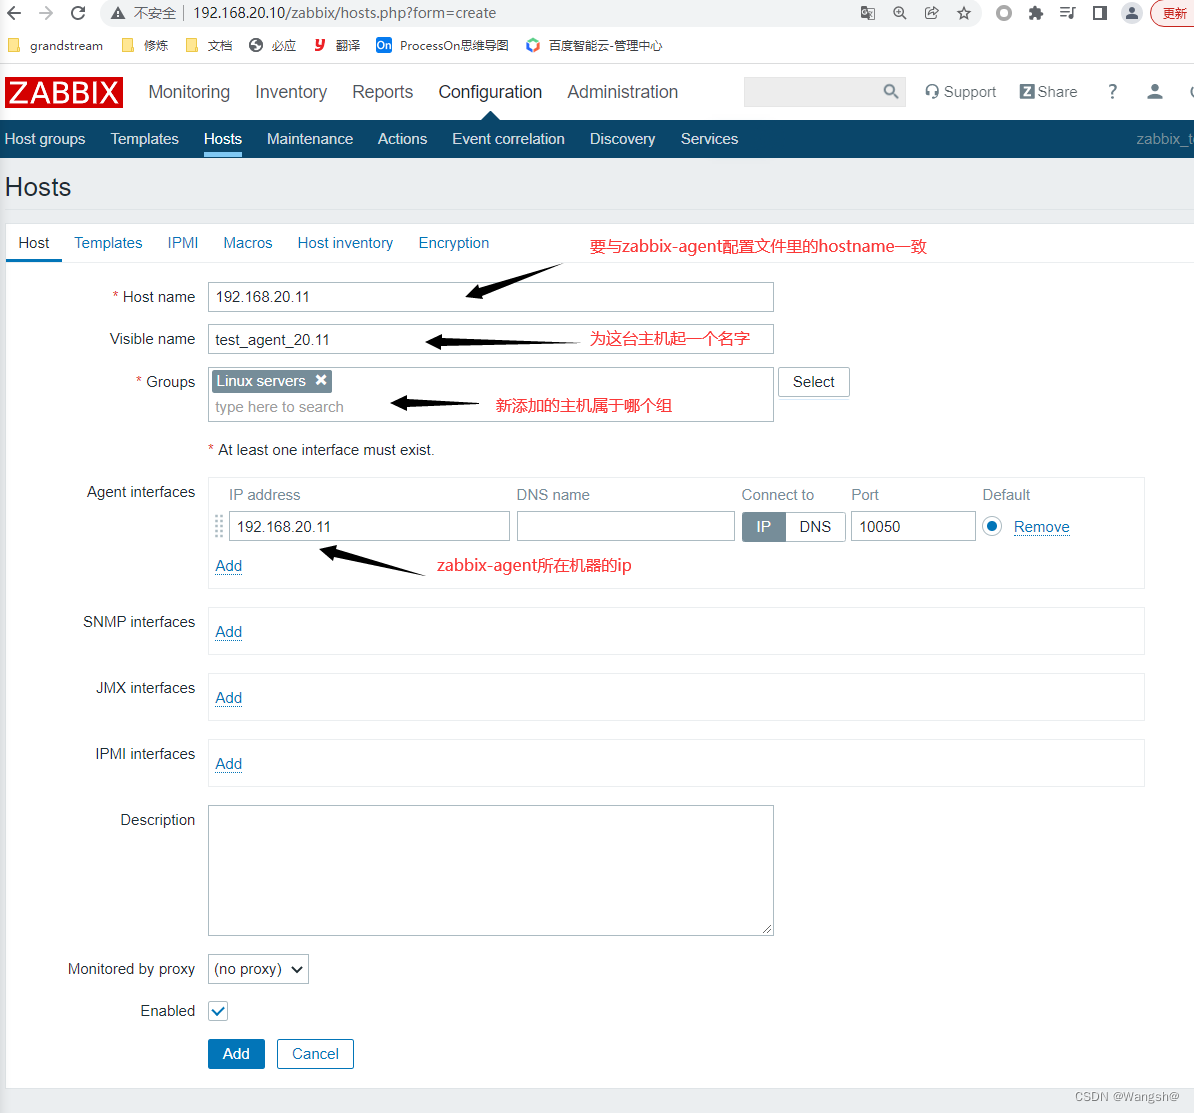
7、在zabbix web端配置zabbix-agent所在的主机
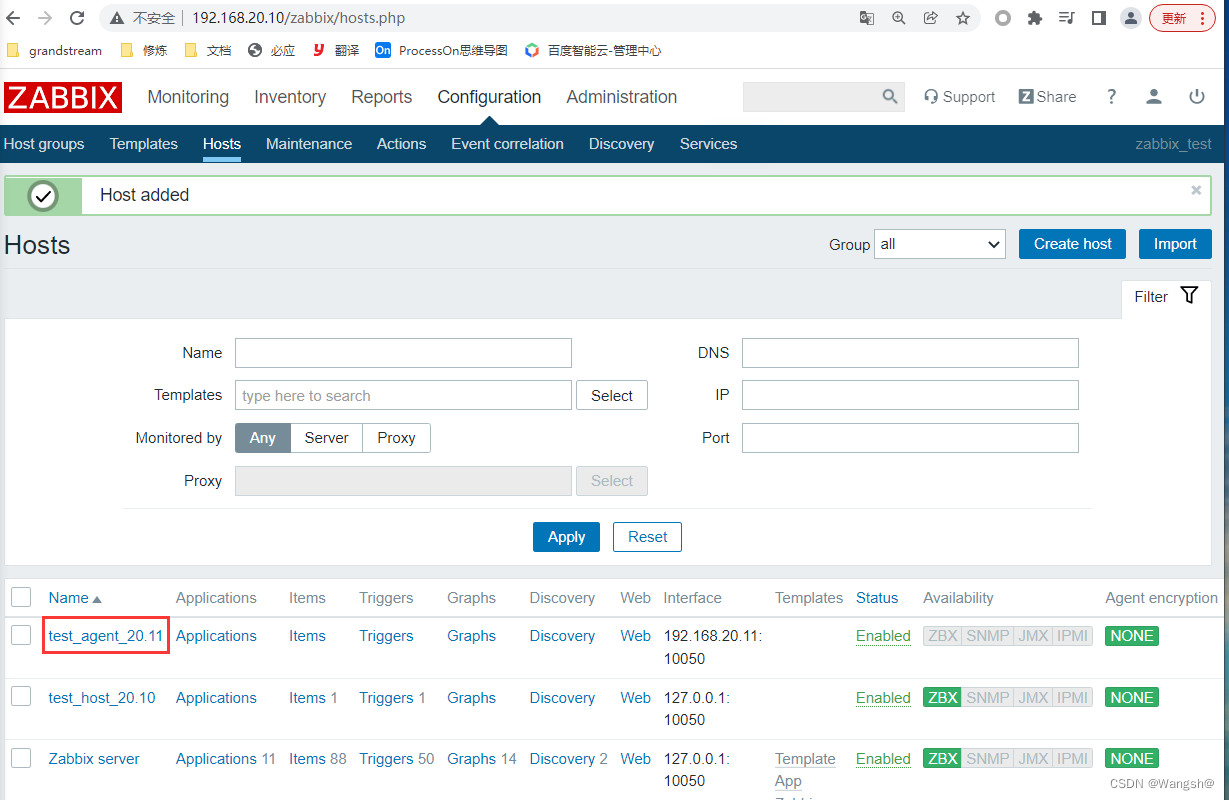
1、添加主机
可以看到,添加主机成功
#########################################################################
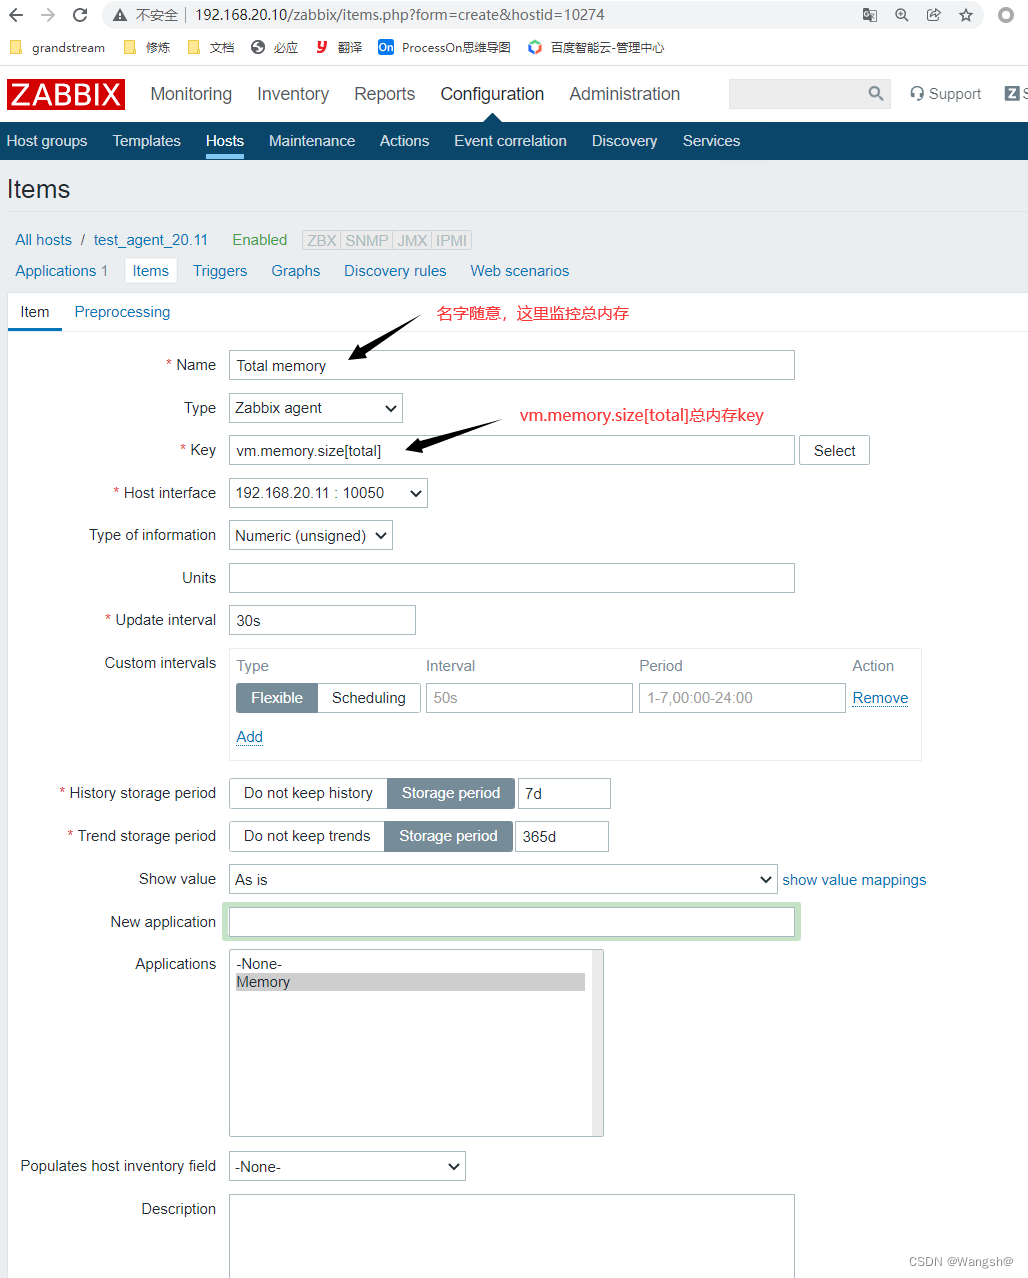
2、添加监控项
#########################################################################
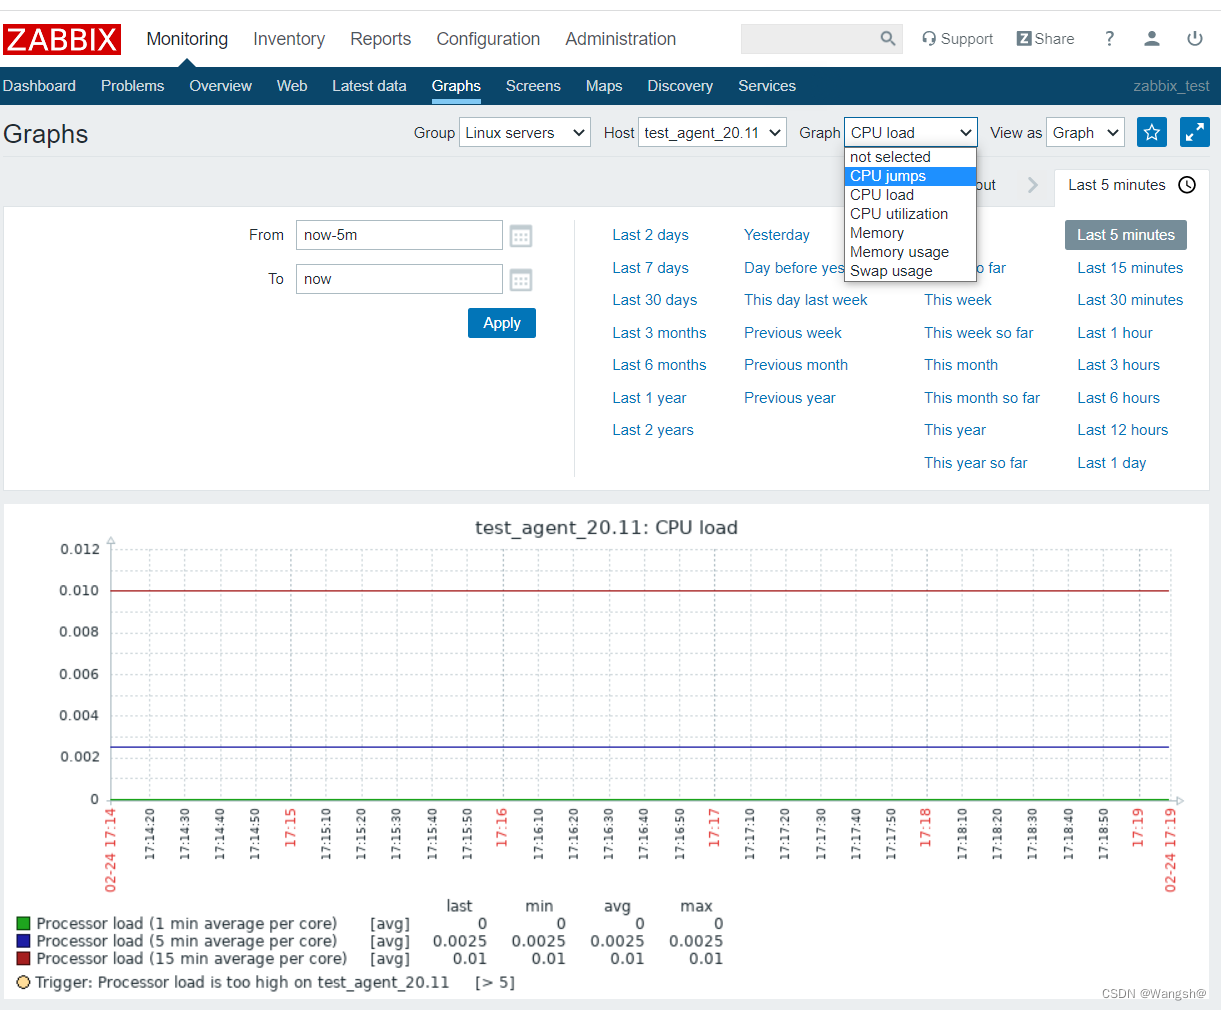
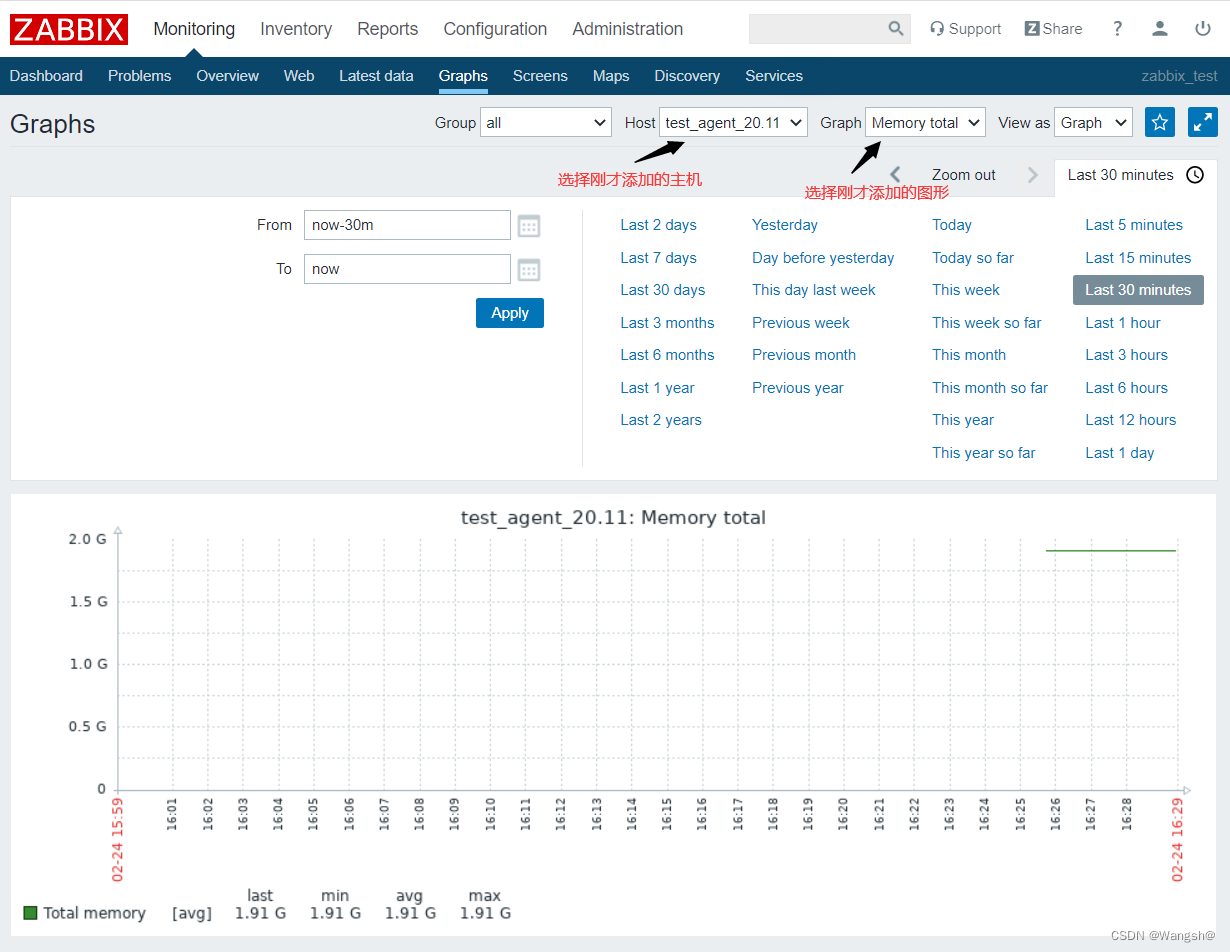
3、添加图形

查看刚才创建的图形
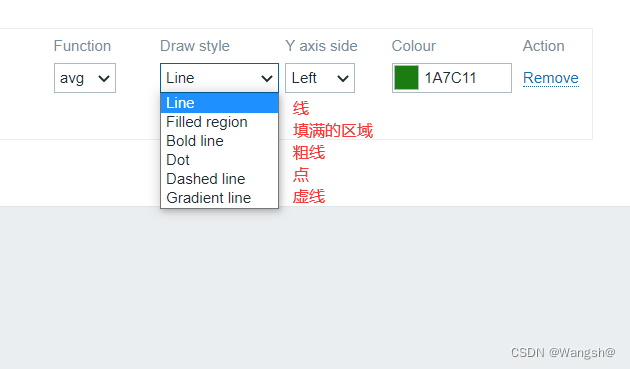
还可以选择绘图风格
#########################################################################
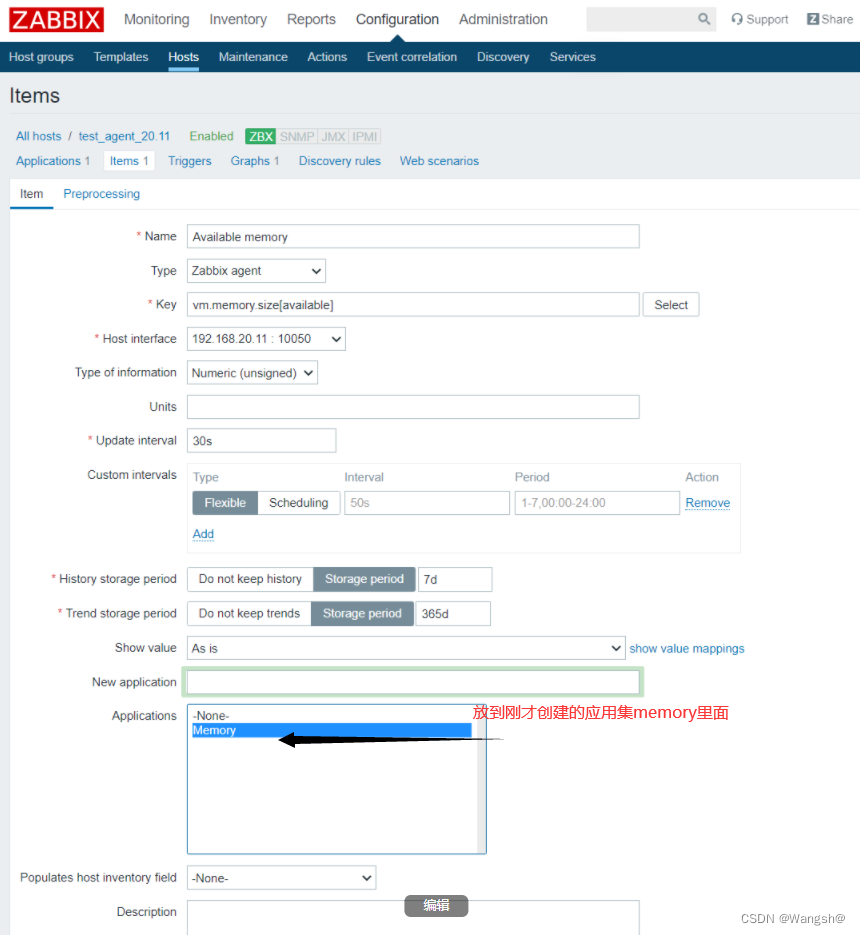
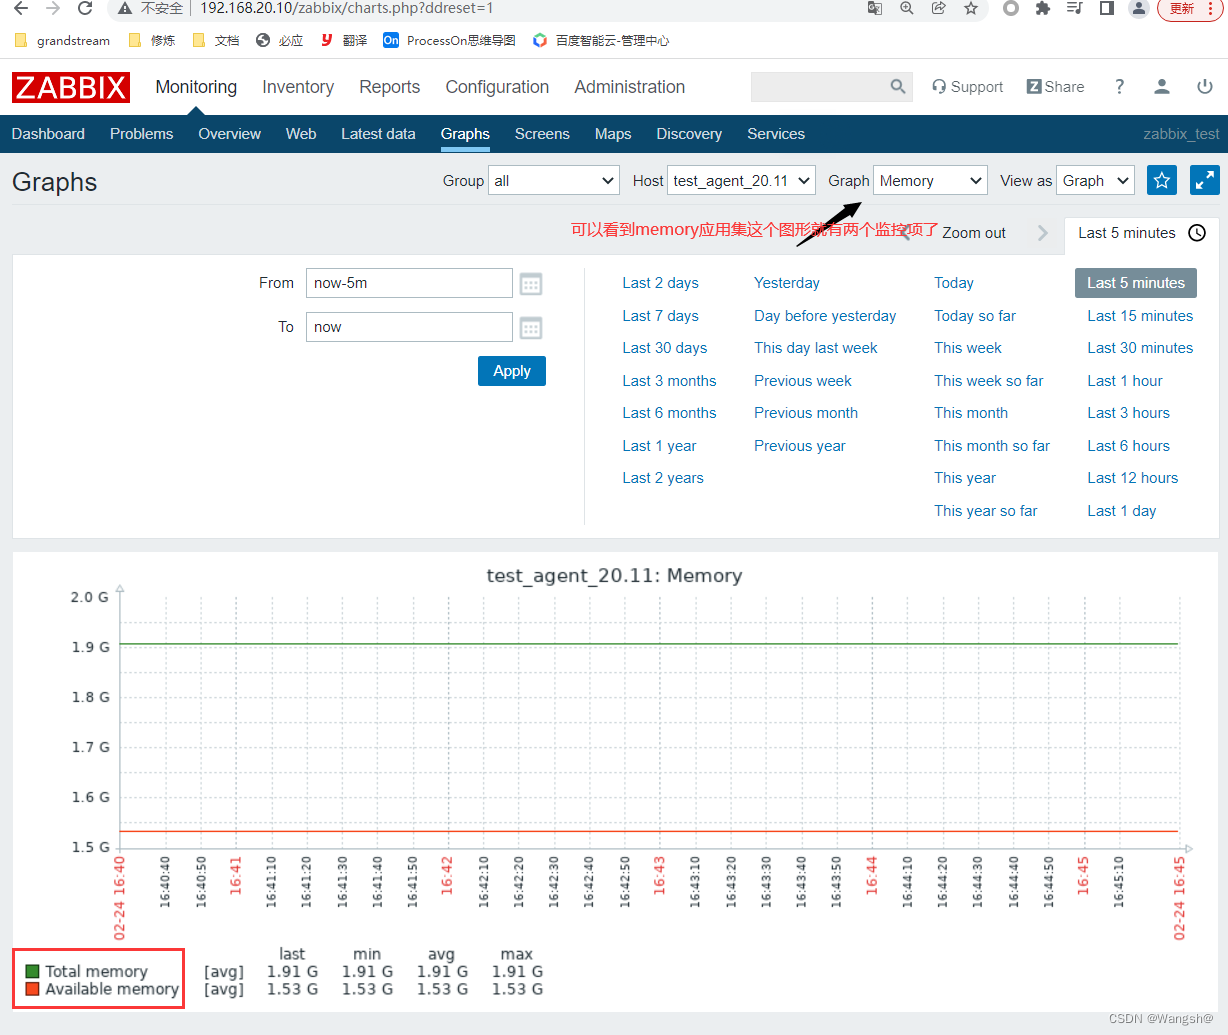
4、再添加一个可用内存的监控项
添加监控项可以按照模板上的名字来起

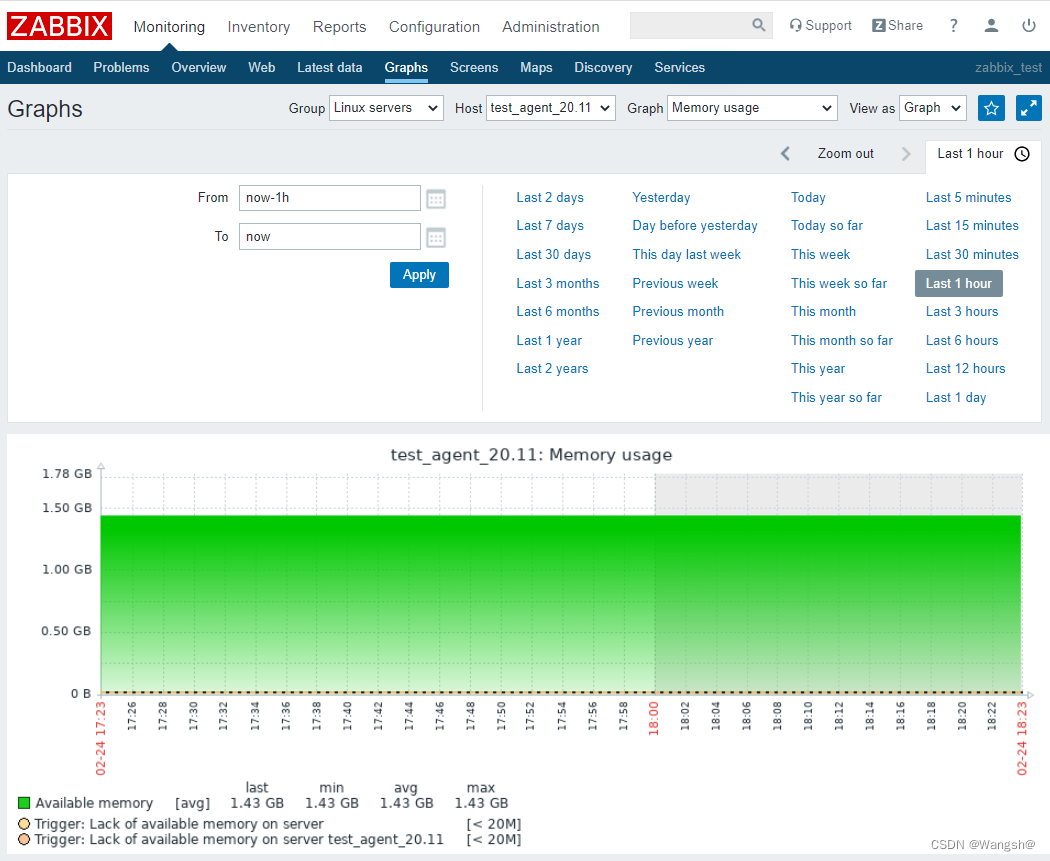
将创建的可用内存也添加到图形里面
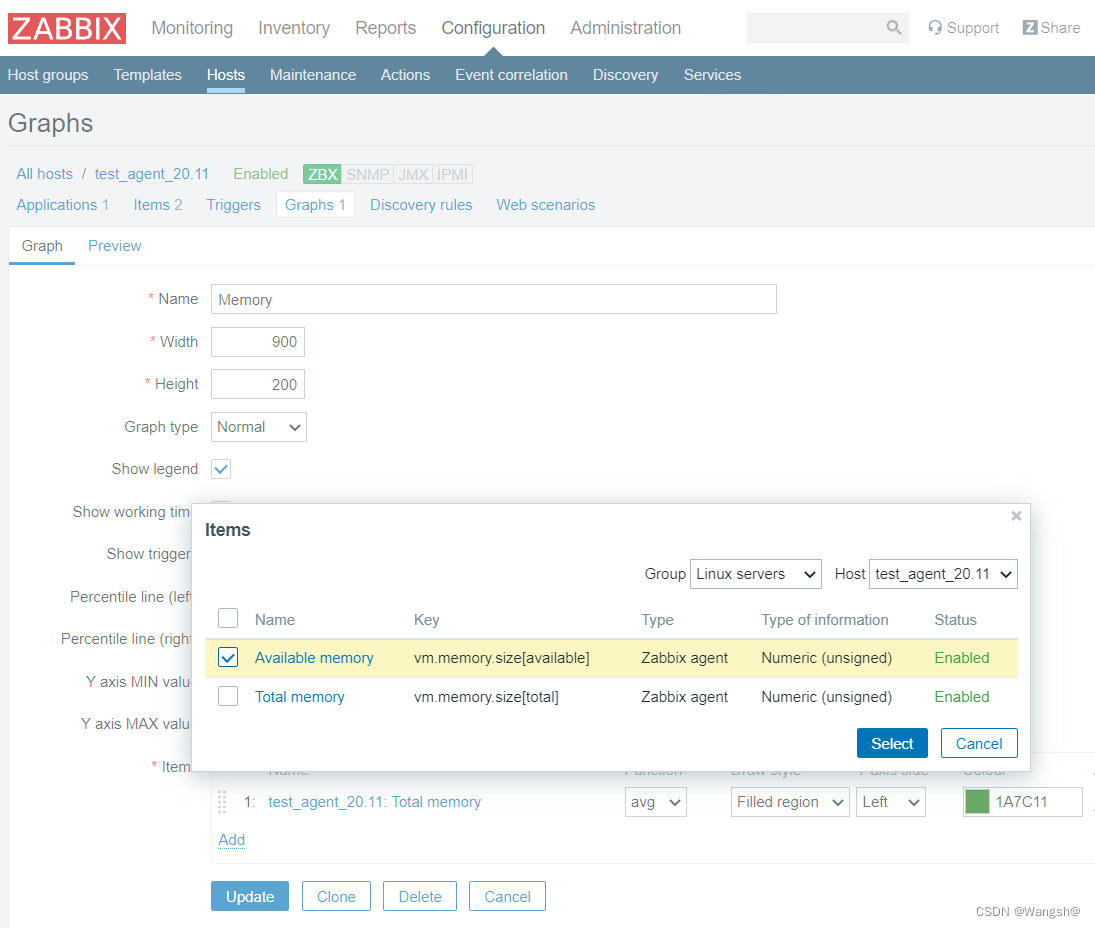
再次查看图形,可以看到,memory这个应用集就有两个监控项图形了。
#########################################################################
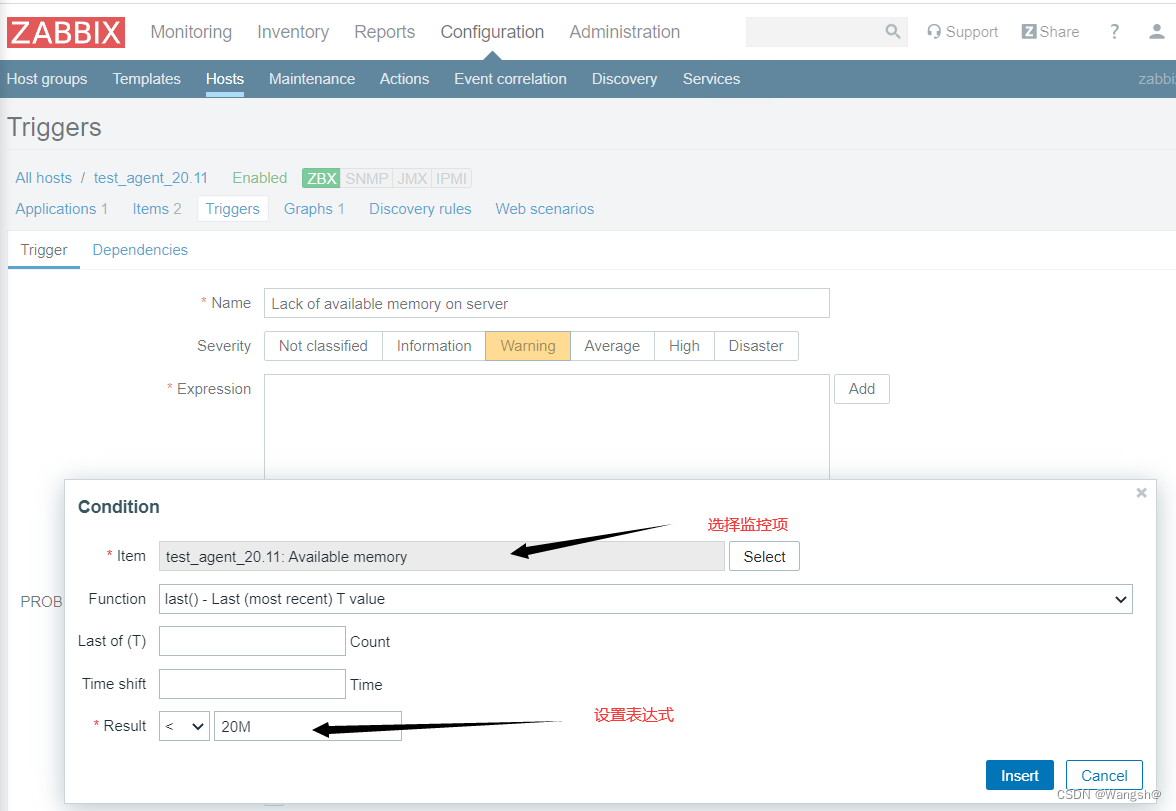
5、根据创建的监控项创建一个触发器
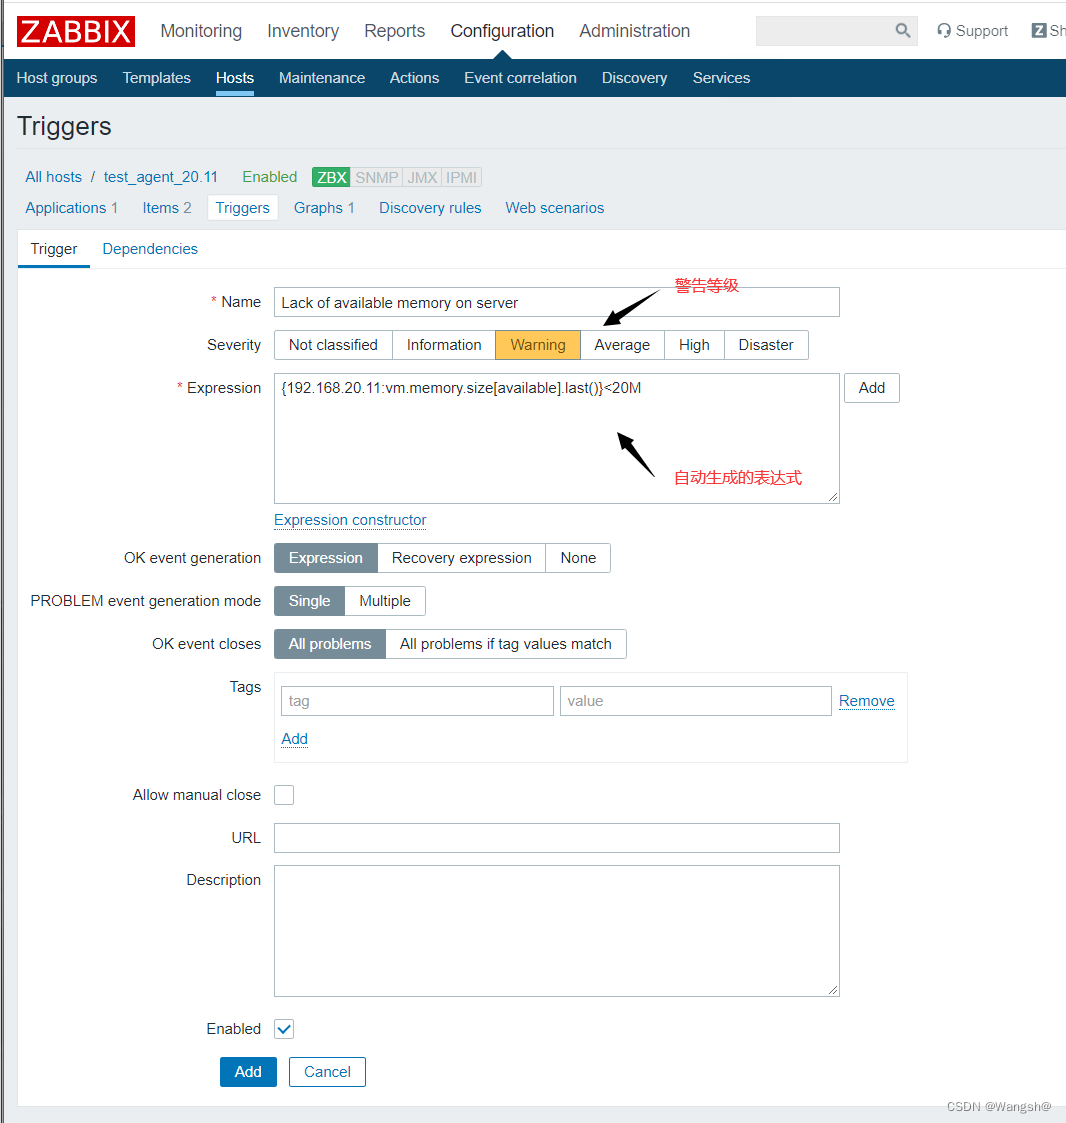
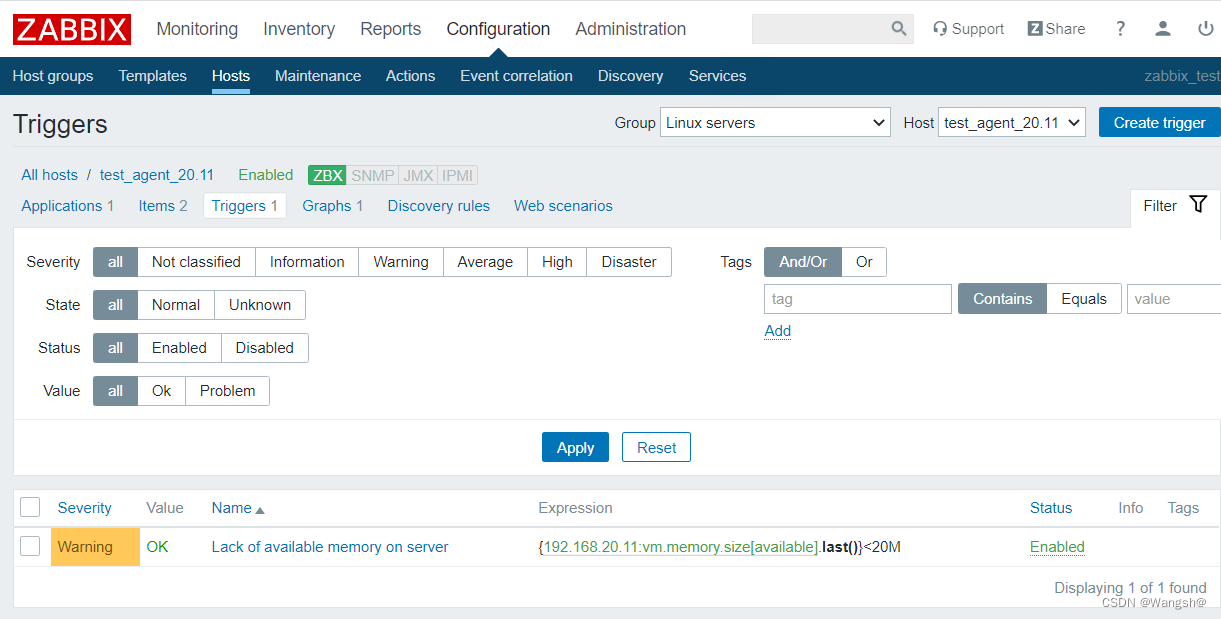
触发器设置完成
#########################################################################
8、为主机添加zabbix模板
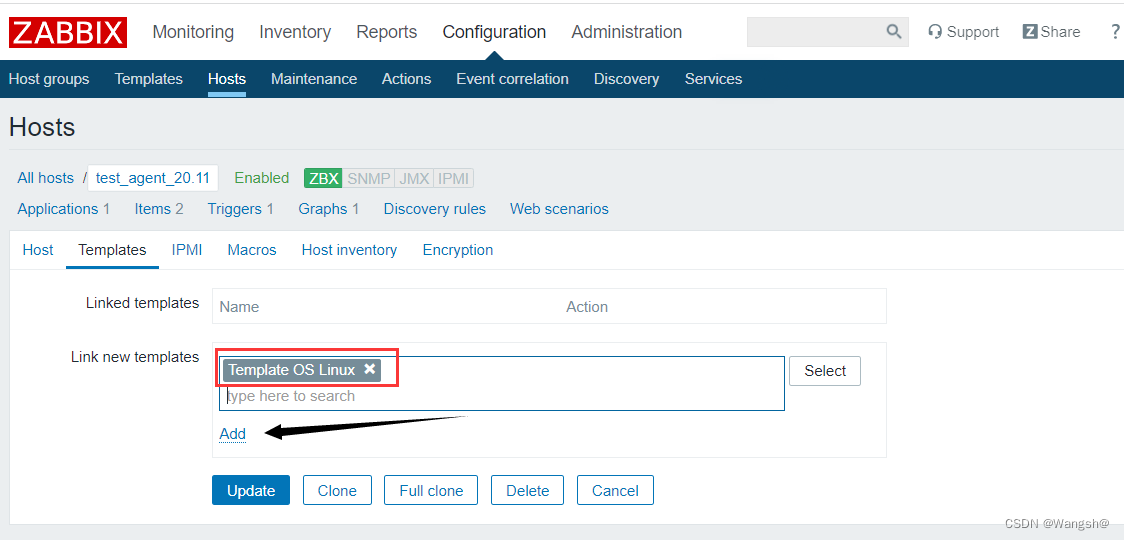
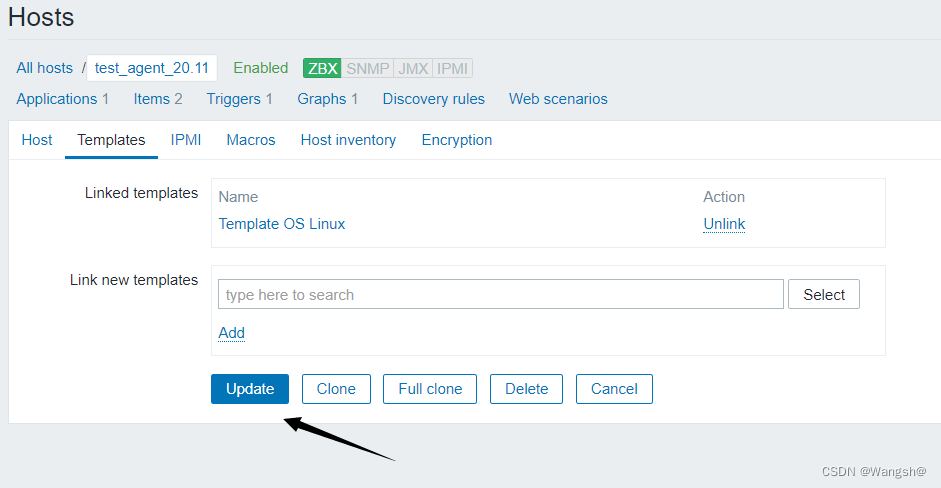
选择好模板以后,update更新
可以看到,应用了模板的主机会多了许多的应用集applications,监控项items,触发器triggers,图形graphs,等等
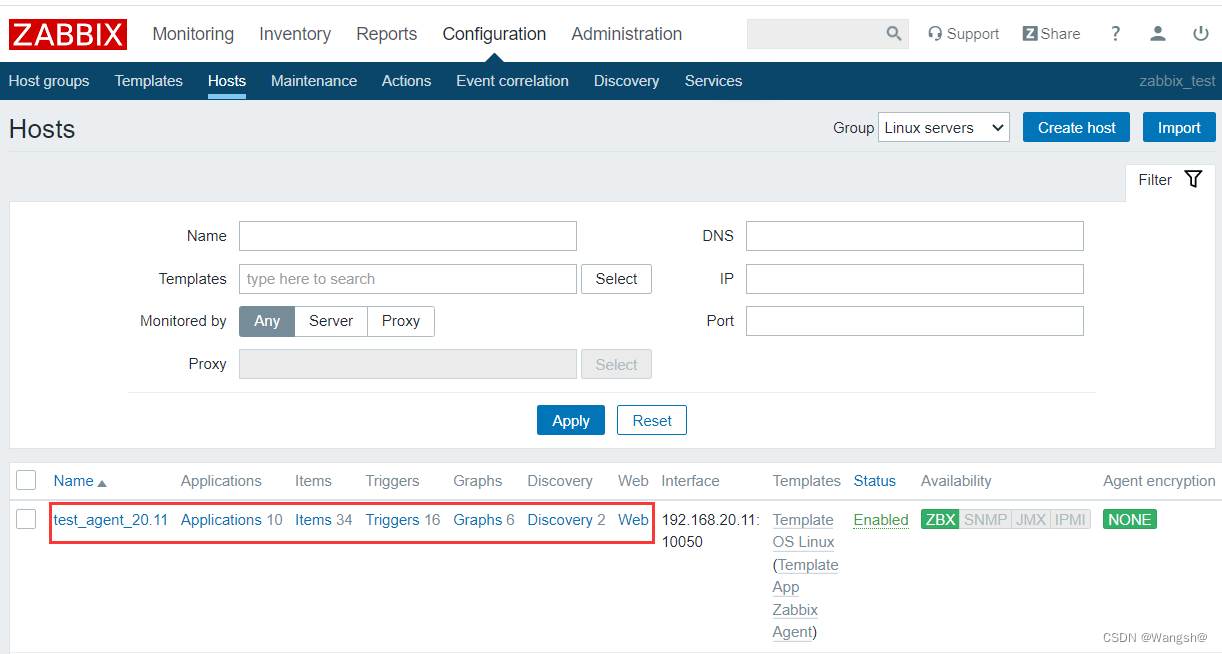
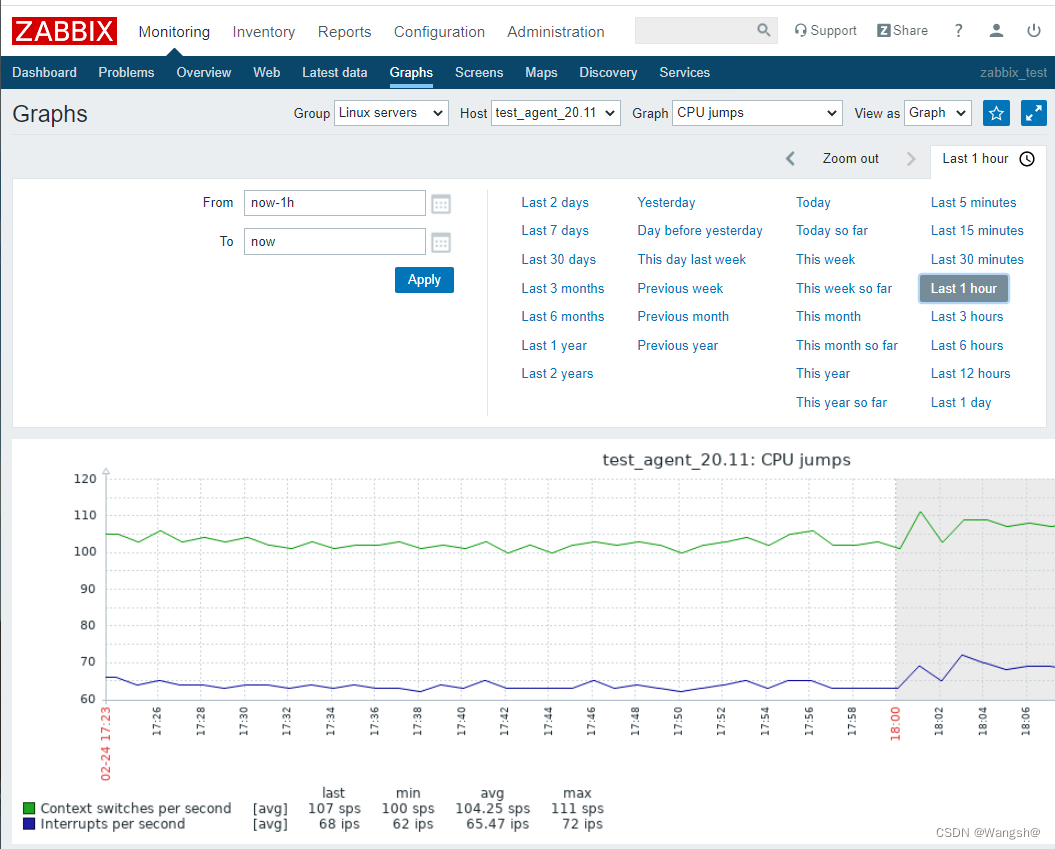
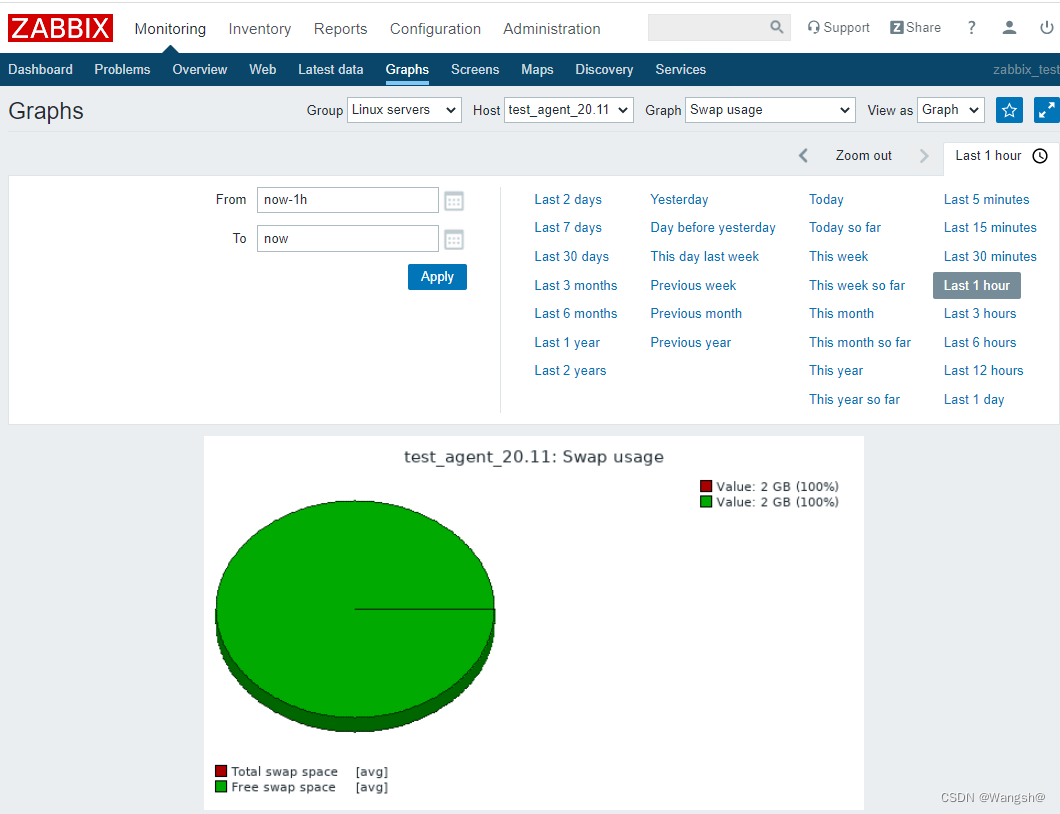
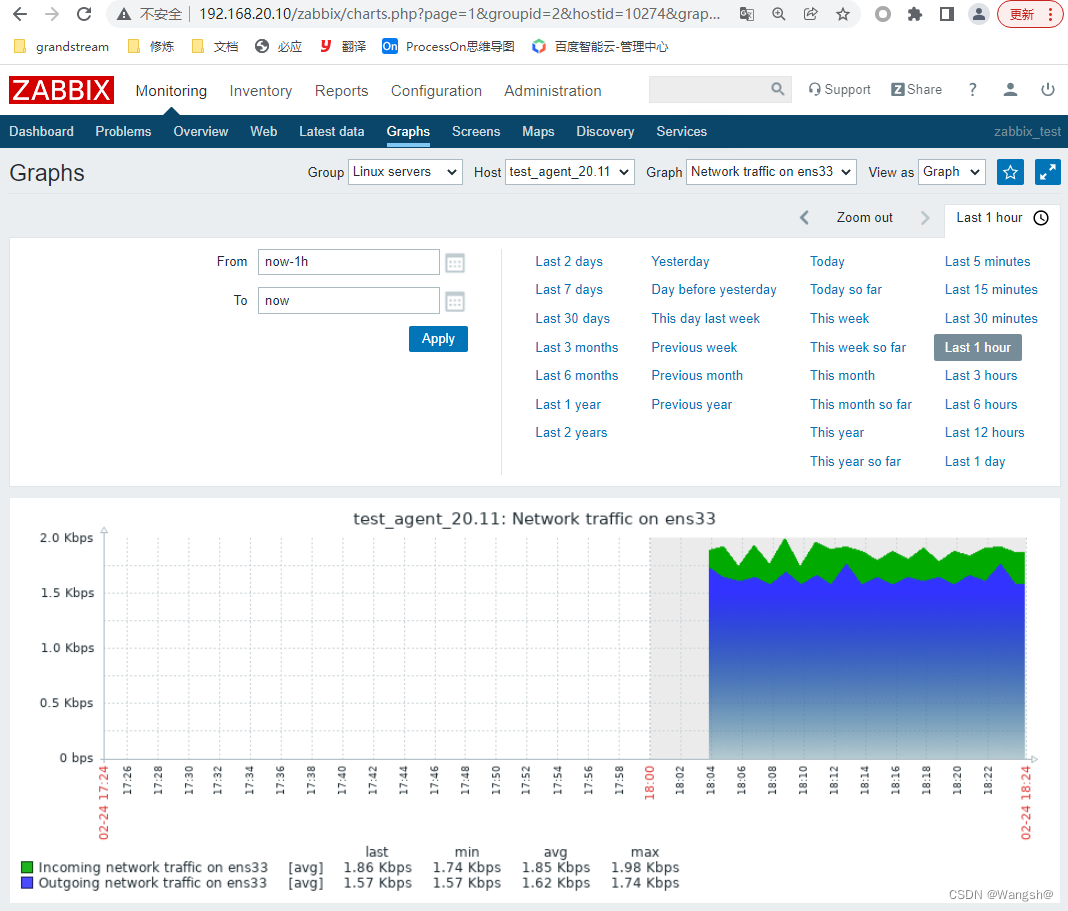
再查看 Monitoring --》graphs 可以看到,多了很多图形,使用模板,一键获取监控数据图形,非常方便。