常用的截屏函数是:
UnityEngine.ScreenCapture.CaptureScreenshot(fileName, 5);
//5代表dpi大小,数字越大越清晰
但是这样保存图片是不能将黑色背景的透明度设为0,最终还是24bit图。
如果将背景透明度设为0而渲染物体透明度设为255,则可以借助Texture::ReadPixels
    private Texture2D outputTexture;
    void Start()
    {

    }
    void Update()
    {
    ...
        if (Input.GetKeyDown(KeyCode.P))//按下p键截屏
        {
            ImageCap();
        }
	...
	}


    public void ImageCap()
    {
        count++;
        Debug.Log("YourPath/" + count + ".png");
        StartCoroutine(MyCaptureFrame());//StartCoroutine开辟辅助线程
    }

    public void ImageSavePng()
    {
        string filepath = "YourPath/";
        string path = string.Format("{0}/{1:D04} shot.png", filepath, count);
        var pngShot = outputTexture.EncodeToPNG();
        File.WriteAllBytes(path, pngShot);
    }

    public void ImageRenderTextureToPNG()
    {
        outputTexture = new Texture2D(Screen.width - 1, Screen.height - 1);
        outputTexture.ReadPixels(new Rect(0, 0, Screen.width - 1, Screen.height - 1), 0, 0);
        outputTexture.Apply();

        ImageSavePng();

        RenderTexture.active = oldRT;
    }

    IEnumerator MyCaptureFrame()
    {
        yield return new WaitForEndOfFrame();
        ImageRenderTextureToPNG();

    }
StartCoroutine 是我之前没有见过的函数,查了一下,是用于开辟辅助线程的。如果不使用该方法的话,会有下面的错误:

WaitForEndOfFrame,顾名思义是在等到本帧的帧末进行在进行处理
| 指令 | 描述 | 实现 |
|---|---|---|
| WaitForSeconds | 等待指定秒数 | yield return new WaitForSeconds(2) |
| WaitForFixedUpdate | 等待一个固定帧 | yield return new WaitForFixedUpdate(); |
| WaitForEndOfFrame | 等待帧结束 | yield return new WaitForEndOfFrame(); |
| StartCoroutine | 等待一个新协程结束 | yield return StartCoroutine(other coroutine); |
参考:
https://blog.csdn.net/qq_15020543/article/details/82701551
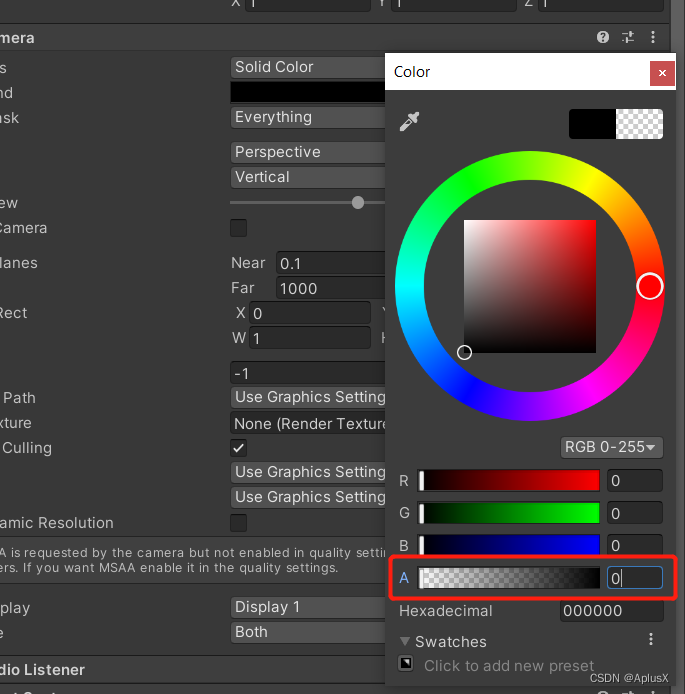
记得,在截屏前还需要将相机背景透明度设置为0