An Introduction to RAID in Linux
news2026/4/13 2:39:08
1. OverviewRAIDstands forRedundantArray ofInexpensive/IndependentDisks.We build our storage with redundancy — duplication of critical functions — so that no one part can fail and bring down our whole system.Because the data reads and writes are spread out over more than one disk, RAID can also provide us performance benefits.Modern filesystems like ZFS and btrfs have built-in RAID functionality. It’s also important we remember what RAID is not: it’s not a backup. For example, if our database gets wiped or corrupted, a mirrored RAID gives us two copies of our blank or broken database. A separate backup gives us a recovery option.In this tutorial, we’ll explore ways to use RAID in Linux.2. Types of RAIDRAID can be implemented with a dedicated hardware controller or entirely in software. Software RAID is more common today.We refer to different kinds of RAID via a standard numbering system of “raid levels”. The numbers do not refer to how many disks are used.RAID’s biggest advantage comes from the replication of data. Our data exists in more than one place on our RAID system, so we can avoid downtime during hardware failure. The replication may be via mirroring (keeping duplicate copies of everything) or parity (checksum calculations of our data).2.1. Hardware vs. SoftwareIn this guide, we’ll explore the RAID options built into Linux via software. Hardware RAID is beyond the scope of this article; just be aware that it is only useful on Linux in special cases, and we may need to turn it off in our computer’s BIOS.2.2. Striped And/or Mirrored (RAID 0, 1, or 10)RAID level 0 has an appropriate number: it has zero redundancy!Instead,in RAID 0, data is written across the drives, or “striped”.This means it can potentially be read from more than one drive concurrently. That can give us a real performance boost.But at the same time, now we have two drives that could fail, taking out all our data. So, RAID 0 is only useful if we want a performance boost but don’t care about long-term storage.We refer to RAID level 1 as “mirrored”because it is created with a pair of equal drives.Each time data is written to a RAID 1 device, it goes to both drives in the pair.Write performance is thus slightly slower, but read performance can be much faster as data is concurrently read from both disks.These two levels of RAID can be combined or nested, creating what’s called RAID 10 or just RAID 10. (There are other permutations, but RAID 10 is the most common.)We can create a RAID 10 device with four disks: one pair of disks in RAID 0, mirroring another pair of disks in RAID 0.This RAID of RAIDs attempts to combine RAID 0’s performance with RAID 1’s redundancy, to be both speedy and reliable.2.3. Parity (RAID 5 or RAID 6)Instead of storing complete copies of our data, we can save space by storing parity data. Parity allows our RAIDs to reconstruct data stored on failed drives.RAID 5 requires at least three equal-size drives to function. In practice, we can add several more, though rarely more than ten are used.RAID 5 sets aside one drive’s worth of space for checksum parity data. It is not all kept on one drive, however; instead, the parity data is striped across all of the devices along with the filesystem data.This means we usually want to build our RAID out of a set of drives of identical size and speed. Adding a larger drive won’t get us more space, as the RAID will just use the size of the smallest member. Similarly, the RAID’s performance will be limited by its slowest member.RAID 5 can recover and rebuild with no data loss if one drive dies. If two or more drives crash, we’ll have to restore the whole thing from backups.RAID 6 is similar to RAID 5 but sets aside two disks’ worth for parity data. That means a RAID 6 can recover from two failed members.RAID 5 gives us more usable storage than mirroring does, but at the price of some performance. A quick way to estimate storage is the total amount of equal-sized drives, minus one drive. For example, if we have 6 drives of 1 terabyte, our RAID 5 will have 5 terabytes of usable space. That’s 83%, compared to 50% of our drives were mirrored in RAID 1.At one time, server manufacturers considered RAID 5 the best practice in storage. It has fallen out of favor to some degree due to the so-called “RAID 5 write hole”, a problem addressed by next-generation filesystems and RAIDZ.3. Linux Kernel RAID(mdraid)Let’s create some new RAIDs with the mdadm tool.3.1. Your Basic RAIDWe’ll start with two identical disks or partitions, and create a striped RAID 0 device.First, let’s make sure we have the correct partitions. We don’t want to destroy something important:# lsblk -o NAME,SIZE,TYPE NAME SIZE TYPE sdb 931.5G disk └─sdb1 4G part sdc 931.5G disk └─sdc1 4G partCopyWe’ll use the mdadm command (multi-disk administrator):# mdadm --verbose --create /dev/md0 --level0 --raid-devices2 /dev/sdb1 /dev/sdc1 mdadm: chunk size defaults to 512K mdadm: Defaulting to version 1.2 metadata mdadm: array /dev/md0 started.CopyOur first RAID device has been created! Let’s break down the options we use withmdadm:–verbosetells us more about what is happening.–createtellsmdadmto create a new RAID device, naming it whatever we want (in this case,md0).–level0is our RAID level, as discussed above. Level 0 is just striped, with no redundancy.–raid-devices2letsmdadmknow to expect two physical disks for this array./dev/sdb1and/dev/sdc1are the two partitions included in our array of independent disks.So our RAID of partitions has been created, but like any device, it does not yet have a filesystem and it hasn’t been mounted.We can look at it again withlsblk:# lsblk -o NAME,SIZE,TYPE NAME SIZE TYPE sdb 931.5G disk └─sdb1 4G part └─md0 8G raid0 sdc 931.5G disk └─sdc1 4G part └─md0 8G raid0CopyNotice how themd0device is the size of the two partitions added together, as we’d expect from RAID 0.3.2. Managing Our RAIDWe also find useful information in/proc/mdstat:# cat /proc/mdstat Personalities : [raid0] md0 : active raid0 sdc1[1] sdb1[0] 1952448512 blocks super 1.2 512k chunks unused devices: noneCopyTo use this new RAID, we need to format it with a filesystem and mount it:# mkfs /dev/md0 mke2fs 1.46.2 (28-Feb-2021) Creating filesystem with 2094592 4k blocks and 524288 inodes Filesystem UUID: 947484b6-05ff-4d34-a0ed-49ee7c5eebd5 Superblock backups stored on blocks: 32768, 98304, 163840, 229376, 294912, 819200, 884736, 1605632 Allocating group tables: done Writing inode tables: done Writing superblocks and filesystem accounting information: done # mount /dev/md0 /mnt/myraid/ # df -h /mnt/myraid Filesystem Size Used Avail Use% Mounted on /dev/md0 7.8G 24K 7.4G 1% /mnt/myraidCopyLike any other filesystem besides ZFS, we would add a line to/etc/fstabto make this mount point permanent.If we want to boot from our RAID device (and we may not, to keep things simple), or otherwise allowmdadmto manage the array during startup or shutdown, we can append our array’s info to an optional/etc/mdadm/mdadm.conffile:# mdadm --detail --scan ARRAY /dev/md1 metadata1.2 spares1 namesalvage:1 UUID0c32834c:e5491814:94a4aa96:32d87024CopyAnd if we want to take down our raid, we can usemdadmagain:# mdadm -S /dev/md0 mdadm: stopped /dev/md0CopyWe can create similar RAIDs with variations of the–leveland–raid-devicesoptions.For example, we could create a 5-disk RAID 5:# mdadm --verbose --create /dev/md1 --level5 --raid-devices5 /dev/sdb1 /dev/sdc1 /dev/sdd1 /dev/sde1 /dev/sdf1 mdadm: layout defaults to left-symmetric mdadm: layout defaults to left-symmetric mdadm: chunk size defaults to 512K mdadm: size set to 4189184K Continue creating array? y mdadm: Defaulting to version 1.2 metadata mdadm: array /dev/md1 started.CopyThen, we canmkfsandmountour latest RAID.3.3. Failed Drives and Hot SparesWhat would happen to our new RAID 5 if one of the drives failed? Let’s simulate that event withmdadm:# mdadm /dev/md1 -f /dev/sdc1 mdadm: set /dev/sdc1 faulty in /dev/md1CopyNow, what does/proc/mdstattell us? Let’s take a look:# cat /proc/mdstat Personalities : [raid0] [raid6] [raid5] [raid4] md1 : active raid5 sdf1[5] sde1[3] sdd1[2] sdb1[1] sdc1[0](F) 16756736 blocks super 1.2 level 5, 512k chunk, algorithm 2 [5/4] [_UUUU] unused devices: noneCopyHere, we see the partition we selected, marked (F) for failed.We can also askmdadmfor more details of our array:# mdadm --detail /dev/md1 /dev/md1: Version : 1.2 Creation Time : Tue Aug 10 14:52:59 2021 Raid Level : raid5 Array Size : 16756736 (15.98 GiB 17.16 GB) Used Dev Size : 4189184 (4.00 GiB 4.29 GB) Raid Devices : 5 Total Devices : 5 Persistence : Superblock is persistent Update Time : Tue Aug 10 14:59:20 2021 State : clean, degraded Active Devices : 4 Working Devices : 4 Failed Devices : 1 Spare Devices : 0 Layout : left-symmetric Chunk Size : 512K Consistency Policy : resync Name : salvage:1 (local to host salvage) UUID : 0c32834c:e5491814:94a4aa96:32d87024 Events : 24 Number Major Minor RaidDevice State - 0 0 0 removed 1 8 34 1 active sync /dev/sdb1 2 8 35 2 active sync /dev/sdd1 3 8 36 3 active sync /dev/sde1 5 8 37 4 active sync /dev/sdf1 0 8 33 - faulty /dev/sdc1CopyOur RAID is still going strong. A user should not be able to tell any difference. But we can see it’s in a “degraded” state, so we need to replace that faulty hard drive.Let’s say we have a replacement for our dead drive. It should be identical to the originals.We can remove our faulty drive and add a new one. We should remember that the/dev/sd*list of devices will sometimes change if the hardware changes, so double-check withlsblk.First, we remove our faulty drive from the array:# mdadm /dev/md1 --remove /dev/sdc1 mdadm: hot removed /dev/sdc1 from /dev/md1CopyNext, we physically replace our drive and add the new one. (This is where hot-swappable drive hardware saves us a lot of time!)We can look at/proc/mdstatto watch the RAID automatically rebuild:# mdadm /dev/md1 --remove /dev/sdc1 mdadm: hot removed /dev/sdc1 from /dev/md1 rootsalvage:~# mdadm /dev/md1 --add /dev/sdc1 mdadm: added /dev/sdc1 # cat /proc/mdstat Personalities : [raid0] [raid6] [raid5] [raid4] md1 : active raid5 sdc1[6] sdf1[5] sde1[3] sdd1[2] sdb1[1] 16756736 blocks super 1.2 level 5, 512k chunk, algorithm 2 [5/4] [_UUUU] [..................] recovery 10.7% (452572/4189184) finish3.4min speed18102K/secCopyIf uptime is really important, we can add a dedicated spare drive to letmdadmautomatically switch over to:# mdadm /dev/md1 --add-spare /dev/sdg1 mdadm: added /dev/sdg1CopyIt might be worth it; we can weigh the time and money involved.Let’s check on our array again:# mdadm --detail /dev/md1 | grep spare 7 8 38 - spare /dev/sdg1CopyFive disks are striped with data and parity. One disk is unused, just waiting to be needed.4. The Logical Volume ManagerMost modern Linux filesystems are no longer created directly on a drive or a partition, but on a logical volume created with the LVM.Briefly, LVM combines Physical Volumes (drives or partitions) into Volume Groups. Volume Groups are pools from which we can create Logical Volumes. We can put filesystems onto these Logical Volumes.RAID comes into it during the creation of Logical Volumes. These may be linear, striped, mirrored, or a more complex parity configuration.We should note that creating a RAID LVM Logical Volume uses Linux kernel RAID (mdraid). If we want the convenience of LVM, being able to expand Volume Groups and resize Logical Volumes, we can have it along with the reliability of simple mdraid.But if LVM sounds like too much added complexity, we can always stick with mdraid on our physical drives.Yet another common option is creating our RAID devices with mdadm and then using them as PVs with LVM.4.1. Telling LVM to Use Our Volumes in a RAIDLVM RAIDs are created at the logical volume level.So that means we need to have first created partitions, used pvcreate to tag them as LVM physical volumes, and used vgcreate to put them into a volume group. In this example, we’ve called the volume groupraid1vg0.The RAID creation step specifies the type of RAID and how many disks to use for mirroring or striping. We don’t need to specify each physical volume. We can let LVM handle all of that:# lvcreate --mirrors 1 --type raid1 -l 100%FREE -n raid01v0 raid1vg0 Logical volume raid01v0 created. # mkfs.ext4 /dev/raid1vg0/raid01v0CopyAs usual, we then format and mount our new RAID volume. If we want a system that handles all of that automatically, we have ZFS.5. Integrated Filesystem RAID with ZFS orbtrfsWe won’t cover the details of next-generation filesystems in this article, but many of the concepts from software RAID and LVM translate over.ZFS uses “vdevs”, virtual devices, much as LVM uses Volume Groups. These vdevs may be physical disks, mirrors, raidz variants (ZFS’s take on RAID 5), or as of OpenZFS 2.1, draid.For example, we can create a RAID 1 mirror zpool:# zpool create -f demo mirror /dev/sdc /dev/sddCopyZFS handles everything else for us, formatting and mounting our new volume pool under/demo.The equivalent in btrfs is:# mkfs.btrfs -L demo -d raid1 /dev/sdc /dev/sddCopyOne major limitation of btrfs is that it does not support RAID5 or RAID 6, at least not reliably. So, we’ll keep that far away from production systems.These next-generation filesystems take care of many of the details of RAID and volume management. In addition, they provide much greater data integrity through block-level checksums.Although they are a whole other topic, we may solve more of our storage problems by investigating ZFS or btrfs.6. Further ReadingThe Linux RAID wiki goes into depth about current issues and best practices.The ArchLinux wiki explains LVM in great detail.The OpenZFS project details how to get started using ZFS on Linux.7. ConclusionWe use RAID for reliability and to limit downtime.In this article, we’ve looked at the building blocks of Linux software RAID (md). We’ve also considered some more complex and advanced additions.There are more details to consider in the day-to-day monitoring and maintenance of our RAID, but this gets us started.
本文来自互联网用户投稿,该文观点仅代表作者本人,不代表本站立场。本站仅提供信息存储空间服务,不拥有所有权,不承担相关法律责任。如若转载,请注明出处:http://www.coloradmin.cn/o/2511626.html
如若内容造成侵权/违法违规/事实不符,请联系多彩编程网进行投诉反馈,一经查实,立即删除!相关文章
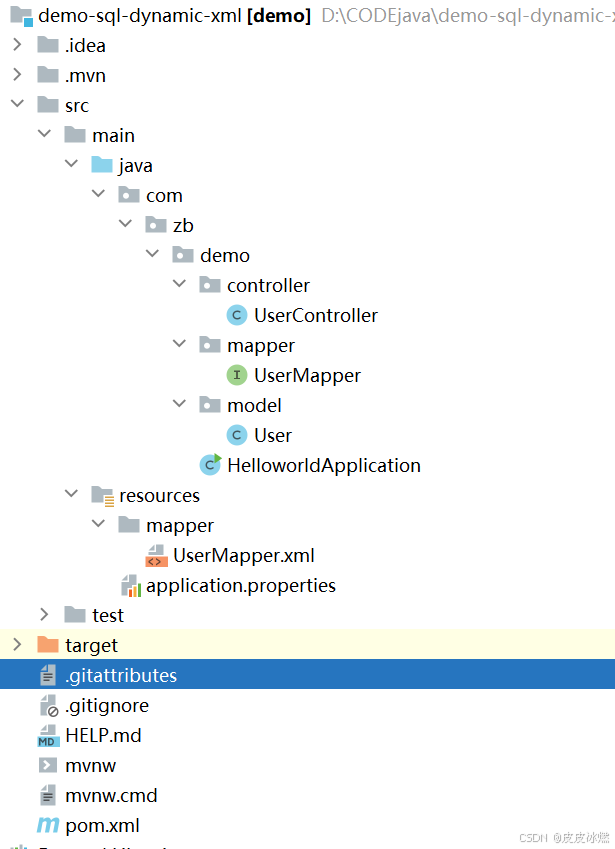
SpringBoot-17-MyBatis动态SQL标签之常用标签
文章目录 1 代码1.1 实体User.java1.2 接口UserMapper.java1.3 映射UserMapper.xml1.3.1 标签if1.3.2 标签if和where1.3.3 标签choose和when和otherwise1.4 UserController.java2 常用动态SQL标签2.1 标签set2.1.1 UserMapper.java2.1.2 UserMapper.xml2.1.3 UserController.ja…

wordpress后台更新后 前端没变化的解决方法
使用siteground主机的wordpress网站,会出现更新了网站内容和修改了php模板文件、js文件、css文件、图片文件后,网站没有变化的情况。
不熟悉siteground主机的新手,遇到这个问题,就很抓狂,明明是哪都没操作错误&#x…
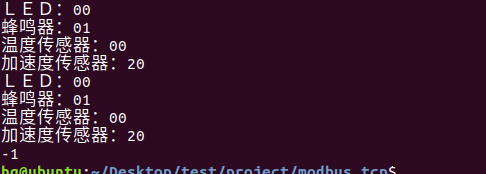
网络编程(Modbus进阶)
思维导图 Modbus RTU(先学一点理论)
概念 Modbus RTU 是工业自动化领域 最广泛应用的串行通信协议,由 Modicon 公司(现施耐德电气)于 1979 年推出。它以 高效率、强健性、易实现的特点成为工业控制系统的通信标准。 包…
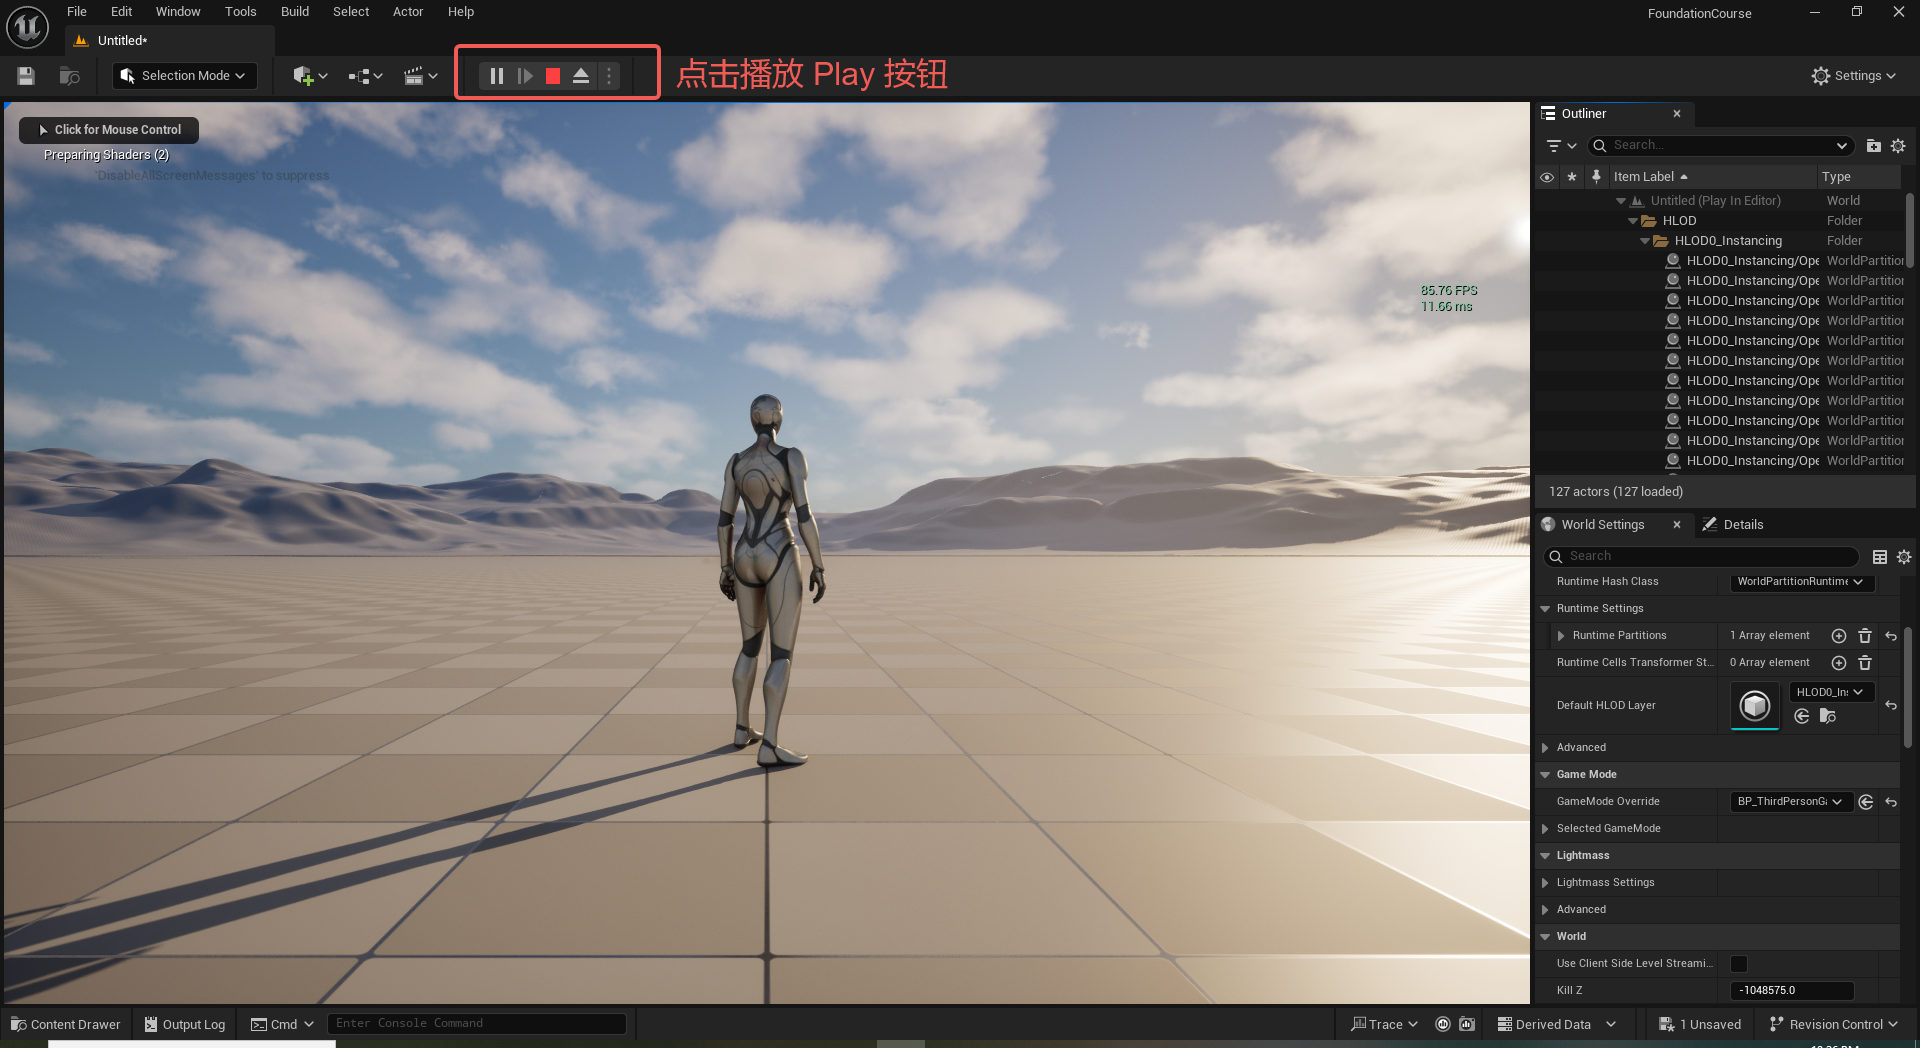
UE5 学习系列(二)用户操作界面及介绍
这篇博客是 UE5 学习系列博客的第二篇,在第一篇的基础上展开这篇内容。博客参考的 B 站视频资料和第一篇的链接如下:
【Note】:如果你已经完成安装等操作,可以只执行第一篇博客中 2. 新建一个空白游戏项目 章节操作,重…
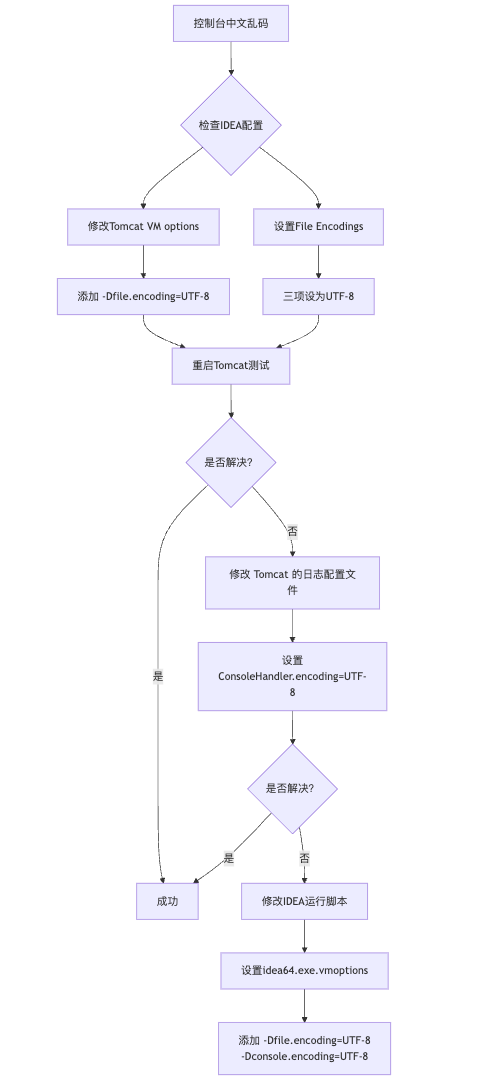
IDEA运行Tomcat出现乱码问题解决汇总
最近正值期末周,有很多同学在写期末Java web作业时,运行tomcat出现乱码问题,经过多次解决与研究,我做了如下整理:
原因:
IDEA本身编码与tomcat的编码与Windows编码不同导致,Windows 系统控制台…
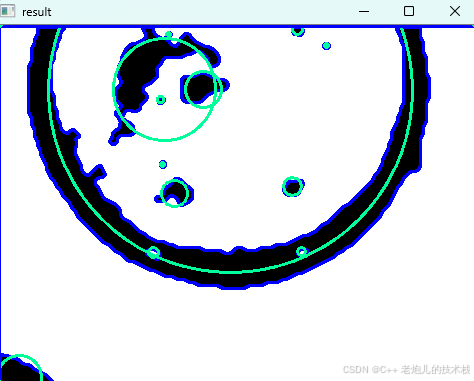
利用最小二乘法找圆心和半径
#include <iostream>
#include <vector>
#include <cmath>
#include <Eigen/Dense> // 需安装Eigen库用于矩阵运算 // 定义点结构
struct Point { double x, y; Point(double x_, double y_) : x(x_), y(y_) {}
}; // 最小二乘法求圆心和半径 …

使用docker在3台服务器上搭建基于redis 6.x的一主两从三台均是哨兵模式
一、环境及版本说明
如果服务器已经安装了docker,则忽略此步骤,如果没有安装,则可以按照一下方式安装: 1. 在线安装(有互联网环境): 请看我这篇文章 传送阵>> 点我查看 2. 离线安装(内网环境):请看我这篇文章 传送阵>> 点我查看
说明:假设每台服务器已…
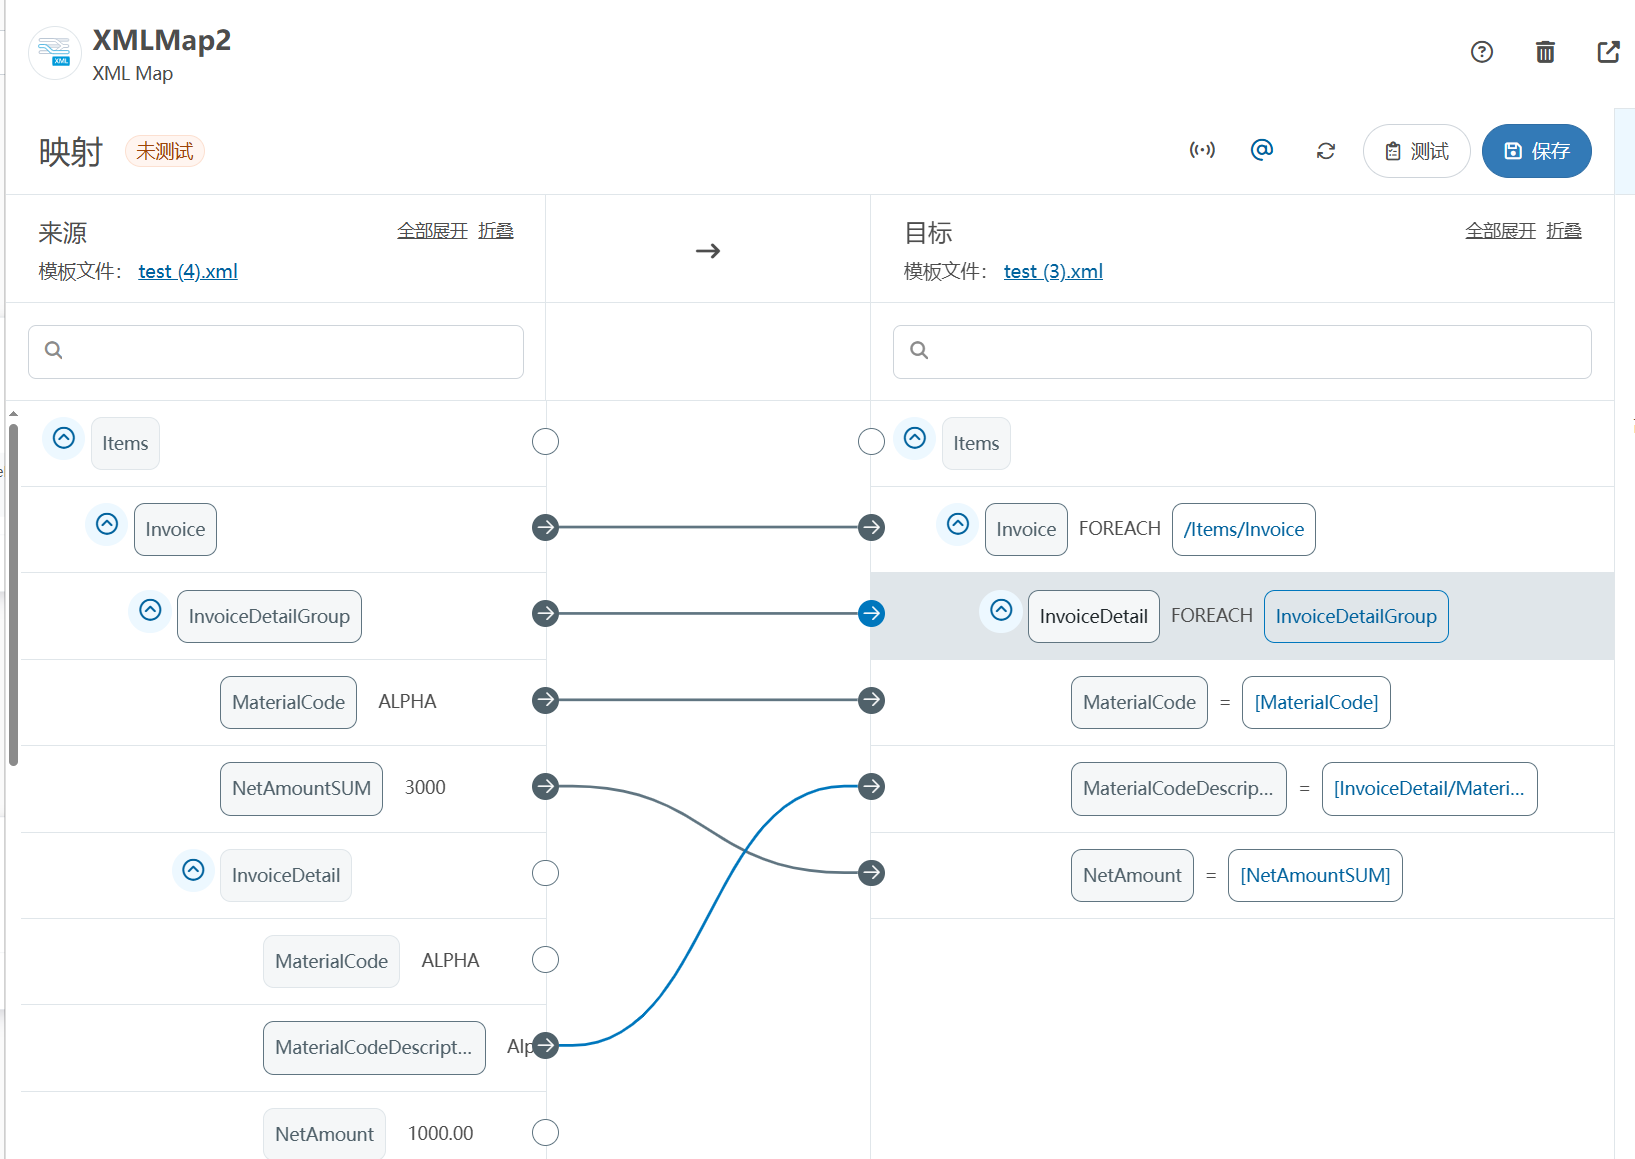
XML Group端口详解
在XML数据映射过程中,经常需要对数据进行分组聚合操作。例如,当处理包含多个物料明细的XML文件时,可能需要将相同物料号的明细归为一组,或对相同物料号的数量进行求和计算。传统实现方式通常需要编写脚本代码,增加了开…
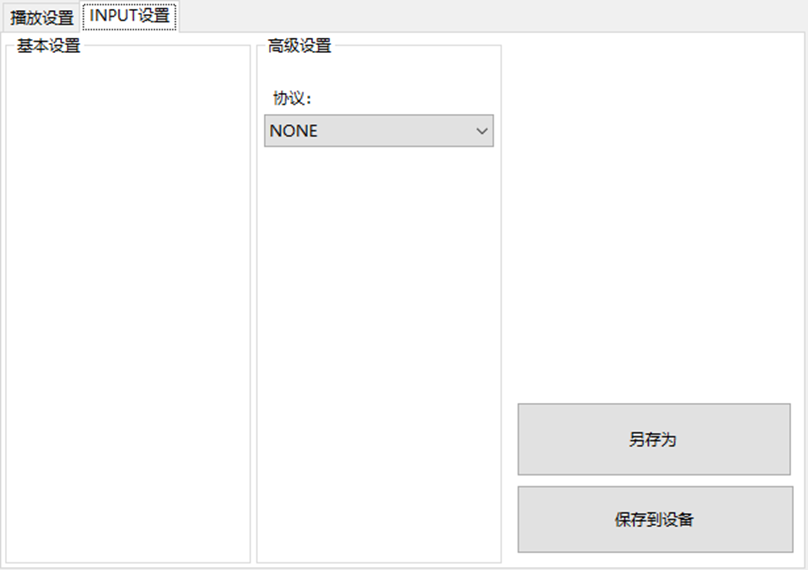
LBE-LEX系列工业语音播放器|预警播报器|喇叭蜂鸣器的上位机配置操作说明
LBE-LEX系列工业语音播放器|预警播报器|喇叭蜂鸣器专为工业环境精心打造,完美适配AGV和无人叉车。同时,集成以太网与语音合成技术,为各类高级系统(如MES、调度系统、库位管理、立库等)提供高效便捷的语音交互体验。
L…
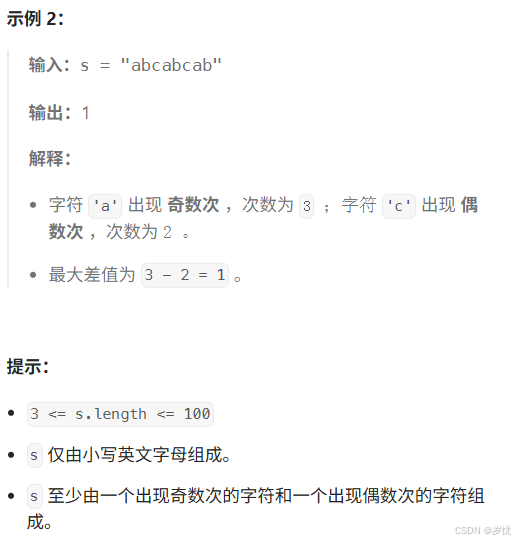
(LeetCode 每日一题) 3442. 奇偶频次间的最大差值 I (哈希、字符串)
题目:3442. 奇偶频次间的最大差值 I 思路 :哈希,时间复杂度0(n)。 用哈希表来记录每个字符串中字符的分布情况,哈希表这里用数组即可实现。
C版本:
class Solution {
public:int maxDifference(string s) {int a[26]…

【大模型RAG】拍照搜题技术架构速览:三层管道、两级检索、兜底大模型
摘要
拍照搜题系统采用“三层管道(多模态 OCR → 语义检索 → 答案渲染)、两级检索(倒排 BM25 向量 HNSW)并以大语言模型兜底”的整体框架: 多模态 OCR 层 将题目图片经过超分、去噪、倾斜校正后,分别用…
【Axure高保真原型】引导弹窗
今天和大家中分享引导弹窗的原型模板,载入页面后,会显示引导弹窗,适用于引导用户使用页面,点击完成后,会显示下一个引导弹窗,直至最后一个引导弹窗完成后进入首页。具体效果可以点击下方视频观看或打开下方…

接口测试中缓存处理策略
在接口测试中,缓存处理策略是一个关键环节,直接影响测试结果的准确性和可靠性。合理的缓存处理策略能够确保测试环境的一致性,避免因缓存数据导致的测试偏差。以下是接口测试中常见的缓存处理策略及其详细说明:
一、缓存处理的核…

龙虎榜——20250610
上证指数放量收阴线,个股多数下跌,盘中受消息影响大幅波动。 深证指数放量收阴线形成顶分型,指数短线有调整的需求,大概需要一两天。 2025年6月10日龙虎榜行业方向分析 1. 金融科技
代表标的:御银股份、雄帝科技
驱动…
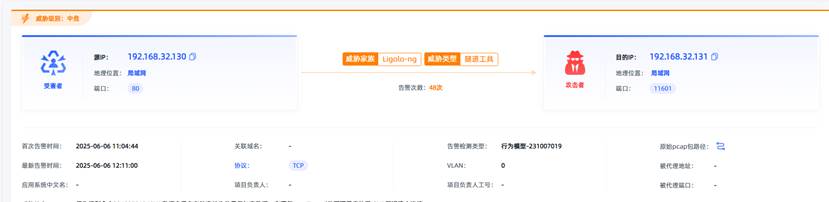
观成科技:隐蔽隧道工具Ligolo-ng加密流量分析
1.工具介绍
Ligolo-ng是一款由go编写的高效隧道工具,该工具基于TUN接口实现其功能,利用反向TCP/TLS连接建立一条隐蔽的通信信道,支持使用Let’s Encrypt自动生成证书。Ligolo-ng的通信隐蔽性体现在其支持多种连接方式,适应复杂网…
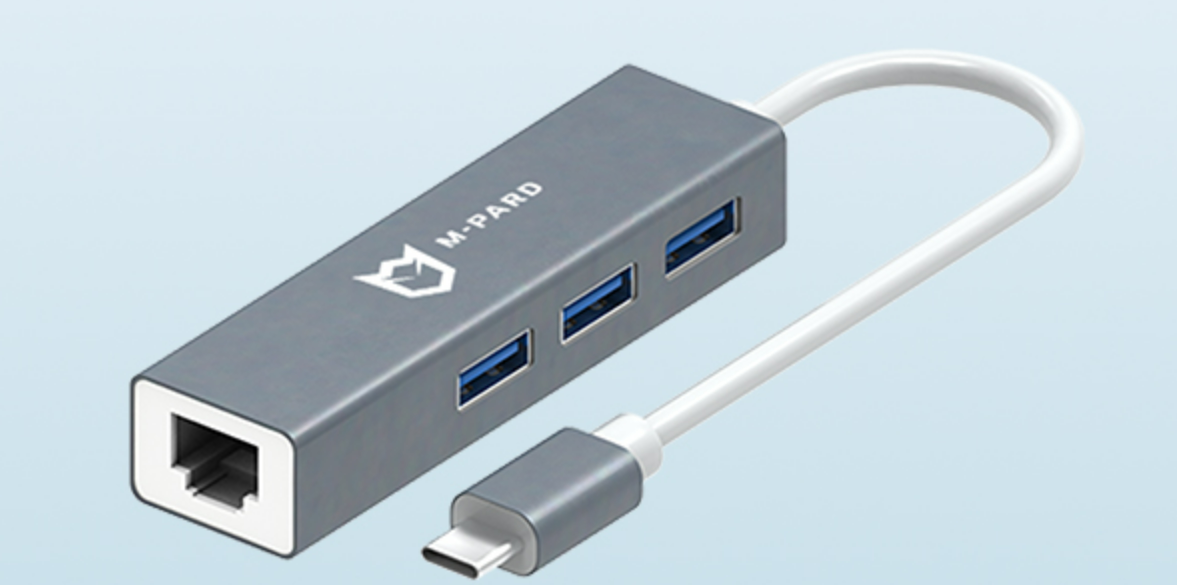
铭豹扩展坞 USB转网口 突然无法识别解决方法
当 USB 转网口扩展坞在一台笔记本上无法识别,但在其他电脑上正常工作时,问题通常出在笔记本自身或其与扩展坞的兼容性上。以下是系统化的定位思路和排查步骤,帮助你快速找到故障原因:
背景:
一个M-pard(铭豹)扩展坞的网卡突然无法识别了,扩展出来的三个USB接口正常。…
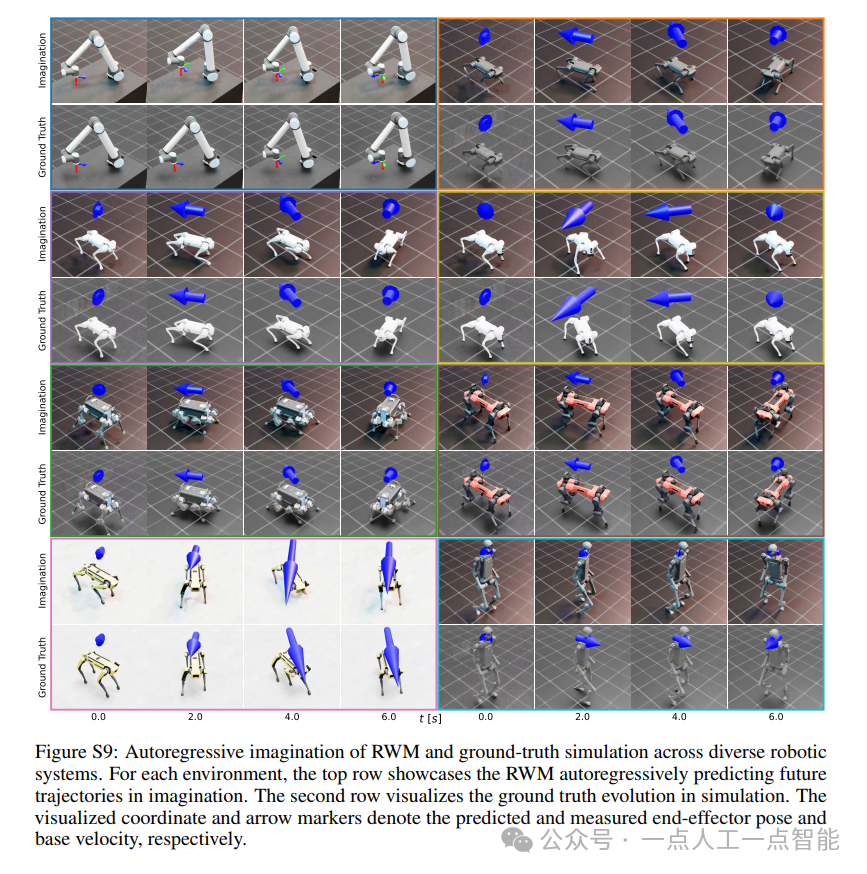
未来机器人的大脑:如何用神经网络模拟器实现更智能的决策?
编辑:陈萍萍的公主一点人工一点智能 未来机器人的大脑:如何用神经网络模拟器实现更智能的决策?RWM通过双自回归机制有效解决了复合误差、部分可观测性和随机动力学等关键挑战,在不依赖领域特定归纳偏见的条件下实现了卓越的预测准…

Linux应用开发之网络套接字编程(实例篇)
服务端与客户端单连接
服务端代码
#include <sys/socket.h>
#include <sys/types.h>
#include <netinet/in.h>
#include <stdio.h>
#include <stdlib.h>
#include <string.h>
#include <arpa/inet.h>
#include <pthread.h>
…

华为云AI开发平台ModelArts
华为云ModelArts:重塑AI开发流程的“智能引擎”与“创新加速器”!
在人工智能浪潮席卷全球的2025年,企业拥抱AI的意愿空前高涨,但技术门槛高、流程复杂、资源投入巨大的现实,却让许多创新构想止步于实验室。数据科学家…
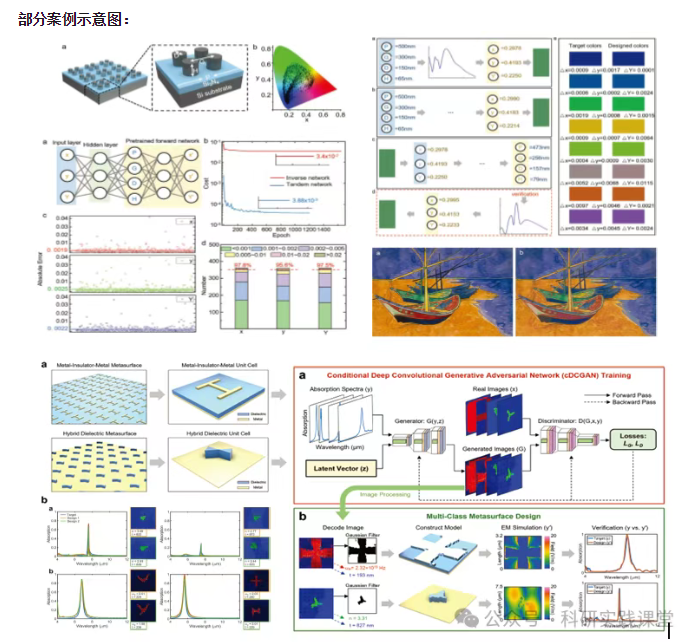
深度学习在微纳光子学中的应用
深度学习在微纳光子学中的主要应用方向
深度学习与微纳光子学的结合主要集中在以下几个方向:
逆向设计 通过神经网络快速预测微纳结构的光学响应,替代传统耗时的数值模拟方法。例如设计超表面、光子晶体等结构。
特征提取与优化 从复杂的光学数据中自…