Spring Boot 基础学习笔记
news2026/4/1 6:05:21
Spring Boot 基础学习笔记一、Spring Boot 概述1. 定义Spring Boot 是 Pivotal 团队基于 Spring 框架开发的快速开发脚手架核心宗旨是简化 Spring 应用的初始化搭建和开发流程通过「约定优于配置」的思想大幅减少 XML 配置和繁琐的依赖管理工作让开发者聚焦业务逻辑。2. 解决的核心问题消除 Spring 应用繁琐的 XML 配置和手动依赖管理内嵌 Web 服务器Tomcat/Jetty/Undertow应用可直接打包为 JAR 包运行无需手动部署基于类路径依赖自动配置 Spring 容器自动配置降低配置成本统一的依赖版本管理避免版本冲突问题。二、Spring Boot 核心特性特性说明约定优于配置内置默认配置如默认端口 8080仅需在约定不满足时做少量自定义配置起步依赖Starter官方封装的依赖集合如spring-boot-starter-web一键引入相关依赖自动管理版本自动配置根据类路径依赖、环境变量等自动初始化 Bean可通过exclude排除不需要的配置内嵌服务器内置 Tomcat默认、Jetty 等无需外部容器即可启动应用无 XML 配置基于注解驱动开发完全摒弃 XML 配置也可兼容Actuator可选提供应用健康检查、指标监控等运维能力三、Spring Boot 入门程序HelloWorld1. 开发环境JDK1.8Spring Boot 2.x/ 17Spring Boot 3.x构建工具Maven/Gradle示例用 MavenIDEIntelliJ IDEA / Eclipse2. 实现步骤1配置 Maven 依赖pom.xml?xml version1.0 encodingUTF-8?projectxmlnshttp://maven.apache.org/POM/4.0.0xmlns:xsihttp://www.w3.org/2001/XMLSchema-instancexsi:schemaLocationhttp://maven.apache.org/POM/4.0.0 http://maven.apache.org/xsd/maven-4.0.0.xsdmodelVersion4.0.0/modelVersion!-- 父工程核心依赖版本管理 --parentgroupIdorg.springframework.boot/groupIdartifactIdspring-boot-starter-parent/artifactIdversion2.7.18/version!-- 稳定版本按需选择 --relativePath//parentgroupIdcom.example/groupIdartifactIdspringboot-hello/artifactIdversion1.0-SNAPSHOT/version!-- 核心依赖web场景包含Spring MVC 内嵌Tomcat --dependenciesdependencygroupIdorg.springframework.boot/groupIdartifactIdspring-boot-starter-web/artifactId/dependency/dependencies!-- 打包插件生成可执行JAR包 --buildpluginsplugingroupIdorg.springframework.boot/groupIdartifactIdspring-boot-maven-plugin/artifactId/plugin/plugins/build/project2编写主启动类packagecom.example;importorg.springframework.boot.SpringApplication;importorg.springframework.boot.autoconfigure.SpringBootApplication;/** * 主启动类Spring Boot应用入口 * SpringBootApplication复合注解包含 * - SpringBootConfiguration标记配置类 * - EnableAutoConfiguration开启自动配置 * - ComponentScan扫描当前包及子包的组件 */SpringBootApplicationpublicclassHelloApplication{publicstaticvoidmain(String[]args){// 启动Spring Boot应用SpringApplication.run(HelloApplication.class,args);}}3编写控制器Controllerpackagecom.example.controller;importorg.springframework.web.bind.annotation.GetMapping;importorg.springframework.web.bind.annotation.RestController;/** * RestController复合注解 Controller ResponseBody * 作用返回字符串/JSON而非视图页面 */RestControllerpublicclassHelloController{// 映射GET请求访问路径/helloGetMapping(/hello)publicStringhello(){returnHello Spring Boot!;}}4运行与测试方式1直接运行主启动类的main方法方式2Maven 打包后运行mvn clean package# 打包生成JAR包java-jarspringboot-hello-1.0-SNAPSHOT.jar# 运行JAR包测试浏览器访问http://localhost:8080/hello页面显示Hello Spring Boot!。四、Spring Boot 配置文件1. 配置文件基础作用覆盖默认配置、自定义应用参数如端口、应用名类型与优先级application.properties高 application.yml/application.yaml低位置默认放在src/main/resources目录下。1application.properties键值对格式# 服务器端口 server.port8081 # 应用名称 spring.application.namespringboot-hello # 自定义参数 user.name张三 user.age202application.ymlYAML 层级格式# 注意YAML中冒号后必须加空格层级用2个空格缩进禁止用Tabserver:port:8081spring:application:name:springboot-hello# 自定义参数user:name:张三age:202. 读取配置文件参数方式1Value 注解单个参数读取packagecom.example.controller;importorg.springframework.beans.factory.annotation.Value;importorg.springframework.web.bind.annotation.GetMapping;importorg.springframework.web.bind.annotation.RestController;RestControllerpublicclassConfigController{// 读取配置中的user.nameValue(${user.name})privateStringuserName;// 读取配置中的user.age指定默认值配置无该参数时生效Value(${user.age:18})privateIntegeruserAge;GetMapping(/config)publicStringgetConfig(){return姓名userName年龄userAge;}}方式2ConfigurationProperties批量绑定推荐步骤1编写实体类绑定配置packagecom.example.entity;importorg.springframework.boot.context.properties.ConfigurationProperties;importorg.springframework.stereotype.Component;/** * Component纳入Spring容器管理 * ConfigurationProperties绑定配置前缀prefix user 对应yml中的user节点 */ComponentConfigurationProperties(prefixuser)publicclassUser{privateStringname;privateIntegerage;// 必须生成getter/setter否则无法绑定值publicStringgetName(){returnname;}publicvoidsetName(Stringname){this.namename;}publicIntegergetAge(){returnage;}publicvoidsetAge(Integerage){this.ageage;}OverridepublicStringtoString(){returnUser{namename\, ageage};}}步骤2注入并使用实体类packagecom.example.controller;importcom.example.entity.User;importorg.springframework.beans.factory.annotation.Autowired;importorg.springframework.web.bind.annotation.GetMapping;importorg.springframework.web.bind.annotation.RestController;RestControllerpublicclassUserController{AutowiredprivateUseruser;GetMapping(/user)publicStringgetUser(){returnuser.toString();}}3. 多环境配置开发/测试/生产实际开发中需区分环境Spring Boot 支持多环境配置文件命名规则application-{环境名}.yml/properties。示例开发环境application-dev.ymlserver:port:8080spring:application:name:springboot-hello-dev生产环境application-prod.ymlserver:port:80spring:application:name:springboot-hello-prod激活指定环境在主配置文件application.yml中spring:profiles:active:dev# 激活开发环境改为prod则切换到生产环境五、核心总结Spring Boot 核心是「约定优于配置」通过起步依赖和自动配置简化开发流程主启动类 SpringBootApplication是应用入口需放在根包下保证组件扫描范围配置文件支持properties键值对和yml层级清晰多环境配置通过spring.profiles.active激活读取配置参数Value适合单个参数ConfigurationProperties适合批量绑定推荐。
本文来自互联网用户投稿,该文观点仅代表作者本人,不代表本站立场。本站仅提供信息存储空间服务,不拥有所有权,不承担相关法律责任。如若转载,请注明出处:http://www.coloradmin.cn/o/2471018.html
如若内容造成侵权/违法违规/事实不符,请联系多彩编程网进行投诉反馈,一经查实,立即删除!相关文章
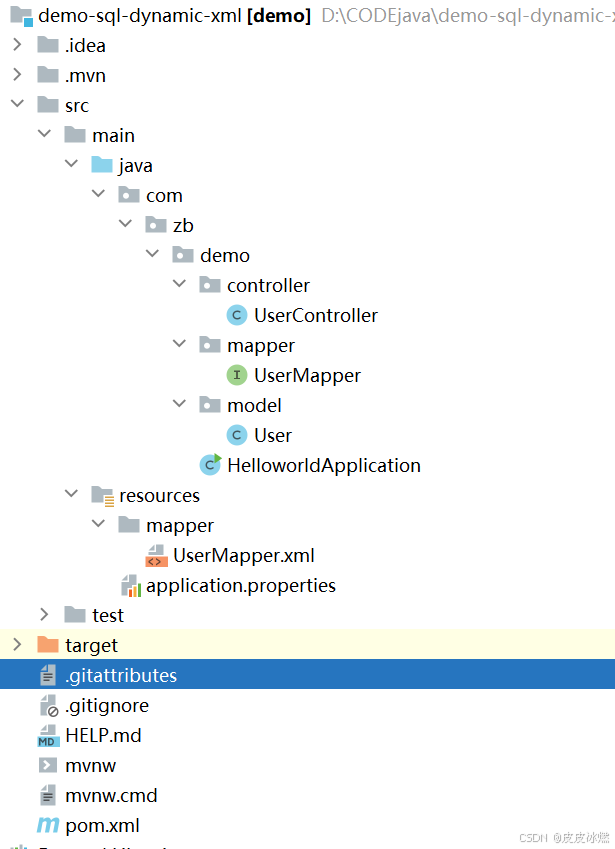
SpringBoot-17-MyBatis动态SQL标签之常用标签
文章目录 1 代码1.1 实体User.java1.2 接口UserMapper.java1.3 映射UserMapper.xml1.3.1 标签if1.3.2 标签if和where1.3.3 标签choose和when和otherwise1.4 UserController.java2 常用动态SQL标签2.1 标签set2.1.1 UserMapper.java2.1.2 UserMapper.xml2.1.3 UserController.ja…
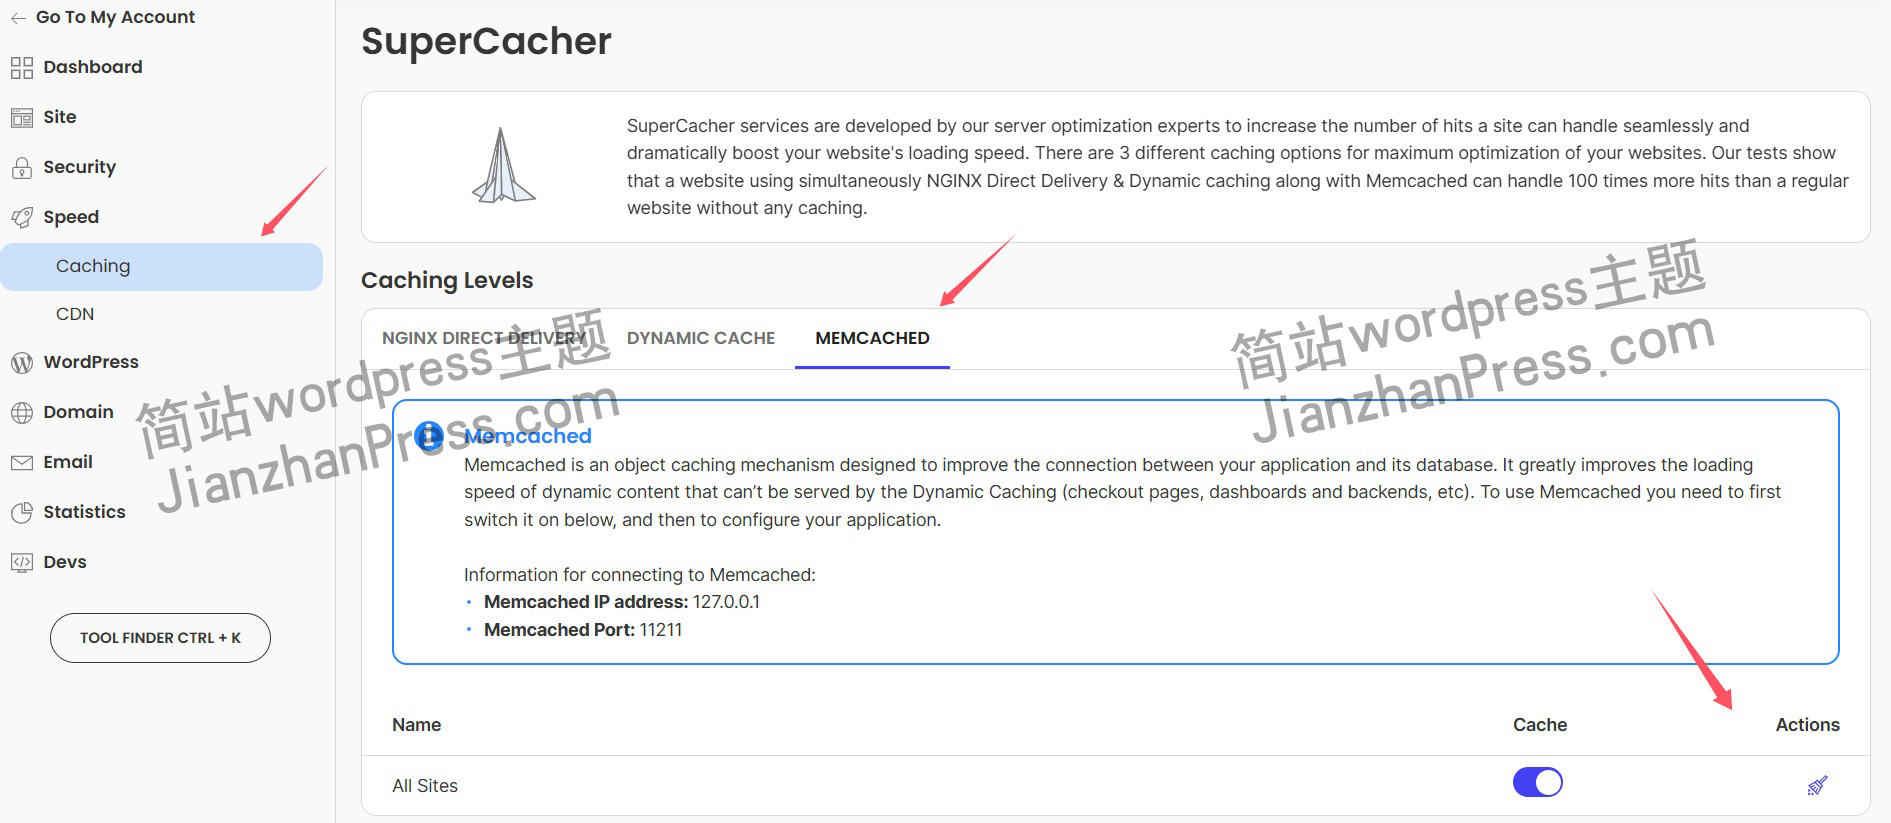
wordpress后台更新后 前端没变化的解决方法
使用siteground主机的wordpress网站,会出现更新了网站内容和修改了php模板文件、js文件、css文件、图片文件后,网站没有变化的情况。
不熟悉siteground主机的新手,遇到这个问题,就很抓狂,明明是哪都没操作错误&#x…
网络编程(Modbus进阶)
思维导图 Modbus RTU(先学一点理论)
概念 Modbus RTU 是工业自动化领域 最广泛应用的串行通信协议,由 Modicon 公司(现施耐德电气)于 1979 年推出。它以 高效率、强健性、易实现的特点成为工业控制系统的通信标准。 包…
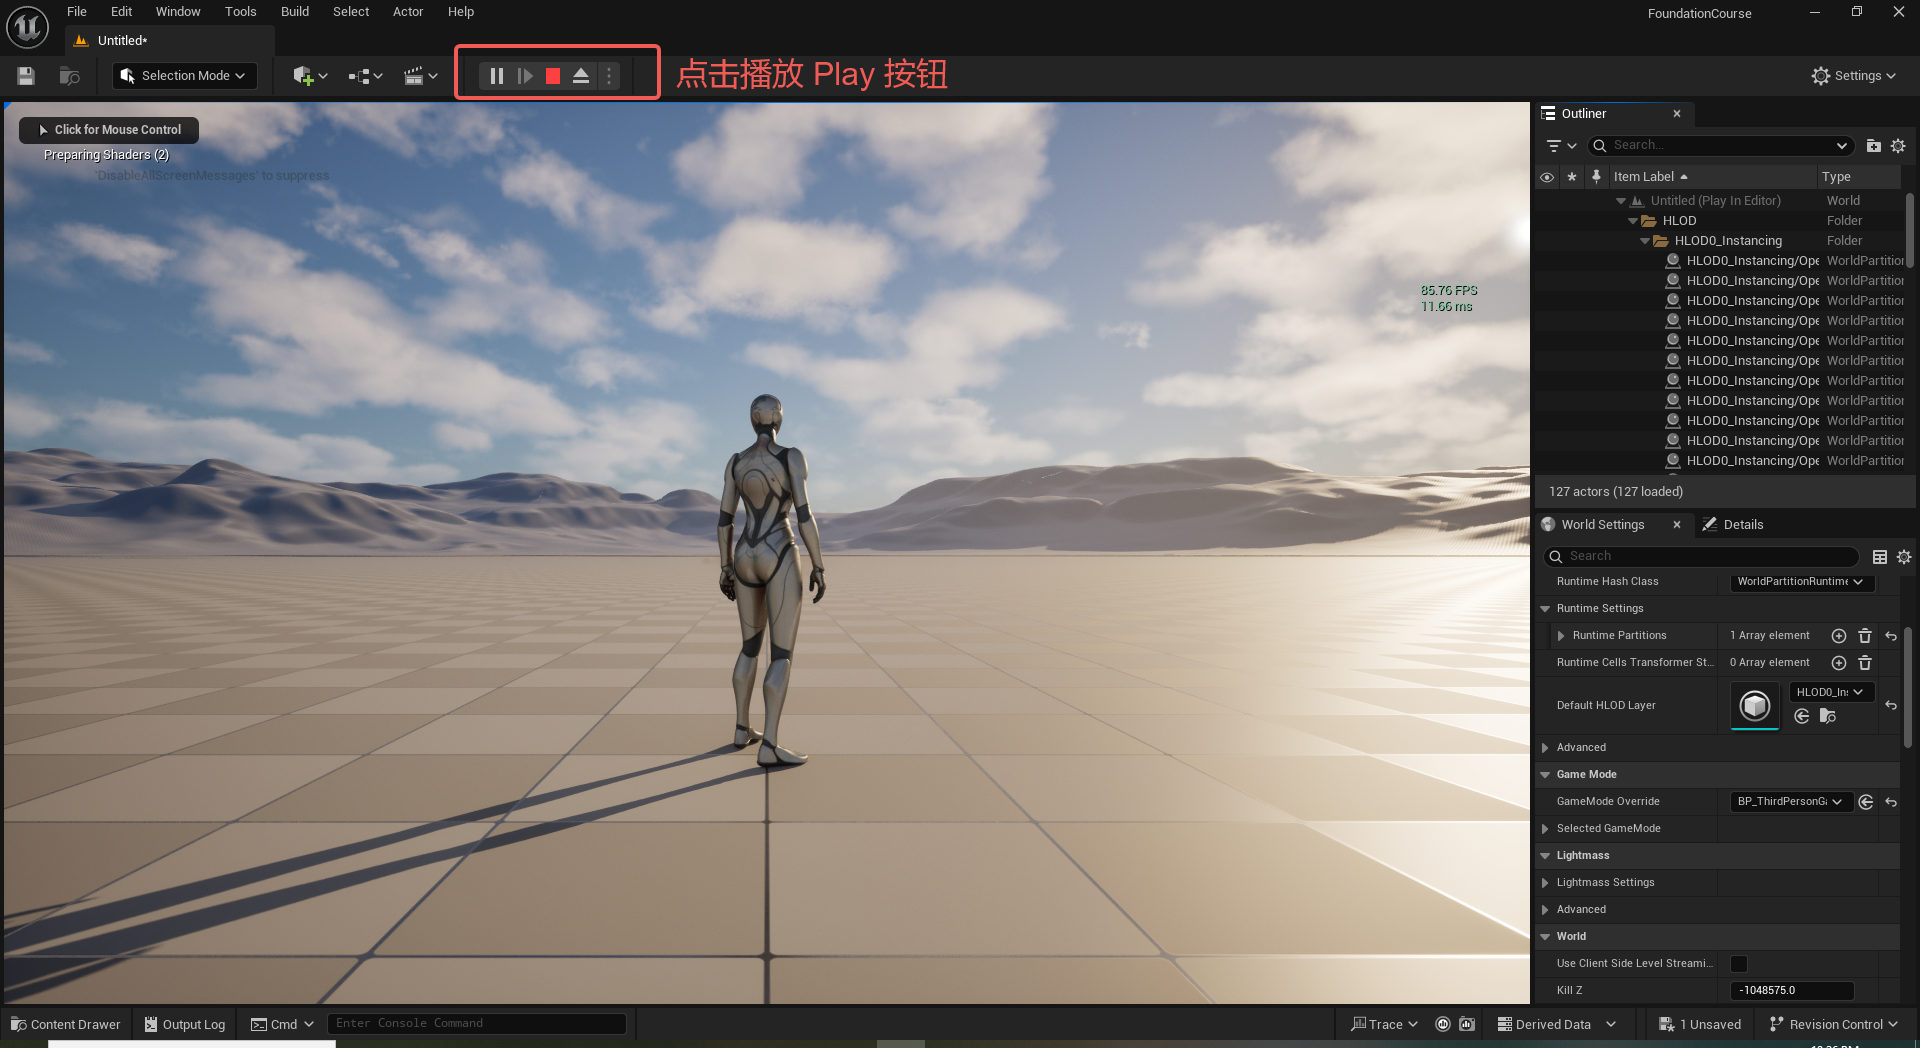
UE5 学习系列(二)用户操作界面及介绍
这篇博客是 UE5 学习系列博客的第二篇,在第一篇的基础上展开这篇内容。博客参考的 B 站视频资料和第一篇的链接如下:
【Note】:如果你已经完成安装等操作,可以只执行第一篇博客中 2. 新建一个空白游戏项目 章节操作,重…
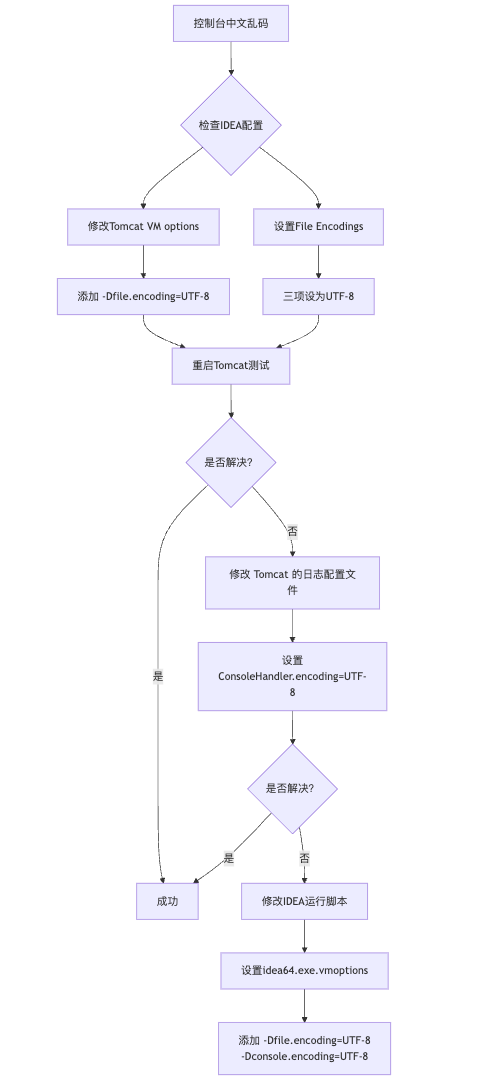
IDEA运行Tomcat出现乱码问题解决汇总
最近正值期末周,有很多同学在写期末Java web作业时,运行tomcat出现乱码问题,经过多次解决与研究,我做了如下整理:
原因:
IDEA本身编码与tomcat的编码与Windows编码不同导致,Windows 系统控制台…
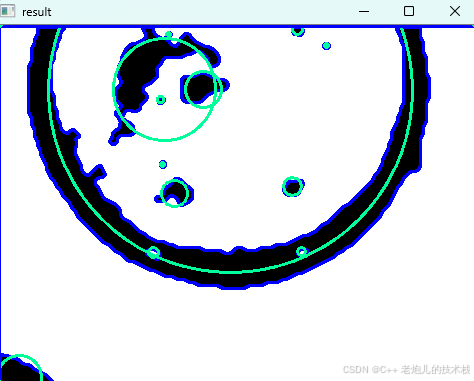
利用最小二乘法找圆心和半径
#include <iostream>
#include <vector>
#include <cmath>
#include <Eigen/Dense> // 需安装Eigen库用于矩阵运算 // 定义点结构
struct Point { double x, y; Point(double x_, double y_) : x(x_), y(y_) {}
}; // 最小二乘法求圆心和半径 …

使用docker在3台服务器上搭建基于redis 6.x的一主两从三台均是哨兵模式
一、环境及版本说明
如果服务器已经安装了docker,则忽略此步骤,如果没有安装,则可以按照一下方式安装: 1. 在线安装(有互联网环境): 请看我这篇文章 传送阵>> 点我查看 2. 离线安装(内网环境):请看我这篇文章 传送阵>> 点我查看
说明:假设每台服务器已…
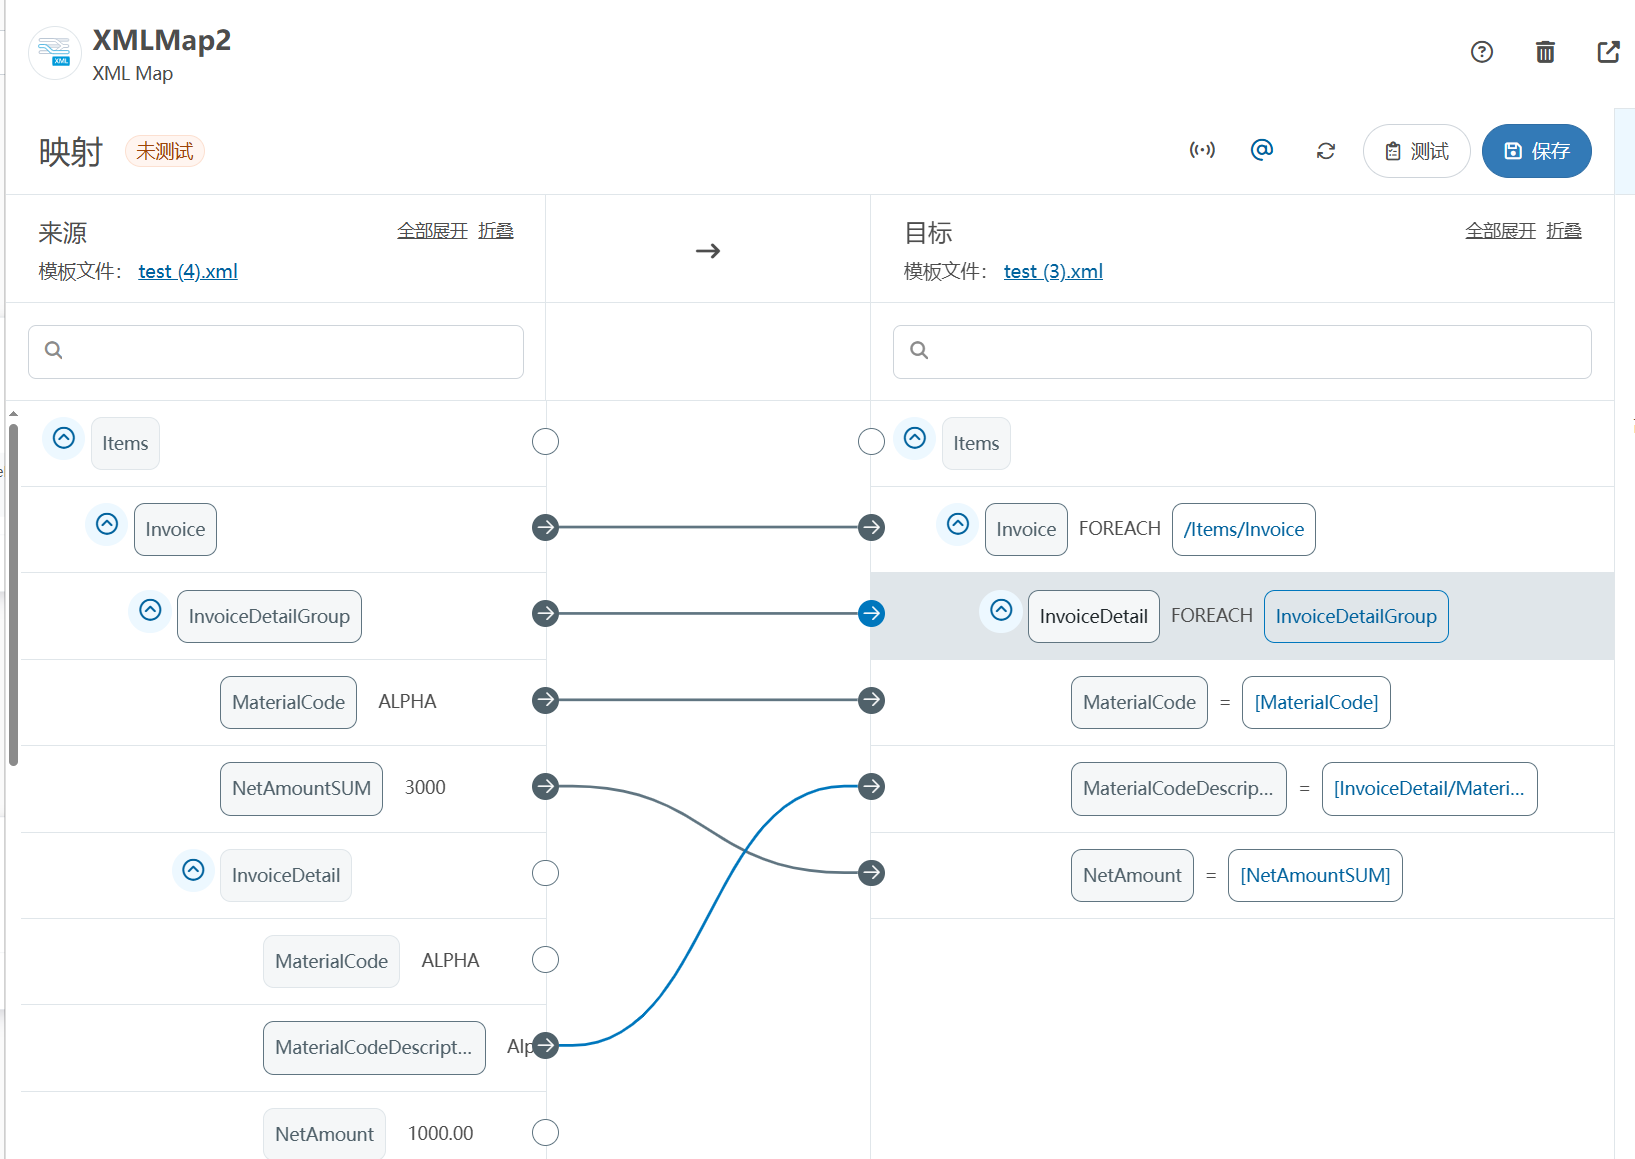
XML Group端口详解
在XML数据映射过程中,经常需要对数据进行分组聚合操作。例如,当处理包含多个物料明细的XML文件时,可能需要将相同物料号的明细归为一组,或对相同物料号的数量进行求和计算。传统实现方式通常需要编写脚本代码,增加了开…
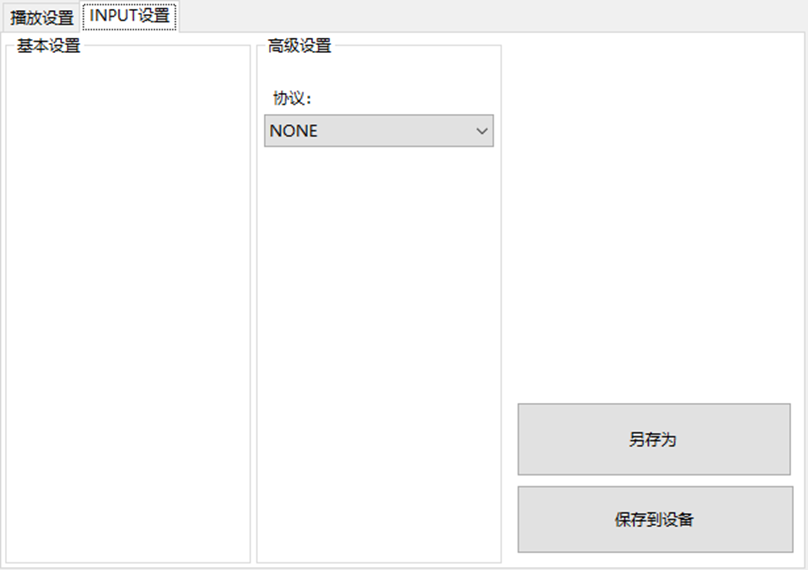
LBE-LEX系列工业语音播放器|预警播报器|喇叭蜂鸣器的上位机配置操作说明
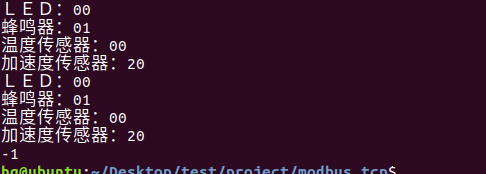
LBE-LEX系列工业语音播放器|预警播报器|喇叭蜂鸣器专为工业环境精心打造,完美适配AGV和无人叉车。同时,集成以太网与语音合成技术,为各类高级系统(如MES、调度系统、库位管理、立库等)提供高效便捷的语音交互体验。
L…
(LeetCode 每日一题) 3442. 奇偶频次间的最大差值 I (哈希、字符串)
题目:3442. 奇偶频次间的最大差值 I 思路 :哈希,时间复杂度0(n)。 用哈希表来记录每个字符串中字符的分布情况,哈希表这里用数组即可实现。
C版本:
class Solution {
public:int maxDifference(string s) {int a[26]…
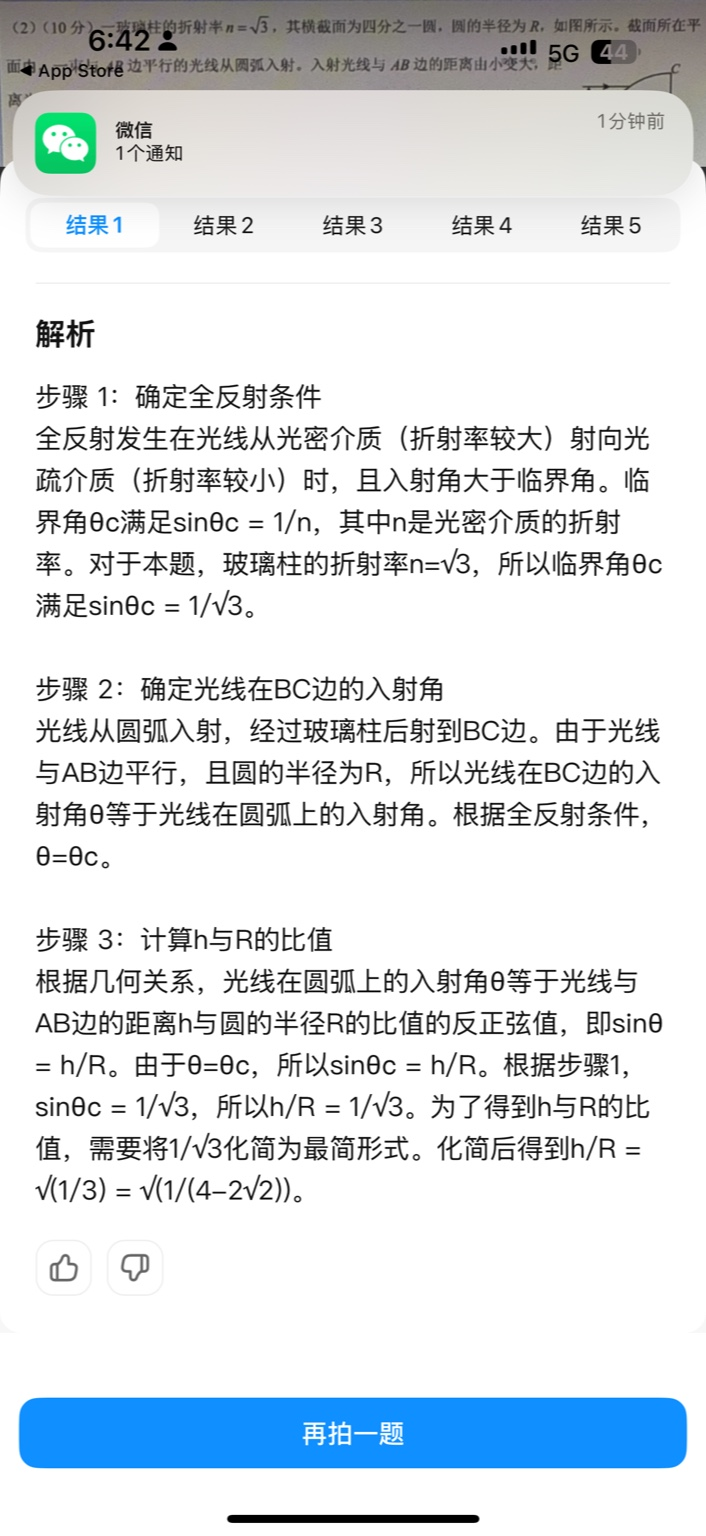
【大模型RAG】拍照搜题技术架构速览:三层管道、两级检索、兜底大模型
摘要
拍照搜题系统采用“三层管道(多模态 OCR → 语义检索 → 答案渲染)、两级检索(倒排 BM25 向量 HNSW)并以大语言模型兜底”的整体框架: 多模态 OCR 层 将题目图片经过超分、去噪、倾斜校正后,分别用…
【Axure高保真原型】引导弹窗
今天和大家中分享引导弹窗的原型模板,载入页面后,会显示引导弹窗,适用于引导用户使用页面,点击完成后,会显示下一个引导弹窗,直至最后一个引导弹窗完成后进入首页。具体效果可以点击下方视频观看或打开下方…
接口测试中缓存处理策略
在接口测试中,缓存处理策略是一个关键环节,直接影响测试结果的准确性和可靠性。合理的缓存处理策略能够确保测试环境的一致性,避免因缓存数据导致的测试偏差。以下是接口测试中常见的缓存处理策略及其详细说明:
一、缓存处理的核…

龙虎榜——20250610
上证指数放量收阴线,个股多数下跌,盘中受消息影响大幅波动。 深证指数放量收阴线形成顶分型,指数短线有调整的需求,大概需要一两天。 2025年6月10日龙虎榜行业方向分析 1. 金融科技
代表标的:御银股份、雄帝科技
驱动…
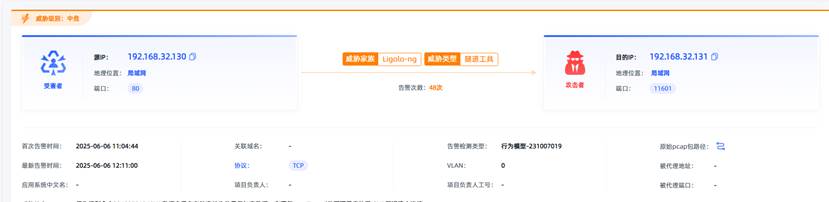
观成科技:隐蔽隧道工具Ligolo-ng加密流量分析
1.工具介绍
Ligolo-ng是一款由go编写的高效隧道工具,该工具基于TUN接口实现其功能,利用反向TCP/TLS连接建立一条隐蔽的通信信道,支持使用Let’s Encrypt自动生成证书。Ligolo-ng的通信隐蔽性体现在其支持多种连接方式,适应复杂网…
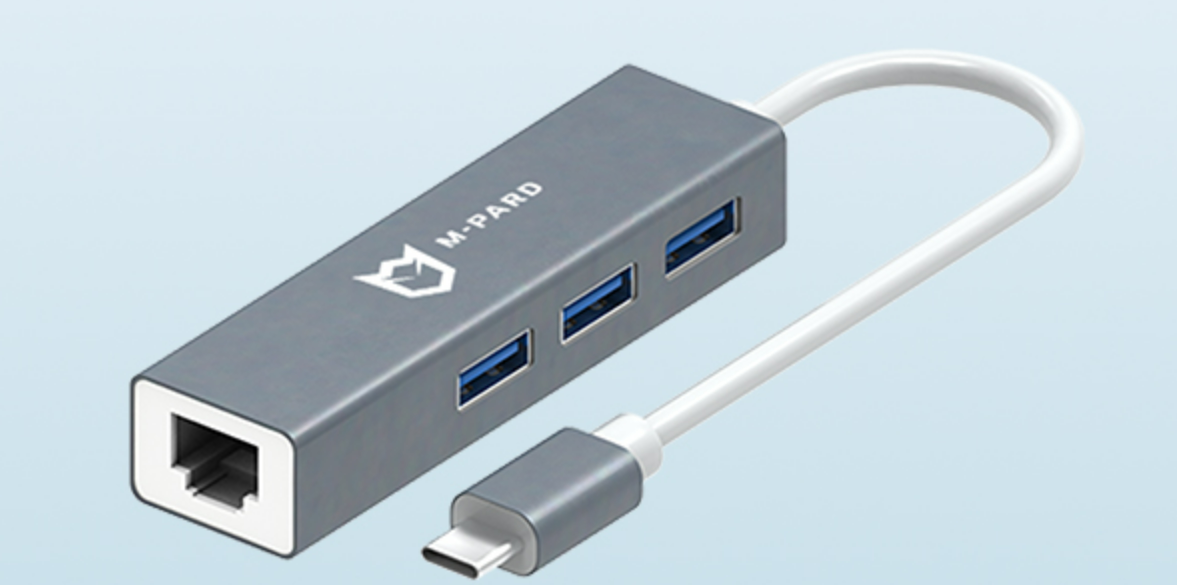
铭豹扩展坞 USB转网口 突然无法识别解决方法
当 USB 转网口扩展坞在一台笔记本上无法识别,但在其他电脑上正常工作时,问题通常出在笔记本自身或其与扩展坞的兼容性上。以下是系统化的定位思路和排查步骤,帮助你快速找到故障原因:
背景:
一个M-pard(铭豹)扩展坞的网卡突然无法识别了,扩展出来的三个USB接口正常。…

未来机器人的大脑:如何用神经网络模拟器实现更智能的决策?
编辑:陈萍萍的公主一点人工一点智能 未来机器人的大脑:如何用神经网络模拟器实现更智能的决策?RWM通过双自回归机制有效解决了复合误差、部分可观测性和随机动力学等关键挑战,在不依赖领域特定归纳偏见的条件下实现了卓越的预测准…

Linux应用开发之网络套接字编程(实例篇)
服务端与客户端单连接
服务端代码
#include <sys/socket.h>
#include <sys/types.h>
#include <netinet/in.h>
#include <stdio.h>
#include <stdlib.h>
#include <string.h>
#include <arpa/inet.h>
#include <pthread.h>
…

华为云AI开发平台ModelArts
华为云ModelArts:重塑AI开发流程的“智能引擎”与“创新加速器”!
在人工智能浪潮席卷全球的2025年,企业拥抱AI的意愿空前高涨,但技术门槛高、流程复杂、资源投入巨大的现实,却让许多创新构想止步于实验室。数据科学家…
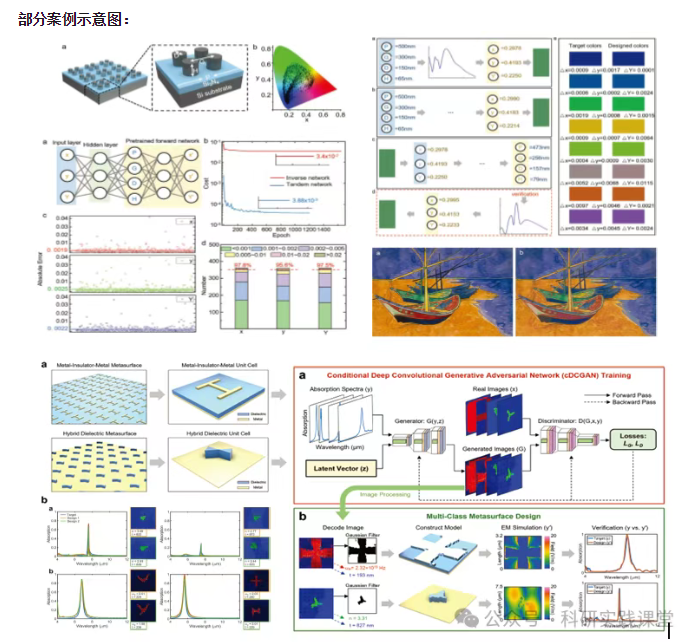
深度学习在微纳光子学中的应用
深度学习在微纳光子学中的主要应用方向
深度学习与微纳光子学的结合主要集中在以下几个方向:
逆向设计 通过神经网络快速预测微纳结构的光学响应,替代传统耗时的数值模拟方法。例如设计超表面、光子晶体等结构。
特征提取与优化 从复杂的光学数据中自…