rknn部署rk3588进行yolov8n-seg分割检测
news2026/5/8 16:01:41
1、pt-onnx:首先根据官方源代码导出onnx模型过程略2、onnx-rknn:分为如下两步执行其中环境要求安装rknn。step1import os, glob, shutil from rknn.api import RKNN input_width 640 input_height 640 model_path ./model dataset_path ./dataset config_path ./config dataset_file ./dataset.txt # model he onnxmodel dou yao gai model_name best platform rk3588 ONNX_MODEL f{model_path}/best-{input_height}-{input_width}.onnx OUT_NODE [output0,output1] def get_dataset_txt(dataset_path, dataset_savefile): file_data glob.glob(os.path.join(dataset_path,*.png)) with open(dataset_savefile, w) as f: for file in file_data: f.writelines(f{file}\n) def move_onnx_config(): file_data glob.glob(*.onnx) for file in file_data: shutil.move(file, f{config_path}/{file}) if __name__ __main__: isExist os.path.exists(dataset_path) if not isExist: os.makedirs(dataset_path) isExist os.path.exists(config_path) if not isExist: os.makedirs(config_path) # Prepare the dataset text file get_dataset_txt(dataset_path, dataset_file) # Create RKNN object rknn RKNN(verboseFalse) # pre-process config print(-- Config model) rknn.config(mean_values[[0, 0, 0]], std_values[[255, 255, 255]], target_platformplatform) print(done) # Load ONNX model print(-- Loading model) ret rknn.load_onnx(modelONNX_MODEL, outputsOUT_NODE) if ret ! 0: print(Load model failed!) exit(ret) print(done) # Build model print(-- hybrid_quantization_step1) ret rknn.hybrid_quantization_step1(datasetdataset_file, proposalFalse) if ret ! 0: print(hybrid_quantization_step1 failed!) exit(ret) print(done) rknn.release() print(-- Move hybrid quatization config into config folder) shutil.move(f{model_name}-{input_height}-{input_width}.data, f{config_path}/{model_name}-{input_height}-{input_width}.data) shutil.move(f{model_name}-{input_height}-{input_width}.model, f{config_path}/{model_name}-{input_height}-{input_width}.model) shutil.move(f{model_name}-{input_height}-{input_width}.quantization.cfg, f{config_path}/{model_name}-{input_height}-{input_width}.quantization.cfg) print(-- Move onnx config into config folder) move_onnx_config()step2:import os, shutil, numpy as np, cv2 from utils import * from rknn.api import RKNN conf_thres 0.65 iou_thres 0.65 input_width 640 input_height 640 model_name best model_path ./model config_path ./config result_path ./result image_path ./dataset/1.png video_path test.mp4 video_inference False RKNN_MODEL fbest-{input_height}-{input_width}.rknn CLASSES [lane, lane_line] if __name__ __main__: isExist os.path.exists(result_path) if not isExist: os.makedirs(result_path) # Create RKNN object rknn RKNN(verboseFalse) # Build model print(-- hybrid_quantization_step2) ret rknn.hybrid_quantization_step2(model_inputf{config_path}/{model_name}-{input_height}-{input_width}.model, data_inputf{config_path}/{model_name}-{input_height}-{input_width}.data, model_quantization_cfgf{config_path}/{model_name}-{input_height}-{input_width}.quantization.cfg) if ret ! 0: print(hybrid_quantization_step2 failed!) exit(ret) print(done) # Export rknn model print(-- Export rknn model) ret rknn.export_rknn(RKNN_MODEL) if ret ! 0: print(Export rknn model failed!) exit(ret) print(done) print(-- Move RKNN file into model folder) shutil.move(RKNN_MODEL, f{model_path}/{RKNN_MODEL}) # Init runtime environment print(-- Init runtime environment) ret rknn.init_runtime() if ret ! 0: print(Init runtime environment failed!) exit(ret) print(done) if video_inference True: cap cv2.VideoCapture(video_path) while(True): ret, image_3c cap.read() if not ret: break image_4c, image_3c preprocess(image_3c, input_height, input_width) print(-- Running model for video inference) outputs rknn.inference(inputs[image_3c]) colorlist gen_color(len(CLASSES)) results postprocess(outputs, image_4c, image_3c, conf_thres, iou_thres, classeslen(CLASSES)) ##[box,mask,shape] results results[0] ## batch1 boxes, masks, shape results if isinstance(masks, np.ndarray): mask_img, vis_img vis_result(image_3c, results, colorlist, CLASSES, result_path) cv2.imshow(mask_img, mask_img) cv2.imshow(vis_img, vis_img) else: print(No segmentation result) cv2.waitKey(10) else: # Preprocess input image image_3c cv2.imread(image_path) image_4c, image_3c preprocess(image_3c, input_height, input_width) print(-- Running model for image inference) print( image_3c.shape) outputs rknn.inference(inputs[image_3c]) colorlist gen_color(len(CLASSES)) results postprocess(outputs, image_4c, image_3c, conf_thres, iou_thres, classeslen(CLASSES)) ##[box,mask,shape] results results[0] ## batch1 boxes, masks, shape results if isinstance(masks, np.ndarray): mask_img, vis_img vis_result(image_3c, results, colorlist, CLASSES, result_path) print(-- Save inference result) else: print(No segmentation result) print(RKNN inference finish) rknn.release() cv2.destroyAllWindows()得到转换后的模型.rknn3、终端安装rknnlite推理代码详细如下rknnlite_inference.py:import os, cv2, time, numpy as np from utils import * from rknnlite.api import RKNNLite conf_thres 0.65 iou_thres 0.95 input_width 640 input_height 640 model_name green model_path ./model config_path ./config result_path ./result image_path ./dataset/0000.png video_path 3.mp4 video_inference False RKNN_MODEL f./model/green-640-640.rknn CLASSES [road, lane_line] if __name__ __main__: isExist os.path.exists(result_path) if not isExist: os.makedirs(result_path) rknn_lite RKNNLite(verboseFalse) ret rknn_lite.load_rknn(RKNN_MODEL) ret rknn_lite.init_runtime(core_maskRKNNLite.NPU_CORE_AUTO) if video_inference True: cap cv2.VideoCapture(video_path) while(cap.isOpened()): ret, image_3c cap.read() if not ret: break print(-- Running model for video inference) image_4c, image_3c preprocess(image_3c, input_height, input_width) #ret rknn_lite.init_runtime() start time.time() image_3C image_3c[np.newaxis,:] # print(111111,image_3C.shape) outputs rknn_lite.inference(inputs[image_3C]) stop time.time() fps round(1/(stop-start), 2) outputs[0]np.squeeze(outputs[0]) outputs[0] np.expand_dims(outputs[0], axis0) colorlist gen_color(len(CLASSES)) results postprocess(outputs, image_4c, image_3c, conf_thres, iou_thres, classeslen(CLASSES)) ##[box,mask,shape] results results[0] ## batch1 boxes, masks, shape results if type(masks) ! list and masks.ndim 3: mask_img, vis_img vis_result(image_3c, results, colorlist, CLASSES, result_path) #cv2.imshow(mask_img, mask_img) cv2.putText(vis_img, str(fps), (1,571),cv2.FONT_HERSHEY_SIMPLEX,1.0,(255,255,255)) cv2.imshow(vis_img, vis_img) else: print(-------------No segmentation result-------------) #img5 image_3c[185:455,:] #img2 np.zeros_like(img5) #cv2.imshow(1, image_3c) cv2.waitKey(1) else: image_3c cv2.imread(image_path) # (640,640,3) image_4c, image_3c preprocess(image_3c, input_height, input_width) print(-- Running model for image inference) #ret rknn_lite.init_runtime() start time.time() image_3C2 image_3c[np.newaxis,:] # (1, 640, 640, 3) outputs rknn_lite.inference(inputs[image_3C2]) # len(outputs)-2 stop time.time() fps round(1/(stop-start), 2) outputs[0]np.squeeze(outputs[0]) outputs[0] np.expand_dims(outputs[0], axis0) colorlist [ (255,255,255), (0,0,0) ] #colorlist gen_color(len(CLASSES)) results postprocess(outputs, image_4c, image_3c, conf_thres, iou_thres, classeslen(CLASSES)) ##[box,mask,shape] results results[0] ## batch1 boxes, masks, shape results if masks.ndim 2: masks np.expand_dims(masks, axis0).astype(np.float32) if type(masks) ! list and masks.ndim 3: mask_img, vis_img vis_result(image_3c, results, colorlist, CLASSES, result_path) print(-- Save inference result) else: print(-------------No segmentation result-------------) print(rknn_liteLite inference finish) rknn_lite.release() cv2.destroyAllWindows()utils.py:import cv2 import time import numpy as np def xywh2xyxy(x): y np.copy(x) y[..., 0] x[..., 0] - x[..., 2] / 2 # top left x y[..., 1] x[..., 1] - x[..., 3] / 2 # top left y y[..., 2] x[..., 0] x[..., 2] / 2 # bottom right x y[..., 3] x[..., 1] x[..., 3] / 2 # bottom right y return y def clip_boxes(boxes, shape): boxes[..., [0, 2]] boxes[..., [0, 2]].clip(0, shape[1]) # x1, x2 boxes[..., [1, 3]] boxes[..., [1, 3]].clip(0, shape[0]) # y1, y2 def scale_boxes(img1_shape, boxes, img0_shape, ratio_padNone): if ratio_pad is None: # calculate from img0_shape gain min(img1_shape[0] / img0_shape[0], img1_shape[1] / img0_shape[1]) # gain old / new pad (img1_shape[1] - img0_shape[1] * gain) / 2, (img1_shape[0] - img0_shape[0] * gain) / 2 # wh padding else: gain ratio_pad[0][0] pad ratio_pad[1] boxes[..., [0, 2]] - pad[0] # x padding boxes[..., [1, 3]] - pad[1] # y padding boxes[..., :4] / gain clip_boxes(boxes, img0_shape) return boxes def crop_mask(masks, boxes): n, h, w masks.shape x1, y1, x2, y2 np.split(boxes[:, :, None], 4, axis1) r np.arange(w, dtypenp.float32)[None, None, :] # rows shape(1,w,1) c np.arange(h, dtypenp.float32)[None, :, None] # cols shape(h,1,1) return masks * ((r x1) * (r x2) * (c y1) * (c y2)) def sigmoid(x): return 1.0 / (1 np.exp(-x)) def process_mask(protos, masks_in, bboxes, shape): c, mh, mw protos.shape # CHW ih, iw shape masks sigmoid(masks_in protos.reshape(c, -1)).reshape(-1, mh, mw) # CHW 【lulu】 downsampled_bboxes bboxes.copy() downsampled_bboxes[:, 0] * mw / iw downsampled_bboxes[:, 2] * mw / iw downsampled_bboxes[:, 3] * mh / ih downsampled_bboxes[:, 1] * mh / ih masks crop_mask(masks, downsampled_bboxes) # CHW masks np.transpose(masks, [1, 2, 0]) # masks cv2.resize(masks, (shape[1], shape[0]), interpolationcv2.INTER_NEAREST) masks cv2.resize(masks, (shape[1], shape[0]), interpolationcv2.INTER_LINEAR) if masks.ndim 3: masks np.transpose(masks, [2, 0, 1]) return np.where(masks 0.5, masks, 0) def nms(bboxes, scores, threshold0.5): x1 bboxes[:, 0] y1 bboxes[:, 1] x2 bboxes[:, 2] y2 bboxes[:, 3] areas (x2 - x1) * (y2 - y1) order scores.argsort()[::-1] keep [] while order.size 0: i order[0] #print(i:,i) keep.append(i) if order.size 1: break xx1 np.maximum(x1[i], x1[order[1:]]) yy1 np.maximum(y1[i], y1[order[1:]]) xx2 np.minimum(x2[i], x2[order[1:]]) yy2 np.minimum(y2[i], y2[order[1:]]) w np.maximum(0.0, (xx2 - xx1)) h np.maximum(0.0, (yy2 - yy1)) inter w * h iou inter / (areas[i] areas[order[1:]] - inter) ids np.where(iou threshold)[0] order order[ids 1] return keep def non_max_suppression( prediction, conf_thres0.25, iou_thres0.45, classesNone, agnosticFalse, multi_labelFalse, labels(), max_det300, nc0, # number of classes (optional) ): # Checks assert 0 conf_thres 1, fInvalid Confidence threshold {conf_thres}, valid values are between 0.0 and 1.0 assert 0 iou_thres 1, fInvalid IoU {iou_thres}, valid values are between 0.0 and 1.0 # 【lulu】prediction.shape[1]box cls num_masks bs prediction.shape[0] # batch size nc nc or (prediction.shape[1] - 4) # number of classes nm prediction.shape[1] - nc - 4 # num_masks mi 4 nc # mask start index xc np.max(prediction[:, 4:mi], axis1) conf_thres ## 【lulu】 # Settings # min_wh 2 # (pixels) minimum box width and height max_wh 7680 # (pixels) maximum box width and height max_nms 30000 # maximum number of boxes into torchvision.ops.nms() time_limit 0.5 0.05 * bs # seconds to quit after redundant True # require redundant detections multi_label nc 1 # multiple labels per box (adds 0.5ms/img) merge False # use merge-NMS t time.time() output [np.zeros((0, 6 nm))] * bs ## 【lulu】 for xi, x in enumerate(prediction): # image_3c index, image_3c inference # Apply constraints # x[((x[:, 2:4] min_wh) | (x[:, 2:4] max_wh)).any(1), 4] 0 # width-height x np.transpose(x, [1, 0])[xc[xi]] ## 【lulu】#x.shape[0]-----10 # If none remain process next image_3c if not x.shape[0]: continue # Detections matrix nx6 (xyxy, conf, cls) box, cls, mask np.split(x, [4, 4 nc], axis1) ## 【lulu】 box xywh2xyxy(box) # center_x, center_y, width, height) to (x1, y1, x2, y2) j np.argmax(cls, axis1) ## 【lulu】 conf cls[np.array(range(j.shape[0])), j].reshape(-1, 1) x np.concatenate([box, conf, j.reshape(-1, 1), mask], axis1)[conf.reshape(-1, ) conf_thres] # Check shape n x.shape[0] # number of boxes if not n: continue x x[np.argsort(x[:, 4])[::-1][:max_nms]] # sort by confidence and remove excess boxes 【lulu】 # Batched NMS c x[:, 5:6] * max_wh # classes boxes, scores x[:, :4] c, x[:, 4] # boxes (offset by class), scores i nms(boxes, scores, iou_thres) ## 【lulu】 i i[:max_det] # limit detections output[xi] x[i] if (time.time() - t) time_limit: # LOGGER.warning(fWARNING ⚠️ NMS time limit {time_limit:.3f}s exceeded) break # time limit exceeded return output def make_anchors(feats_shape, strides, grid_cell_offset0.5): Generate anchors from features. anchor_points, stride_tensor [], [] assert feats_shape is not None dtype_ np.float for i, stride in enumerate(strides): _, _, h, w feats_shape[i] sx np.arange(w, dtypedtype_) grid_cell_offset # shift x sy np.arange(h, dtypedtype_) grid_cell_offset # shift y sy, sx np.meshgrid(sy, sx, indexingij) anchor_points.append(np.stack((sx, sy), -1).reshape(-1, 2)) stride_tensor.append(np.full((h * w, 1), stride, dtypedtype_)) return np.concatenate(anchor_points), np.concatenate(stride_tensor) def dist2bbox(distance, anchor_points, xywhTrue, dim-1): Transform distance(ltrb) to box(xywh or xyxy). lt, rb np.split(distance, 2, dim) x1y1 anchor_points - lt x2y2 anchor_points rb if xywh: c_xy (x1y1 x2y2) / 2 wh x2y2 - x1y1 return np.concatenate((c_xy, wh), dim) # xywh bbox return np.concatenate((x1y1, x2y2), dim) # xyxy bbox def letterbox(im, new_shape(640, 640), color(114, 114, 114), autoTrue, scaleFillFalse, scaleupTrue, stride32): # Resize and pad image while meeting stride-multiple constraints shape im.shape[:2] # current shape [height, width] if isinstance(new_shape, int): new_shape (new_shape, new_shape) # Scale ratio (new / old) r min(new_shape[0] / shape[0], new_shape[1] / shape[1]) if not scaleup: # only scale down, do not scale up (for better val mAP) r min(r, 1.0) # Compute padding ratio r, r # width, height ratios new_unpad int(round(shape[1] * r)), int(round(shape[0] * r)) dw, dh new_shape[1] - new_unpad[0], new_shape[0] - new_unpad[1] # wh padding if auto: # minimum rectangle dw, dh np.mod(dw, stride), np.mod(dh, stride) # wh padding elif scaleFill: # stretch dw, dh 0.0, 0.0 new_unpad (new_shape[1], new_shape[0]) ratio new_shape[1] / shape[1], new_shape[0] / shape[0] # width, height ratios dw / 2 # divide padding into 2 sides dh / 2 if shape[::-1] ! new_unpad: # resize im cv2.resize(im, new_unpad, interpolationcv2.INTER_LINEAR) top, bottom int(round(dh - 0.1)), int(round(dh 0.1)) left, right int(round(dw - 0.1)), int(round(dw 0.1)) im cv2.copyMakeBorder(im, top, bottom, left, right, cv2.BORDER_CONSTANT, valuecolor) # add border return im, ratio, (dw, dh) def preprocess(image, input_height, input_width): image_3c image # Convert the image_3c color space from BGR to RGB image_3c cv2.cvtColor(image_3c, cv2.COLOR_BGR2RGB) # Resize the image_3c to match the input shape image_3c, ratio, dwdh letterbox(image_3c, new_shape[input_height, input_width], autoFalse) # Normalize the image_3c data by dividing it by 255.0 image_4c np.array(image_3c) / 255.0 # Transpose the image_3c to have the channel dimension as the first dimension image_4c np.transpose(image_4c, (2, 0, 1)) # Channel first # Expand the dimensions of the image_3c data to match the expected input shape image_4c np.expand_dims(image_4c, axis0).astype(np.float32) image_4c np.ascontiguousarray(image_4c) # contiguous # Return the preprocessed image_3c data return image_4c, image_3c def postprocess(preds, img, orig_img, OBJ_THRESH, NMS_THRESH, classesNone): p non_max_suppression(preds[0], OBJ_THRESH, NMS_THRESH, agnosticFalse, max_det300, ncclasses, classesNone) results [] proto preds[1] for i, pred in enumerate(p): shape orig_img.shape if not len(pred): results.append([[], [], []]) # save empty boxes continue masks process_mask(proto[i], pred[:, 6:], pred[:, :4], img.shape[2:]) # HWC pred[:, :4] scale_boxes(img.shape[2:], pred[:, :4], shape).round() results.append([pred[:, :6], masks, shape[:2]]) return results def gen_color(class_num): color_list [] np.random.seed(1) while 1: a list(map(int, np.random.choice(range(255), 3))) if (np.sum(a) 0): continue color_list.append(a) if len(color_list) class_num: break return color_list def vis_result(image_3c, results, colorlist, CLASSES, result_path): boxes, masks, shape results #if masks.ndim 2: # masks np.expand_dims(masks, axis0).astype(np.float32) # Convert the image_3c color space from BGR to RGB image_3c cv2.cvtColor(image_3c, cv2.COLOR_RGB2BGR) vis_img image_3c.copy() mask_img np.zeros_like(image_3c) cls_list [] center_list [] #print(boxes.shape,masks.shape,len(boxes),masks.shape) for box, mask in zip(boxes, masks): cls int(box[-1]) cls_list.append(cls) #print(box.shape,mask.shape,cls.shape,box.shape,mask.shape,cls) dummy_img np.zeros_like(image_3c) dummy_img[mask ! 0] colorlist[int(box[-1])] #(640, 640, 3) mask_img[mask ! 0] colorlist[int(box[-1])] #(640, 640, 3) centroid np.mean(np.argwhere(dummy_img), axis0) #(x,y) if np.isnan(centroid).all() False: centroid_x, centroid_y int(centroid[1]), int(centroid[0]) center_list.append([centroid_x, centroid_y]) #print(center_list,center_list) vis_img cv2.addWeighted(vis_img, 0.5, mask_img, 0.5, 0) #print(vis_img,vis_img.shape) for i, box in enumerate(boxes): cls int(box[-1]) cv2.rectangle(vis_img, (int(box[0]), int(box[1])), (int(box[2]), int(box[3])), (0, 0, 255), 3, 4) cv2.putText(vis_img, f{CLASSES[cls]}:{round(box[4], 2)}, (int(box[0]), int(box[1])), cv2.FONT_HERSHEY_SIMPLEX, 1, (0, 255, 0), 2) for j in range(len(center_list)): cv2.circle(vis_img, (center_list[j][0], center_list[j][1]), radius5, color(0, 0, 255), thickness-1) vis_img np.concatenate([image_3c, mask_img, vis_img], axis1) for i in range(len(CLASSES)): num cls_list.count(i) if num ! 0: print(fFound {num} {CLASSES[i]}) cv2.imwrite(f./{result_path}/origin_image.jpg, image_3c) cv2.imwrite(f./{result_path}/mask_image.jpg, mask_img) cv2.imwrite(f./{result_path}/visual_image.jpg, vis_img) return mask_img, vis_img
本文来自互联网用户投稿,该文观点仅代表作者本人,不代表本站立场。本站仅提供信息存储空间服务,不拥有所有权,不承担相关法律责任。如若转载,请注明出处:http://www.coloradmin.cn/o/2447444.html
如若内容造成侵权/违法违规/事实不符,请联系多彩编程网进行投诉反馈,一经查实,立即删除!相关文章
SpringBoot-17-MyBatis动态SQL标签之常用标签
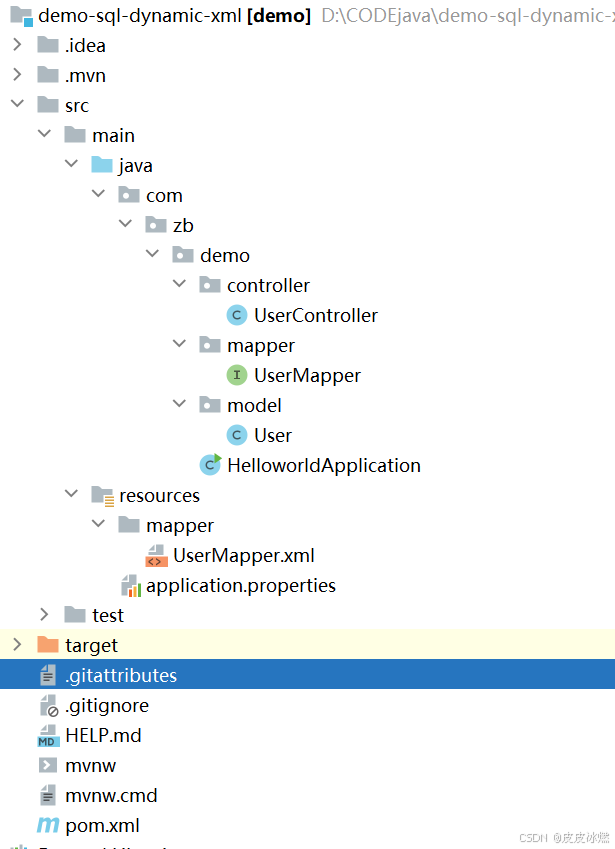
文章目录 1 代码1.1 实体User.java1.2 接口UserMapper.java1.3 映射UserMapper.xml1.3.1 标签if1.3.2 标签if和where1.3.3 标签choose和when和otherwise1.4 UserController.java2 常用动态SQL标签2.1 标签set2.1.1 UserMapper.java2.1.2 UserMapper.xml2.1.3 UserController.ja…

wordpress后台更新后 前端没变化的解决方法
使用siteground主机的wordpress网站,会出现更新了网站内容和修改了php模板文件、js文件、css文件、图片文件后,网站没有变化的情况。
不熟悉siteground主机的新手,遇到这个问题,就很抓狂,明明是哪都没操作错误&#x…
网络编程(Modbus进阶)
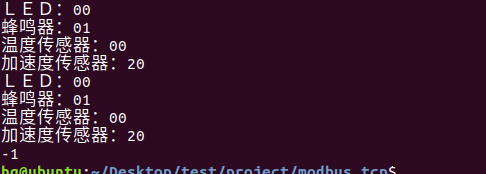
思维导图 Modbus RTU(先学一点理论)
概念 Modbus RTU 是工业自动化领域 最广泛应用的串行通信协议,由 Modicon 公司(现施耐德电气)于 1979 年推出。它以 高效率、强健性、易实现的特点成为工业控制系统的通信标准。 包…
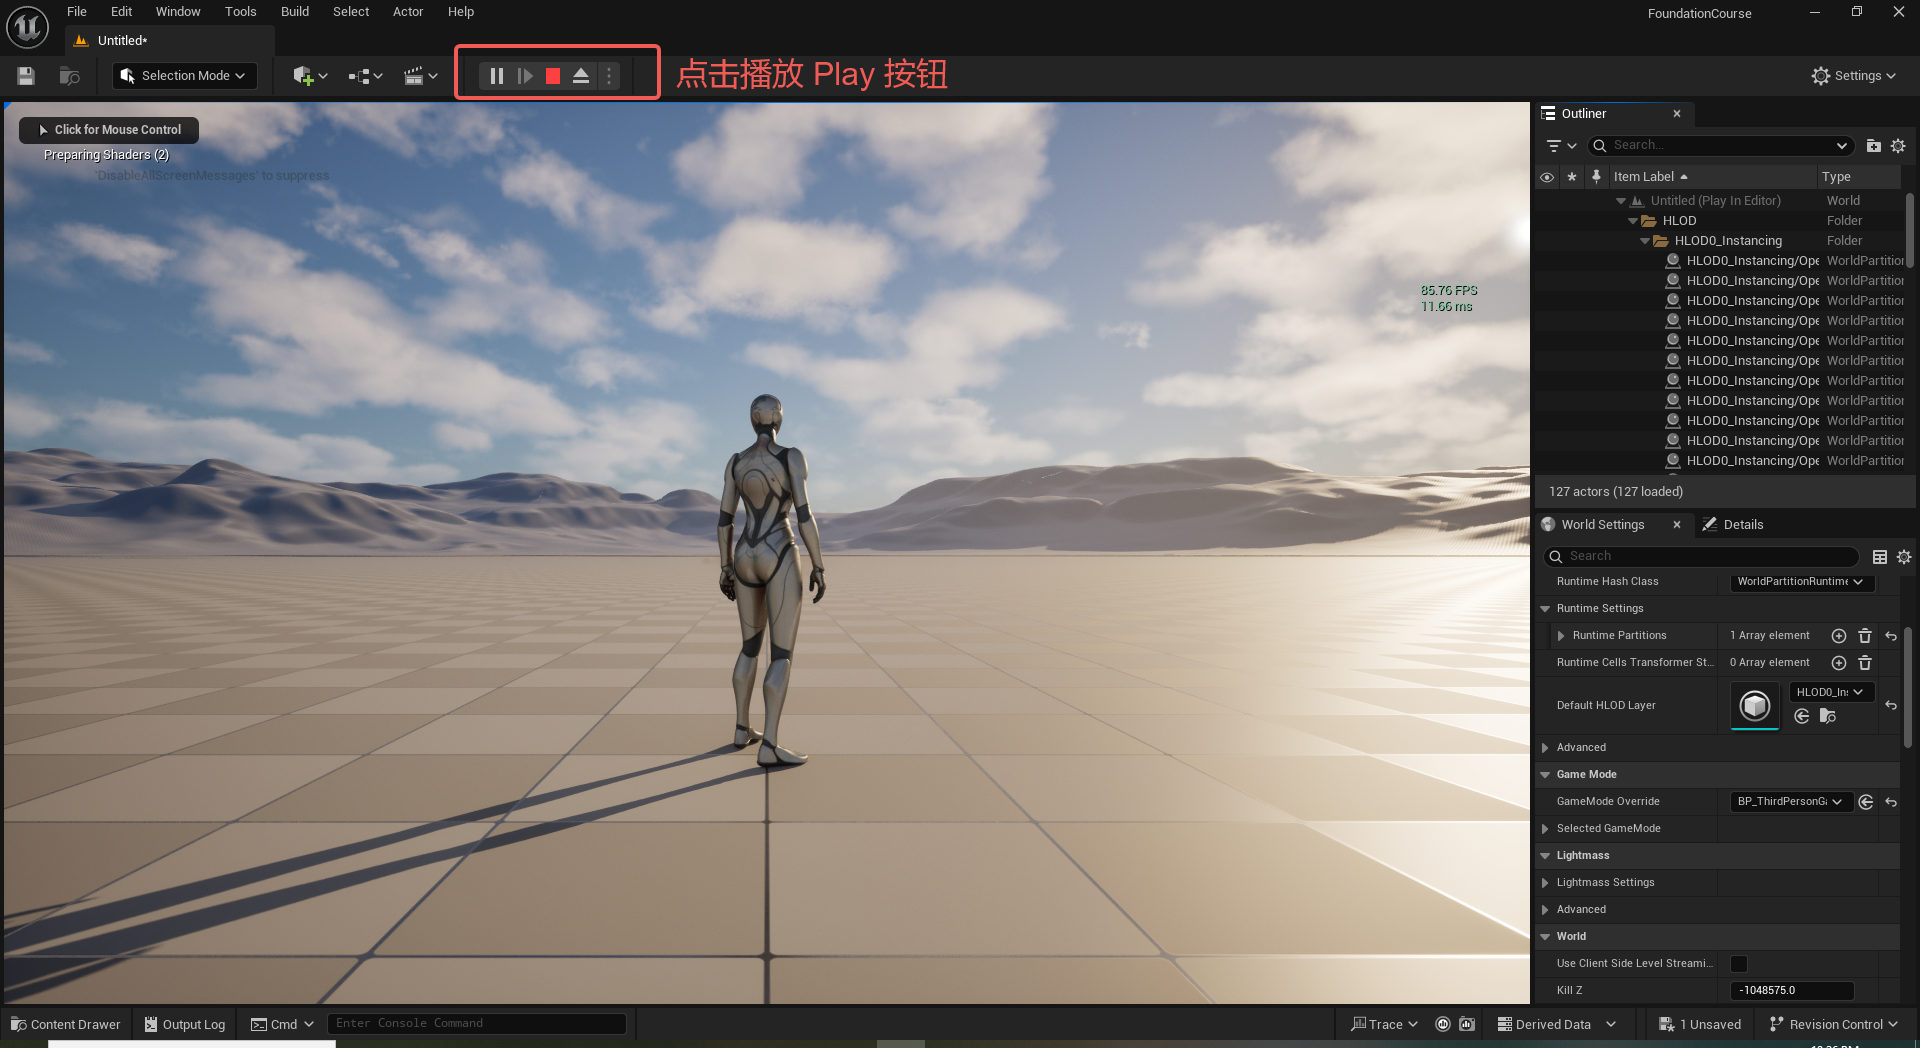
UE5 学习系列(二)用户操作界面及介绍
这篇博客是 UE5 学习系列博客的第二篇,在第一篇的基础上展开这篇内容。博客参考的 B 站视频资料和第一篇的链接如下:
【Note】:如果你已经完成安装等操作,可以只执行第一篇博客中 2. 新建一个空白游戏项目 章节操作,重…
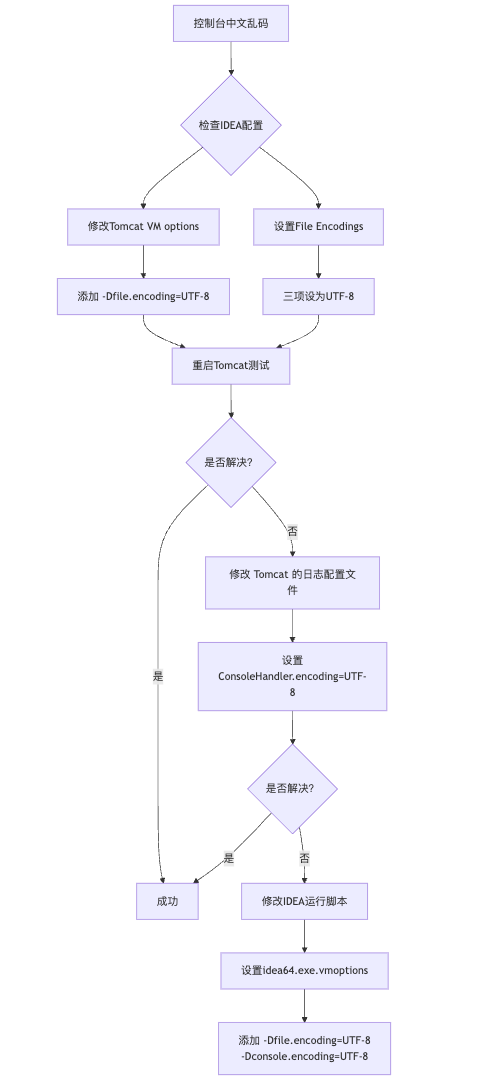
IDEA运行Tomcat出现乱码问题解决汇总
最近正值期末周,有很多同学在写期末Java web作业时,运行tomcat出现乱码问题,经过多次解决与研究,我做了如下整理:
原因:
IDEA本身编码与tomcat的编码与Windows编码不同导致,Windows 系统控制台…
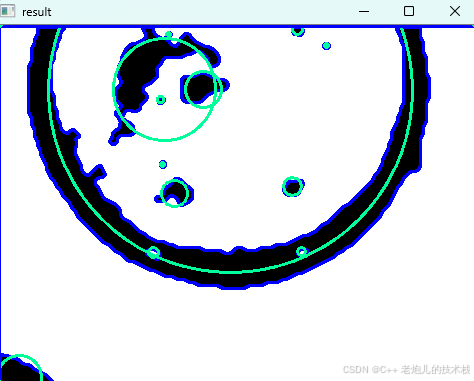
利用最小二乘法找圆心和半径
#include <iostream>
#include <vector>
#include <cmath>
#include <Eigen/Dense> // 需安装Eigen库用于矩阵运算 // 定义点结构
struct Point { double x, y; Point(double x_, double y_) : x(x_), y(y_) {}
}; // 最小二乘法求圆心和半径 …

使用docker在3台服务器上搭建基于redis 6.x的一主两从三台均是哨兵模式
一、环境及版本说明
如果服务器已经安装了docker,则忽略此步骤,如果没有安装,则可以按照一下方式安装: 1. 在线安装(有互联网环境): 请看我这篇文章 传送阵>> 点我查看 2. 离线安装(内网环境):请看我这篇文章 传送阵>> 点我查看
说明:假设每台服务器已…
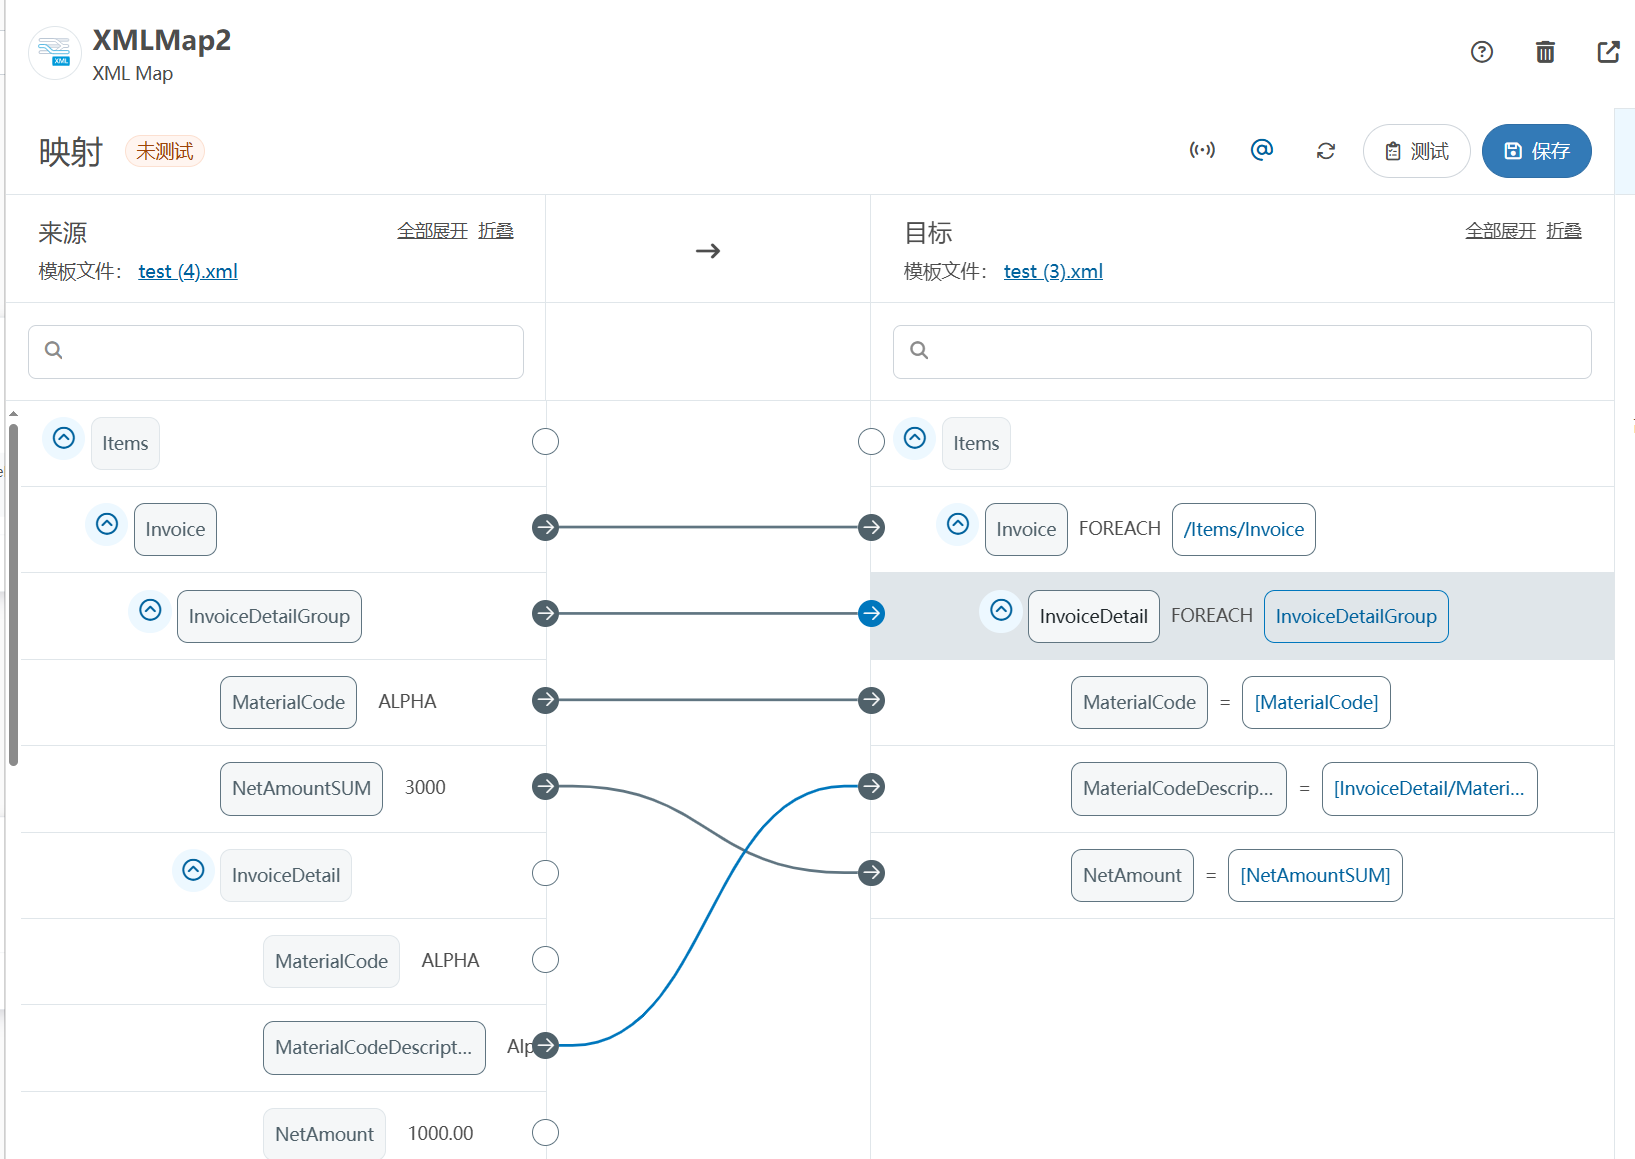
XML Group端口详解
在XML数据映射过程中,经常需要对数据进行分组聚合操作。例如,当处理包含多个物料明细的XML文件时,可能需要将相同物料号的明细归为一组,或对相同物料号的数量进行求和计算。传统实现方式通常需要编写脚本代码,增加了开…
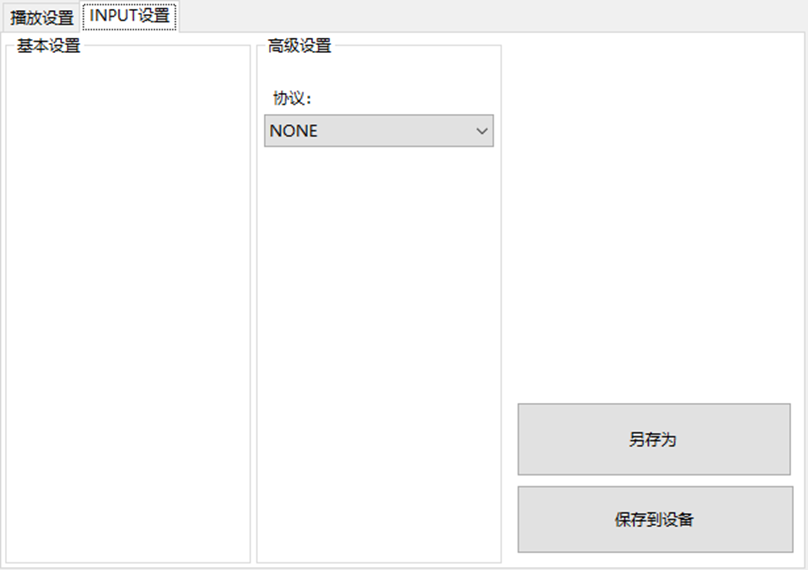
LBE-LEX系列工业语音播放器|预警播报器|喇叭蜂鸣器的上位机配置操作说明
LBE-LEX系列工业语音播放器|预警播报器|喇叭蜂鸣器专为工业环境精心打造,完美适配AGV和无人叉车。同时,集成以太网与语音合成技术,为各类高级系统(如MES、调度系统、库位管理、立库等)提供高效便捷的语音交互体验。
L…
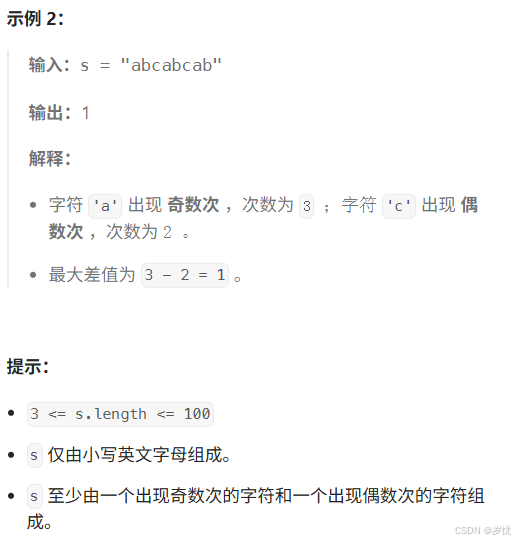
(LeetCode 每日一题) 3442. 奇偶频次间的最大差值 I (哈希、字符串)
题目:3442. 奇偶频次间的最大差值 I 思路 :哈希,时间复杂度0(n)。 用哈希表来记录每个字符串中字符的分布情况,哈希表这里用数组即可实现。
C版本:
class Solution {
public:int maxDifference(string s) {int a[26]…
【大模型RAG】拍照搜题技术架构速览:三层管道、两级检索、兜底大模型
摘要
拍照搜题系统采用“三层管道(多模态 OCR → 语义检索 → 答案渲染)、两级检索(倒排 BM25 向量 HNSW)并以大语言模型兜底”的整体框架: 多模态 OCR 层 将题目图片经过超分、去噪、倾斜校正后,分别用…
【Axure高保真原型】引导弹窗
今天和大家中分享引导弹窗的原型模板,载入页面后,会显示引导弹窗,适用于引导用户使用页面,点击完成后,会显示下一个引导弹窗,直至最后一个引导弹窗完成后进入首页。具体效果可以点击下方视频观看或打开下方…
接口测试中缓存处理策略
在接口测试中,缓存处理策略是一个关键环节,直接影响测试结果的准确性和可靠性。合理的缓存处理策略能够确保测试环境的一致性,避免因缓存数据导致的测试偏差。以下是接口测试中常见的缓存处理策略及其详细说明:
一、缓存处理的核…
龙虎榜——20250610
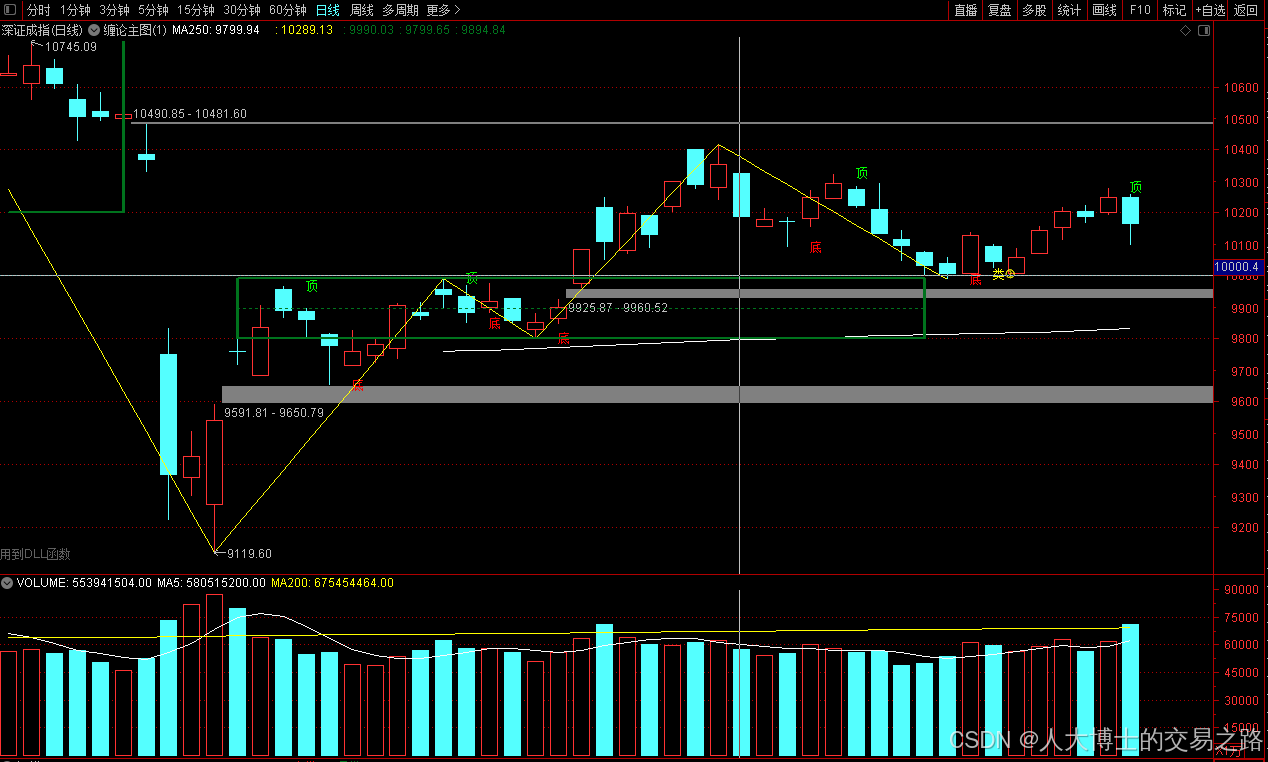
上证指数放量收阴线,个股多数下跌,盘中受消息影响大幅波动。 深证指数放量收阴线形成顶分型,指数短线有调整的需求,大概需要一两天。 2025年6月10日龙虎榜行业方向分析 1. 金融科技
代表标的:御银股份、雄帝科技
驱动…
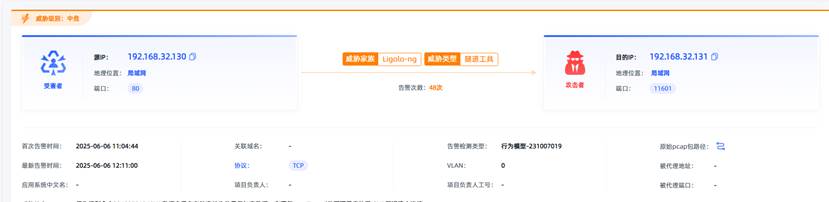
观成科技:隐蔽隧道工具Ligolo-ng加密流量分析
1.工具介绍
Ligolo-ng是一款由go编写的高效隧道工具,该工具基于TUN接口实现其功能,利用反向TCP/TLS连接建立一条隐蔽的通信信道,支持使用Let’s Encrypt自动生成证书。Ligolo-ng的通信隐蔽性体现在其支持多种连接方式,适应复杂网…
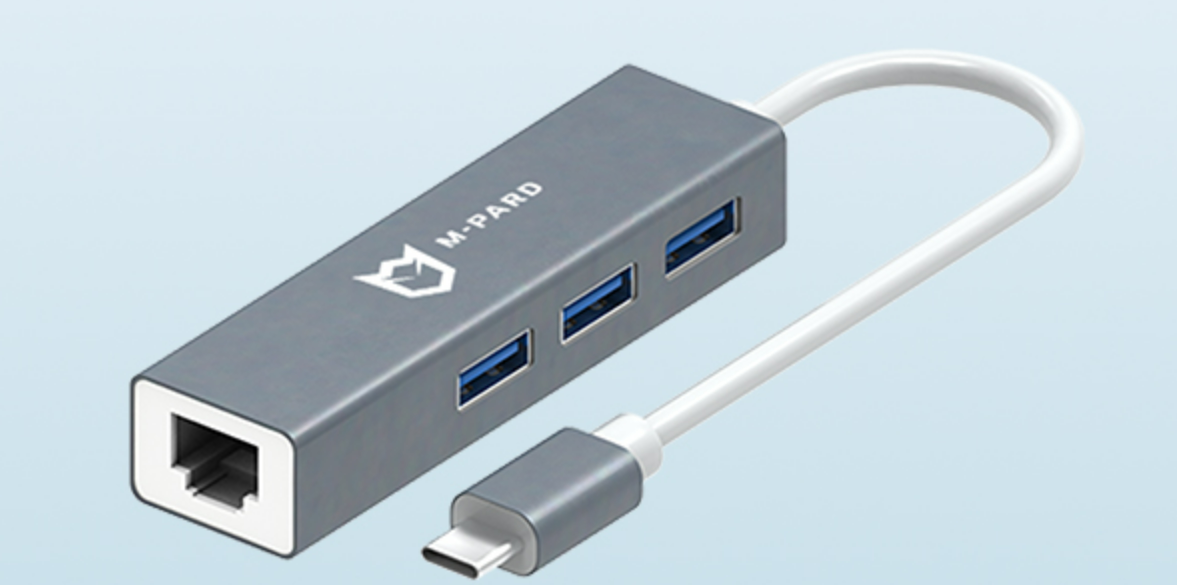
铭豹扩展坞 USB转网口 突然无法识别解决方法
当 USB 转网口扩展坞在一台笔记本上无法识别,但在其他电脑上正常工作时,问题通常出在笔记本自身或其与扩展坞的兼容性上。以下是系统化的定位思路和排查步骤,帮助你快速找到故障原因:
背景:
一个M-pard(铭豹)扩展坞的网卡突然无法识别了,扩展出来的三个USB接口正常。…
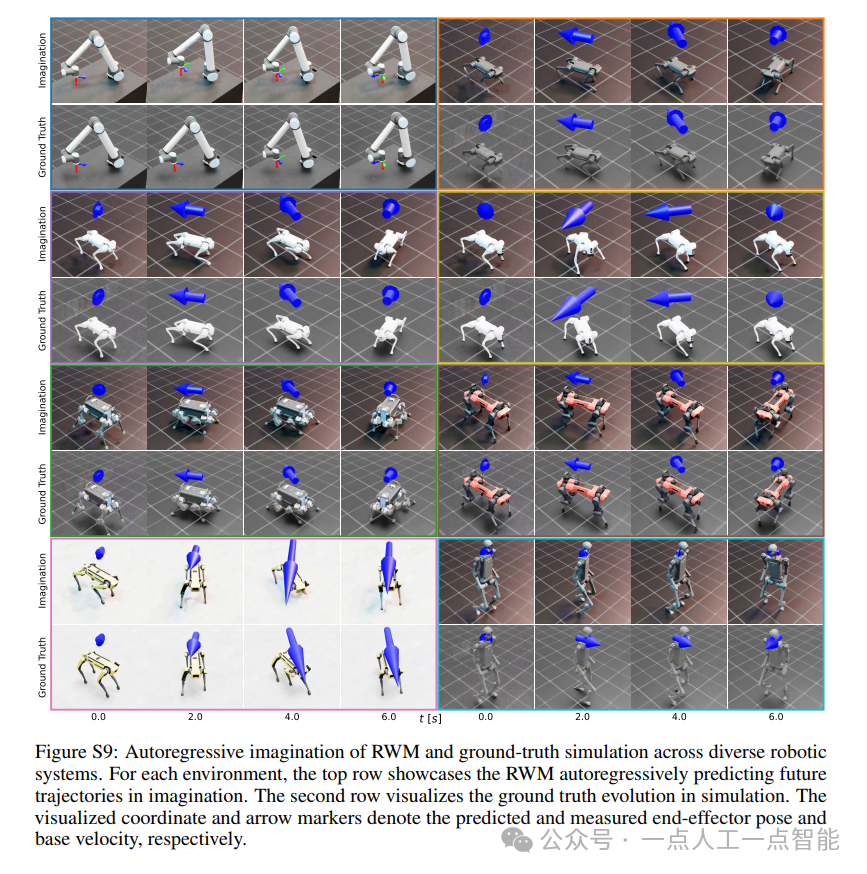
未来机器人的大脑:如何用神经网络模拟器实现更智能的决策?
编辑:陈萍萍的公主一点人工一点智能 未来机器人的大脑:如何用神经网络模拟器实现更智能的决策?RWM通过双自回归机制有效解决了复合误差、部分可观测性和随机动力学等关键挑战,在不依赖领域特定归纳偏见的条件下实现了卓越的预测准…

Linux应用开发之网络套接字编程(实例篇)
服务端与客户端单连接
服务端代码
#include <sys/socket.h>
#include <sys/types.h>
#include <netinet/in.h>
#include <stdio.h>
#include <stdlib.h>
#include <string.h>
#include <arpa/inet.h>
#include <pthread.h>
…

华为云AI开发平台ModelArts
华为云ModelArts:重塑AI开发流程的“智能引擎”与“创新加速器”!
在人工智能浪潮席卷全球的2025年,企业拥抱AI的意愿空前高涨,但技术门槛高、流程复杂、资源投入巨大的现实,却让许多创新构想止步于实验室。数据科学家…
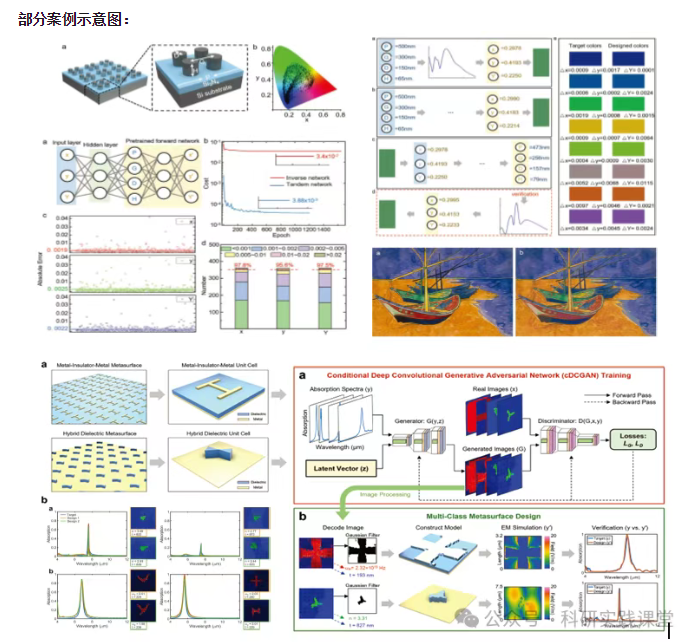
深度学习在微纳光子学中的应用
深度学习在微纳光子学中的主要应用方向
深度学习与微纳光子学的结合主要集中在以下几个方向:
逆向设计 通过神经网络快速预测微纳结构的光学响应,替代传统耗时的数值模拟方法。例如设计超表面、光子晶体等结构。
特征提取与优化 从复杂的光学数据中自…