Windows下载OpenClaw源码,启动和安装攻略
news2026/3/20 10:00:26
关注前端小讴原创技术文章官方文档 →安装向导1.安装node推荐版本24最低版本22.16推荐使用nvm控制node版本2.安装pnpmnpm install -g pnpm3.克隆并构建git clone https://github.com/openclaw/openclaw.gitcd openclawpnpm installpnpm ui:buildpnpm build4.链接cli让openclaw命令全局可用pnpm link --global验证命令行输入openclaw有相关提示报错及解决方法用管理员打开命令行/powershellpnpm install报错Error error code 3221225477降级node到22版本安装C构建工具下载Visual Studio Build Tools 2022运行安装器工作负载列表中只勾选“使用 C 的桌面开发”完成后需重启电脑重新install即可建议删掉node_modules和pnpm-lock.yaml并执行pnpm store prune参考方案 →pnpm build报错scripts/bundle-a2ui.sh: line 31: node: command not found创建scripts/bundle-a2ui.mjs// scripts/bundle-a2ui.mjs// OpenClaw A2UI Bundle Placeholder Generator// For public repository users who do not have access to private A2UI source code.// This script creates a minimal valid ES module to satisfy TypeScript compilation.importfsfromnode:fs;importpathfromnode:path;import{createHash}fromnode:crypto;import{fileURLToPath}fromnode:url;// ── Resolve project root directory correctly on Windows and Unix ──const__filenamefileURLToPath(import.meta.url);const__dirnamepath.dirname(__filename);constROOT_DIRpath.resolve(__dirname,..);// openclaw/ root// ── Define output paths ──constOUTPUT_DIRpath.join(ROOT_DIR,src,canvas-host,a2ui);constOUTPUT_FILEpath.join(OUTPUT_DIR,a2ui.bundle.js);constHASH_FILEpath.join(OUTPUT_DIR,.bundle.hash);// ── Ensure output directory exists ──fs.mkdirSync(OUTPUT_DIR,{recursive:true});// ── Generate placeholder content (valid ES module) ──constplaceholderContent// Auto-generated placeholder for A2UI // Source code is not available in the public OpenClaw repository. // This file exists only to satisfy build dependencies. export const A2UI { version: 0.0.0-placeholder, render: () { throw new Error(A2UI runtime is not available in this build.); } };.trim()\n;// ── Write the bundle file ──fs.writeFileSync(OUTPUT_FILE,placeholderContent);// ── Compute and write hash to prevent unnecessary rebuilds ──consthashcreateHash(sha256).update(placeholderContent).digest(hex);fs.writeFileSync(HASH_FILE,hash);// ── Success message ──console.log(✅ A2UI placeholder bundle created successfully.);console.log(Bundle:${OUTPUT_FILE});console.log(Hash:${HASH_FILE});在package.json中替换脚本{scripts:{//...canvas:a2ui:bundle:node --import tsx scripts/bundle-a2ui.mjs}}参考方案 →新手向导openclaw onboard --install-daemonI understand this is personal-by-default and shared/multi-user use requires lock-down. Continue?风险告知YesSetup mode选择配置模式QuickStartModel/auth provider选择执行模型Skip for now暂时跳过Filter models by provider选择供应商All providersDefault model默认模型Keep current验证全部显示✅即表示配置成功。启动向导1.运行诊断命令pnpm openclaw doctor依次提示“是否创建token”、“是否创建.openclaw文件夹”等均选择Yes完成后会在C:\Users\${userName}\里创建.openclaw文件夹2.配置本地网关openclaw config set gateway.mode local3.启动本地网关openclaw gateway4.在浏览器打开默认http://127.0.0.1:18789验证可在浏览器打开初始化连接界面相关配置配置文件位置C:\Users\${userName}\openclaw.json如已一键安装过OpenClaw建议备份整个.openclaw文件夹并选择性覆盖token初始化界面输入token并连接然后在控制-概览里配置网关令牌模型// openclaw.json{// ...,models:{providers:{DeepSeek:{baseUrl:xxx,// 替换即可apiKey:xxx,// 替换即可api:openai-completions,models:[{id:xx,// 替换即可name:DeepSeek-V3.2 (非思考模式),reasoning:false,input:[text],cost:{input:0,output:0,cacheRead:0,cacheWrite:0},contextWindow:128000,maxTokens:8192}]}}}}
本文来自互联网用户投稿,该文观点仅代表作者本人,不代表本站立场。本站仅提供信息存储空间服务,不拥有所有权,不承担相关法律责任。如若转载,请注明出处:http://www.coloradmin.cn/o/2429519.html
如若内容造成侵权/违法违规/事实不符,请联系多彩编程网进行投诉反馈,一经查实,立即删除!相关文章
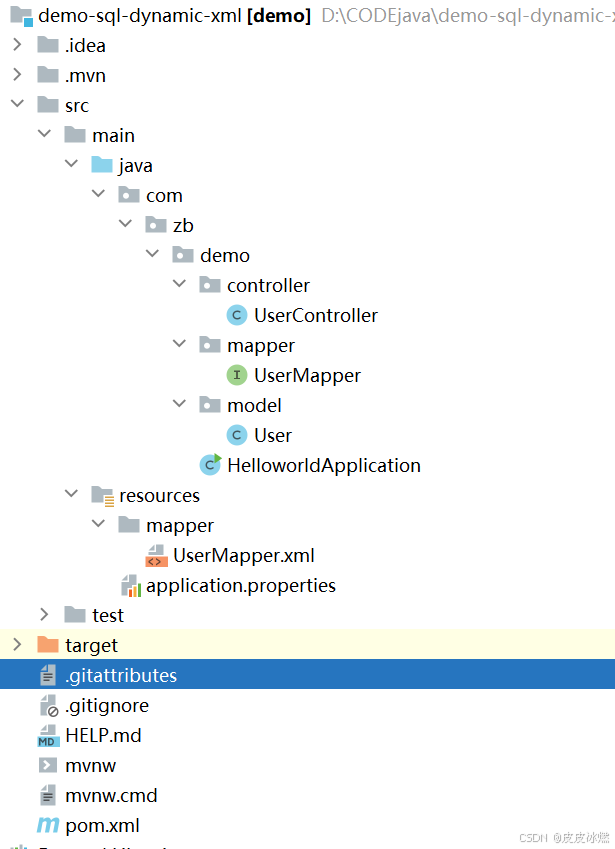
SpringBoot-17-MyBatis动态SQL标签之常用标签
文章目录 1 代码1.1 实体User.java1.2 接口UserMapper.java1.3 映射UserMapper.xml1.3.1 标签if1.3.2 标签if和where1.3.3 标签choose和when和otherwise1.4 UserController.java2 常用动态SQL标签2.1 标签set2.1.1 UserMapper.java2.1.2 UserMapper.xml2.1.3 UserController.ja…
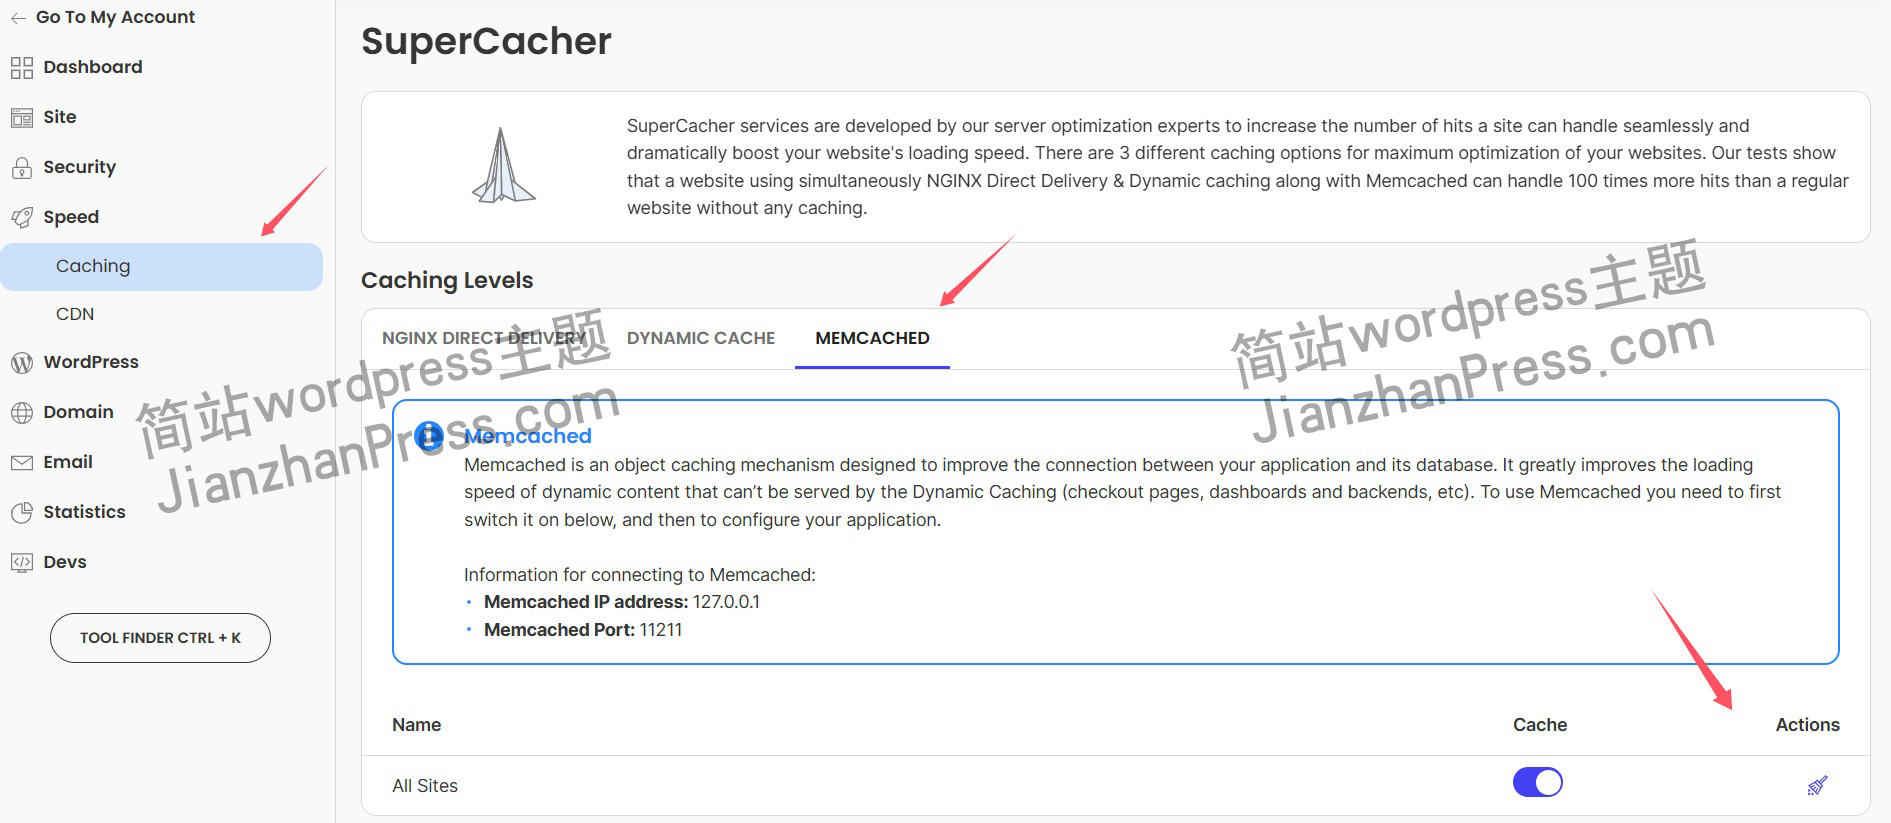
wordpress后台更新后 前端没变化的解决方法
使用siteground主机的wordpress网站,会出现更新了网站内容和修改了php模板文件、js文件、css文件、图片文件后,网站没有变化的情况。
不熟悉siteground主机的新手,遇到这个问题,就很抓狂,明明是哪都没操作错误&#x…
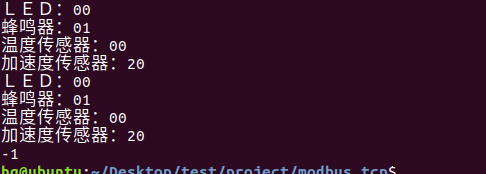
网络编程(Modbus进阶)
思维导图 Modbus RTU(先学一点理论)
概念 Modbus RTU 是工业自动化领域 最广泛应用的串行通信协议,由 Modicon 公司(现施耐德电气)于 1979 年推出。它以 高效率、强健性、易实现的特点成为工业控制系统的通信标准。 包…
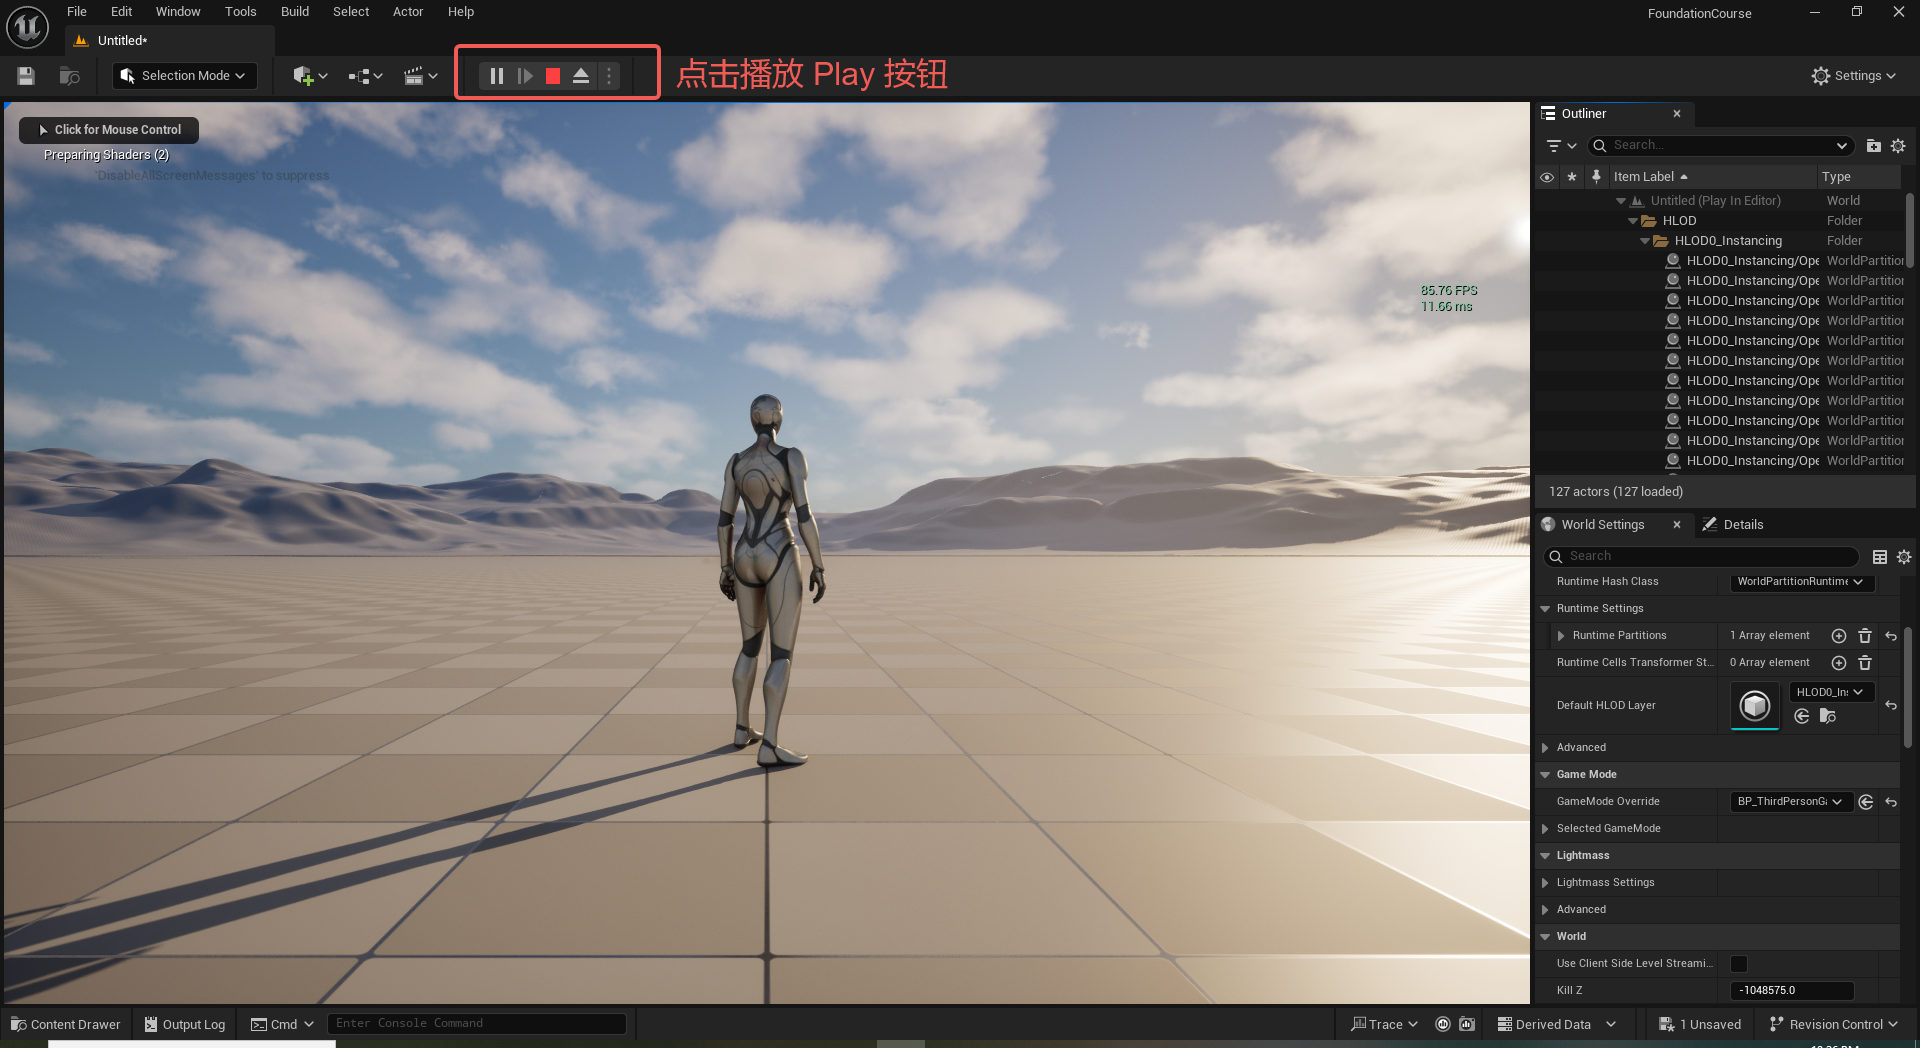
UE5 学习系列(二)用户操作界面及介绍
这篇博客是 UE5 学习系列博客的第二篇,在第一篇的基础上展开这篇内容。博客参考的 B 站视频资料和第一篇的链接如下:
【Note】:如果你已经完成安装等操作,可以只执行第一篇博客中 2. 新建一个空白游戏项目 章节操作,重…
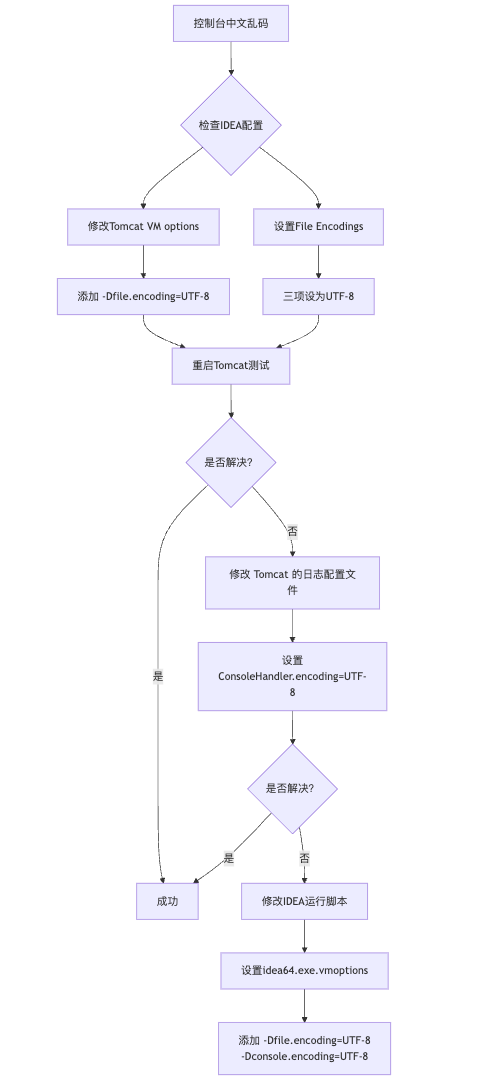
IDEA运行Tomcat出现乱码问题解决汇总
最近正值期末周,有很多同学在写期末Java web作业时,运行tomcat出现乱码问题,经过多次解决与研究,我做了如下整理:
原因:
IDEA本身编码与tomcat的编码与Windows编码不同导致,Windows 系统控制台…
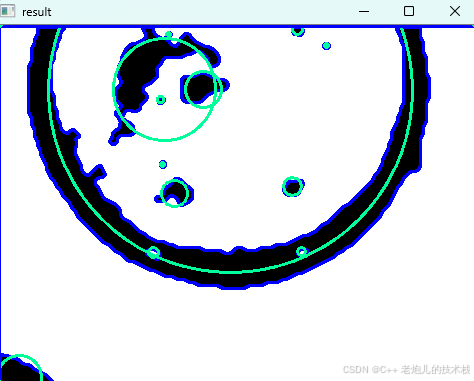
利用最小二乘法找圆心和半径
#include <iostream>
#include <vector>
#include <cmath>
#include <Eigen/Dense> // 需安装Eigen库用于矩阵运算 // 定义点结构
struct Point { double x, y; Point(double x_, double y_) : x(x_), y(y_) {}
}; // 最小二乘法求圆心和半径 …

使用docker在3台服务器上搭建基于redis 6.x的一主两从三台均是哨兵模式
一、环境及版本说明
如果服务器已经安装了docker,则忽略此步骤,如果没有安装,则可以按照一下方式安装: 1. 在线安装(有互联网环境): 请看我这篇文章 传送阵>> 点我查看 2. 离线安装(内网环境):请看我这篇文章 传送阵>> 点我查看
说明:假设每台服务器已…
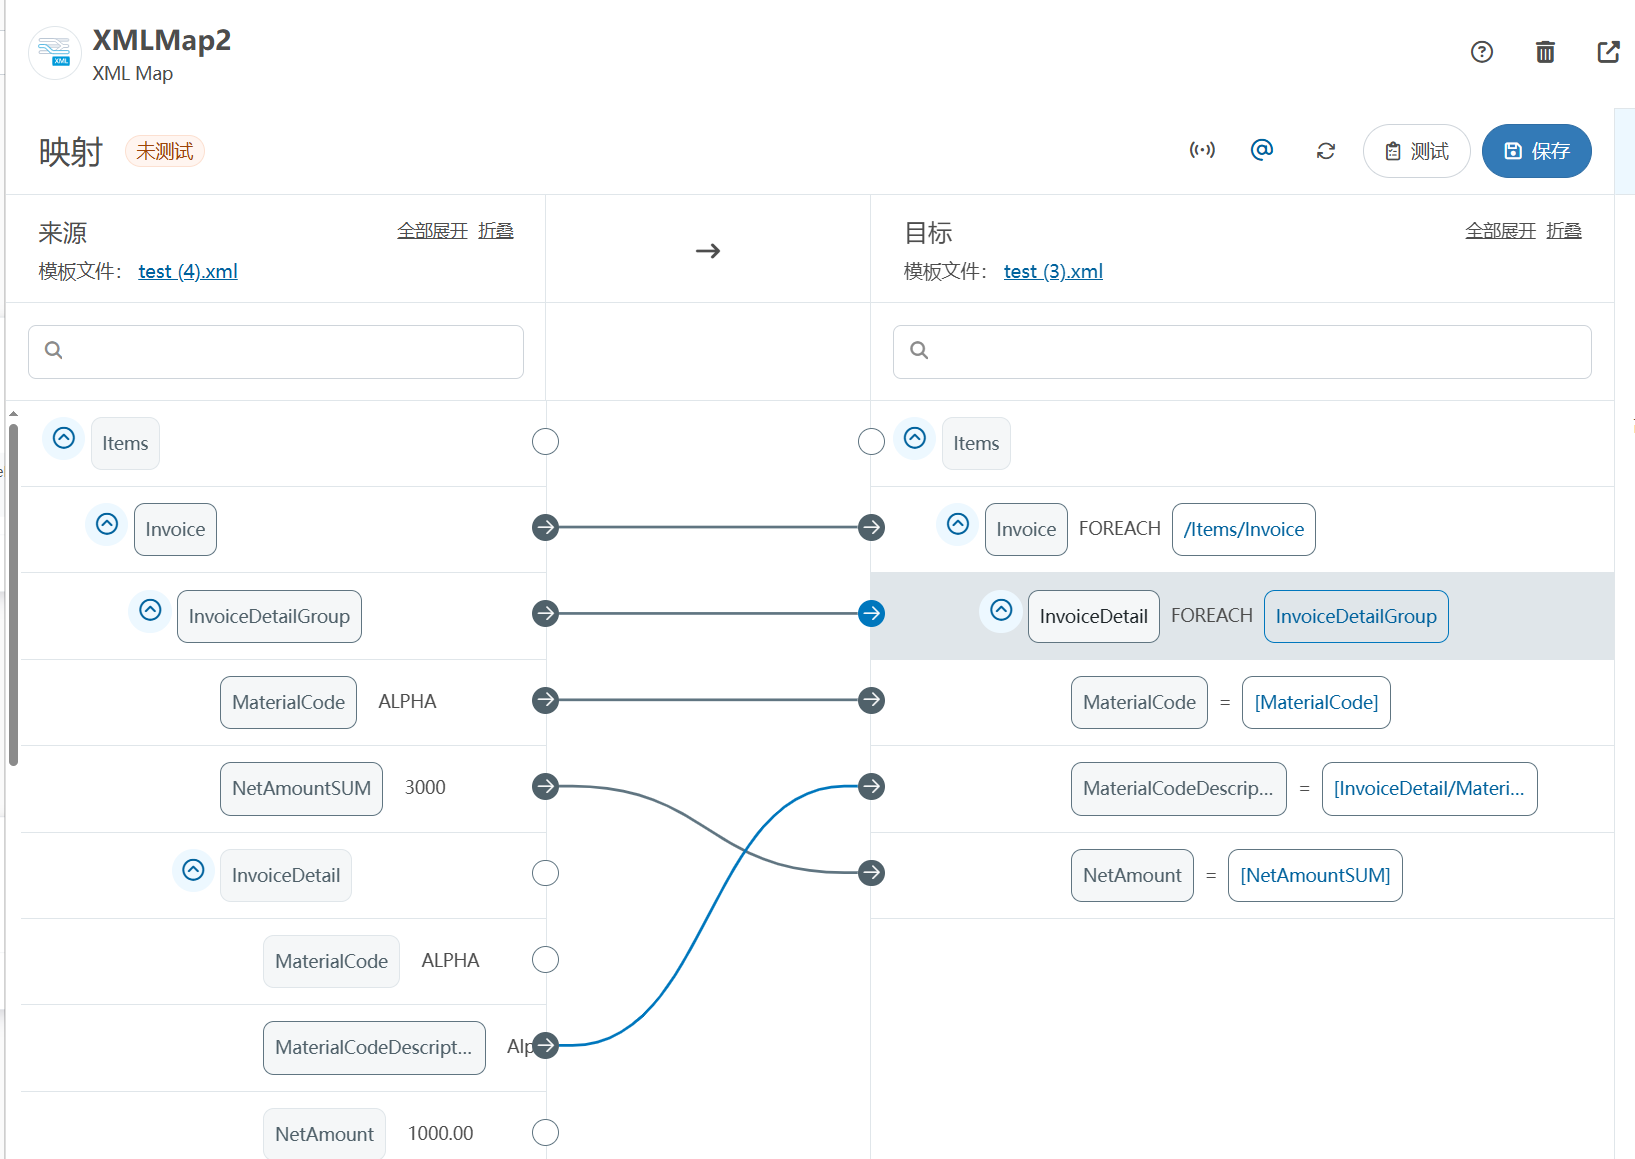
XML Group端口详解
在XML数据映射过程中,经常需要对数据进行分组聚合操作。例如,当处理包含多个物料明细的XML文件时,可能需要将相同物料号的明细归为一组,或对相同物料号的数量进行求和计算。传统实现方式通常需要编写脚本代码,增加了开…
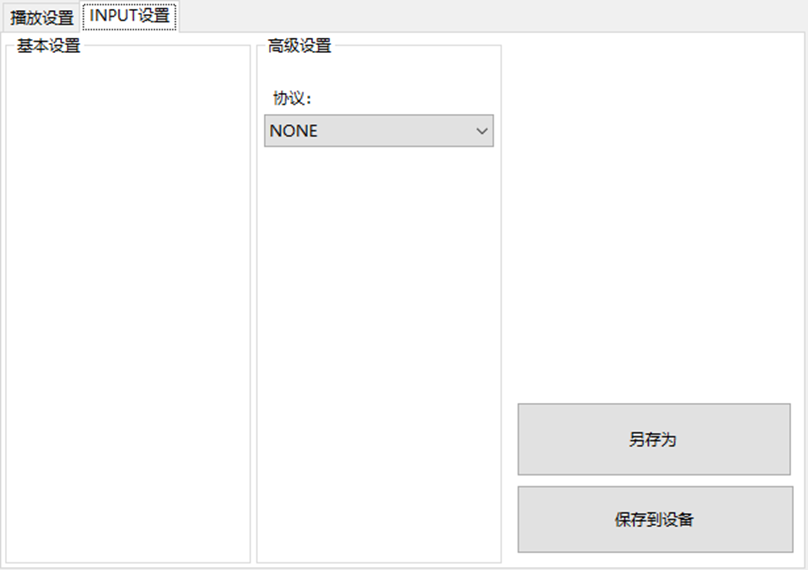
LBE-LEX系列工业语音播放器|预警播报器|喇叭蜂鸣器的上位机配置操作说明
LBE-LEX系列工业语音播放器|预警播报器|喇叭蜂鸣器专为工业环境精心打造,完美适配AGV和无人叉车。同时,集成以太网与语音合成技术,为各类高级系统(如MES、调度系统、库位管理、立库等)提供高效便捷的语音交互体验。
L…
(LeetCode 每日一题) 3442. 奇偶频次间的最大差值 I (哈希、字符串)
题目:3442. 奇偶频次间的最大差值 I 思路 :哈希,时间复杂度0(n)。 用哈希表来记录每个字符串中字符的分布情况,哈希表这里用数组即可实现。
C版本:
class Solution {
public:int maxDifference(string s) {int a[26]…
【大模型RAG】拍照搜题技术架构速览:三层管道、两级检索、兜底大模型
摘要
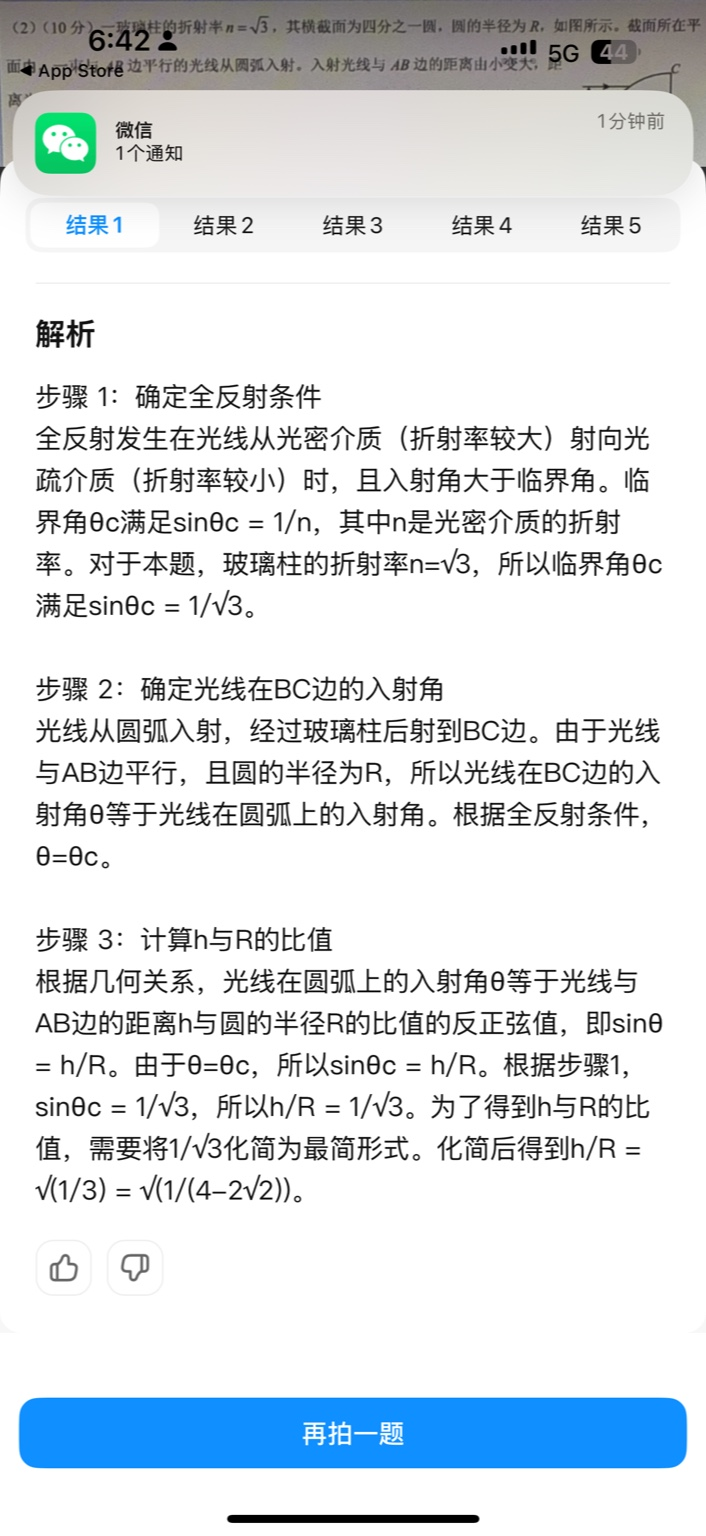
拍照搜题系统采用“三层管道(多模态 OCR → 语义检索 → 答案渲染)、两级检索(倒排 BM25 向量 HNSW)并以大语言模型兜底”的整体框架: 多模态 OCR 层 将题目图片经过超分、去噪、倾斜校正后,分别用…
【Axure高保真原型】引导弹窗
今天和大家中分享引导弹窗的原型模板,载入页面后,会显示引导弹窗,适用于引导用户使用页面,点击完成后,会显示下一个引导弹窗,直至最后一个引导弹窗完成后进入首页。具体效果可以点击下方视频观看或打开下方…
接口测试中缓存处理策略
在接口测试中,缓存处理策略是一个关键环节,直接影响测试结果的准确性和可靠性。合理的缓存处理策略能够确保测试环境的一致性,避免因缓存数据导致的测试偏差。以下是接口测试中常见的缓存处理策略及其详细说明:
一、缓存处理的核…

龙虎榜——20250610
上证指数放量收阴线,个股多数下跌,盘中受消息影响大幅波动。 深证指数放量收阴线形成顶分型,指数短线有调整的需求,大概需要一两天。 2025年6月10日龙虎榜行业方向分析 1. 金融科技
代表标的:御银股份、雄帝科技
驱动…
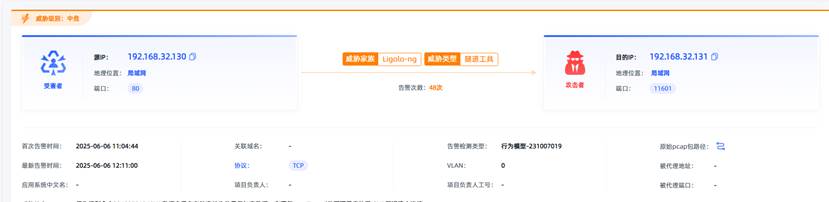
观成科技:隐蔽隧道工具Ligolo-ng加密流量分析
1.工具介绍
Ligolo-ng是一款由go编写的高效隧道工具,该工具基于TUN接口实现其功能,利用反向TCP/TLS连接建立一条隐蔽的通信信道,支持使用Let’s Encrypt自动生成证书。Ligolo-ng的通信隐蔽性体现在其支持多种连接方式,适应复杂网…
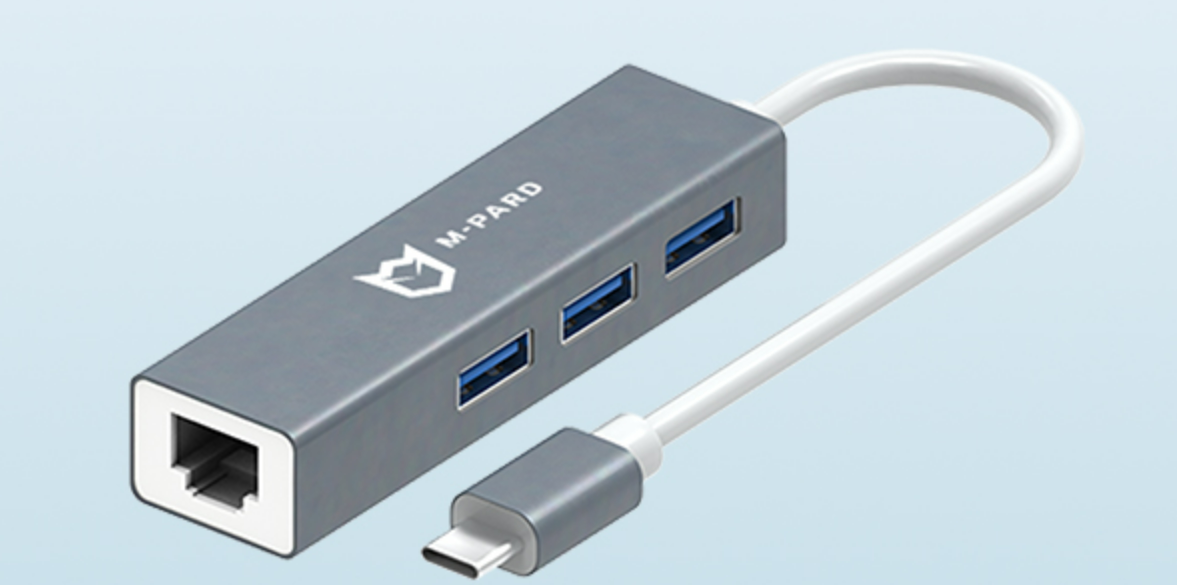
铭豹扩展坞 USB转网口 突然无法识别解决方法
当 USB 转网口扩展坞在一台笔记本上无法识别,但在其他电脑上正常工作时,问题通常出在笔记本自身或其与扩展坞的兼容性上。以下是系统化的定位思路和排查步骤,帮助你快速找到故障原因:
背景:
一个M-pard(铭豹)扩展坞的网卡突然无法识别了,扩展出来的三个USB接口正常。…
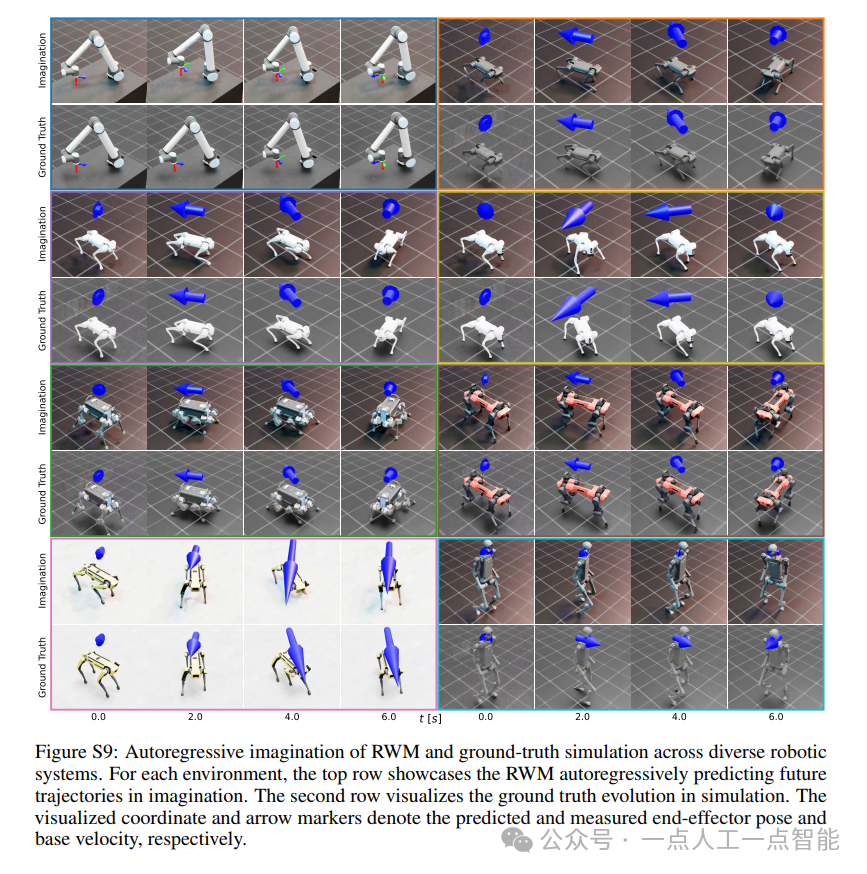
未来机器人的大脑:如何用神经网络模拟器实现更智能的决策?
编辑:陈萍萍的公主一点人工一点智能 未来机器人的大脑:如何用神经网络模拟器实现更智能的决策?RWM通过双自回归机制有效解决了复合误差、部分可观测性和随机动力学等关键挑战,在不依赖领域特定归纳偏见的条件下实现了卓越的预测准…

Linux应用开发之网络套接字编程(实例篇)
服务端与客户端单连接
服务端代码
#include <sys/socket.h>
#include <sys/types.h>
#include <netinet/in.h>
#include <stdio.h>
#include <stdlib.h>
#include <string.h>
#include <arpa/inet.h>
#include <pthread.h>
…

华为云AI开发平台ModelArts
华为云ModelArts:重塑AI开发流程的“智能引擎”与“创新加速器”!
在人工智能浪潮席卷全球的2025年,企业拥抱AI的意愿空前高涨,但技术门槛高、流程复杂、资源投入巨大的现实,却让许多创新构想止步于实验室。数据科学家…
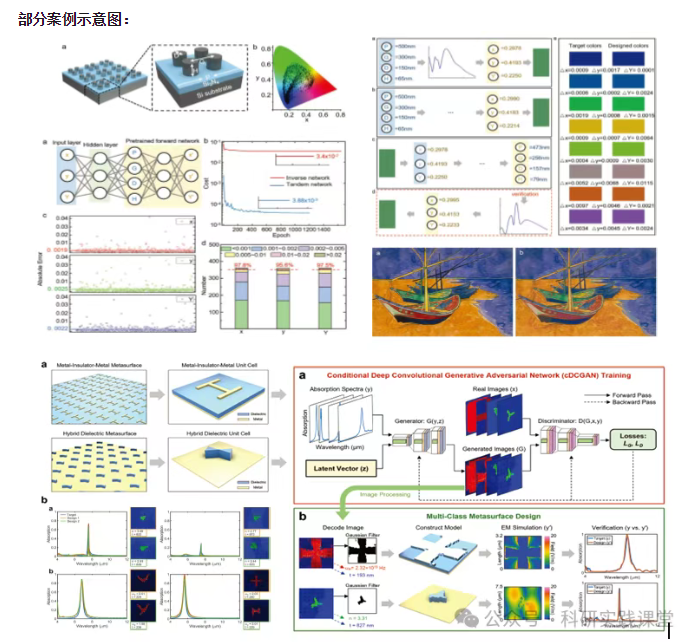
深度学习在微纳光子学中的应用
深度学习在微纳光子学中的主要应用方向
深度学习与微纳光子学的结合主要集中在以下几个方向:
逆向设计 通过神经网络快速预测微纳结构的光学响应,替代传统耗时的数值模拟方法。例如设计超表面、光子晶体等结构。
特征提取与优化 从复杂的光学数据中自…