文章目录
- 前言
- 一、SignalR
- 是什么?
- 在 ASP.NET Core 中的关键特性:
- SignalR 工作原理简图:
- 二、使用步骤
- 1.创建ASP.NET Core web Api 项目
- 2.添加 SignalR 包
- 3.创建 SignalR Hub
- 4.配置服务与中间件
- 5.创建控制器(模拟服务器向客户端发送消息)
- 6.创建Vue前端项目(模拟客户端发送消息)
- 7.运行使用
- 三、关键配置说明
- 四、故障排查
- 总结
前言
在 ASP.NET Core 中, SignalR 是用于实现实时、双向通信的技术。
一、SignalR
是什么?
一个由微软开发的高级库,构建在 ASP.NET Core 之上,用于简化向应用添加实时 Web 功能。
-
核心目标: 让开发者能够轻松实现服务器到客户端的实时推送(例如:聊天、通知、仪表盘更新、协作编辑)。
-
抽象层: 它在底层自动选择并使用最佳的传输协议来建立实时连接。首选是 WebSocket,但如果 WebSocket 不可用(例如旧浏览器、某些网络限制),它会自动优雅降级到其他技术,如 Server-Sent Events (SSE) 或 Long Polling。开发者无需关心底层使用的是哪种传输方式。
-
基于 Hub 的模型: SignalR 的核心抽象是 Hub。Hub 是一个高级管道,允许客户端和服务器直接相互调用方法(RPC 风格)。
在 ASP.NET Core 中的关键特性:
- 自动传输协商与回退: 无缝处理连接建立和传输选择。
- 连接管理: 内置管理连接的生命周期、连接组(Groups)和用户(Users),方便实现广播(所有客户端)、组播(特定组)、单播(特定客户端或用户)。
- 自动重新连接: 提供客户端 API 在连接意外断开时尝试自动重新连接。
- 简单的编程模型 (RPC):
- 服务器端: 定义继承自 Hub 的类,并在其中声明客户端可以调用的 public 方法。
- 客户端: 提供多种语言的客户端库(JavaScript, .NET, Java 等),调用服务器 Hub 上的方法,并注册处理程序来响应服务器调用的方法。
- 可扩展性: 支持通过 SignalR Backplane(如 Azure SignalR Service, Redis)将消息分发到多个服务器实例,实现横向扩展。
- 与 ASP.NET Core 集成: 深度集成身份认证(如 [Authorize] 特性)、依赖注入等。
SignalR 工作原理简图:
```csharp
[Client]  <---(首选 WebSocket, 次选 SSE/Long Polling)--->  [ASP.NET Core Server]
    |                                                         |
    |----(调用) ServerMethod(args) ------------------->| (Hub 方法)
    |<---(调用) ClientMethod(args) --------------------| (Clients.Caller, Clients.All, etc.)
```
二、使用步骤
1.创建ASP.NET Core web Api 项目
2.添加 SignalR 包
- 执行安装命令
install-package Microsoft.AspNetCore.SignalR
3.创建 SignalR Hub
-
MyHubService.cs
using Microsoft.AspNetCore.SignalR;

namespace SignalRDemo.HubService
{
    public class MyHubService:Hub
    {
        public Task SendMessageAsync(string user,string content)
        {
            var connectionId=this.Context.ConnectionId;
            string msg = $"{connectionId},{DateTime.Now.ToString()}:{user}";
            return Clients.All.SendAsync("ReceivePubMsg", msg, content);
        }
    }
}
4.配置服务与中间件
- Program.cs
using SignalRDemo.HubService;

var builder = WebApplication.CreateBuilder(args);

// Add services to the container.

builder.Services.AddControllers();
// Learn more about configuring Swagger/OpenAPI at https://aka.ms/aspnetcore/swashbuckle
builder.Services.AddEndpointsApiExplorer();
builder.Services.AddSwaggerGen();
// 添加 SignalR 服务
builder.Services.AddSignalR();
//跨域
string[] urls = new[] { "http://localhost:5173" };
builder.Services.AddCors(opt =>
        opt.AddDefaultPolicy(builder => builder.WithOrigins(urls)
        .AllowAnyMethod().AllowAnyHeader().AllowCredentials())
        );

var app = builder.Build();

// Configure the HTTP request pipeline.
if (app.Environment.IsDevelopment())
{
    app.UseSwagger();
    app.UseSwaggerUI();
}
app.UseCors();
app.UseHttpsRedirection();

app.UseAuthorization();
// 配置路由
app.MapHub<MyHubService>("/Hubs/MyHubService");// SignalR 终结点
app.MapControllers();

app.Run();
5.创建控制器(模拟服务器向客户端发送消息)
- TestController.cs
using Microsoft.AspNetCore.Http;
using Microsoft.AspNetCore.Mvc;
using Microsoft.AspNetCore.SignalR;
using SignalRDemo.Entity;
using SignalRDemo.HubService;

namespace SignalRDemo.Controllers
{
    [Route("api/[controller]/[action]")]
    [ApiController]
    public class TestController : ControllerBase
    {
        private readonly IHubContext<MyHubService> _hubContext;

        public TestController(IHubContext<MyHubService> hubContext)
        {
            _hubContext = hubContext;
        }

        [HttpPost("broadcast")]
        public async Task<IActionResult> BroadcastMessage([FromBody] MessageModel msg)
        {
            // 从服务端主动推送消息
            await _hubContext.Clients.All.SendAsync("ReceivePubMsg", msg.User, msg.Content);
            return Ok();
        }
    }
}
6.创建Vue前端项目(模拟客户端发送消息)
- 打开文件夹(D:\Project\MyProject\SignalRProject\SignalRDemo)
- 创建文件夹:Front
- 当前文件夹下运行cmd
- 执行命令
- npm create vite@latest SignalRClient1
- 输入y,回车
- 选择JavaScript
- 等待项目创建完成
- npm
- npm run dev
- 进入前端项目文件夹D:\Project\MyProject\SignalRProject\SignalRDemo\Front\SignalClient1\src\components,编辑HelloWorld.vue文件。
- HelloWorld.vue
<template>
    <div style="padding: 20px; max-width: 800px; margin: 0 auto;">
      <h2 style="color: #2c3e50;">SignalR 聊天室</h2>

      <div style="margin-bottom: 20px; display: flex; align-items: center;">
        <label style="margin-right: 10px; font-weight: bold; min-width: 80px;">用户:</label>
        <input
          type="text"
          v-model="state.userMsg"
          @keydown.enter="sendMessage"
          placeholder="输入消息后按回车发送"
          :disabled="!state.isConnected || state.isConnecting"
          style="padding: 10px; border: 1px solid #ddd; border-radius: 4px; flex: 1;"
        />
 	<label style="margin-right: 10px; font-weight: bold; min-width: 80px;">消息内容:</label>
        <input
          type="text"
          v-model="state.contentMsg"
          @keydown.enter="sendMessage"
          placeholder="输入消息后按回车发送"
          :disabled="!state.isConnected || state.isConnecting"
          style="padding: 10px; border: 1px solid #ddd; border-radius: 4px; flex: 1;"
        />
      </div>

      <div style="margin-bottom: 20px; background: #f8f9fa; padding: 15px; border-radius: 4px;">
        <div style="display: flex; margin-bottom: 10px;">
          <label style="margin-right: 10px; font-weight: bold; min-width: 80px;">服务器:</label>
          <input
            type="text"
            v-model="state.serverUrl"
            placeholder="输入 SignalR Hub URL"
            style="padding: 8px; border: 1px solid #ddd; border-radius: 4px; flex: 1;"
          />
        </div>
        <button
          @click="reconnect"
          style="padding: 8px 15px; background: #3498db; color: white; border: none; border-radius: 4px; cursor: pointer;"
        >
          {{ state.isConnected ? '重新连接' : '连接' }}
        </button>
      </div>

      <div style="border: 1px solid #e0e0e0; border-radius: 4px; overflow: hidden; margin-bottom: 20px;">
        <div style="background: #f0f0f0; padding: 10px; font-weight: bold;">消息记录</div>
        <div style="max-height: 300px; overflow-y: auto; padding: 10px; background: white;">
          <div v-for="(msg, index) in state.messages" :key="index" style="padding: 8px 0; border-bottom: 1px solid #f5f5f5;">
           	  {{ msg }}
          </div>
           <div v-if="state.messages.length === 0" style="text-align: center; color: #999; padding: 20px;">
            暂无消息
          </div>
        </div>
      </div>

      <div :style="{
        padding: '12px',
        borderRadius: '4px',
        marginBottom: '15px',
        backgroundColor: state.connectionStatus.includes('失败') ? '#ffebee' :
                        state.connectionStatus.includes('连接') ? '#e8f5e9' : '#e3f2fd',
        color: state.connectionStatus.includes('失败') ? '#b71c1c' :
               state.connectionStatus.includes('连接') ? '#1b5e20' : '#0d47a1',
        border: state.connectionStatus.includes('失败') ? '1px solid #ffcdd2' : 'none'
      }">
        <div style="font-weight: bold; margin-bottom: 5px;">连接状态:</div>
        <div>{{ state.connectionStatus }}</div>
        <div v-if="state.errorDetails" style="margin-top: 10px; font-size: 0.9em; color: #b71c1c;">
          <div style="font-weight: bold;">错误详情:</div>
          <div style="word-break: break-all;">{{ state.errorDetails }}</div>
        </div>
      </div>
    </div>
  </template>

  <script>
  import { reactive, onMounted, onUnmounted } from 'vue';
  import * as signalR from '@microsoft/signalr';

  export default {
    setup() {
      const state = reactive({
        userMsg: "",
        contentMsg:"",
        messages: [],
        connectionStatus: "正在初始化...",
        isConnected: false,
        isConnecting: false,
        serverUrl: "https://localhost:7183/Hubs/MyHubService",
        errorDetails: "",
        connection: null,
        retryCount: 0
      });

      const sendMessage = async () => {
        if (!state.userMsg.trim()) return;

        if (!state.isConnected || !state.connection) {
          state.connectionStatus = "连接尚未建立,无法发送消息";
          return;
        }

        try {
        // 尝试多种可能的服务端方法名
        const possibleMethods = [
          "SendMessage",          // 标准命名
          "SendMessageAsync",     // Async后缀命名
          "BroadcastMessage",     // 其他可能命名
          "SendToAll",            // 另一种常见命名
          "PublishMessage"        // 备用命名
        ];

        let lastError = null;

        // 依次尝试所有可能的方法名
        for (const method of possibleMethods) {
          try {
            await state.connection.invoke(method, state.userMsg,state.contentMsg);
            state.userMsg = "";
            state.contentMsg="";
            return; // 成功发送则退出
          } catch (error) {
            lastError = error;
            console.log(`尝试调用 ${method} 失败:`, error.message);
          }
        }

        // 所有方法都失败
        state.connectionStatus = `发送失败: 未找到服务端方法`;
        state.errorDetails = `尝试的方法: ${possibleMethods.join(", ")}\n错误: ${lastError.message}`;

        } catch (error) {
            state.connectionStatus = `发送失败: ${error.message}`;
            state.errorDetails = error.toString();
        }
      };

      const initSignalRConnection = async () => {
        state.isConnecting = true;
        state.connectionStatus = "正在连接...";
        state.errorDetails = "";

        try {
          // 清理现有连接
          if (state.connection) {
            await state.connection.stop();
            state.connection = null;
          }

          // 创建新连接
          state.connection = new signalR.HubConnectionBuilder()
            .withUrl(state.serverUrl, {
              skipNegotiation: true, // 尝试跳过协商步骤
              transport: signalR.HttpTransportType.WebSockets // 强制使用 WebSockets
            })
            .withAutomaticReconnect({
              nextRetryDelayInMilliseconds: retryContext => {
                state.retryCount = retryContext.previousRetryCount + 1;
                return Math.min(1000 * Math.pow(2, state.retryCount), 30000);
              }
            })
            .configureLogging(signalR.LogLevel.Debug) // 启用详细调试日志
            .build();

          // 消息接收处理
          state.connection.on('ReceiveMessage', rcvMsg => {
            state.messages.push(rcvMsg);
          });

          state.connection.on('ReceivePubMsg', (rcvMsg,rcvContent) => {
            state.messages.push(rcvMsg,rcvContent);
          });

          // 连接状态变化
          state.connection.onreconnecting(() => {
            state.isConnected = false;
            state.isConnecting = true;
            state.connectionStatus = "连接丢失,正在重连...";
          });

          state.connection.onreconnected(connectionId => {
            state.isConnected = true;
            state.isConnecting = false;
            state.retryCount = 0;
            state.connectionStatus = `已重新连接 (ID: ${connectionId})`;
          });

          state.connection.onclose(error => {
            state.isConnected = false;
            state.isConnecting = false;
            state.connectionStatus = error
              ? `连接关闭: ${error.message}`
              : "连接已关闭";
          });

          // 启动连接
          await state.connection.start();
          state.isConnected = true;
          state.isConnecting = false;
          state.retryCount = 0;
          state.connectionStatus = `已连接 (ID: ${state.connection.connectionId})`;

          console.log("SignalR 连接详情:", state.connection);
        } catch (error) {
          console.error("SignalR 连接失败:", error);
          state.isConnected = false;
          state.isConnecting = false;
          state.connectionStatus = `连接失败: ${error.message}`;
          state.errorDetails = error.toString();

          // 提供详细的错误诊断
          if (error.message.includes("Failed to fetch")) {
            state.errorDetails += "\n\n可能的原因:\n" +
              "1. CORS 问题 - 确保服务器已启用 CORS\n" +
              "2. URL 错误 - 检查服务器地址是否正确\n" +
              "3. 证书问题 - 尝试访问服务器URL查看证书是否有效\n" +
              "4. 服务器未运行 - 确保后端服务正在运行";
          }
        }
      };

      const reconnect = async () => {
        await initSignalRConnection();
      };

      onMounted(() => {
        initSignalRConnection();
      });

      onUnmounted(() => {
        if (state.connection) {
          state.connection.stop();
        }
      });

      return { state, sendMessage, reconnect };
    }
  }
  </script>

  <style>
  body {
    font-family: 'Segoe UI', Tahoma, Geneva, Verdana, sans-serif;
    background-color: #f5f7fa;
    margin: 0;
    padding: 20px;
    color: #333;
  }

  input {
    font-size: 1rem;
    transition: border-color 0.3s;
  }

  input:focus {
    outline: none;
    border-color: #3498db;
    box-shadow: 0 0 0 2px rgba(52, 152, 219, 0.2);
  }

  button {
    font-weight: 500;
    transition: background-color 0.3s;
  }

  button:hover {
    background-color: #2980b9 !important;
  }

  button:disabled {
    background-color: #bdc3c7 !important;
    cursor: not-allowed;
  }
  </style>
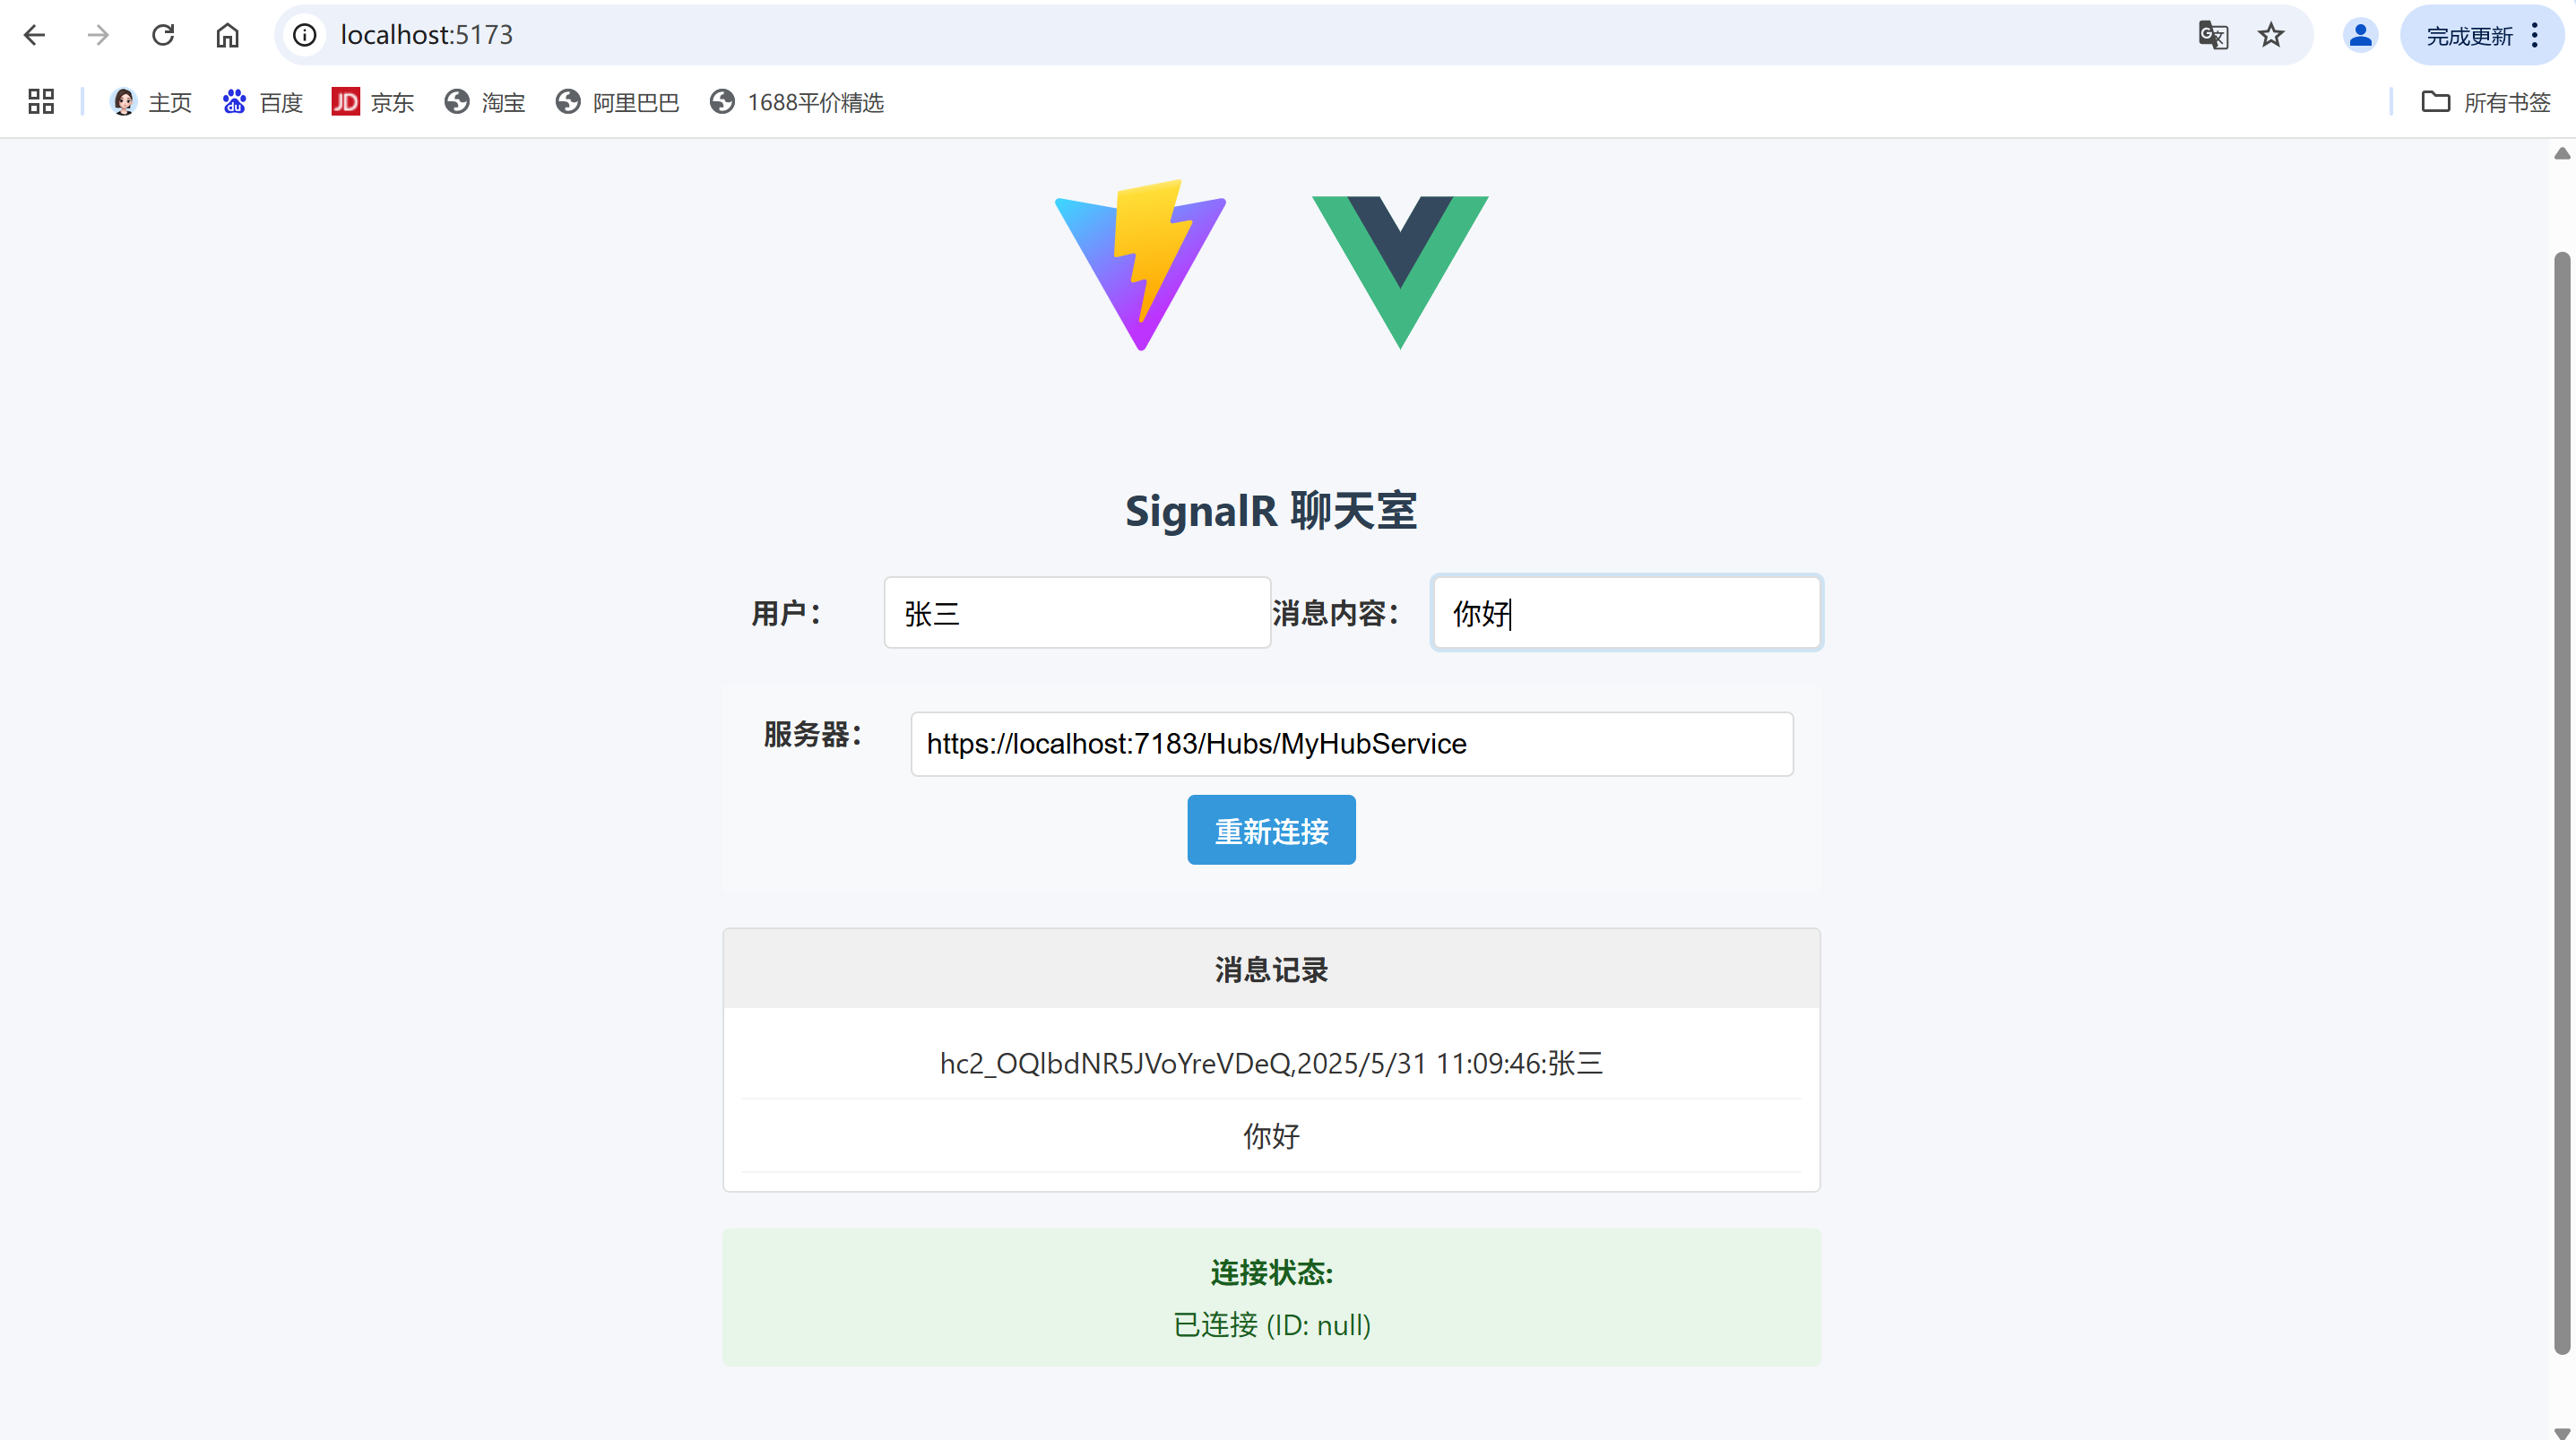
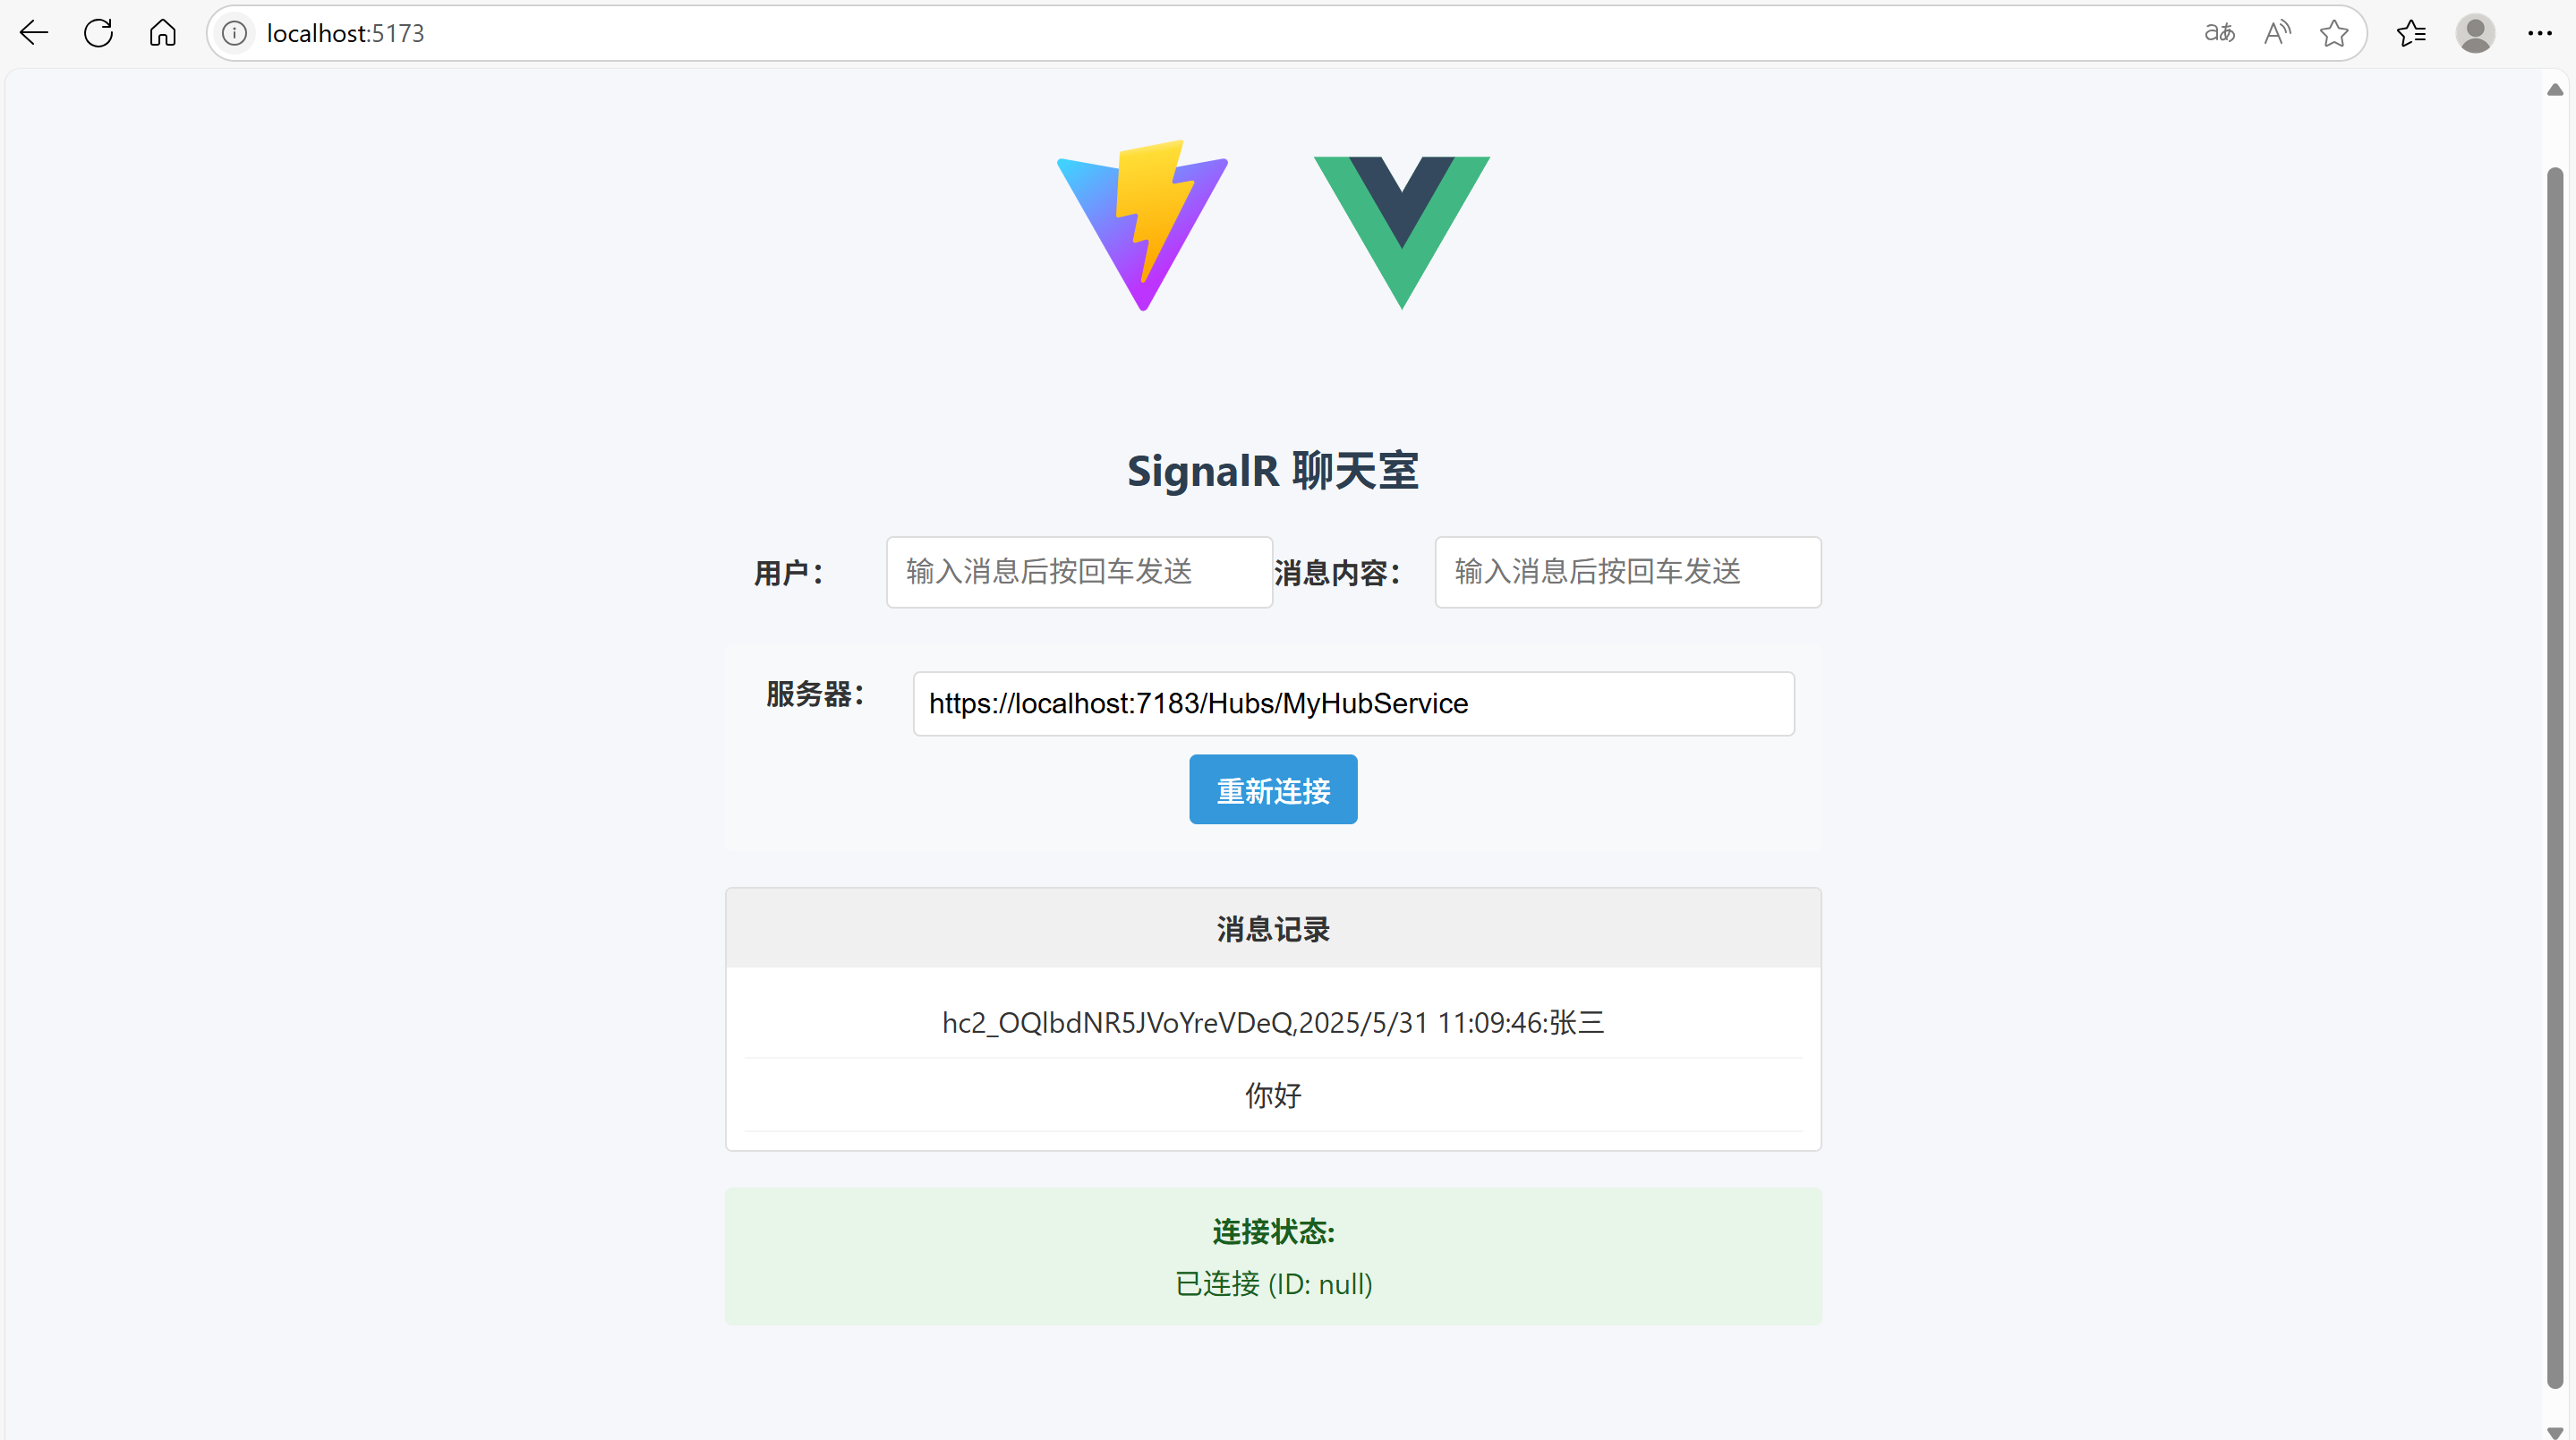
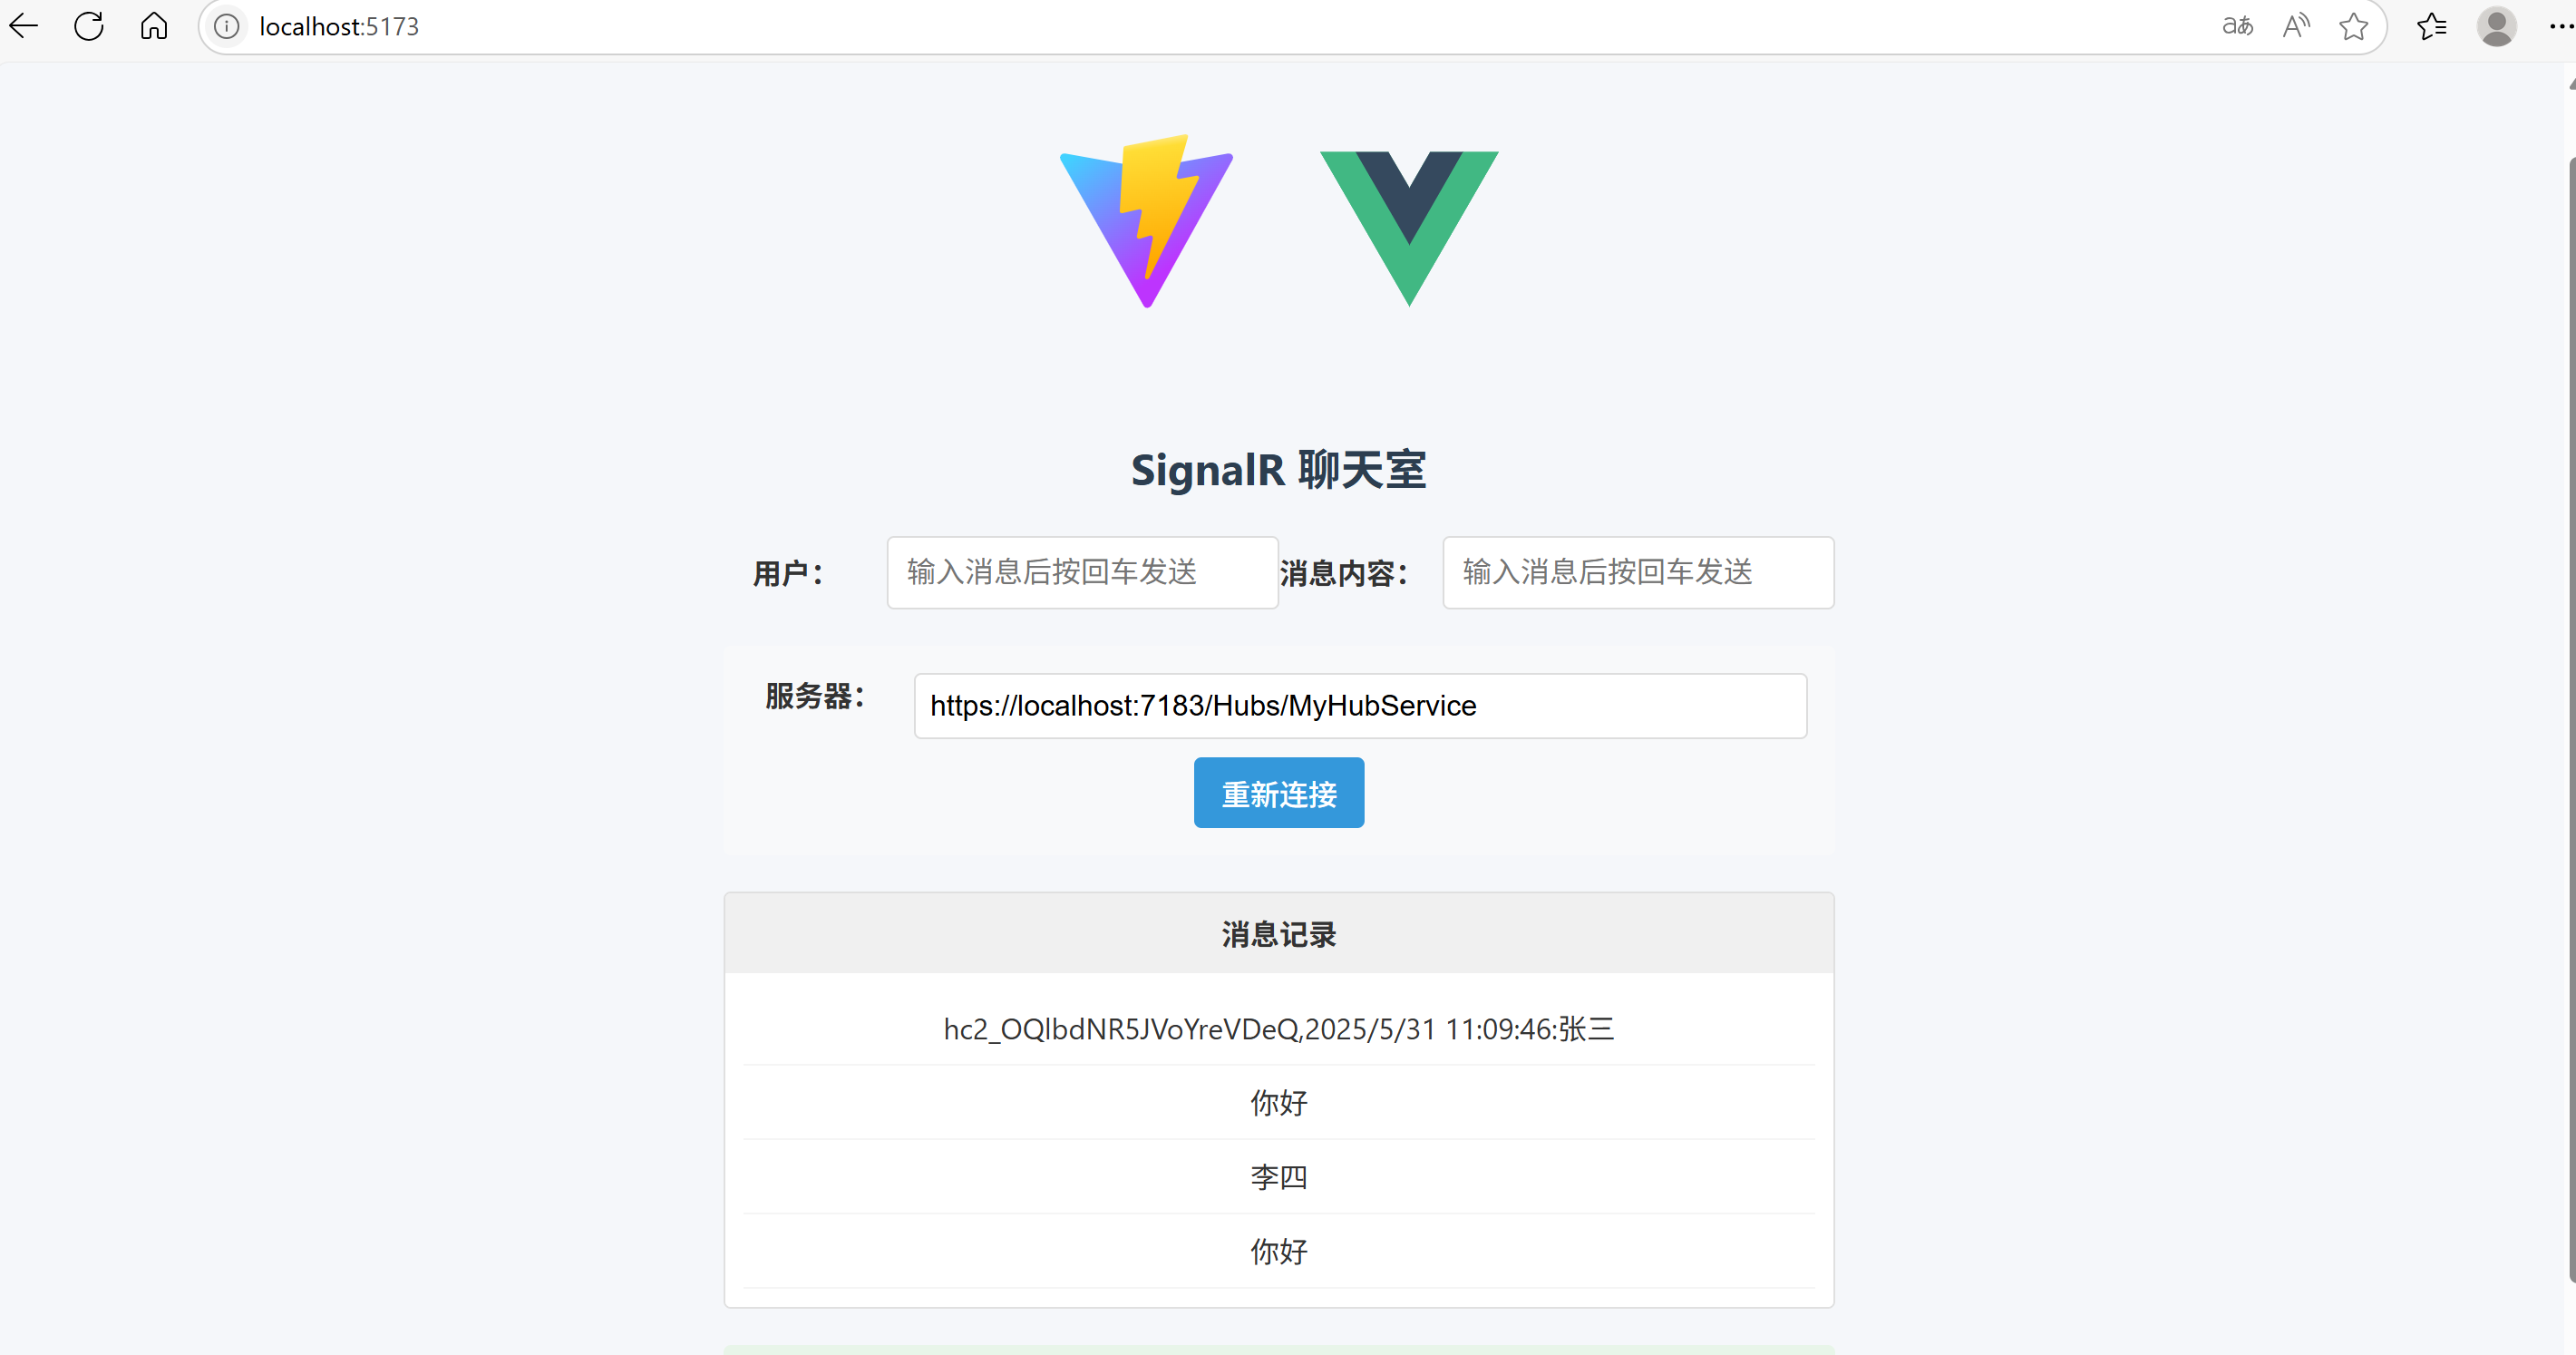
7.运行使用
- 客户端推送消息
- 访问前端地址: http://localhost:5173/ (打开多个浏览器窗口测试消息广播)
- 输入消息,回车
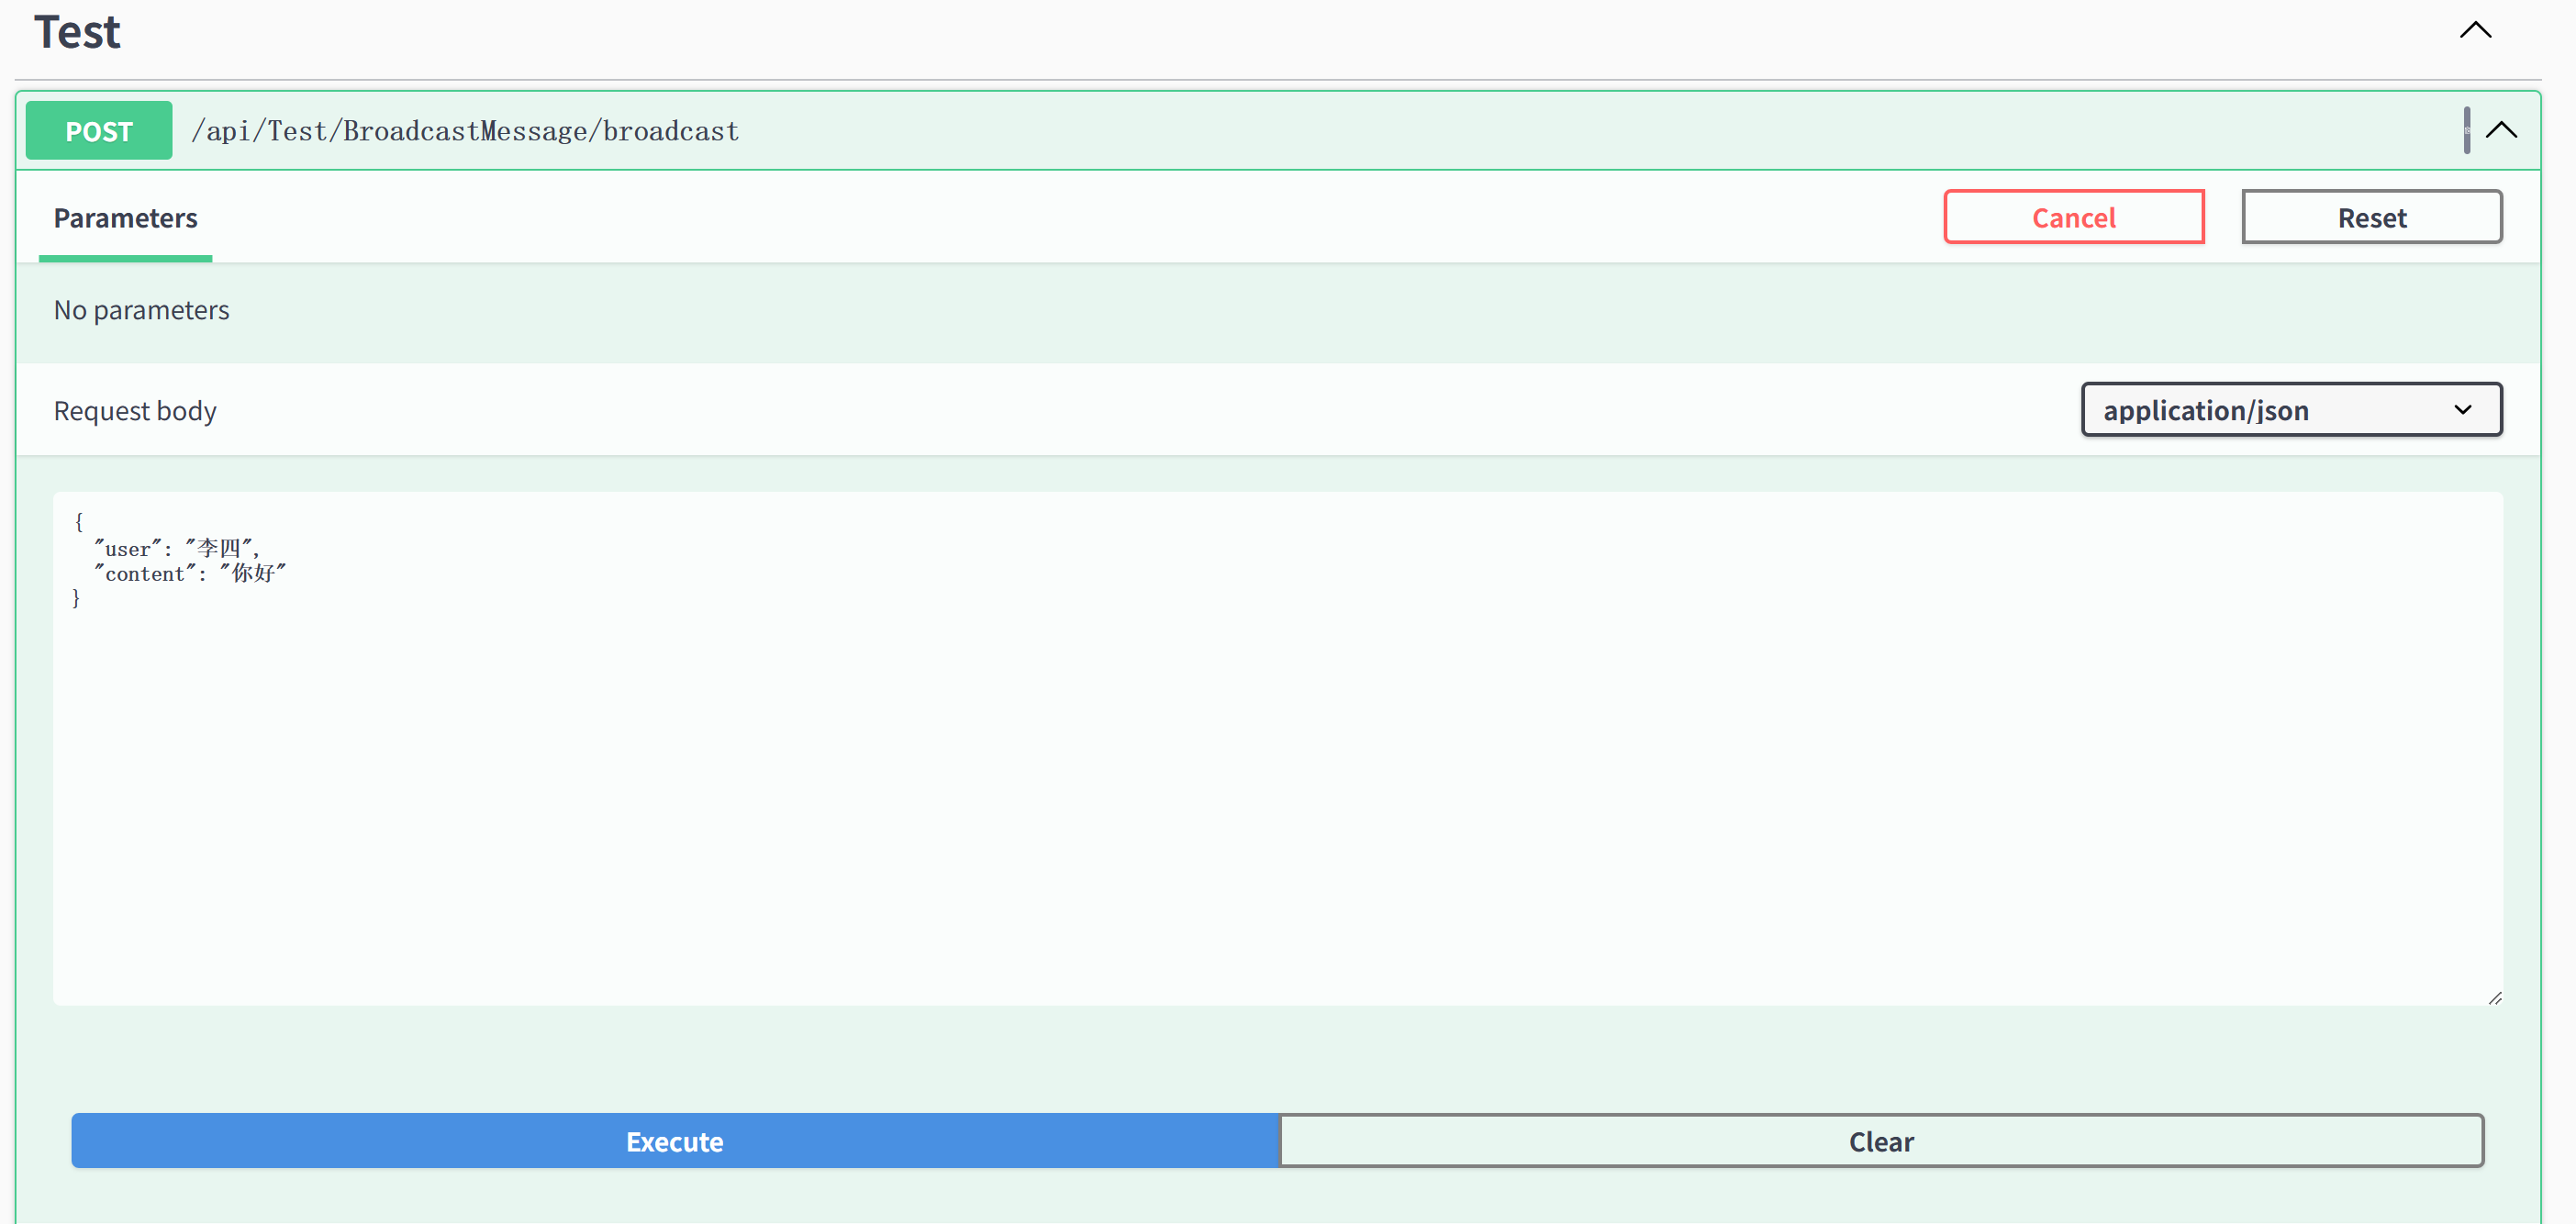
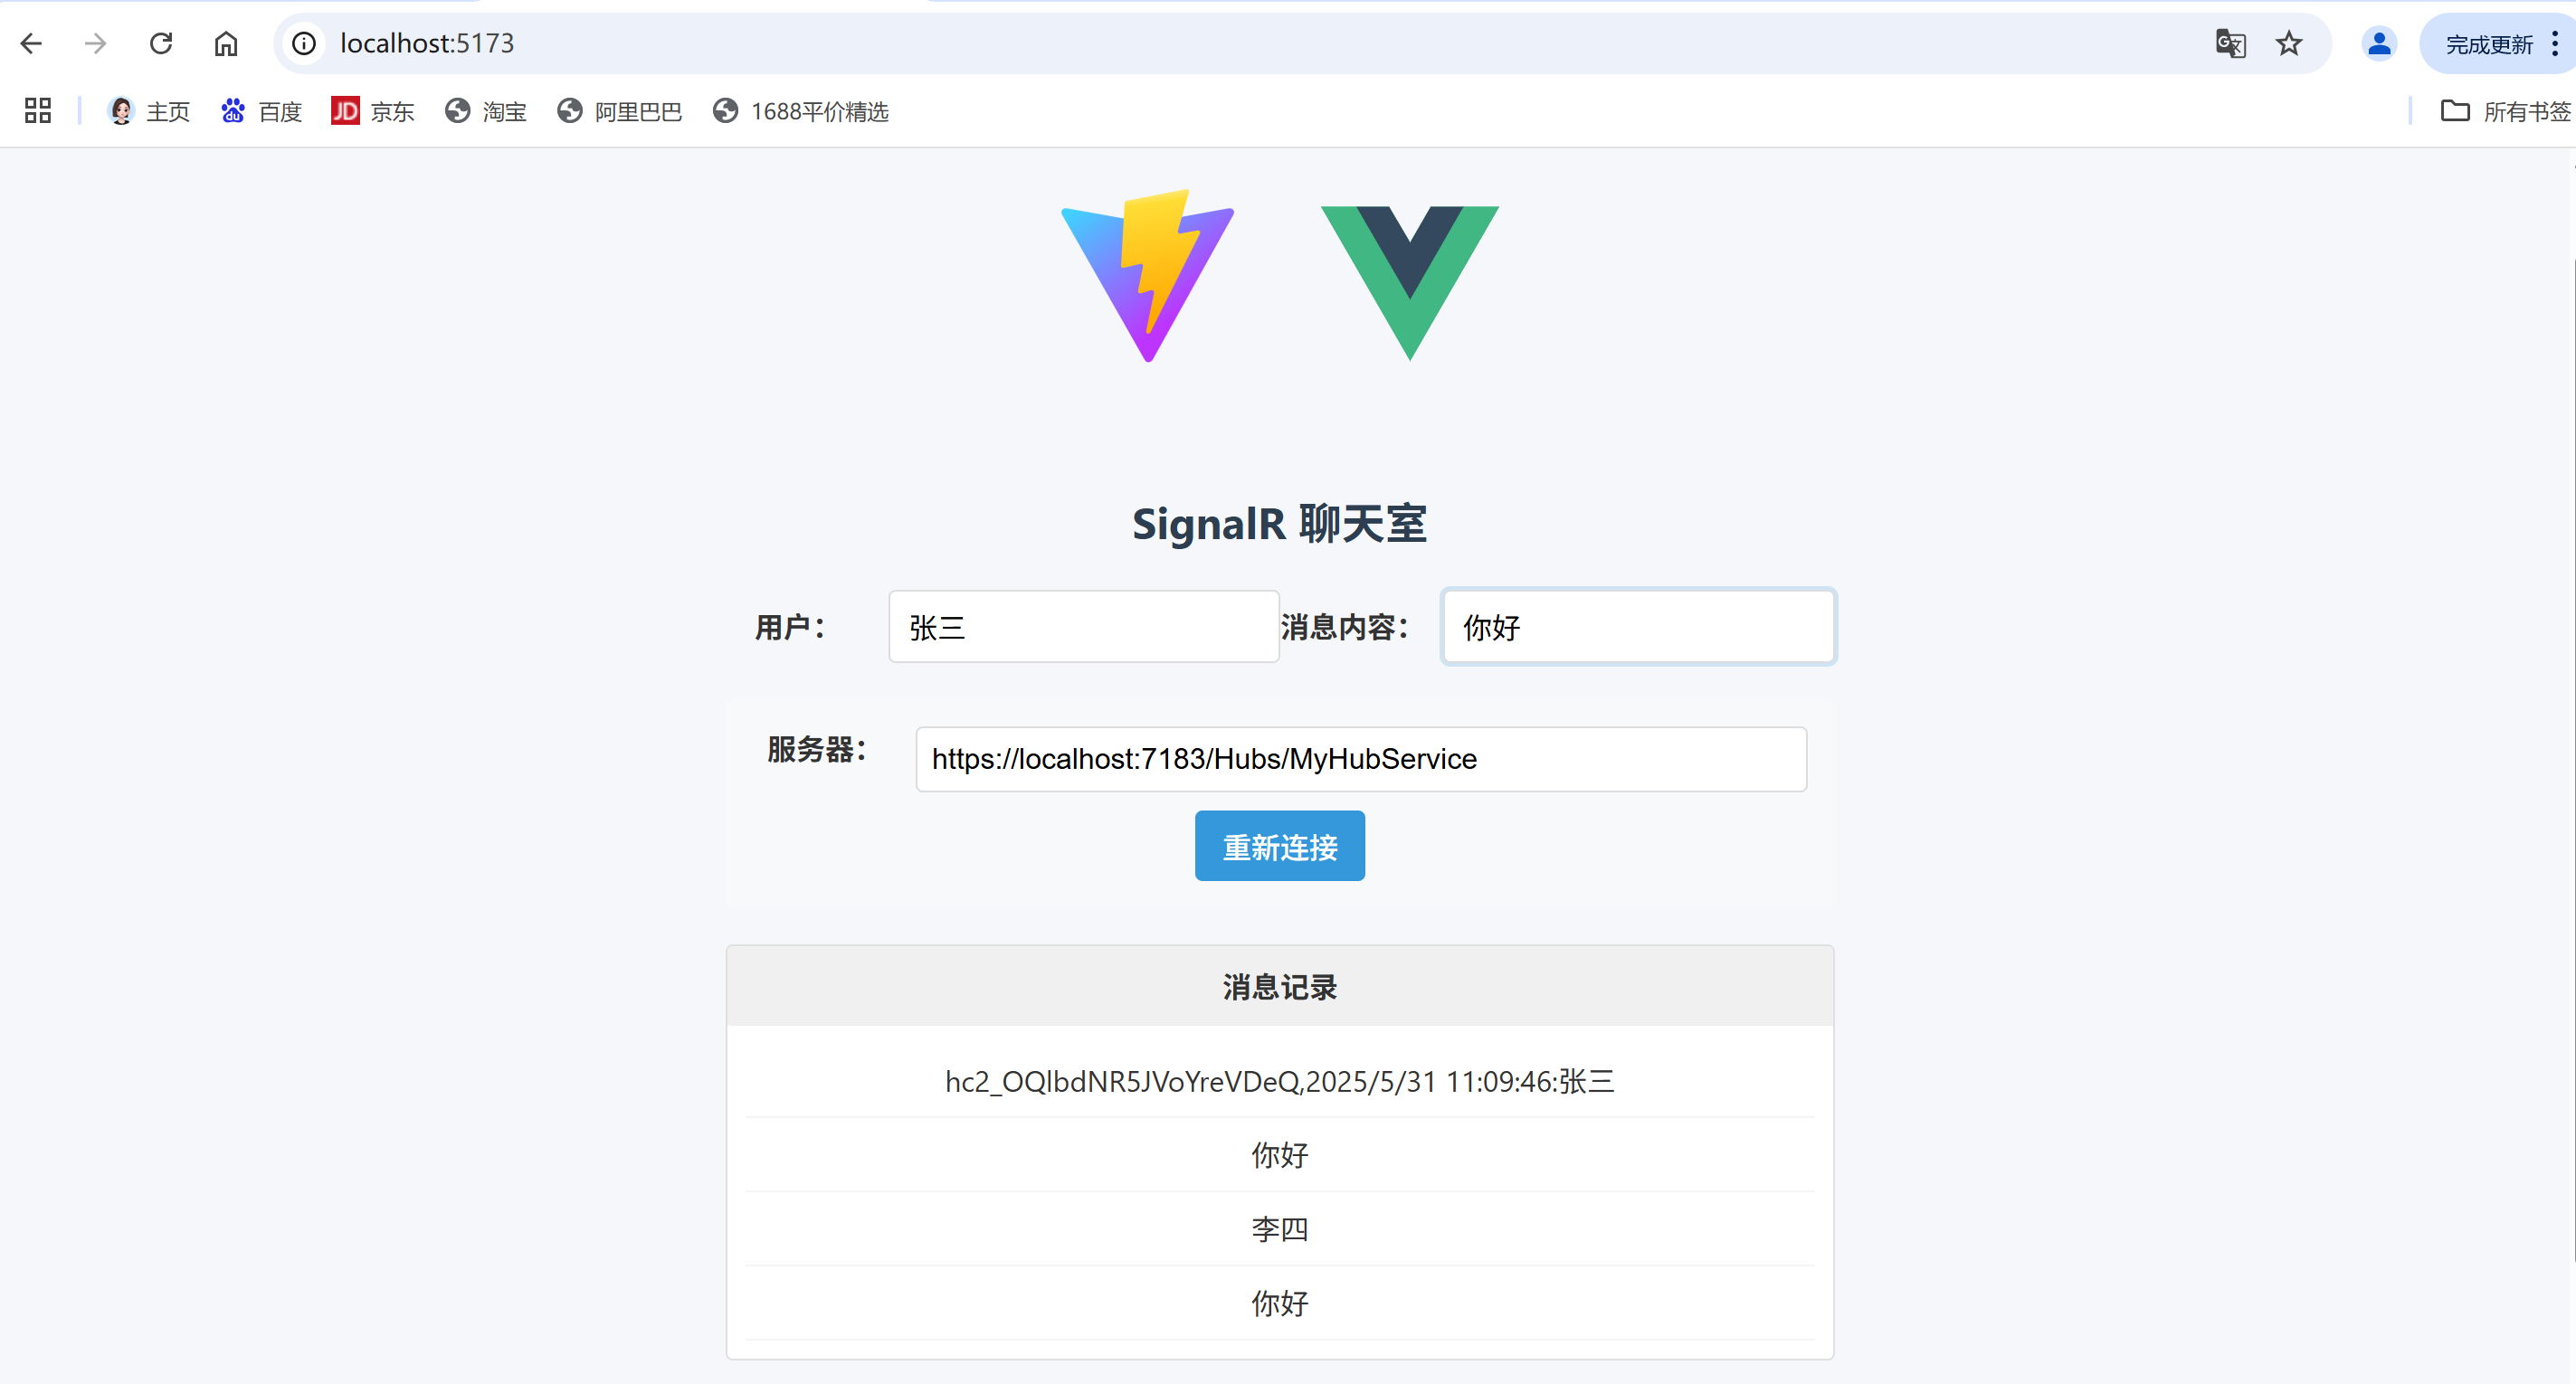
- 服务端推送(多个客户端都可接收到服务端推送的消息)
三、关键配置说明
- 跨域支持 (CORS)
若客户端在不同域,在 Program.cs 添加:..... //跨域 string[] urls = new[] { "http://localhost:5173" }; builder.Services.AddCors(opt => opt.AddDefaultPolicy(builder => builder.WithOrigins(urls) .AllowAnyMethod().AllowAnyHeader().AllowCredentials()) ); .... app.UseCors(); app.UseHttpsRedirection(); ...... - 配置路由
在 Program.cs 添加:app.MapHub<MyHubService>("/Hubs/MyHubService");// SignalR 终结点 app.MapControllers();
四、故障排查
-
连接失败 404
检查终结点路由是否匹配 app.MapHub(“/chatHub”) -
跨域问题
确保启用 CORS 并正确配置 -
HTTPS 证书
开发环境下信任本地证书或改用 HTTP
总结
SignalR: 是构建在 WebSocket (和其他传输) 之上的高级框架。它抽象了底层复杂性,提供了极其便利的编程模型(Hub)、内置的连接管理、自动传输回退和重连机制,极大地简化了在 ASP.NET Core 中开发各种实时功能的过程。它是大多数需要服务器主动推送消息的 ASP.NET Core 实时应用的首选。