Python |GIF 解析与构建(3):简单哈希压缩256色算法
目录
Python |GIF 解析与构建(3):简单哈希压缩256色算法
一、算法性能表现
二、算法核心原理与实现
(一)简单哈希算法逻辑
1. 颜色分量压缩
2. 加权灰度值计算
3. 旋转哈希生成
(二)图像压缩流程
三、图像质量评估实现
(一)PSNR 计算
(二)SSIM 计算
四、算法优缺点与应用场景
(一)优势
(二)局限性
(三)适用场景
五、总结与改进方向
在图像处理领域,压缩算法的效率与效果始终是研究的核心方向之一。本文将聚焦于一种适用于 256 色 GIF 的简单哈希压缩算法,通过实际案例分析其压缩性能、技术实现及应用场景。
一、算法性能表现
该算法在不同尺寸、类型的图像上在同类的算法之中展现出了中游水平的压缩能力和处理图像质量能力,在GIF256色压缩可以很容易的构建出来,以下是具体测试数据:
| 图像类型 | 原始尺寸 | 原始大小 | 压缩后大小 | 压缩率 | PSNR(dB) | SSIM |
|---|---|---|---|---|---|---|
| 900P 全屏截图 | 1600×900 | 740KB | 224KB | 69.73% | 24.48 | 0.8358 |
| 900P 全屏截图 | 1600×900 | 477KB | 238KB | 50.1% | 24.83 | 0.8997 |
| 小型图片 | 300×160 | 39KB | 7KB | 82.05% | 27.98 | 0.8877 |
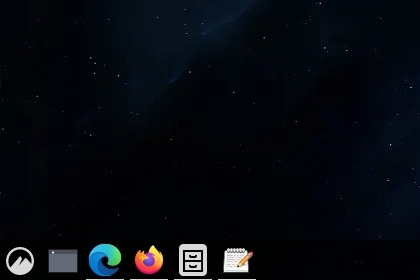
| 任务栏截图 | 1260×40 | 27KB | 13KB | 51.8% | 25.10 | 0.9448 |
关键指标说明:
- 压缩率:文件体积缩减比例,数值越高表示压缩效果越显著(如小型图片压缩率达 82.05%)。
- PSNR(峰值信噪比):衡量图像失真程度,数值越高表示画质保留越好(任务栏截图 PSNR 为 25.10dB,接近人眼可接受范围)。
- SSIM(结构相似性):评估图像结构相似度,取值越接近 1 表示画质越接近原图(任务栏截图 SSIM 达 0.9448,视觉效果接近无损)。
二、算法核心原理与实现
(一)简单哈希算法逻辑
1. 颜色分量压缩
通过右移操作降低颜色精度:
def shift_bytes_data(data):
    return bytes(c >> 5 for c in data)  # 将RGB各分量从8位压缩为3位(0-7)
原理:利用人眼对颜色细节敏感度较低的特性,通过舍弃低位数据减少颜色数量。
2. 加权灰度值计算
结合人眼对 RGB 三通道的敏感度差异(绿光 > 红光 > 蓝光):
r, g, b = data[0], data[1], data[2]
weighted_sum = (r * 299 + g * 587 + b * 114) // 1000  # 近似计算亮度值
作用:将彩色信息转化为亮度特征,为哈希值提供感知层面的鲁棒性。
3. 旋转哈希生成
通过位移与异或运算增强哈希值的扩散性:
rotated_hash = ((r << 5) ^ g ^ (b >> 3)) & 0xFF  # 混合RGB分量并限制值域
hash_value = (weighted_sum + rotated_hash) & 0xFF  # 合并亮度与色彩特征
优势:减少哈希冲突概率,确保相似颜色生成不同哈希值。
(二)图像压缩流程
-
像素数据处理:
将图像转换为 RGB 模式,提取像素列表:with Image.open("1.png").convert('RGB') as img: pixels = list(img.getdata()) # 获取所有像素的(R, G, B)元组 -
哈希映射构建:
对每个像素生成哈希值,统计唯一哈希数量(即压缩后颜色数):image_set = set([simple_hash_unrolled(bytes(i)) for i in pixels]) print("压缩数量:", len(image_set)) # 输出唯一哈希值总数 -
颜色映射与重建:
创建哈希值到原始颜色的映射表,用映射颜色重建图像:hash_map = {key: pixels[image_hash.index(s)] for key in image_set} # 记录每个哈希对应的原始颜色 new_image = [hash_map.get(x, x) for x in image_hash] # 用映射颜色替换像素值
三、图像质量评估实现
(一)PSNR 计算
基于均方误差(MSE)评估像素级差异:
def calculate_psnr(original_img, compressed_img):
    original = np.array(original_img).astype(np.float64)
    compressed = np.array(compressed_img).astype(np.float64)
    mse = np.mean((original - compressed) ** 2)
    return 20 * np.log10(255.0 / np.sqrt(mse))  # 假设像素值范围0-255
(二)SSIM 计算
从亮度、对比度、结构三方面评估图像相似性:
def calculate_ssim(original_img, compressed_img):
    original = np.array(original_img)
    compressed = np.array(compressed_img)
    if len(original.shape) == 3:  # 彩色图像分通道计算
        return np.mean([ssim(original[:, :, i], compressed[:, :, i], data_range=255) for i in range(3)])
    else:  # 灰度图像直接计算
        return ssim(original, compressed, data_range=255)
四、算法优缺点与应用场景
(一)优势
- 速度快:压缩耗时约 5 秒(针对 1600×900 图像),适合实时或批量处理。
- 实现简单:无需复杂数学变换,仅通过位运算和哈希映射完成压缩。
- 适应性强:在文字图标(如任务栏)、大面积单色区域图像中表现优异(SSIM>0.9)。
(二)局限性
- 颜色损失明显:在高色彩丰富度图像中(如自然风景),压缩后可能出现色块化。
- 压缩率波动大:依赖图像内容,复杂图像压缩率较低(约 50%)。
(三)适用场景
- UI 界面截图:任务栏、菜单等含大量纯色或重复图案的场景。
- 简单图标 / 图形:LOGO、线条图等对色彩精度要求不高的图像。
- 低带宽传输:需要快速压缩传输的简单图像场景(如嵌入式设备)。
五、总结与改进方向
该简单哈希算法为 256 色 GIF 压缩提供了一种轻量级解决方案,平衡了压缩效率与实现复杂度。未来可通过以下方式优化:
- 动态颜色量化:结合 K-means 等聚类算法,自适应选择最优颜色子集。
- 哈希函数优化:引入更复杂的哈希算法(如感知哈希),提升相似颜色区分度。
- 分块处理:对图像分区域应用不同压缩策略,保留高细节区域的色彩精度。
代码如下:
import os
from PIL import Image

"""
此算法压缩256色在gif使用的算法中属于中游
尺寸: 1600x900
PSNR: 24.45 dB
SSIM: 0.8676
原始: 666.91KB | 压缩后: 284.01KB | 压缩率: 57.41%

尺寸: 1600x900
PSNR: 26.44 dB
SSIM: 0.9225
原始: 434.13KB | 压缩后: 219.29KB | 压缩率: 49.49%

尺寸: 300x160
PSNR: 34.48 dB
SSIM: 0.8587
原始: 32.36KB | 压缩后: 9.47KB | 压缩率: 70.75%

尺寸: 690x300
PSNR: 23.46 dB
SSIM: 0.9106
原始: 106.14KB | 压缩后: 71.28KB | 压缩率: 32.84%

尺寸: 480x480
PSNR: 29.43 dB
SSIM: 0.6616
原始: 107.20KB | 压缩后: 17.50KB | 压缩率: 83.67%
"""


# 简单哈希
def simple_hash_unrolled(data):
    # 通过右移来实现对细节的颜色进行进一步压缩
    def shift_bytes_data(data):
        return bytes(c >> 5 for c in data)

    data = shift_bytes_data(data)
    # 提取RGB分量
    r, g, b = data[0], data[1], data[2]
    # 人眼敏感度计算
    weighted_sum = (r * 299 + g * 587 + b * 114) // 1000
    # 旋转哈希:结合位移和异或运算,扩散哈希值分布
    rotated_hash = ((r << 5) ^ g ^ (b >> 3)) & 0xFF
    # 亮度
    brightness_component = max(r, g, b) & 0xFF
    # 计算哈希
    hash_value = (weighted_sum + rotated_hash + brightness_component) & 0xFF
    return hash_value


# 简单压缩
def rgb332_hash(data):
    r = data[0] >> 5  # 3 bits (0-7)
    g = data[1] >> 5  # 3 bits (0-7)
    b = data[2] >> 6  # 2 bits (0-3)
    return (r << 5) | (g << 2) | b


#  亮度
def perceptual_hash(data):
    # 转换到YUV空间,提取亮度(更符合人眼敏感度)
    y = (data[0] * 299 + data[1] * 587 + data[2] * 114) // 1000
    # 结合色度简化
    u = data[1] >> 5  # 3-bit
    v = data[2] >> 5  # 3-bit
    return (y & 0xF8) | (u >> 2) | (v << 3)


# 换位
def enhanced_rotated_hash(data):
    r, g, b = data[0] >> 4, data[1] >> 4, data[2] >> 4  # 4-bit压缩
    # 多重异或+位移扩散
    hash_r = (r << 4) ^ (g << 2) ^ b
    hash_g = (g << 4) ^ (b << 2) ^ r
    hash_b = (b << 4) ^ (r << 2) ^ g
    return (hash_r + hash_g * 3 + hash_b * 5) & 0xFF


# 简单哈希法
with Image.open("1.png").convert('RGB') as img:
    width, height = img.size
    pixels = list(img.getdata())
    print(f"尺寸: {width}x{height}")
    print(f"像素数据: {pixels[:10]} ...")

image_set = set([simple_hash_unrolled(bytes(i)) for i in pixels])
print("压缩数量:", len(image_set))
print("压缩哈希:", image_set)
image_hash = [simple_hash_unrolled(bytes(i)) for i in pixels]

hash_map = {key: (0, 0, 0) for key in image_set}
# 全部哈希遍历映射字典
for s in image_set:
    hash_map[s] = pixels[image_hash.index(s)]  # 字典赋值

new_image = [hash_map.get(x, x) for x in image_hash]
# RGB模式
new_img = Image.new('RGB', (width, height))
# 按行填充
new_img.putdata(new_image)
# 保存为PNG文件
new_img.save('2.png', 'PNG')

import numpy as np
from skimage.metrics import structural_similarity as ssim


def calculate_psnr(original_img: Image.Image, compressed_img: Image.Image) -> float:
    """计算两张图像之间的PSNR值"""
    # 将图像转换为NumPy数组
    original = np.array(original_img).astype(np.float64)
    compressed = np.array(compressed_img).astype(np.float64)

    # 确保图像尺寸相同
    if original.shape != compressed.shape:
        raise ValueError("两张图像的尺寸必须相同")

    # 计算MSE(均方误差)
    mse = np.mean((original - compressed) ** 2)

    # 避免除零错误
    if mse == 0:
        return float('inf')

    # 计算PSNR(假设像素值范围为0-255)
    max_pixel = 255.0
    psnr = 20 * np.log10(max_pixel / np.sqrt(mse))

    return psnr


def calculate_ssim(original_img: Image.Image, compressed_img: Image.Image) -> float:
    """计算两张图像之间的SSIM值"""
    # 将图像转换为NumPy数组
    original = np.array(original_img).astype(np.float64)
    compressed = np.array(compressed_img).astype(np.float64)

    # 确保图像尺寸相同
    if original.shape != compressed.shape:
        raise ValueError("两张图像的尺寸必须相同")

    # 如果是彩色图像,分别计算每个通道的SSIM并取平均
    if len(original.shape) == 3 and original.shape[2] == 3:  # RGB图像
        ssim_values = []
        for i in range(3):  # 分别计算R、G、B通道
            ssim_val = ssim(original[:, :, i], compressed[:, :, i],
                            data_range=compressed[:, :, i].max() - compressed[:, :, i].min())
            ssim_values.append(ssim_val)
        return np.mean(ssim_values)
    else:  # 灰度图像
        return ssim(original, compressed,
                    data_range=compressed.max() - compressed.min())


# 加载图像
original = Image.open("1.png").convert("RGB")
compressed = Image.open("2.png").convert("RGB")

# 计算PSNR和SSIM
psnr_value = calculate_psnr(original, compressed)
ssim_value = calculate_ssim(original, compressed)

print(f"PSNR: {psnr_value:.2f} dB")
print(f"SSIM: {ssim_value:.4f}")

# 替换为你的图片路径
original = "1.png"
compressed = "2.png"
# 获取文件大小(KB)
o_size = os.path.getsize(original) / 1024
c_size = os.path.getsize(compressed) / 1024
# 计算并打印压缩率
ratio = (1 - c_size / o_size) * 100
print(f"原始: {o_size:.2f}KB | 压缩后: {c_size:.2f}KB | 压缩率: {ratio:.2f}%")
![[9-1] USART串口协议 江协科技学习笔记(13个知识点)](https://i-blog.csdnimg.cn/direct/d5563cc08c4440868136791644edf7e0.png)