SpringAI实战链接
1.SpringAl实现AI应用-快速搭建-CSDN博客
2.SpringAI实现AI应用-搭建知识库-CSDN博客
3.SpringAI实现AI应用-内置顾问-CSDN博客
4.SpringAI实现AI应用-使用redis持久化聊天记忆-CSDN博客
5.SpringAI实现AI应用-自定义顾问(Advisor)-CSDN博客
概述
针对SpringAI的内置顾问,上篇帖子已经进行了说明,这里就不再赘述,之前使用SpringAI的内置的聊天记忆顾问时,都是使用内存的方式进行存储,当项目重启的时候,聊天记录就没有了。此篇就使用redis将聊天记录进行持久化
项目修改
通过前面几篇帖子,已经有了一个项目框架,这里不再说项目搭建所需的环境,只在原来的项目上进行修改
安装并启动redis
redis的安装,网上有很多方法,在此不再说明,安装完成之后,启动redis就可以了
pom文件
<?xml version="1.0" encoding="UTF-8"?>
<project xmlns="http://maven.apache.org/POM/4.0.0"
xmlns:xsi="http://www.w3.org/2001/XMLSchema-instance"
xsi:schemaLocation="http://maven.apache.org/POM/4.0.0 http://maven.apache.org/xsd/maven-4.0.0.xsd">
<modelVersion>4.0.0</modelVersion>
<groupId>org.example</groupId>
<artifactId>SpringAI_Demo</artifactId>
<version>1.0-SNAPSHOT</version>
<parent>
<groupId>org.springframework.boot</groupId>
<artifactId>spring-boot-starter-parent</artifactId>
<version>3.2.5</version>
<relativePath/> <!-- lookup parent from repository -->
</parent>
<properties>
<java.version>17</java.version>
<spring-ai.version>1.0.0-M6</spring-ai.version>
<maven.compiler.source>17</maven.compiler.source>
<maven.compiler.target>17</maven.compiler.target>
<project.build.sourceEncoding>UTF-8</project.build.sourceEncoding>
</properties>
<dependencyManagement>
<dependencies>
<dependency>
<groupId>org.springframework.ai</groupId>
<artifactId>spring-ai-bom</artifactId>
<version>${spring-ai.version}</version>
<type>pom</type>
<scope>import</scope>
</dependency>
</dependencies>
</dependencyManagement>
<dependencies>
<!-- 常规jar-->
<dependency>
<groupId>org.springframework.boot</groupId>
<artifactId>spring-boot-starter-web</artifactId>
</dependency>
<dependency>
<groupId>org.springframework.boot</groupId>
<artifactId>spring-boot-starter-test</artifactId>
<scope>test</scope>
</dependency>
<dependency>
<groupId>org.springframework.boot</groupId>
<artifactId>spring-boot-starter-actuator</artifactId>
</dependency>
<!-- springAI-->
<dependency>
<groupId>org.springframework.ai</groupId>
<artifactId>spring-ai-openai-spring-boot-starter</artifactId>
</dependency>
<!-- 向量存储引擎-->
<dependency>
<groupId>org.springframework.ai</groupId>
<artifactId>spring-ai-pgvector-store-spring-boot-starter</artifactId>
</dependency>
<dependency>
<groupId>org.springframework.ai</groupId>
<artifactId>spring-ai-transformers-spring-boot-starter</artifactId>
</dependency>
<!-- 向量库-->
<dependency>
<groupId>org.postgresql</groupId>
<artifactId>postgresql</artifactId>
</dependency>
<!-- 文档解析器-->
<dependency>
<groupId>org.springframework.ai</groupId>
<artifactId>spring-ai-tika-document-reader</artifactId>
</dependency>
<!-- lombok-->
<dependency>
<groupId>org.projectlombok</groupId>
<artifactId>lombok</artifactId>
<optional>true</optional>
</dependency>
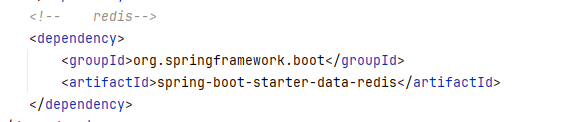
<!-- redis-->
<dependency>
<groupId>org.springframework.boot</groupId>
<artifactId>spring-boot-starter-data-redis</artifactId>
</dependency>
</dependencies>
<build>
<resources>
<resource>
<directory>src/main/java</directory>
<!--所在的目录-->
<includes>
<!--包括目录下的.properties,.xml 文件都会被扫描到-->
<include>**/*.properties</include>
<include>**/*.xml</include>
</includes>
<filtering>false</filtering>
</resource>
<resource>
<directory>src/main/resources</directory>
<includes>
<include>**/*.*</include>
</includes>
</resource>
</resources>
<plugins>
<plugin>
<groupId>org.springframework.boot</groupId>
<artifactId>spring-boot-maven-plugin</artifactId>
<version>3.2.5</version>
</plugin>
</plugins>
</build>
<repositories>
<repository>
<id>spring-milestones</id>
<name>Spring Milestones</name>
<url>https://repo.spring.io/milestone</url>
<snapshots>
<enabled>false</enabled>
</snapshots>
</repository>
</repositories>
</project>与前文相比,只添加一个redis的依赖,别的都没动
Application.yml
server:
port: 3210
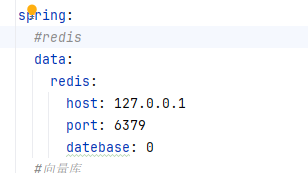
spring:
#redis
data:
redis:
host: 127.0.0.1
port: 6379
datebase: 0
#向量库
datasource:
url: jdbc:postgresql://localhost:5432/postgres
username: postgres
password: pgsql
driver-class-name: org.postgresql.Driver
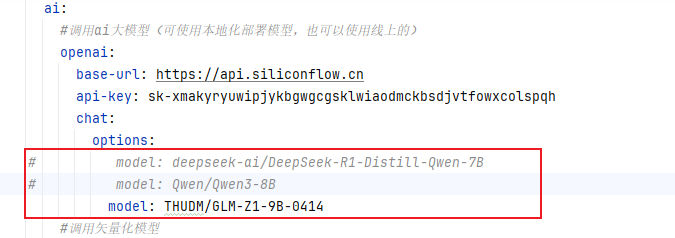
ai:
#调用ai大模型(可使用本地化部署模型,也可以使用线上的)
openai:
base-url: https://api.siliconflow.cn
api-key: #你自己申请的key
chat:
options:
model: deepseek-ai/DeepSeek-R1-Distill-Qwen-7B
#调用矢量化模型
embedding:
transformer:
onnx:
modelUri: classpath:/text2vec-base-chinese/onnx/model.onnx
tokenizer:
uri: classpath:/text2vec-base-chinese/onnx/tokenizer.json
#矢量化配置
vectorstore:
pgvector:
index-type: HNSW
distance-type: COSINE_DISTANCE
dimensions: 768与之前代码相比,多配置了redis的相关东西
RedisConfig(redis配置文件)
添加redis依赖之后,首先对redis进行配置
import org.springframework.context.annotation.Bean;
import org.springframework.context.annotation.Configuration;
import org.springframework.data.redis.connection.RedisConnectionFactory;
import org.springframework.data.redis.core.RedisTemplate;
import org.springframework.data.redis.serializer.Jackson2JsonRedisSerializer;
import org.springframework.data.redis.serializer.StringRedisSerializer;
import org.springframework.http.converter.json.Jackson2ObjectMapperBuilder;

/**
 * @Author majinzhong
 * @Date 2025/5/7 14:49
 * @Version 1.0
 */
@Configuration
public class RedisConfig {

    @Bean
    public RedisTemplate<String, Object> messageRedisTemplate(RedisConnectionFactory factory, Jackson2ObjectMapperBuilder builder) {
        RedisTemplate<String, Object> template = new RedisTemplate<>();
        template.setConnectionFactory(factory);

        // 使用String序列化器作为key的序列化方式
        template.setKeySerializer(new StringRedisSerializer());
        // 对value进行序列化
        template.setValueSerializer(new Jackson2JsonRedisSerializer<>(Object.class));

        // 设置hash类型的key和value序列化方式
        template.setHashKeySerializer(new StringRedisSerializer());
        template.setHashValueSerializer(new Jackson2JsonRedisSerializer<>(Object.class));

        template.afterPropertiesSet();
        return template;
    }
}
ChatRedisMemory(重写ChatMemory)
通过前文可知,聊天记忆的内置顾问都有ChatMemory,想要将聊天记录持久化就需要将ChatMemory内的方法按照redis存储的方式进行重写
import com.fasterxml.jackson.databind.ObjectMapper;
import lombok.extern.slf4j.Slf4j;
import org.example.entity.ChatEntity;
import org.springframework.ai.chat.memory.ChatMemory;
import org.springframework.ai.chat.messages.*;
import org.springframework.data.redis.core.RedisTemplate;
import org.springframework.stereotype.Component;

import java.util.ArrayList;
import java.util.Collections;
import java.util.List;
import java.util.concurrent.TimeUnit;

/**
 * @Author majinzhong
 * @Date 2025/5/7 14:51
 * @Version 1.0
 */
@Slf4j
@Component
public class ChatRedisMemory implements ChatMemory {

    private static final String KEY_PREFIX = "chat:history:";
    private final RedisTemplate<String, Object> redisTemplate;

    public ChatRedisMemory(RedisTemplate<String, Object> redisTemplate) {
        this.redisTemplate = redisTemplate;
    }

    @Override
    public void add(String conversationId, List<Message> messages) {
        String key = KEY_PREFIX + conversationId;
        List<ChatEntity> listIn = new ArrayList<>();
        for (Message msg : messages) {
            String[] strs = msg.getText().split("</think>");
            String text = strs.length == 2 ? strs[1] : strs[0];

            ChatEntity ent = new ChatEntity();
            ent.setChatId(conversationId);
            ent.setType(msg.getMessageType().getValue());
            ent.setText(text);
            listIn.add(ent);
        }
        redisTemplate.opsForList().rightPushAll(key, listIn.toArray());
        redisTemplate.expire(key, 30, TimeUnit.MINUTES);
    }

    @Override
    public List<Message> get(String conversationId, int lastN) {
        String key = KEY_PREFIX + conversationId;
        Long size = redisTemplate.opsForList().size(key);
        if (size == null || size == 0) {
            return Collections.emptyList();
        }

        int start = Math.max(0, (int) (size - lastN));
        List<Object> listTmp = redisTemplate.opsForList().range(key, start, -1);
        List<Message> listOut = new ArrayList<>();
        ObjectMapper objectMapper = new ObjectMapper();
        for (Object obj : listTmp) {
            ChatEntity chat = objectMapper.convertValue(obj, ChatEntity.class);
            if (MessageType.USER.getValue().equals(chat.getType())) {
                listOut.add(new UserMessage(chat.getText()));
            } else if (MessageType.ASSISTANT.getValue().equals(chat.getType())) {
                listOut.add(new AssistantMessage(chat.getText()));
            } else if (MessageType.SYSTEM.getValue().equals(chat.getType())) {
                listOut.add(new SystemMessage(chat.getText()));
            }
        }
        return listOut;
    }

    @Override
    public void clear(String conversationId) {
        redisTemplate.delete(KEY_PREFIX + conversationId);
    }
}
AiConfig
因为重写了ChatMemory,所以需要重新对内置顾问进行重新配置
import org.springframework.ai.chat.client.ChatClient;
import org.springframework.ai.chat.client.advisor.*;
import org.springframework.ai.chat.memory.ChatMemory;
import org.springframework.ai.chat.memory.InMemoryChatMemory;
import org.springframework.ai.chat.prompt.ChatOptions;
import org.springframework.ai.vectorstore.VectorStore;
import org.springframework.context.annotation.Bean;
import org.springframework.context.annotation.Configuration;
import org.springframework.data.redis.core.RedisTemplate;
import java.util.List;
/**
* @Author majinzhong
* @Date 2025/4/28 10:34
* @Version 1.0
*/
@Configuration
public class AiConfig {
@Bean
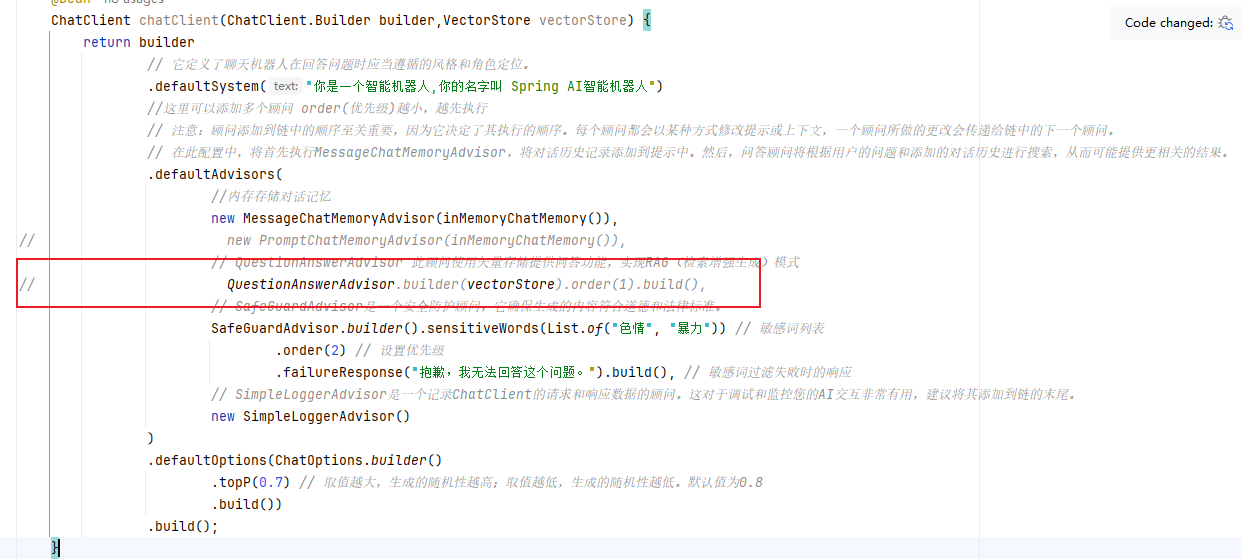
ChatClient chatClient(ChatClient.Builder builder,VectorStore vectorStore) {
return builder
// 它定义了聊天机器人在回答问题时应当遵循的风格和角色定位。
.defaultSystem("你是一个智能机器人,你的名字叫 Spring AI智能机器人")
//这里可以添加多个顾问 order(优先级)越小,越先执行
// 注意:顾问添加到链中的顺序至关重要,因为它决定了其执行的顺序。每个顾问都会以某种方式修改提示或上下文,一个顾问所做的更改会传递给链中的下一个顾问。
// 在此配置中,将首先执行MessageChatMemoryAdvisor,将对话历史记录添加到提示中。然后,问答顾问将根据用户的问题和添加的对话历史进行搜索,从而可能提供更相关的结果。
.defaultAdvisors(
//内存存储对话记忆
new MessageChatMemoryAdvisor(inMemoryChatMemory()),
// new PromptChatMemoryAdvisor(inMemoryChatMemory()),
// QuestionAnswerAdvisor 此顾问使用矢量存储提供问答功能,实现RAG(检索增强生成)模式
// QuestionAnswerAdvisor.builder(vectorStore).order(1).build(),
// SafeGuardAdvisor是一个安全防护顾问,它确保生成的内容符合道德和法律标准。
SafeGuardAdvisor.builder().sensitiveWords(List.of("色情", "暴力")) // 敏感词列表
.order(2) // 设置优先级
.failureResponse("抱歉,我无法回答这个问题。").build(), // 敏感词过滤失败时的响应
// SimpleLoggerAdvisor是一个记录ChatClient的请求和响应数据的顾问。这对于调试和监控您的AI交互非常有用,建议将其添加到链的末尾。
new SimpleLoggerAdvisor()
)
.defaultOptions(ChatOptions.builder()
.topP(0.7) // 取值越大,生成的随机性越高;取值越低,生成的随机性越低。默认值为0.8
.build())
.build();
}
@Bean
ChatMemory inMemoryChatMemory() {
return new InMemoryChatMemory();
}
@Bean
public ChatMemory chatMemory(RedisTemplate<String, Object> redisTemplate) {
return new ChatRedisMemory(redisTemplate);
}
}与前文相比,多配置了ChatRedisMemory

注意:为了测试要将问答顾问注释掉
RedisAiController(新建测试接口类)
import org.example.config.ChatRedisMemory;
import org.springframework.ai.chat.client.ChatClient;
import org.springframework.ai.chat.client.advisor.MessageChatMemoryAdvisor;
import org.springframework.ai.chat.client.advisor.VectorStoreChatMemoryAdvisor;
import org.springframework.ai.vectorstore.VectorStore;
import org.springframework.beans.factory.annotation.Autowired;
import org.springframework.web.bind.annotation.CrossOrigin;
import org.springframework.web.bind.annotation.GetMapping;
import org.springframework.web.bind.annotation.RequestParam;
import org.springframework.web.bind.annotation.RestController;

/**
 * @Author majinzhong
 * @Date 2025/5/7 15:03
 * @Version 1.0
 */
@CrossOrigin
@RestController
public class RedisAiController {

    @Autowired
    ChatClient chatClient;

    @Autowired
    ChatRedisMemory chatRedisMemory;


    /**
     * 持久化聊天记录
     * @param message
     * @param sessionId
     * @return
     */
    @GetMapping("/ai/redisCall")
    public String redisCall(@RequestParam(value = "message", defaultValue = "讲个笑话") String message, @RequestParam String sessionId) {
        return chatClient.prompt().user(message)
                .advisors(new MessageChatMemoryAdvisor(chatRedisMemory, sessionId, 10))
                .call().content().trim();
    }
}
代码中注入了重写的ChatMemory(ChatRedisMemory)

也在方法中重新配置了聊天记忆的内置顾问

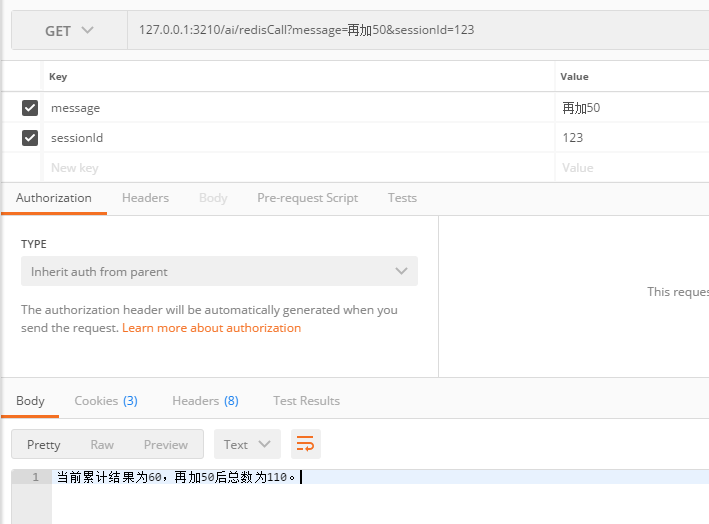
测试
还是使用postman进行测试
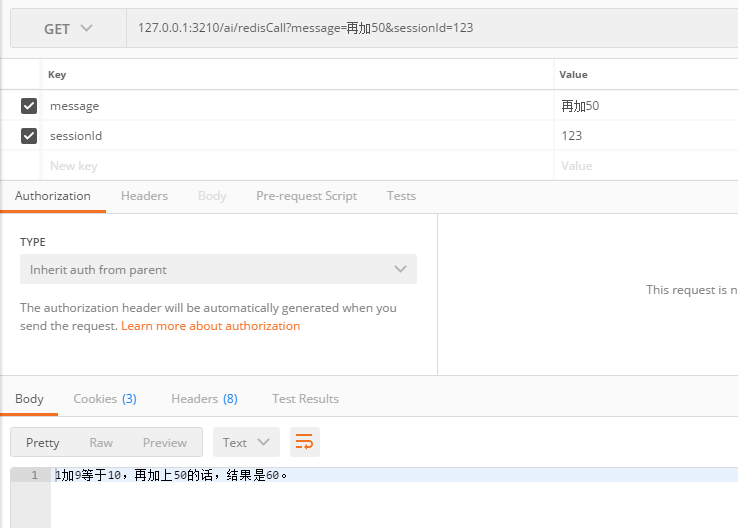
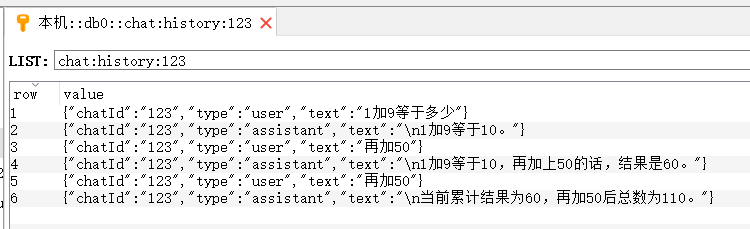
查看redis储存结果

经过测试,聊天记录已经存到redis,重启项目之后,再测试
补充
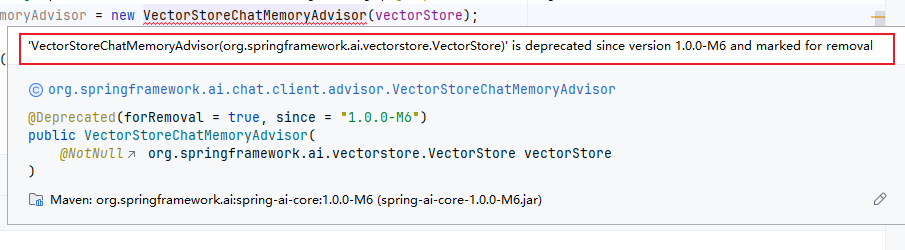
VectorStoreChatMemoryAdvisor
上篇中没有对VectorStoreChatMemoryAdvisor进行测试,现在想对它进行测试时,才发现它已经被弃用了
也来简单测试一下吧,使用之前搭建知识库时创建的向量库
    @Autowired
    VectorStore vectorStore;

    /**
     * 检索聊天记录向量数据库
     * @param message
     * @param sessionId
     * @return
     */
    @GetMapping("/ai/vectorCall")
    public String vectorCall(@RequestParam(value = "message", defaultValue = "讲个笑话") String message, @RequestParam String sessionId) {
        VectorStoreChatMemoryAdvisor vectorStoreChatMemoryAdvisor = new VectorStoreChatMemoryAdvisor(vectorStore);
        return chatClient.prompt().user(message)
                .advisors(vectorStoreChatMemoryAdvisor)
                .call().content().trim();
    }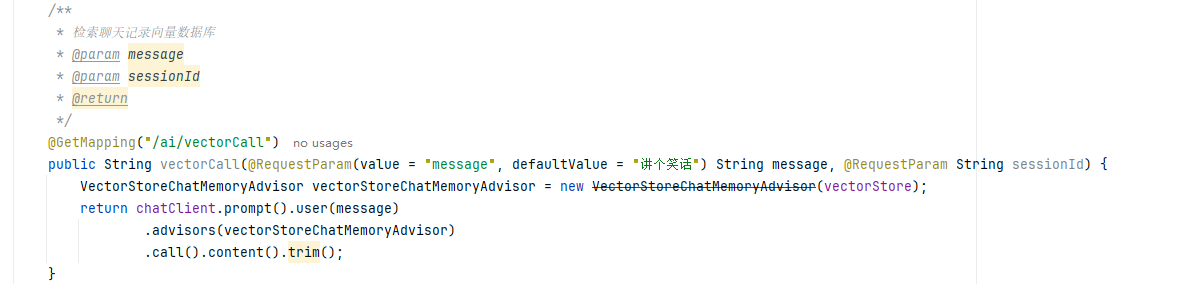
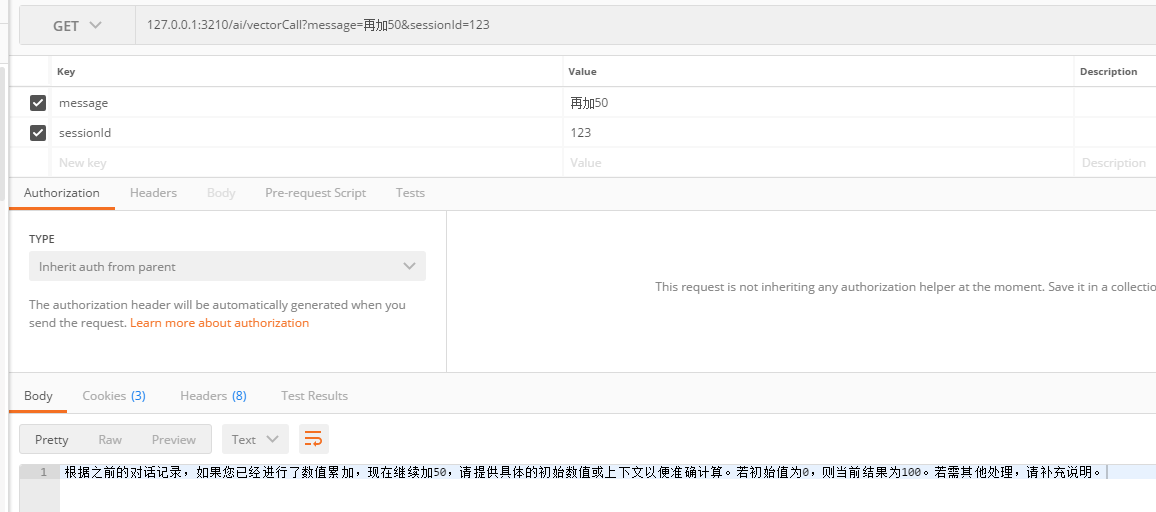
经过测试可以看出VectorStoreChatMemoryAdvisor先检索之前的对话记录,然后再生成回答
问题
调用接口时,控制台报了503,(System is too busy now. Please try again later.)这是因为AI大模型被使用的人太多了,所以才出现的错误(毕竟使用的是免费的,本地部署的AI大模型不会出现这种问题)

解决方法:换一个模型就行了,直接再配置文件里修改