VSCode远程图形化GDB
- 摘要
- 一、安装VSCode
- 1、使用.exe安装包安装VSCode
- 2、VSCode 插件安装
- 3、VSCode建立远程连接
- 二、core dump找bug
- 1、开启core文件
- 2、永久生效的方法
- 3、编写测试程序
- 4、运行结果
- 5、查看core段错误位置
- 6、在程序中开启core dump并二者core文件大小
- 三、gdbserver
- 1、[GDB移植](https://blog.csdn.net/weixin_38426553/article/details/126633280)
- 2、VSCode远程连接
- 3、代码编译
- 4、代码调试
- 4.1、修改launch.json文件
- 4.2、gdbserver启动
- 四、客户端命令行gdbserver调试
- 1、在arm开发板启动gdbserver
- 2、在客户端输入命令
- 3、开启远程连接
- 4、打断点
- 5、c继续运行,在断点处停止
- 6、打印参数
- 7、其他功能
- 总结
摘要
本文详细介绍了如何在 Visual Studio Code (VSCode) 中实现远程图形化调试,使用 GDB 和 gdbserver 工具进行嵌入式开发中的程序调试。文章分为四个部分:首先介绍了 VSCode 的安装和插件配置;其次讲解了如何通过 core dump 文件定位程序中的错误;接着介绍了如何在嵌入式设备上使用 gdbserver 进行远程调试;最后通过客户端命令行展示了 gdbserver 的调试功能。通过本文,读者可以掌握在 VSCode 中进行远程调试的完整流程,包括环境搭建、调试配置和常见问题解决。
一、安装VSCode
1、使用.exe安装包安装VSCode
2、VSCode 插件安装
添加Remote SSH、Remote Development等插件
1)、C/C++,这个肯定是必须的。
2)、C/C++ Snippets,即 C/C++重用代码块。
3)、C/C++ Advanced Lint,即 C/C++静态检测 。
4)、Code Runner,即代码运行。
5)、Include AutoComplete,即自动头文件包含。
6)、Rainbow Brackets,彩虹花括号,有助于阅读代码。
7)、One Dark Pro,VSCode 的主题。
8)、GBKtoUTF8,将 GBK 转换为 UTF8。
9)、ARM,即支持 ARM 汇编语法高亮显示。Arm Assembly
10)、Chinese(Simplified),即中文环境。
11)、vscode-icons,VSCode 图标插件,主要是资源管理器下各个文件夹的图标。
12)、compareit,比较插件,可以用于比较两个文件的差异。
13)、DeviceTree,设备树语法插件。
14)、TabNine,一款 AI 自动补全插件,强烈推荐,谁用谁知道!
15)、Remote SSH
16)、Remote Development
(ARM替代,Arm Assembly更全)
设置语言环境:中文环境,安装Chinese(Simplified)插件后会提示更换并重启VSCode,或者去setting去设置locale.jsons设置"zh_cn"并重启VSCode。
{
	// 定义 VS Code 的显示语言。
	// 请参阅 https://go.microsoft.com/fwlink/?LinkId=761051,了解支持的语言列表。

	"locale":"zh-cn" // 更改将在重新启动 VS Code 之后生效。
}
3、VSCode建立远程连接
使用本地vscode的remote ssh 远程链接服务器
二、core dump找bug
1、开启core文件
root@ATK-IMX6U:/opt# ulimit -a
core file size          (blocks, -c) 0
data seg size           (kbytes, -d) unlimited
scheduling priority             (-e) 0
file size               (blocks, -f) unlimited
pending signals                 (-i) 2931
max locked memory       (kbytes, -l) 64
max memory size         (kbytes, -m) unlimited
open files                      (-n) 1024
pipe size            (512 bytes, -p) 8
POSIX message queues     (bytes, -q) 819200
real-time priority              (-r) 0
stack size              (kbytes, -s) 8192
cpu time               (seconds, -t) unlimited
max user processes              (-u) 2931
virtual memory          (kbytes, -v) unlimited
file locks                      (-x) unlimited
第一行core文件大小为0,没有开启。
使用#ulimit -c [kbytes]可以设置系统允许生成的core文件大小;
ulimit -c 0 不产生core文件
ulimit -c 100 设置core文件最大为100k
ulimit -c unlimited 不限制core文件大小
root@ATK-IMX6U:/opt# ulimit -c unlimited
root@ATK-IMX6U:/opt# ulimit -a
core file size          (blocks, -c) unlimited
data seg size           (kbytes, -d) unlimited
scheduling priority             (-e) 0
file size               (blocks, -f) unlimited
pending signals                 (-i) 2931
max locked memory       (kbytes, -l) 64
max memory size         (kbytes, -m) unlimited
open files                      (-n) 1024
pipe size            (512 bytes, -p) 8
POSIX message queues     (bytes, -q) 819200
real-time priority              (-r) 0
stack size              (kbytes, -s) 8192
cpu time               (seconds, -t) unlimited
max user processes              (-u) 2931
virtual memory          (kbytes, -v) unlimited
file locks                      (-x) unlimited
2、永久生效的方法
这样进程奔溃就可以生成core文件了,这种方法只能在shell中生效,下面说一下永久生效的方法
vi /etc/profile 进入编辑模式在文件最后加入:ulimit -c unlimited
root@ATK-IMX6U:/opt# vi /etc/profile
root@ATK-IMX6U:/opt# sync
3、编写测试程序
 #include <stdio.h>
 #include <unistd.h>

 int main(int argc, char *argv[])
 {
    unsigned int timerCnt = 0;
    while(1)
    {
        printf("system runing times:%d\r\n", timerCnt);
        timerCnt++;

        int *p = NULL;
        int num = *p;
        sleep(1);
    }
}
4、运行结果
root@ATK-IMX6U:/opt# ./gdbApp
system runing times:0
Segmentation fault (core dumped)
root@ATK-IMX6U:/opt# ls
core  download.sh  gdbApp  GW_EVSE  IBG_AWS_Conn  logs  QDesktop  sqlite  src  volume.tmp
root@ATK-IMX6U:/opt# ls -l core
-rw------- 1 root root 344K Jul 21 23:14 core
root@ATK-IMX6U:/opt#
产生的core文件即为异常中止调试文件。
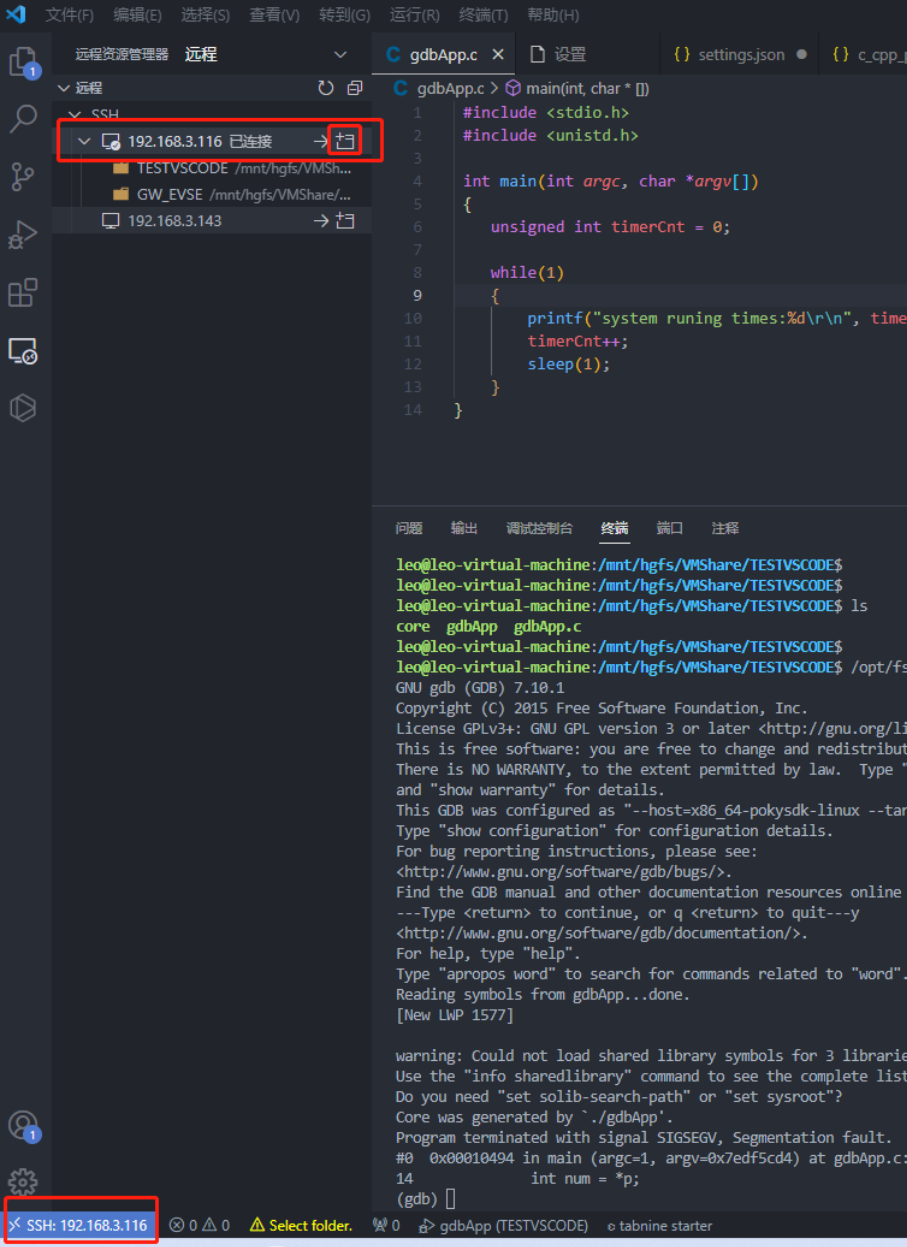
5、查看core段错误位置
将core文件拷贝到Ubuntu平台上,和可自行文件放在同一个文件夹下,然后运行下面的命令:
/opt/fsl-imx-x11/4.1.15-2.1.0/sysroots/x86_64-pokysdk-linux/usr/bin/arm-poky-linux-gnueabi/arm-poky-linux-gnueabi-gdb gdbApp core
运行结果:
leo@leo-virtual-machine:/mnt/hgfs/VMShare/TESTVSCODE$ /opt/fsl-imx-x11/4.1.15-2.1.0/sysroots/x86_64-pokysdk-linux/usr/bin/arm-poky-linux-gnueabi/arm-poky-linux-gnueabi-gdb gdbApp core
GNU gdb (GDB) 7.10.1
Copyright (C) 2015 Free Software Foundation, Inc.
License GPLv3+: GNU GPL version 3 or later <http://gnu.org/licenses/gpl.html>
This is free software: you are free to change and redistribute it.
There is NO WARRANTY, to the extent permitted by law.  Type "show copying"
and "show warranty" for details.
This GDB was configured as "--host=x86_64-pokysdk-linux --target=arm-poky-linux-gnueabi".
Type "show configuration" for configuration details.
For bug reporting instructions, please see:
<http://www.gnu.org/software/gdb/bugs/>.
Find the GDB manual and other documentation resources online at:
---Type <return> to continue, or q <return> to quit---y
<http://www.gnu.org/software/gdb/documentation/>.
For help, type "help".
Type "apropos word" to search for commands related to "word"...
Reading symbols from gdbApp...done.
[New LWP 1577]

warning: Could not load shared library symbols for 3 libraries, e.g. linux-vdso.so.1.
Use the "info sharedlibrary" command to see the complete listing.
Do you need "set solib-search-path" or "set sysroot"?
Core was generated by `./gdbApp'.
Program terminated with signal SIGSEGV, Segmentation fault.
#0  0x00010494 in main (argc=1, argv=0x7edf5cd4) at gdbApp.c:14
14              int num = *p;
(gdb)
运行结果来看,错误产生在14行,将空指针*p赋值给了num。
6、在程序中开启core dump并二者core文件大小
#define CORE_DUMP_SIZE	1024*1024*500 //500M
#define CORE_DUMP_DEBUG 1

#if CORE_DUMP_DEBUG
	/*设置core文件存储上限,系统默认为0.用于段错误时堆栈信息记录的操作,可以产生一个core文件*/
	struct rlimit rlmt;
	if (getrlimit(RLIMIT_CORE, &rlmt) == -1)
    {
		return -1;
	}
	rlmt.rlim_cur	= (rlim_t)CORE_DUMP_SIZE;
	rlmt.rlim_max	= (rlim_t)CORE_DUMP_SIZE;
	if (setrlimit(RLIMIT_CORE, &rlmt) == -1)
    {
        return -1;
    }
#endif
三、gdbserver
1、GDB移植
将Ubuntu上的交叉编译器里面的gdbserver拷贝到开发板文件系统指定目录/bin/
leo@leo-virtual-machine:~$ whereis gdbserver
gdbserver: /usr/bin/gdbserver /usr/local/arm_gcc/gcc-linaro-4.9.4-2017.01-x86_64_arm-linux-gnueabihf/bin/gdbserver /usr/share/man/man1/gdbserver.1.gz
leo@leo-virtual-machine:~$

2、VSCode远程连接
具体步骤可以百度:
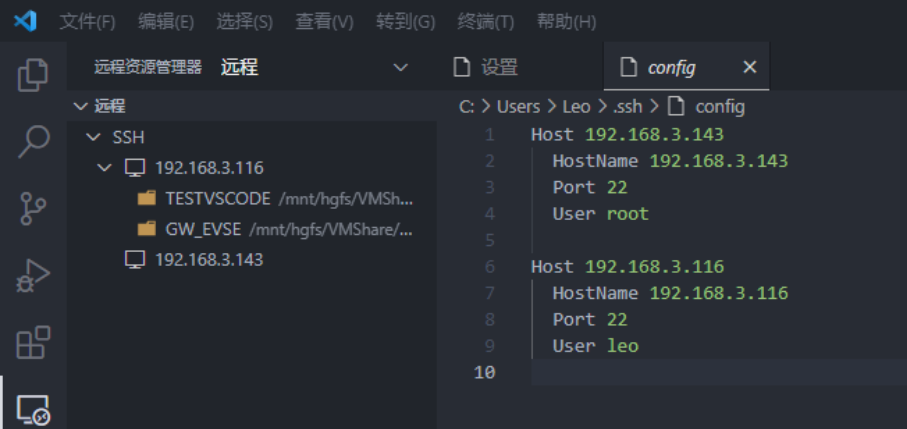
设置.ssh config
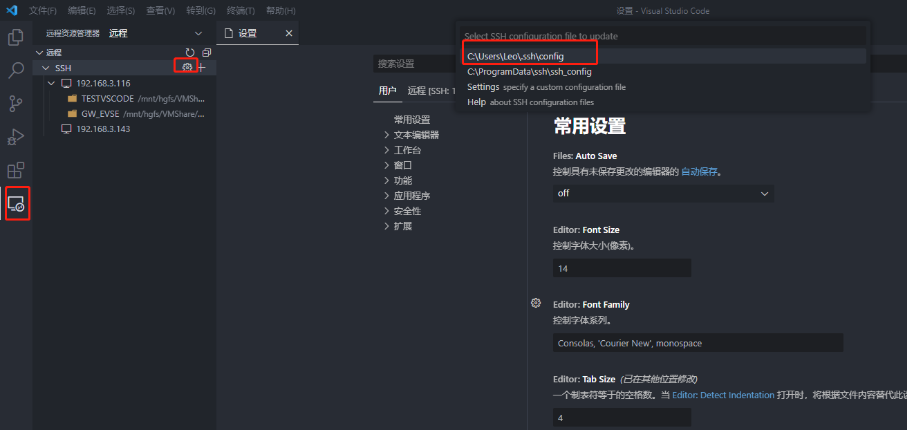
设置config文件
Host 192.168.3.116
  HostName 192.168.3.116

Host 192.168.3.143
  HostName 192.168.3.143
  Port 22
  User root

Host 192.168.3.116
  HostName 192.168.3.116
  Port 22
  User leo
server设置:
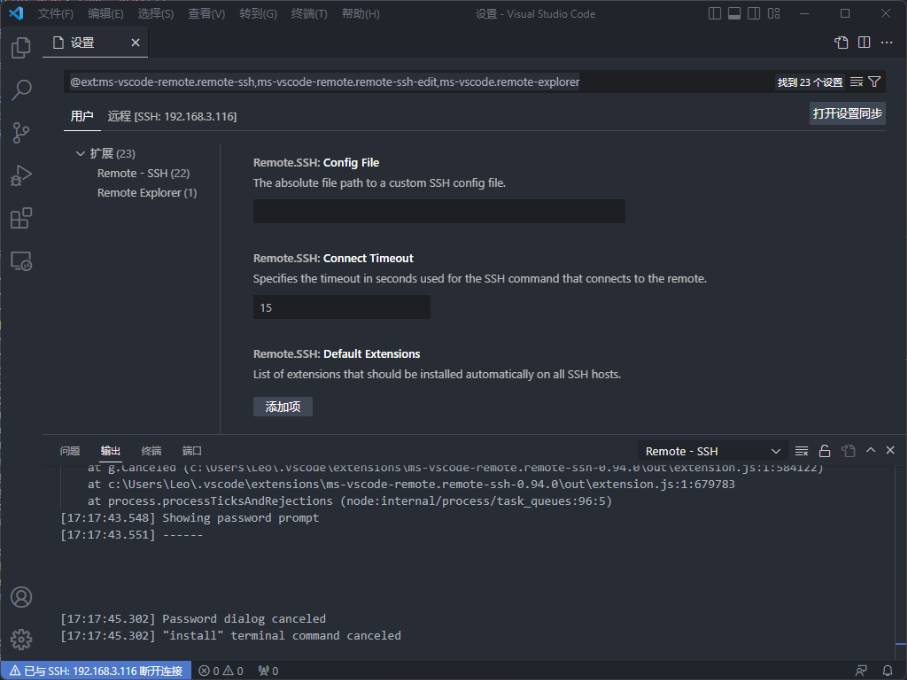
输入密码连接

3、代码编译
编译代码:修改Makefile,在gcc 后面加上 -ggdb选项
# -------------[ CFLAGS ] -------------
CFLAGS += -g
CFLAGS += -ggdb
CFLAGS += -Wall
CFLAGS += -I.
CFLAGS += -I $(TOPDIR)/api
CFLAGS += -I $(TOPDIR)/daemon
......
然后和以前一样编译代码,这样代码编译出来的可执行文件会更大一些,保留了调试信息在可执行文件中。
4、代码调试
4.1、修改launch.json文件
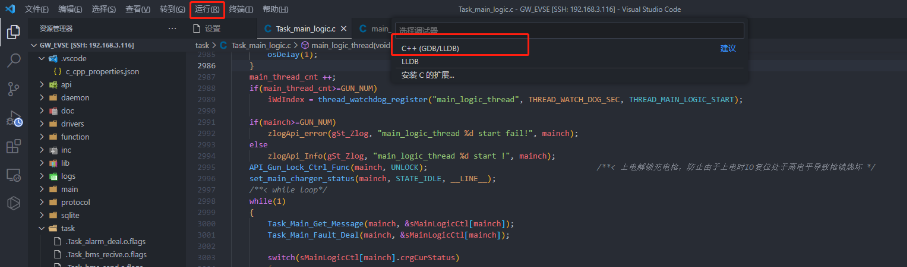
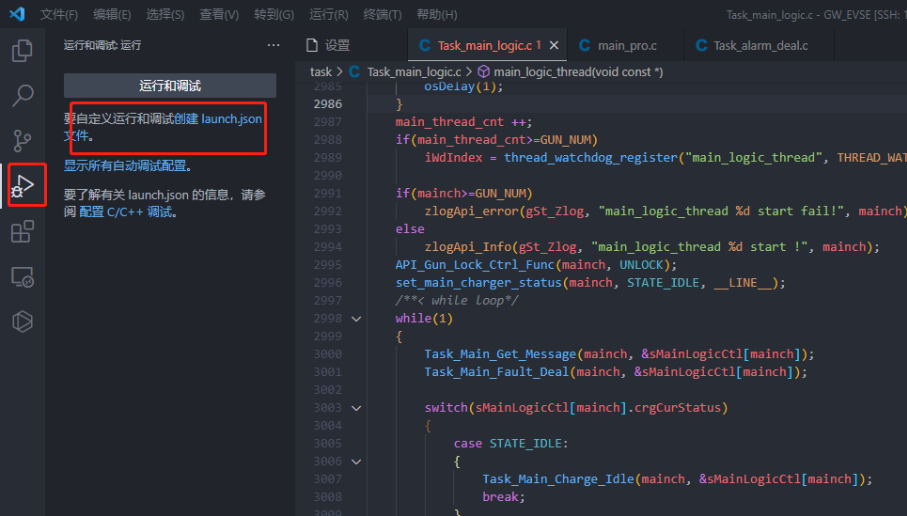
点击运行->启动调试(或者按F5)。新的代码未创建launch.json文件,选择C++(GDB/LLDB),选择默认配置会自动生成一个launch.json文件。
或者
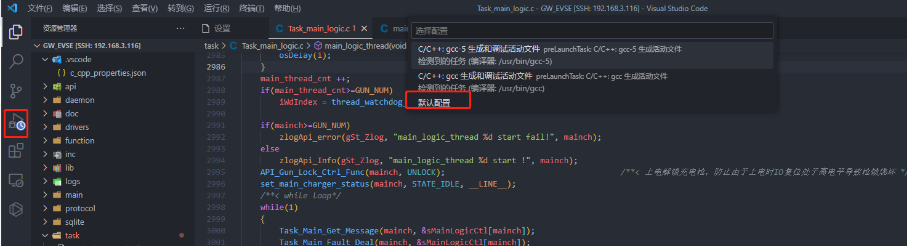
或者点击调试,选择创建爱你launch.json文件。,选择C++(GDB/LLDB)生成一个launch.json文件。
修改launch.json文件
{
    // 使用 IntelliSense 了解相关属性。
    // 悬停以查看现有属性的描述。
    // 欲了解更多信息,请访问: https://go.microsoft.com/fwlink/?linkid=830387
    "version": "0.2.0",
    "configurations": [
        {
            "type": "cppdbg",
            "request": "launch",
            "name": "(gdb)调试",
            "program": "${workspaceFolder}/GW_EVSE",
            "args": [],
            "stopAtEntry": false,
            "cwd": "${workspaceFolder}",
            "environment": [],
            "externalConsole": false,
            "MIMode": "gdb",
            "miDebuggerPath":
            "/opt/fsl-imx-x11/4.1.15-2.1.0/sysroots/x86_64-pokysdk-linux/usr/bin/arm-poky-linux-gnueabi/arm-poky-linux-gnueabi-gdb",
            //"/usr/local/arm_gcc/gcc-linaro-4.9.4-2017.01-x86_64_arm-linux-gnueabihf/bin/arm-linux-gnueabihf-gdb",
            "miDebuggerServerAddress": "192.168.3.143:2001",
            "setupCommands": [
                {
                    "description": "为 gdb 启用整齐打印",
                    "text": "-enable-pretty-printing",
                    "ignoreFailures": true
                }
            ]
        }
    ]
}
注意交叉编译器和可执行文件名称需要修改。上面交叉编译器有两个,需要和编译代码的交叉编译器对应上,否则程序不可执行,会段错误。
4.2、gdbserver启动
将程序可执行文件下载到arm linux开发板后,执行
root@ATK-IMX6U:/opt# gdbserver 192.168.3.143:2001 GW_EVSE
Process gdbApp created; pid = 1629
Listening on port 2001
或者本机地址可以省略
root@ATK-IMX6U:/opt# gdbserver 3:2001 GW_EVSE
Process gdbApp created; pid = 1629
Listening on port 2001
然后在PC端VSCode启动调试,就可以打断点进行调试了
四、客户端命令行gdbserver调试
1、在arm开发板启动gdbserver
root@ATK-IMX6U:/opt# gdbserver 192.168.3.143:2001 GW_EVSE
Process gdbApp created; pid = 1629
Listening on port 2001
2、在客户端输入命令
leo@leo-virtual-machine:/mnt/hgfs/VMShare/VSCodeWorkSpace/GW_EVSE$ /opt/fsl-imx-x11/4.1.15-2.1.0/sysroots/x86_64-pokysdk-linux/usr/bin/arm-poky-linux-gnueabi/arm-poky-linux-gnueabi-gdb GW_EVSE
GNU gdb (GDB) 7.10.1
Copyright (C) 2015 Free Software Foundation, Inc.
License GPLv3+: GNU GPL version 3 or later <http://gnu.org/licenses/gpl.html>
This is free software: you are free to change and redistribute it.
There is NO WARRANTY, to the extent permitted by law.  Type "show copying"
and "show warranty" for details.
This GDB was configured as "--host=x86_64-pokysdk-linux --target=arm-poky-linux-gnueabi".
Type "show configuration" for configuration details.
For bug reporting instructions, please see:
<http://www.gnu.org/software/gdb/bugs/>.
Find the GDB manual and other documentation resources online at:
<http://www.gnu.org/software/gdb/documentation/>.
For help, type "help".
Type "apropos word" to search for commands related to "word"...
Reading symbols from GW_EVSE...done.
(gdb)
3、开启远程连接
(gdb) target remote 192.168.3.143:2001
Remote debugging using 192.168.3.143:2001
Reading /lib/ld-linux-armhf.so.3 from remote target...
warning: File transfers from remote targets can be slow. Use "set sysroot" to access files locally instead.
Reading /lib/ld-linux-armhf.so.3 from remote target...
Reading symbols from target:/lib/ld-linux-armhf.so.3...Reading /lib/ld-2.23.so from remote target...
Reading /lib/.debug/ld-2.23.so from remote target...
(no debugging symbols found)...done.
0x76fcfac0 in ?? () from target:/lib/ld-linux-armhf.so.3
(gdb)
4、打断点
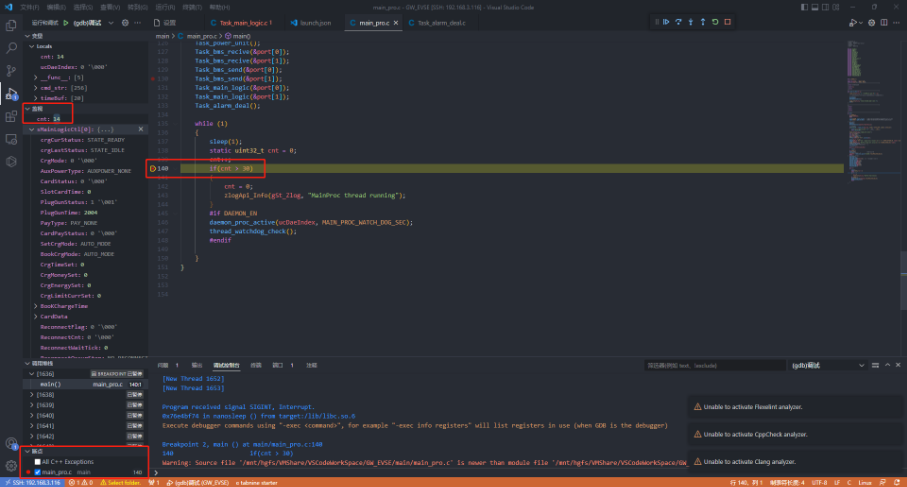
(gdb) b 140
Breakpoint 1 at 0x1efac: file main/main_pro.c, line 140.
(gdb)
5、c继续运行,在断点处停止
(gdb) c
Continuing.
Reading /lib/librt.so.1 from remote target...
Reading /lib/libpthread.so.0 from remote target...
Reading /lib/libm.so.6 from remote target...
Reading /lib/libdl.so.2 from remote target...
Reading /lib/libc.so.6 from remote target...
Reading /lib/librt-2.23.so from remote target...
Reading /lib/.debug/librt-2.23.so from remote target...
Reading /lib/libpthread-2.23.so from remote target...
Reading /lib/.debug/libpthread-2.23.so from remote target...
Reading /lib/libm-2.23.so from remote target...
Reading /lib/.debug/libm-2.23.so from remote target...
Reading /lib/libdl-2.23.so from remote target...
Reading /lib/.debug/libdl-2.23.so from remote target...
Reading /lib/libc-2.23.so from remote target...
Reading /lib/.debug/libc-2.23.so from remote target...
[New Thread 1725]
[New Thread 1726]
[New Thread 1727]
[New Thread 1728]
[New Thread 1729]
[New Thread 1731]
[New Thread 1732]
[New Thread 1733]
[New Thread 1734]
[New Thread 1736]
[New Thread 1738]
[New Thread 1739]
[New Thread 1740]

Breakpoint 1, main () at main/main_pro.c:140
warning: Source file is more recent than executable.
140                     if(cnt > 30)
(gdb)
6、打印参数
(gdb) r
The "remote" target does not support "run".  Try "help target" or "continue".
(gdb) c
Continuing.

Breakpoint 1, main () at main/main_pro.c:140
140                     if(cnt > 30)
(gdb) c
Continuing.

Breakpoint 1, main () at main/main_pro.c:140
140                     if(cnt > 30)
(gdb) print cnt
$1 = 3
(gdb)
从上面看出,远程模式下,不支持全速运行 r 命令。
7、其他功能
这里不再赘述,可以查看操作手册。
总结
本文为嵌入式开发人员提供了一套完整的 VSCode 远程调试解决方案。通过安装必要的插件和配置远程连接,开发者可以在 VSCode 中方便地进行代码编写和调试。core dump 功能可以帮助快速定位程序崩溃的原因,而 gdbserver 则实现了远程设备与本地调试环境的无缝连接。通过修改 launch.json 文件和正确配置交叉编译器路径,开发者可以在 VSCode 中轻松启动和管理远程调试会话。此外,文章还介绍了如何通过命令行使用 gdbserver 进行调试,进一步扩展了调试功能的灵活性。总之,本文为希望在 VSCode 中实现高效远程调试的开发者提供了实用的指导和参考。