系列文档目录
Vue3+Vite+TypeScript安装
Element Plus安装与配置
主页设计与router配置
静态菜单设计
Pinia引入
Header响应式菜单缩展
Mockjs引用与Axios封装
登录设计
登录成功跳转主页
多用户动态加载菜单
Pinia持久化
动态路由 -动态增加路由
动态路由-动态删除路由
路由守卫-无路由跳转404
路由守卫-未登录跳转登录界面
登录退出
Tags-组件构建
Tags-与菜单联动
文章目录
目录
系列文档目录
文章目录
前言
Tags组件构建
main界面调整
效果首现
Tags存储初始化
Tags组件初始化调整
运行效果
后续
前言
在上一章节中,详细探讨了登录与退出机制的构建。本章节将聚焦于 Tags 组件的开发,其核心目标是:当用户点击菜单项时,能够在 main 区域以 Tab 的形式动态呈现对应内容。
Tags组件构建
在 components 文件夹中新建 MainTagsCont.vue 文件
代码如下:
<template>
    <div class="tabs">
        <el-tab v-for="(item,index) in tabs"
            :key="index"
            :label="item.label"
            :name="item.name"
            :icon="item.icon"
            :path="item.path"
            :closable="item.name !== 'home'"
            :effect="route.name===item.name?'dark':'plain'"
            >
 {{ item.label }}
        </el-tab>
    </div>
</template>
<script lang="ts" setup>
import{ effect, ref } from "vue"
import { useRoute } from "vue-router";

 const tabs=ref([
    {path:"/home"
    ,name:"home"
    ,label:"首页"
    ,icon:"home"}

])
const route=useRoute()
</script>
<style scoped>
 .tabs{
    margin: 20px 0 0 20px;
}
.el-tab{
    margin-right: 10px;
}
</style>
main界面调整
修改 main.vue 文件在 main.vue 文件中导入 MainTagsCont组件,并在 <el-header> 和 <el-main> 之间插入 <MainTagsCont/> 组件。
 <el-header>
          <MainHdrCont />
 </el-header>
 <MainTagsCont />
<el-main>
          <router-view></router-view>
</el-main>
调整后完整代码:
<template>
  <div class="common-layout">
    <el-container class="container-aside" >
      <el-aside  :width="ContAsideWidth">
        <MainAsideCont />
      </el-aside>
      <el-container>
        <el-header>
          <MainHdrCont />
        </el-header>
        <MainTagsCont />
        <el-main>
          <router-view></router-view>
        </el-main>
      </el-container>
    </el-container>
  </div>
</template>
<script lang="ts" setup>
import { defineComponent, computed , onMounted} from 'vue';
import MainAsideCont from '@/components/MainAsideCont.vue';
import MainHdrCont from '@/components/MainHdrCont.vue'
import MainTagsCont from '@/components/MainTagsCont.vue';
import { useAllDataStore } from '@/stores';
import { ReloadData } from '@/stores';

const store = useAllDataStore();

const ContAsideWidth = computed(() => {
return store.isCollapse ? '60px' : '180px';
});

// 在组件挂载时调用 ReloadData
onMounted(() => {
 // ReloadData();
});
</script>

<style lang="less" scoped>
.common-layout {
  height: 100%; /* 设置整个布局的高度为 100%,确保布局占满整个视口 */
  width: 100%; /* 设置整个布局的宽度为 100%,确保布局占满整个视口 */
  .container-aside {
    height: 100%; /* 确保内部的 el-container 也占满整个父容器的高度 */
  }
  .el-header {
    background-color: #141515 ; /* 设置表头的背景色为深黑色 fff 141515*/
    color: #fff; /* 设置表头文字颜色为白色,以便在深色背景上更清晰 */
    display: flex; /* 使用 flex 布局,方便对齐内容 */
    align-items: center; /* 垂直居中对齐内容 */
    justify-content: center; /* 水平居中对齐内容 */
    font-size: 18px; /* 设置文字大小为 18px */
    font-weight: bold; /* 设置文字为加粗 */
  }
  .el-aside {
    background-color:rgba(242, 242, 242, 0.19); /* 设置侧边栏的背景色为浅灰色 */
    color: #333; /* 设置侧边栏文字颜色为深灰色 */
    display: flex; /* 使用 flex 布局,方便对齐内容 */
    align-items: center; /* 垂直居中对齐内容 */
    justify-content: center; /* 水平居中对齐内容 */
    font-size: 16px; /* 设置文字大小为 16px */
    font-weight: normal; /* 设置文字为正常粗细 */
    height: 100%; /* 确保侧边栏高度占满 */

  }
  .el-main {
    background-color: #fff; /* 设置主内容区域的背景色为白色 */
    color: #333; /* 设置主内容区域文字颜色为深灰色 */
    padding: 20px; /* 添加内边距,使内容不紧贴边缘 */
    font-size: 14px; /* 设置文字大小为 14px */
  }
}
</style>
效果首现
登录后,会显示 Tags 标签组件首页
Tags存储初始化
在构建 Tags 组件 时,Tags 的初始数据在组件内部进行初始化。为了实现对 Tags 的动态调整,使用 Pinia 来管理 Tags 的状态,并通过 Pinia 的状态管理功能对 Tags 的初始数据进行统一管理和调整。
tabs:[
      {path:"/home"
      ,name:"home"
      ,label:"home"
      ,icon:"home"}

      ],


   // tabs
    setTabsData(tabs: any)
    {
      this.tabs = tabs
    },
    getTabsData(): [] {
      return this.tabs;
    },
调整后完整语句:
// src/stores/index.ts

import { defineStore } from 'pinia';
import router from '../router';
import type { Component } from 'vue';
import { get } from 'http';


type Modules = Record<string, () => Promise<{ default: Component }>>;


// 定义公共 store
export const useAllDataStore = defineStore('useAllData', {
  // 定义状态
  state: () => ({
    isCollapse: false, // 定义初始状态
    username: '',
    token_key: '',
    menuData:[],
    tabs:[
      {path:"/home"
      ,name:"home"
      ,label:"home"
      ,icon:"home"}

      ],
  }),

  // 定义 actions
  actions: {
    // 设置用户名
    setUsername(username: string) {
      this.username = username;
    },

    // 获取用户名
    getUsername(): string {
      return this.username;
    },

    // 设置 token_key
    setTokenKey(token_key: string) {
      // sessionStorage.setItem('useAllData-session-store', JSON.stringify({ token_key: token_key, menuData: this.menuData}));
      this.token_key = token_key;
    },

    // 获取 token_key
    getTokenKey(): string {
      /*
      const sessionData = sessionStorage.getItem('useAllData-session-store');
      console.log(sessionData)
      if (sessionData) {
        const data = JSON.parse(sessionData);
        this.token_key = data.token_key;
        this.menuData = data.menuData;
      }
      else
      {
        this.token_key = ''
      }
      */
      return this.token_key;
    },
    // 设置菜单数据
    setMenuData(menuData: any){
      // sessionStorage.setItem('useAllData-session-store', JSON.stringify({ token_key: this.token_key, menuData: menuData}));
      addRouter(menuData)
      this.menuData = menuData
    },
    // 获取菜单数据
    getMenuData(): [] {
      return this.menuData;
    },
    // tabs
    setTabsData(tabs: any)
    {
      this.tabs = tabs
    },
    getTabsData(): [] {
      return this.tabs;
    },
     // 登出方法
     logout() {
      sessionStorage.removeItem('useAllData-store'); // 清除 sessionStorage 中的数据
      /*
      this.username = '';
      this.token_key = '';
      this.menuData = [];*/
       router.push({ name: 'login' }); // 重定向到登录页面
    },

  },
  persist: {
    enabled: true,
    key: 'useAllData-store',
    storage: sessionStorage, // // localStorage  sessionStorage
    paths: ['token_key'], // 指定持久化的字段
  },
  /*
  persist: {
    enabled: true,
    strategies: [
      {
        key: 'useAllData-store',
        storage: sessionStorage,// localStorage  sessionStorage
        paths: ['token_key','menuData'], // 指定需要持久化的字段
      },

    ],
  },
  */


});

function addRouter(menuData: any){
  const routerList=router.getRoutes()
  const modules: Modules = import.meta.glob('../views/**/*.vue') as Modules;
  const routerArr=[]

  menuData.forEach((item:any) => {
   // console.log(item)
    if(item.children){
     item.children.forEach((child:any) => {

       const componentPath = `../${child.path}.vue`;

       const module = modules[componentPath];

       if (module) {
         /*
         module().then(({ default: component }) => {
           child.component = component;
         });
         */
         child.component = module;
         routerArr.push(child)

       }
     });
   }
   else
   {
     const componentPath = `../${item.path}.vue`;
     const module = modules[componentPath];
     if(module)
     {
       item.component = module;
       routerArr.push(item)
     }

   }
  });
  // 增加删除路由
  routerList.forEach((item:any) => {

    if (item.name === 'main'
        || item.name === 'home'
        || item.name === '404'
        || item.name === 'login'
        || item.name === 'error'
        || item.name === 'undefined'
        || item.path === '/'
        || item.path === '/main')
      return
    router.removeRoute(item.name)
  });

  routerArr.forEach((item:any) => {

   router.addRoute('main',
     {
     path: item.index,
     name: item.label,
     component: item.component,

   });

})
const routerListLast=router.getRoutes()
console.log(routerListLast)

}

export function ReloadData() {
  const store = useAllDataStore();
  const menuData = store.getMenuData();
  addRouter(menuData);


}
Tags组件初始化调整
Tags 的初始化内容主要通过 Pinia store 获取。
const store = useAllDataStore();

 const tabs=computed(() => store.getTabsData());
调整后语句:
<template>
<div class="tabs">
<el-tab v-for="(item,index) in tabs"
:key="index"
:label="item.label"
:name="item.name"
:icon="item.icon"
:path="item.path"
:closable="item.name !== 'home'"
:effect="route.name===item.name?'dark':'plain'"
>
{{ item.label }}
</el-tab>
</div>
</template>
<script lang="ts" setup>
import{ effect, ref ,computed} from "vue"
import { useRoute } from "vue-router";
import { useAllDataStore } from '@/stores';
const store = useAllDataStore();
const tabs=computed(() => store.getTabsData());
const route=useRoute()
</script>
<style scoped>
.tabs{
margin: 20px 0 0 20px;
}
.el-tab{
margin-right: 10px;
}
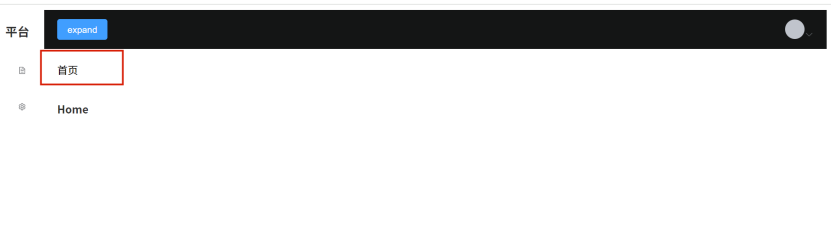
</style>运行效果
后续
本章节已完成了 Tags 组件的初步构建。在下一章节中,我们将继续完善 Tags 组件,使其与菜单实现完整联动。