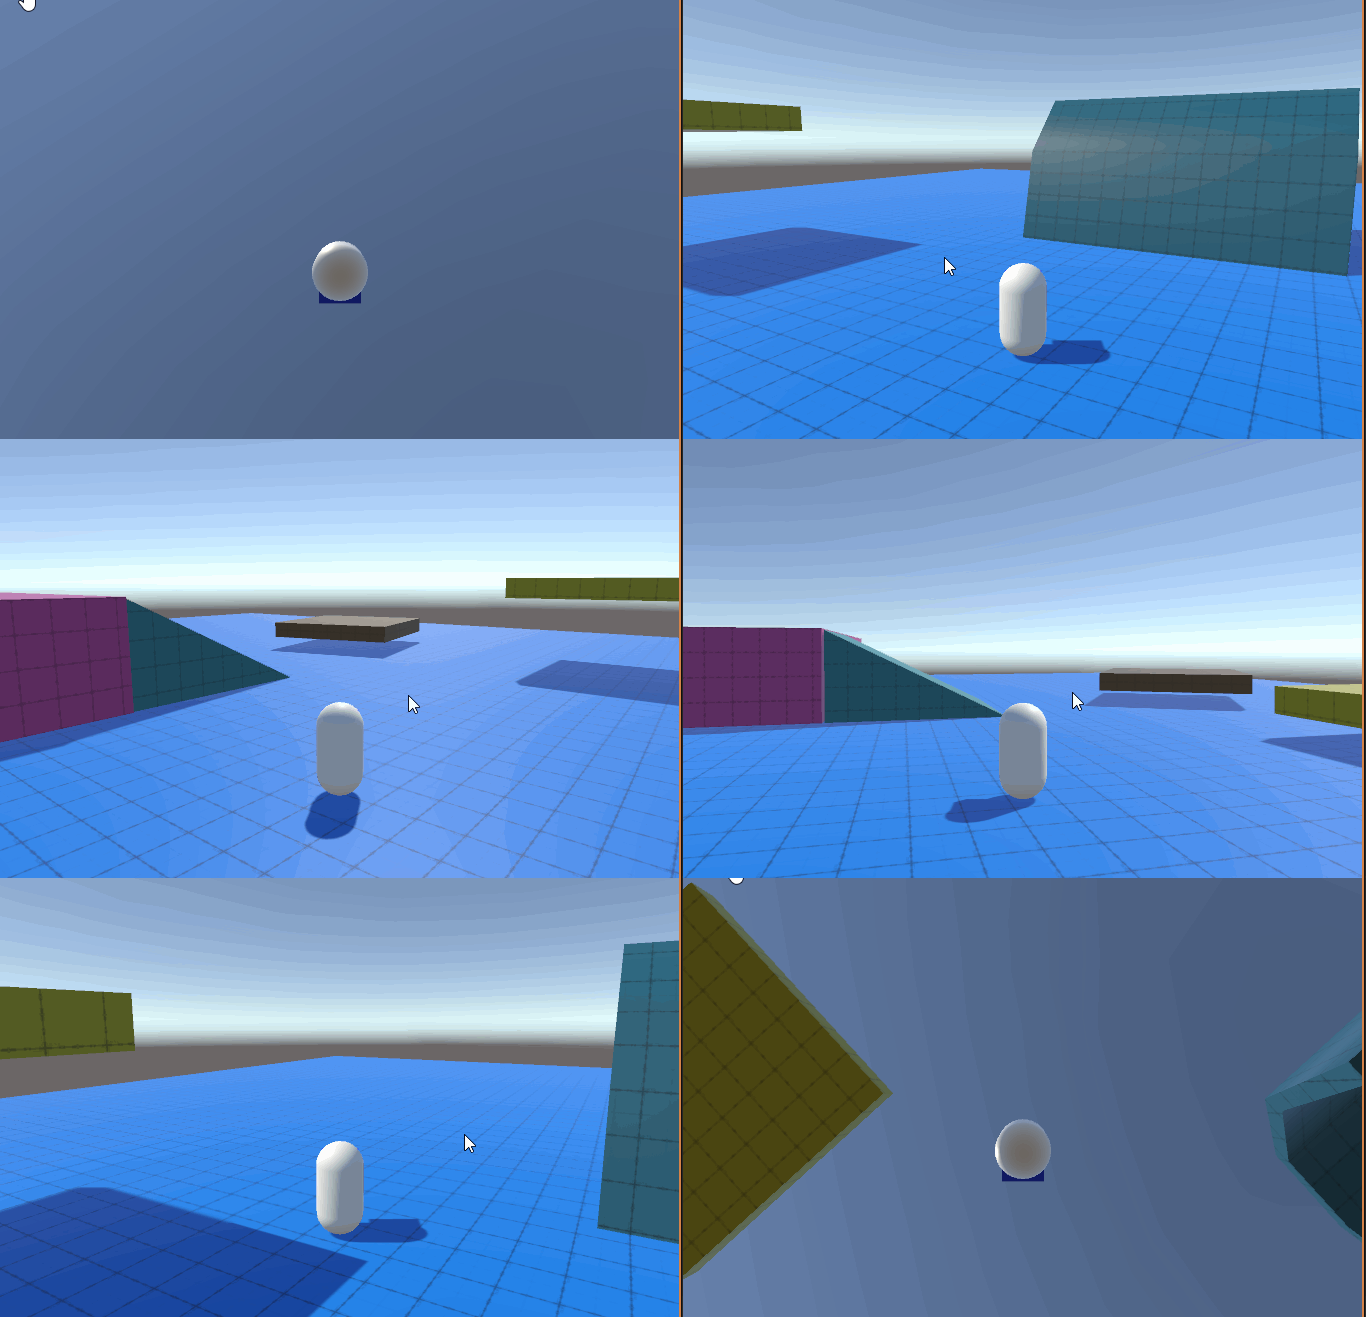
最终效果

前言
使用CharacterController实现3d角色控制器,之前已经做过很多了:
【unity小技巧】unity最完美的CharacterController 3d角色控制器,实现移动、跳跃、下蹲、奔跑、上下坡、物理碰撞效果,复制粘贴即用
【unity实战】Cinemachine虚拟相机+Character Controller实现俯视角、第三人称角色控制,复制粘贴即用
有的人就会问了,使用Rigidbody要怎么做呢?这不就来了,本文主要是使用新版输入系统Input System+Rigidbody实现第三人称人物控制器,我就不做特别复杂了,其他内容欢迎大家自行补充。因为我也不是很推荐大家使用Rigidbody,CharacterController 其实已经可以满足我们开发中的所有需求了。Rigidbody定义一些CharacterController自带的功能真的非常麻烦,比如爬坡,走楼梯等等,所以我这里主要只是带大家了解一下,并不会深入研究。
使用Input System获取玩家输入
参考:【推荐100个unity插件之18】Unity 新版输入系统Input System的使用,看这篇就够了
我这里直接使用Player Input组件,生成的默认的Input Actions映射

新增脚本获取玩家输入
/// <summary>
/// 玩家输入
/// </summary>
public class PlayerInput : MonoBehaviour
{
    // 用于存储移动输入的向量
    public Vector2 MoveInput { get; private set; }

    // 用于存储视角输入的向量
    public Vector2 LookInput { get; private set; }
    public bool ChangeCameraWasPressedThisFrame{get; private set; }//是否按下切换相机

    private InputActions _input;

    private void OnEnable()
    {
        _input = new InputActions();
        _input.Player.Enable();

        _input.Player.Move.performed += SetMove;
        _input.Player.Move.canceled += SetMove;
        _input.Player.Look.performed += SetLook;
        _input.Player.Look.canceled += SetLook;
    }

    private void OnDisable()
    {
        _input.Player.Move.performed -= SetMove;
        _input.Player.Move.canceled -= SetMove;
        _input.Player.Look.performed -= SetLook;
        _input.Player.Look.canceled -= SetLook;
        _input.Player.Disable();
    }


    private void SetMove(InputAction.CallbackContext context)
    {
        MoveInput = context.ReadValue<Vector2>();
    }

    private void SetLook(InputAction.CallbackContext context)
    {
        LookInput = context.ReadValue<Vector2>();
    }
}
人物添加刚体
添加刚体,配置参数

控制角色移动
新增脚本控制角色移动,对这里的AddRelativeForce不太了解的小伙伴可以查看我这篇文章:
【unity小技巧】常用的方法属性和技巧汇总(长期更新)

public class PlayerController : PlayerInput
{
    Rigidbody _rb;
    [Header("移动")]
    [SerializeField] float _speed= 1000f;// 移动的速度

    private void Awake()
    {
        _rb = GetComponent<Rigidbody>();
    }

    private void FixedUpdate()
    {
        PlayerMove();
    }

    // 计算并应用玩家的移动
    private void PlayerMove()
    {
        // 根据输入和速度计算移动向量
        _playerMoveInput = new Vector3(MoveInput.x, 0, MoveInput.y).normalized * _speed;
        // 将相对力应用到刚体上
        _rb.AddRelativeForce(_playerMoveInput, ForceMode.Force);
    }
}
配置

效果

手搓代码控制相机视角
修改PlayerInput
[Header("相机视角控制")]
public Transform CameraFollow;// 用于跟随摄像机的 Transform
private Vector3 _playerLookInput;// 玩家视角输入
private float _playerRotation;// 角色旋转角度
private float _cameraPitch;// 摄像机俯仰角度
[SerializeField] float _rotationSpeed = 180.0f;// 角色旋转速度
[SerializeField] float _pitchSpeed = 180.0f;// 摄像机俯仰速度

private void Awake()
{
    _rb = GetComponent<Rigidbody>();
    mainCamera = Camera.main; // 获取主相机
}

private void Update()
{
    _playerLookInput = new Vector3(LookInput.x, -LookInput.y, 0f) * Time.deltaTime;// 获取视角输入
    PlayerLook(); // 更新角色的旋转
    PitchCamera(); // 更新摄像机的俯仰角度
}

// 更新角色的旋转
private void PlayerLook()
{
    _playerRotation += _playerLookInput.x * _rotationSpeed;
    _rb.rotation = Quaternion.Euler(0f, _playerRotation, 0f);
}

// 更新摄像机的俯仰角度
private void PitchCamera()
{
    Vector3 rotationValues = CameraFollow.rotation.eulerAngles;
    _cameraPitch += _playerLookInput.y * _pitchSpeed;
    _cameraPitch = Mathf.Clamp(_cameraPitch, -89.9f, 89.9f);//限制俯仰视角角度
    CameraFollow.rotation = Quaternion.Euler(_cameraPitch, rotationValues.y, rotationValues.z);
}
配置相机为角色的子物体

效果

最终代码
using UnityEngine;

public class PlayerController : PlayerInput
{
    Rigidbody _rb;

    [Header("移动")]
    Vector3 _playerMoveInput;// 玩家移动向量
    [SerializeField] float _speed = 1000f;// 移动的速度

    [Header("相机视角控制")]
    public Transform CameraFollow;// 用于跟随摄像机的 Transforms
    private Vector3 _playerLookInput;// 玩家视角输入
    private float _playerRotation;// 角色旋转角度
    private float _cameraPitch;// 摄像机俯仰角度
    [SerializeField] float _rotationSpeed = 180.0f;// 角色旋转速度
    [SerializeField] float _pitchSpeed = 180.0f;// 摄像机俯仰速度
    private Camera mainCamera; // 主相机

    private void Awake()
    {
        _rb = GetComponent<Rigidbody>();
        mainCamera = Camera.main; // 获取主相机
    }

    private void Update()
    {
        _playerLookInput = new Vector3(LookInput.x, -LookInput.y, 0f) * Time.deltaTime;// 获取视角输入
        PlayerLook(); // 更新角色的旋转
        PitchCamera(); // 更新摄像机的俯仰角度
    }

    private void FixedUpdate()
    {
        PlayerMove();
    }

    // 计算并应用玩家的移动
    private void PlayerMove()
    {
        // 根据输入和速度计算移动向量
        _playerMoveInput = new Vector3(MoveInput.x, 0, MoveInput.y).normalized * _speed;
        // 将相对力应用到刚体上
        _rb.AddRelativeForce(_playerMoveInput, ForceMode.Force);
    }

    // 更新角色的旋转
    private void PlayerLook()
    {
        _playerRotation += _playerLookInput.x * _rotationSpeed;
        _rb.rotation = Quaternion.Euler(0f, _playerRotation, 0f);
    }

    // 更新摄像机的俯仰角度
    private void PitchCamera()
    {
        Vector3 rotationValues = CameraFollow.rotation.eulerAngles;
        _cameraPitch += _playerLookInput.y * _pitchSpeed;
        _cameraPitch = Mathf.Clamp(_cameraPitch, -89.9f, 89.9f);//限制俯仰视角角度
        CameraFollow.rotation = Quaternion.Euler(_cameraPitch, rotationValues.y, rotationValues.z);
    }
}
源码
很遗憾源码我并不想
免费分享,我也建议大家能自己手动去敲代码,逐步实现和理解每一块功能。项目实现所涉及的主要功能思路和代码我也已经毫无保留的分享在文章中了,当然,如果你真的需要的话,源码我也放出来了,收个辛苦费,就当作你对我不断创作的支持。力量随微,心暖人。您的每一次支持都是我创作的最大动力!!!
https://gf.bilibili.com/item/detail/1106435120
完结
赠人玫瑰,手有余香!如果文章内容对你有所帮助,请不要吝啬你的点赞评论和关注,你的每一次支持都是我不断创作的最大动力。当然如果你发现了文章中存在错误或者有更好的解决方法,也欢迎评论私信告诉我哦!
好了,我是向宇,https://xiangyu.blog.csdn.net
一位在小公司默默奋斗的开发者,闲暇之余,边学习边记录分享,站在巨人的肩膀上,通过学习前辈们的经验总是会给我很多帮助和启发!如果你遇到任何问题,也欢迎你评论私信或者加群找我, 虽然有些问题我也不一定会,但是我会查阅各方资料,争取给出最好的建议,希望可以帮助更多想学编程的人,共勉~


