2022尚硅谷SSM框架跟学 十 SSM整合
- 四、SSM整合
- 4.1ContextLoaderListener
- (1).创建Maven Module
- (2).导入依赖
- (3).配置web.xml
- (4).创建SpringMVC的配置文件并配置
- (5).创建Spring的配置文件并配置
- (6).创建组件
- (7).创建页面
- (8).访问测试功能
- 4.2准备工作
- (1).创建Maven Module
- (2).导入依赖
- (3).创建表
- 4.3配置web.xml
- 4.4创建SpringMVC的配置文件并配置
- 4.5创建Spring的配置文件并配置
- 4.6测试功能
- (1).创建组件
- (2).创建页面
- (3).访问测试分页功能
- 4.7搭建MyBatis环境
- (1).创建属性文件jdbc.properties
- (2).创建MyBatis的核心配置文件mybatis-config.xml
- (3).创建Mapper接口和映射文件
- (4).创建日志文件log4j.xml
- 4.8测试整合Spring整合MyBatis
- 4.8测试整合配置事务
- 4.9测试实现功能
- (1).查询所有员工信息
- (2).分页
- (3).添加
- (4).修改
- (5).删除
- 5.项目结构
- 5.1项目界面
- 首页
- 员工列表
- 添加员工
- 修改员工
- 5.2项目结构
- 5.2配置文件
- jdbc.properties
- log4j.xml
- mybatis-config.xml
- spring.xml
- springmvc.xml
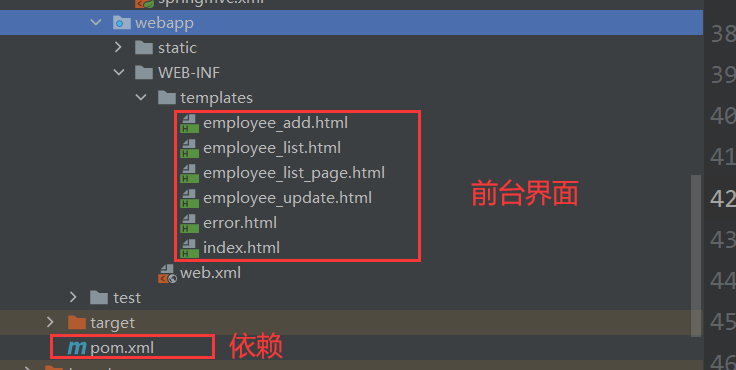
- 5.3前台界面
- index.html首页
- employee_add.html添加员工
- employee_list.html员工列表(无分页)
- employee_list_page.html员工列表分页
- employee_update.html员工信息修改
- error.html错误页面
- 5.4后台界面
- EmployeeController.java
- ExceptionController.java
- FirstInterceptor.java
- EmployeeMapper.java
- Employee.java
- EmployeeServiceImpl.java
- EmployeeService.java
四、SSM整合
分析一下,要想整合,那就要满足Spring中的IOC容器先加载Service,之后Spring MVC中的IOC容器加载Controller。这是因为加载Controller的前提是要获取Service中的Bean的自动装配。而Spring MVC中的IOC容器的初始化是在DispatcherServlet中,所以Service的加载必须在这之前。
各个组件初始化执行顺序:
监听器→过滤器→Servlet
所以自然想到,把获取Spring的IOC容器的方法放到监听器初始化中。
4.1ContextLoaderListener
Spring提供了监听器ContextLoaderListener,实现ServletContextListener接口,可监听ServletContext的状态,在web服务器的启动,读取Spring的配置文件,创建Spring的IOC容器。
监听器常见的类型:
ServletContextListener:监听ServletContext的状态
HttpSessionListener:监听HttpSession的状态
HttpSessionAttributeListener:监听HttpSession的状
而看源码,ContextLoaderListener就是接口ServletContextListener的实现类。
public class ContextLoaderListener extends ContextLoader implements ServletContextListener {}

之后我们看initWebApplicationContext方法

往下拉继续看

web应用中必须在web.xml中来配置监听器。
<listener>
        <!--
        配置Spring的监听器,在服务器启动时加载Spring的配置文件
        Spring配置文件默认位置和名称:/WEB-INF/applicationContext.xml
        可通过上下文参数自定义Spring配置文件的位置和名称
        -->
        <listener-class>org.springframework.web.context.ContextLoaderListener</listener-class>
    </listener>
    <!--自定义Spring配置文件的位置和名称-->
    <context-param>
        <param-name>contextConfigLocation</param-name>
        <param-value>classpath:spring.xml</param-value>
    </context-param>
那我们先来看下监听器的应用
(1).创建Maven Module
Name:spring-integration-listener
GroupId:com.atguigu
pom.xml配置打包形式
<packaging>war</packaging>
(2).导入依赖
pom.xml剩下的依赖和之前的文件一样
<dependencies>
        <!-- SpringMVC -->
        <dependency>
            <groupId>org.springframework</groupId>
            <artifactId>spring-webmvc</artifactId>
            <version>5.3.1</version>
        </dependency>
        <!-- 日志 -->
        <dependency>
            <groupId>ch.qos.logback</groupId>
            <artifactId>logback-classic</artifactId>
            <version>1.2.3</version>
        </dependency>
        <!-- ServletAPI -->
        <dependency>
            <groupId>javax.servlet</groupId>
            <artifactId>javax.servlet-api</artifactId>
            <version>3.1.0</version>
            <scope>provided</scope>
        </dependency>
        <!-- Spring5和Thymeleaf整合包 -->
        <dependency>
            <groupId>org.thymeleaf</groupId>
            <artifactId>thymeleaf-spring5</artifactId>
            <version>3.0.12.RELEASE</version>
        </dependency>
    </dependencies>
(3).配置web.xml
修改web.xml的路径
F:\javawebwork\SSM\spring-integration-listener\src\main\webapp\WEB-INF\web.xml

配置web.xml
<?xml version="1.0" encoding="UTF-8"?>
<web-app xmlns="http://xmlns.jcp.org/xml/ns/javaee"
         xmlns:xsi="http://www.w3.org/2001/XMLSchema-instance"
         xsi:schemaLocation="http://xmlns.jcp.org/xml/ns/javaee http://xmlns.jcp.org/xml/ns/javaee/web-app_4_0.xsd"
         version="4.0">
    <!-- 配置Spring的编码过滤器 -->
    <filter>
        <filter-name>CharacterEncodingFilter</filter-name>
        <filter-class>org.springframework.web.filter.CharacterEncodingFilter
        </filter-class>
        <!-- 请求 -->
        <init-param>
            <param-name>encoding</param-name>
            <param-value>UTF-8</param-value>
        </init-param>
        <!-- 响应 -->
        <init-param>
            <param-name>forceEncoding</param-name>
            <param-value>true</param-value>
        </init-param>
    </filter>
    <filter-mapping>
        <filter-name>CharacterEncodingFilter</filter-name>
        <url-pattern>/*</url-pattern>
    </filter-mapping>
    <!-- 配置处理请求方式PUT和DELETE的过滤器 -->
    <filter>
        <filter-name>HiddenHttpMethodFilter</filter-name>
        <filter-class>org.springframework.web.filter.HiddenHttpMethodFilter
        </filter-class>
    </filter>
    <filter-mapping>
        <filter-name>HiddenHttpMethodFilter</filter-name>
        <url-pattern>/*</url-pattern>
    </filter-mapping>
    <!-- 配置SpringMVC的前端控制器 -->
    <servlet>
        <servlet-name>DispatcherServlet</servlet-name>
        <servlet-class>org.springframework.web.servlet.DispatcherServlet
        </servlet-class>
        <!-- 设置SpringMVC的配置文件的位置和名称 -->
        <init-param>
            <param-name>contextConfigLocation</param-name>
            <param-value>classpath:springmvc.xml</param-value>
        </init-param>
        <!-- 启动的时候加载DispatcherServlet,让第一次服务请求响应更快 -->
        <load-on-startup>1</load-on-startup>
    </servlet>
    <servlet-mapping>
        <servlet-name>DispatcherServlet</servlet-name>
        <!-- /指的是排除了jsp剩下都由DispatcherServlet启动,jsp由Tomcat中jspServlet来启动 -->
        <url-pattern>/</url-pattern>
    </servlet-mapping>
    <!-- 设置Spring的配置文件的位置和名称 -->
    <context-param>
        <param-name>contextConfigLocation</param-name>
        <param-value>classpath:spring.xml</param-value>
    </context-param>
    <!-- 配置Spring的监听器 -->
    <listener>
        <!-- 在服务器启动时,加载spring的配置文件 -->
        <listener-class>org.springframework.web.context.ContextLoaderListener
        </listener-class>
    </listener>
</web-app>
(4).创建SpringMVC的配置文件并配置
springmvc.xml拷贝之前的项目配置即可
<?xml version="1.0" encoding="UTF-8"?>
<beans xmlns="http://www.springframework.org/schema/beans"
       xmlns:xsi="http://www.w3.org/2001/XMLSchema-instance"
       xmlns:context="http://www.springframework.org/schema/context"
       xmlns:mvc="http://www.springframework.org/schema/mvc"
       xsi:schemaLocation="http://www.springframework.org/schema/beans http://www.springframework.org/schema/beans/spring-beans.xsd http://www.springframework.org/schema/context https://www.springframework.org/schema/context/spring-context.xsd http://www.springframework.org/schema/mvc https://www.springframework.org/schema/mvc/spring-mvc.xsd">

    <!-- 扫描业务层组件(自己配置package) -->
    <context:component-scan base-package="com.atguigu.controller"></context:component-scan>

    <!-- 配置Thymeleaf视图解析器(直接拷贝即可) -->
    <bean id="viewResolver"
          class="org.thymeleaf.spring5.view.ThymeleafViewResolver">
        <property name="order" value="1"/>
        <property name="characterEncoding" value="UTF-8"/>
        <property name="templateEngine">
            <bean class="org.thymeleaf.spring5.SpringTemplateEngine">
                <property name="templateResolver">
                    <bean class="org.thymeleaf.spring5.templateresolver.SpringResourceTemplateResolver">
                        <!--
                            比如当前index的实际位置在/WEB-INF/templates/index.html(物理视图)
                            去掉视图前缀变为 index.html
                            去掉视图后缀变为 index(逻辑视图)
                        -->
                        <!-- 视图前缀 -->
                        <property name="prefix" value="/WEB-INF/templates/"/>
                        <!-- 视图后缀 -->
                        <property name="suffix" value=".html"/>
                        <property name="templateMode" value="HTML5"/>
                        <property name="characterEncoding" value="UTF-8"/>
                    </bean>
                </property>
            </bean>
        </property>
    </bean>

    <!-- 配置视图控制器 -->
    <mvc:view-controller path="/" view-name="index"></mvc:view-controller>

    <!-- 开启mvc注解驱动 -->
    <mvc:annotation-driven/>

    <!--
        配置默认的servlet处理静态资源
        当前工程的web.xml配置的前端控制器DispatcherServlet的url-pattern是/
        Tomcat的web.xml配置的DefaultServlet的url-pattern也是/
        此时浏览器发送的请求,优先按照工程的DispatcherServlet处理,所以静态资源处理不了
        若配置了<mvc:default-servlet-handler/>,浏览器发送的请求都会被DefaultServlet处理
        如果配置了<mvc:default-servlet-handler/>和<mvc:annotation-driven/>浏览器发送的请求会先被DispatcherServlet处理,无法处理后再交给DefaultServlet处理
    -->
    <mvc:default-servlet-handler/>

</beans>
(5).创建Spring的配置文件并配置
创建spring.xml
配置扫描业务层组件,先自动装配Spring中的Service组件
<?xml version="1.0" encoding="UTF-8"?>
<beans xmlns="http://www.springframework.org/schema/beans"
       xmlns:xsi="http://www.w3.org/2001/XMLSchema-instance"
       xmlns:context="http://www.springframework.org/schema/context"
       xsi:schemaLocation="http://www.springframework.org/schema/beans http://www.springframework.org/schema/beans/spring-beans.xsd http://www.springframework.org/schema/context https://www.springframework.org/schema/context/spring-context.xsd">
    <!-- 扫描业务层组件(自己配置package) -->
    <context:component-scan base-package="com.atguigu"></context:component-scan>
</beans>
(6).创建组件
创建控制层组件创建com.atguigu.controller.HelloController
package com.atguigu.controller;

import com.atguigu.service.HelloService;
import org.springframework.beans.factory.annotation.Autowired;
import org.springframework.stereotype.Controller;

/**
 * @ClassName: HelloController
 * @Description:
 * @Author: wty
 * @Date: 2023/2/3
 */
@Controller
public class HelloController {
    @Autowired
    private HelloService helloService;
}
创建接口com.atguigu.service.HelloService
package com.atguigu.service;

/**
 * @InterfaceName: HelloService
 * @Description:
 * @Author: wty
 * @Date: 2023/2/3
 */

public interface HelloService {
}
创建实现类HelloServiceImpl.java
package com.atguigu.service.impl;

import com.atguigu.service.HelloService;

/**
 * @ClassName: HelloServiceImpl
 * @Description:
 * @Author: wty
 * @Date: 2023/2/3
 */
@Service
public class HelloServiceImpl implements HelloService {
}
(7).创建页面
创建首页index.html
<!DOCTYPE html>
<html lang="en" xmlns:th="http://www.thymeleaf.org">
<head>
    <meta charset="UTF-8">
    <title>首页</title>
</head>
<body>
<h1>index.html</h1>
</body>
</html>
(8).访问测试功能
重新配置Tomcat


启动Tomcat,首页加载成功

这里如果我们把监听器的那段配置注释会怎么样呢?
注释掉web.xml的代码

这里注意2个配置文件的自动装配的范围不一样

重新启动Tomcat,直接报错,没有任何一个匹配的bean完成自动装配

这里我们不禁会问,为啥spring的ioc容器初始化和spring mvc的ioc容器初始化可以整合呢,我们看一下源代码。
FrameworkServlet.class

4.2准备工作
(1).创建Maven Module
新建Module
Name:ssm
GroupId:com.atguigu.ssm
(2).导入依赖
pom.xml中设置打包方式
<packaging>war</packaging>
pom.xml中继续配置
<?xml version="1.0" encoding="UTF-8"?>
<project xmlns="http://maven.apache.org/POM/4.0.0"
         xmlns:xsi="http://www.w3.org/2001/XMLSchema-instance"
         xsi:schemaLocation="http://maven.apache.org/POM/4.0.0 http://maven.apache.org/xsd/maven-4.0.0.xsd">
    <parent>
        <artifactId>SSM</artifactId>
        <groupId>org.example</groupId>
        <version>1.0-SNAPSHOT</version>
    </parent>
    <modelVersion>4.0.0</modelVersion>
    <packaging>war</packaging>

    <groupId>com.atguigu.ssm</groupId>
    <artifactId>ssm</artifactId>

    <properties>
        <maven.compiler.source>8</maven.compiler.source>
        <maven.compiler.target>8</maven.compiler.target>
        <!-- spring的版本 -->
        <spring.version>5.3.1</spring.version>
    </properties>

    <!-- 配置如下 -->
    <dependencies>
        <dependency>
            <groupId>org.springframework</groupId>
            <!-- spring上下文依赖 -->
            <artifactId>spring-context</artifactId>
            <version>${spring.version}</version>
        </dependency>
        <dependency>
            <groupId>org.springframework</groupId>
            <!-- 管理beans -->
            <artifactId>spring-beans</artifactId>
            <version>${spring.version}</version>
        </dependency>
        <!--springmvc-->
        <dependency>
            <groupId>org.springframework</groupId>
            <!-- 和SpringMVC相关的依赖 -->
            <artifactId>spring-web</artifactId>
            <version>${spring.version}</version>
        </dependency>
        <dependency>
            <groupId>org.springframework</groupId>
            <!-- 和SpringMVC相关的依赖 -->
            <artifactId>spring-webmvc</artifactId>
            <version>${spring.version}</version>
        </dependency>
        <dependency>
            <groupId>org.springframework</groupId>
            <!-- 事务管理器在当前依赖下 -->
            <artifactId>spring-jdbc</artifactId>
            <version>${spring.version}</version>
        </dependency>
        <dependency>
            <groupId>org.springframework</groupId>
            <!-- 管理切面 -->
            <artifactId>spring-aspects</artifactId>
            <version>${spring.version}</version>
        </dependency>
        <dependency>
            <groupId>org.springframework</groupId>
            <!-- spring整合Junit -->
            <artifactId>spring-test</artifactId>
            <version>${spring.version}</version>
        </dependency>
        <!-- Mybatis核心 -->
        <dependency>
            <groupId>org.mybatis</groupId>
            <artifactId>mybatis</artifactId>
            <version>3.5.7</version>
        </dependency>
        <!--mybatis和spring的整合包-->
        <dependency>
            <groupId>org.mybatis</groupId>
            <artifactId>mybatis-spring</artifactId>
            <version>2.0.6</version>
        </dependency>
        <!-- 连接池 -->
        <dependency>
            <groupId>com.alibaba</groupId>
            <artifactId>druid</artifactId>
            <version>1.0.9</version>
        </dependency>
        <!-- junit测试 -->
        <dependency>
            <groupId>junit</groupId>
            <artifactId>junit</artifactId>
            <version>4.12</version>
            <scope>test</scope>
        </dependency>
        <!-- MySQL驱动 -->
        <dependency>
            <groupId>mysql</groupId>
            <artifactId>mysql-connector-java</artifactId>
            <version>5.1.20</version>
        </dependency>
        <!-- log4j日志 -->
        <dependency>
            <groupId>log4j</groupId>
            <artifactId>log4j</artifactId>
            <version>1.2.17</version>
        </dependency>
        <!-- 分页插件 -->
        <!-- https://mvnrepository.com/artifact/com.github.pagehelper/pagehelper -->
        <dependency>
            <groupId>com.github.pagehelper</groupId>
            <artifactId>pagehelper</artifactId>
            <version>5.2.0</version>
        </dependency>
        <!-- slf4j的实现,日志 -->
        <dependency>
            <groupId>ch.qos.logback</groupId>
            <artifactId>logback-classic</artifactId>
            <version>1.2.3</version>
        </dependency>
        <!-- ServletAPI -->
        <dependency>
            <groupId>javax.servlet</groupId>
            <artifactId>javax.servlet-api</artifactId>
            <version>3.1.0</version>
            <scope>provided</scope>
        </dependency>
        <dependency>
            <!-- 在SpringMVC中处理json -->
            <groupId>com.fasterxml.jackson.core</groupId>
            <artifactId>jackson-databind</artifactId>
            <version>2.12.1</version>
        </dependency>
        <dependency>
            <!-- 文件上传 -->
            <groupId>commons-fileupload</groupId>
            <artifactId>commons-fileupload</artifactId>
            <version>1.3.1</version>
        </dependency>
        <!-- Spring5和Thymeleaf整合包 -->
        <dependency>
            <groupId>org.thymeleaf</groupId>
            <artifactId>thymeleaf-spring5</artifactId>
            <version>3.0.12.RELEASE</version>
        </dependency>
    </dependencies>

</project>
(3).创建表

建表语句如下:
CREATE TABLE `t_emp` (
  `emp_id` INT(11) NOT NULL AUTO_INCREMENT,
  `emp_name` VARCHAR(20) DEFAULT NULL,
  `age` INT(11) DEFAULT NULL,
  `gender` CHAR(1) DEFAULT NULL,
  `email` VARCHAR(50) DEFAULT NULL,
  PRIMARY KEY (`emp_id`)
) ENGINE=INNODB AUTO_INCREMENT=31 DEFAULT CHARSET=utf8
4.3配置web.xml
配置web.xml
正确路径如下:
F:\javawebwork\SSM\ssm\src\main\webapp\WEB-INF\web.xml

web.xml文件配置如下
<?xml version="1.0" encoding="UTF-8"?>
<web-app xmlns="http://xmlns.jcp.org/xml/ns/javaee"
         xmlns:xsi="http://www.w3.org/2001/XMLSchema-instance"
         xsi:schemaLocation="http://xmlns.jcp.org/xml/ns/javaee http://xmlns.jcp.org/xml/ns/javaee/web-app_4_0.xsd"
         version="4.0">

    <!-- 配置Spring的编码过滤器 -->
    <filter>
        <filter-name>CharacterEncodingFilter</filter-name>
        <filter-class>org.springframework.web.filter.CharacterEncodingFilter</filter-class>
        <init-param>
            <param-name>encoding</param-name>
            <param-value>UTF-8</param-value>
        </init-param>
        <init-param>
            <param-name>forceEncoding</param-name>
            <param-value>true</param-value>
        </init-param>
    </filter>
    <filter-mapping>
        <filter-name>CharacterEncodingFilter</filter-name>
        <url-pattern>/*</url-pattern>
    </filter-mapping>

    <!-- 处理请求方式的过滤器 -->
    <filter>
        <filter-name>HiddenHttpMethodFilter</filter-name>
        <filter-class>org.springframework.web.filter.HiddenHttpMethodFilter</filter-class>
    </filter>
    <filter-mapping>
        <filter-name>HiddenHttpMethodFilter</filter-name>
        <url-pattern>/*</url-pattern>
    </filter-mapping>

    <!-- 前端控制器DispatcherServlet -->
    <servlet>
        <servlet-name>SpringMVC</servlet-name>
        <servlet-class>org.springframework.web.servlet.DispatcherServlet</servlet-class>
        <!-- 设置SpringMVC配置文件自定义位置和名称 -->
        <init-param>
            <param-name>contextConfigLocation</param-name>
            <param-value>classpath:springmvc.xml</param-value>
        </init-param>
        <!-- 将DispatcherServlet的初始化时间提前到服务器启动时 -->
        <load-on-startup>1</load-on-startup>
    </servlet>
    <servlet-mapping>
        <servlet-name>SpringMVC</servlet-name>
        <url-pattern>/</url-pattern>
    </servlet-mapping>

    <!-- Spring监听器 -->
    <listener>
        <listener-class>org.springframework.web.context.ContextLoaderListener</listener-class>
    </listener>

    <!-- 配置Spring配置文件自定义的位置和名称 -->
    <context-param>
        <param-name>contextConfigLocation</param-name>
        <param-value>classpath:spring.xml</param-value>
    </context-param>

</web-app>
4.4创建SpringMVC的配置文件并配置
创建springmvc.xml
<?xml version="1.0" encoding="UTF-8"?>
<beans xmlns="http://www.springframework.org/schema/beans"
       xmlns:xsi="http://www.w3.org/2001/XMLSchema-instance"
       xmlns:context="http://www.springframework.org/schema/context"
       xmlns:mvc="http://www.springframework.org/schema/mvc"
       xsi:schemaLocation="http://www.springframework.org/schema/beans http://www.springframework.org/schema/beans/spring-beans.xsd http://www.springframework.org/schema/context https://www.springframework.org/schema/context/spring-context.xsd http://www.springframework.org/schema/mvc https://www.springframework.org/schema/mvc/spring-mvc.xsd">

    <!-- 扫描控制层组件 -->
    <context:component-scan base-package="com.atguigu.controller"></context:component-scan>

    <!-- 配置Thymeleaf视图解析器(直接拷贝即可) -->
    <bean id="viewResolver"
          class="org.thymeleaf.spring5.view.ThymeleafViewResolver">
        <property name="order" value="1"/>
        <property name="characterEncoding" value="UTF-8"/>
        <property name="templateEngine">
            <bean class="org.thymeleaf.spring5.SpringTemplateEngine">
                <property name="templateResolver">
                    <bean class="org.thymeleaf.spring5.templateresolver.SpringResourceTemplateResolver">
                        <!--
                            比如当前index的实际位置在/WEB-INF/templates/index.html(物理视图)
                            去掉视图前缀变为 index.html
                            去掉视图后缀变为 index(逻辑视图)
                        -->
                        <!-- 视图前缀 -->
                        <property name="prefix" value="/WEB-INF/templates/"/>
                        <!-- 视图后缀 -->
                        <property name="suffix" value=".html"/>
                        <property name="templateMode" value="HTML5"/>
                        <property name="characterEncoding" value="UTF-8"/>
                    </bean>
                </property>
            </bean>
        </property>
    </bean>


    <!-- 静态资源:默认的Servlet -->
    <mvc:default-servlet-handler/>

    <!-- 开启mvc的注解驱动 -->
    <mvc:annotation-driven/>

    <!-- 配置视图控制器 -->
    <mvc:view-controller path="/" view-name="index"></mvc:view-controller>

    <!-- 配置文件上传解析器 -->
    <!--必须通过文件解析器的解析才能将文件转换为MultipartFile对象-->
    <bean id="multipartResolver"
          class="org.springframework.web.multipart.commons.CommonsMultipartResolver">
    </bean>

    <!-- 拦截器 -->
    <mvc:interceptors>
        <mvc:interceptor>
            <!-- 配置需要拦截额请求的请求路径 /**所有请求 -->
            <mvc:mapping path="/**"/>
            <!-- 排除拦截 -->
            <mvc:exclude-mapping path="/abc"/>
            <bean class="com.atguigu.interceptor.FirstInterceptor"></bean>
        </mvc:interceptor>
    </mvc:interceptors>


    <!-- 异常处理解析器 -->
    <bean id="SimpleMappingExceptionResolver"
          class="org.springframework.web.servlet.handler.SimpleMappingExceptionResolver">
        <property name="exceptionMappings">
            <props>
                <!-- error是逻辑视图, key设置要处理的异常,value设置出现该异常时要跳转的页面所对应的逻辑视图 -->
                <prop key="java.lang.ArithmeticException">error</prop>
            </props>
        </property>
        <!-- 设置共享在请求域中的异常信息的属性名 -->
        <property name="exceptionAttribute" value="ex"></property>
    </bean>

</beans>
4.5创建Spring的配置文件并配置
在这里插入代码片
4.6测试功能
(1).创建组件
实体类Employee
com.atguigu.pojo.Employee
package com.atguigu.pojo;

/**
 * @ClassName: Employee
 * @Description:
 * @Author: wty
 * @Date: 2023/2/3
 */

public class Employee {
    private Integer empId;
    private String empName;
    private Integer age;
    private String gender;
    private String email;

    public Employee() {
    }

    public Employee(Integer empId, String empName, Integer age, String gender, String email) {
        this.empId = empId;
        this.empName = empName;
        this.age = age;
        this.gender = gender;
        this.email = email;
    }

    public Integer getEmpId() {
        return empId;
    }

    public void setEmpId(Integer empId) {
        this.empId = empId;
    }

    public String getEmpName() {
        return empName;
    }

    public void setEmpName(String empName) {
        this.empName = empName;
    }

    public Integer getAge() {
        return age;
    }

    public void setAge(Integer age) {
        this.age = age;
    }

    public String getGender() {
        return gender;
    }

    public void setGender(String gender) {
        this.gender = gender;
    }

    public String getEmail() {
        return email;
    }

    public void setEmail(String email) {
        this.email = email;
    }

    @Override
    public String toString() {
        return "Employee{" +
                "empId=" + empId +
                ", empName='" + empName + '\'' +
                ", age=" + age +
                ", gender='" + gender + '\'' +
                ", email='" + email + '\'' +
                '}';
    }
}
创建控制层组件EmployeeController
com.atguigu.controller.EmployeeController
@Controller
public class EmployeeController {
}
创建接口EmployeeService
public interface EmployeeService {
}
创建实现类EmployeeServiceImpl
@Service
public class EmployeeServiceImpl implements EmployeeService {
}
创建ExceptionController.java
// 将当前类标识为异常处理的组件
@ControllerAdvice
public class ExceptionController {
    // 设置要处理的异常信息
    @ExceptionHandler(ArithmeticException.class)
    // ex表示控制器方法出现的异常
    public ModelAndView handleException(Throwable ex) {
        ModelAndView mav = new ModelAndView();
        //向请求域共享数据
        mav.addObject("ex", ex);
        //设置视图,实现页面跳转
        mav.setViewName("error");
        return mav;
    }
}
(2).创建页面
创建首页index.html
<!DOCTYPE html>
<html lang="en" xmlns:th="http://www.thymeleaf.org">
<head>
    <meta charset="UTF-8">
    <title>首页</title>
</head>
<body>
<h1>index.html</h1>
</body>
</html>
创建错误页面error.html
<!DOCTYPE html>
<html lang="en" xmlns:th="http://www.thymeleaf.org">
<head>
    <meta charset="UTF-8">
    <title>错误</title>
</head>
<body>
<h1>error.html</h1>
<p th:text="${ex}"></p>
</body>
</html>
(3).访问测试分页功能
部署Tomcat

配置重启设置

启动Tomcat看一下

4.7搭建MyBatis环境
(1).创建属性文件jdbc.properties
jdbc.driver=com.mysql.jdbc.Driver
jdbc.url=jdbc:mysql://localhost:3306/ssm
jdbc.username=root
jdbc.password=hsp
(2).创建MyBatis的核心配置文件mybatis-config.xml
用模板创建即可

(3).创建Mapper接口和映射文件
com.atguigu.mapper.EmployeeMapper
在这里插入代码片
创建映射文件ssm/src/main/resources/com/atguigu/mapper/EmployeeMapper.xml
<?xml version="1.0" encoding="UTF-8" ?>
<!DOCTYPE mapper
        PUBLIC "-//mybatis.org//DTD Mapper 3.0//EN"
        "http://mybatis.org/dtd/mybatis-3-mapper.dtd">
<mapper namespace="com.atguigu.mapper.EmployeeMapper">
    <!--
        mapper接口和映射文件要保证两个一致
        1.mapper接口的权和类名和映射文件的namespace一致
        2.mapper接口中的方法的方法名要和映射文件中的sql的id保持一致
     -->

</mapper>
(4).创建日志文件log4j.xml

<?xml version="1.0" encoding="UTF-8" ?>
<!DOCTYPE log4j:configuration SYSTEM "log4j.dtd">
<log4j:configuration xmlns:log4j="http://jakarta.apache.org/log4j/">
    <appender name="STDOUT" class="org.apache.log4j.ConsoleAppender">
        <param name="Encoding" value="UTF-8"/>
        <layout class="org.apache.log4j.PatternLayout">
            <param name="ConversionPattern" value="%-5p %d{MM-dd HH:mm:ss,SSS}%m (%F:%L) \n"/>
        </layout>
    </appender>
    <logger name="java.sql">
        <level value="debug"/>
    </logger>
    <logger name="org.apache.ibatis">
        <level value="info"/>
    </logger>
    <root>
        <level value="debug"/>
        <appender-ref ref="STDOUT"/>
    </root>
</log4j:configuration>
4.8测试整合Spring整合MyBatis
修改spring.xml
增加代码
    <!-- 当前Spring整合MyBatis -->
    <!-- 配置sqlSessionFactoryBean,可以直接在spring的IOC中获取sqlSessionFactory对象 -->
    <bean class="org.mybatis.spring.SqlSessionFactoryBean"></bean>
看一下SqlSessionFactoryBean的源码
public class SqlSessionFactoryBean implements FactoryBean<SqlSessionFactory>, InitializingBean, ApplicationListener<ApplicationEvent> {}
其父类是
public interface FactoryBean<T> {}

修改EmployeeServiceImpl.java
这里可以看到,可以从业务层直接调用SqlSessionFactory进行装配,当然这里了解一下即可,我们最终的实现方案比这个简单。
@Service
public class EmployeeServiceImpl implements EmployeeService {
    @Autowired
    private SqlSessionFactory sqlSessionFactory;
}
删除这段代码即可

继续修改spring.xml,加上数据源的引用
    <!-- 当前Spring整合MyBatis -->
    <!-- 配置sqlSessionFactoryBean,可以直接在spring的IOC中获取sqlSessionFactory对象 -->
    <bean class="org.mybatis.spring.SqlSessionFactoryBean">
        <!-- 设置mybatis的核心配置文件的路径 -->
        <property name="configLocation" value="classpath:mybatis-config.xml"></property>
        <!-- 设置数据源 -->
        <property name="dataSource" ref="dataSource"></property>
    </bean>
mybatis-config.xml中关于数据源的配置就可以删除了
<?xml version="1.0" encoding="UTF-8" ?>
<!DOCTYPE configuration
        PUBLIC "-//mybatis.org//DTD Config 3.0//EN"
        "http://mybatis.org/dtd/mybatis-3-config.dtd">
<configuration>

	<!-- 将下划线映射成驼峰 -->
    <settings>
        <setting name="mapUnderscoreToCamelCase" value="true"/>
    </settings>

    <!-- 给全类名设置别名,为某个具体的类型设置一个别名
         在MyBatis的范围中,可以使用别名
         type:设置需要起别名的类型:全类名
         alias:别名

     -->
    <typeAliases>
        <!-- 别名方式1 -->
        <!-- <typeAlias type="" alias="User"></typeAlias>-->
        <!-- 别名方式2:默认是类名不需要区分大小写 -->
        <!--<typeAlias type=""></typeAlias>-->
        <!-- 别名方式3:设置包名,包下的类都是别名,且不区分大小写 -->
        <package name=""/>
    </typeAliases>

    <!-- 引入MyBatis的映射文件 一张表对应一个映射文件的标签 -->
    <mappers>
        <!-- 方式1: -->
        <!--<mapper resource=""/>-->
        <!-- 方式2:以包的形式引入映射文件,但是需要满足以下2点
                   1.mapper接口和映射文件所在的包必须一致
                   2.mapper接口的名字和映射文件的名字必须一致
         -->
        <package name="com.atguigu.mapper"/>
    </mappers>
</configuration>
继续配置spring.xml
配置类型别名的包
        <!-- 设置类型别名所对应的包 -->
        <property name="typeAliasesPackage" value="com.atguigu.pojo"></property>
那么mybatis-config.xml对别名的配置可以删除了

修改spring.xml
这个设置时,映射文件对应的包和mapper接口对应的包不一致的时候才配置。

配置如下:
<!-- 映射文件的路径 -->
        <property name="mapperLocations" value="classpath:mappers/*.xml"></property>
删除mybatis-config.xml的配置

当然这里只是演示一下不一样的情况,spring.xml还是注释掉

在mybatis-config.xml中配置分页插件
 <!-- 配置分页插件 -->
    <plugins>
        <plugin interceptor="com.github.pagehelper.PageInterceptor"></plugin>
    </plugins>
当然在spring.xml也可以配置(这里看一下如何配置即可,注释掉)
    <!-- 设置插件 -->
        <property name="plugins">
            <array>
                <bean class="com.github.pagehelper.PageInterceptor"></bean>
            </array>
        </property>
注释掉

现在mybatis-config.xml只剩下
<?xml version="1.0" encoding="UTF-8" ?>
<!DOCTYPE configuration
        PUBLIC "-//mybatis.org//DTD Config 3.0//EN"
        "http://mybatis.org/dtd/mybatis-3-config.dtd">
<configuration>
    <!-- MyBatis核心配置文件中的标签必须要按照指定顺序配置:
        核心配置文件中configuration标签下的子标签要按照一定的顺序书写
      ● properties => settings => typeAliases => typeHandlers => objectFactory =>
        objectWrapperFactory => reflectorFactory => plugins => environments =>
        databaseIdProvider => mappers
     -->

    <!-- 将下划线映射成驼峰 -->
    <settings>
        <setting name="mapUnderscoreToCamelCase" value="true"/>
    </settings>

    <!-- 配置分页插件 -->
    <plugins>
        <plugin interceptor="com.github.pagehelper.PageInterceptor"></plugin>
    </plugins>
</configuration>
继续配置spring.xml
把bean配置的所有Mapper接口,通过SqlSessionFactory创建的sqlSession创建代理实现类对象,并将这些对象交给IOC容器管理。
    <!-- Mapper扫描配置(核心) -->
    <bean class="org.mybatis.spring.mapper.MapperScannerConfigurer">
        <property name="basePackage" value="com.atguigu.mapper"></property>
    </bean>
4.8测试整合配置事务
在spring.xml中配置
    <!-- 配置事务管理器 -->
    <bean id="transactionManager" class="org.springframework.jdbc.datasource.DataSourceTransactionManager">
        <property name="dataSource" ref="dataSource"></property>
    </bean>

    <!-- 开启事务的注解驱动 -->
    <tx:annotation-driven transaction-manager="transactionManager"/>
开启事务注解驱动,要注意选择tx结尾的。


修改EmployeeServiceImpl.java
@Service
@Transactional
public class EmployeeServiceImpl implements EmployeeService {
}
拷贝static

4.9测试实现功能
(1).查询所有员工信息
修改com.atguigu.controller
@Controller
public class EmployeeController {
    @Autowired
    private EmployeeService employeeService;

    @RequestMapping(value = "/employee", method = RequestMethod.GET)
    public String getAllEmployee(ModelMap map) {
        // 查询所有的员工信息
        List<Employee> list = employeeService.getAllEmployee();
        // 在请求域中共享
        map.addAttribute("list", list);
        // 跳转界面
        return "employee_list";
    }
}
修改EmployeeService.java
public interface EmployeeService {
    /**
     * @param
     * @return java.util.List<com.atguigu.pojo.Employee>
     * @description //查询所有员工信息
     * @date 2023/2/3 13:32
     * @author wty
     **/
    List<Employee> getAllEmployee();
}
修改EmployeeServiceImpl.java
@Service
@Transactional
public class EmployeeServiceImpl implements EmployeeService {
    @Autowired
    private EmployeeMapper employeeMapper;

    @Override
    public List<Employee> getAllEmployee() {
        return employeeMapper.getAllEmployee();
    }
}
修改EmployeeMapper.java
public interface EmployeeMapper {
    /**
     * @param
     * @return java.util.List<com.atguigu.pojo.Employee>
     * @description //查询所有员工
     * @date 2023/2/3 13:35
     * @author wty
     **/
    List<Employee> getAllEmployee();
}
修改EmployeeMapper.xml
<?xml version="1.0" encoding="UTF-8" ?>
<!DOCTYPE mapper
        PUBLIC "-//mybatis.org//DTD Mapper 3.0//EN"
        "http://mybatis.org/dtd/mybatis-3-mapper.dtd">
<mapper namespace="com.atguigu.mapper.EmployeeMapper">
    <!--
        mapper接口和映射文件要保证两个一致
        1.mapper接口的权和类名和映射文件的namespace一致
        2.mapper接口中的方法的方法名要和映射文件中的sql的id保持一致
     -->

    <!-- List<Employee> getAllEmployee(); -->
    <select id="getAllEmployee" resultType="Employee">
        select *
        from ssm.`t_emp`
    </select>
</mapper>
创建employee_list.html
<!DOCTYPE html>
<html lang="en" xmlns:th="http://www.thymeleaf.org">
<head>
    <meta charset="UTF-8">
    <title>员工列表</title>
    <link rel="stylesheet" th:href="@{/static/css/index_work.css}">
</head>
<body>
<div id="app">
    <table>
        <tr>
            <th colspan="6">员工列表</th>
        </tr>
        <tr>
            <th>流水号</th>
            <th>员工姓名</th>
            <th>年龄</th>
            <th>性别</th>
            <th>邮箱</th>
            <th>操作</th>
        </tr>
        <tr th:each="employee,status:${list}">
            <td th:text="${status.count}"></td>
            <td th:text="${employee.empName}"></td>
            <td th:text="${employee.age}"></td>
            <td th:text="${employee.gender}"></td>
            <td th:text="${employee.email}"></td>
            <td>
                <a href="">修改</a>
                <a href="">删除</a>
            </td>
        </tr>
    </table>
</div>

</body>
</html>
看一下target中没有加载static

执行后点击package

修改index.html
<!DOCTYPE html>
<html lang="en" xmlns:th="http://www.thymeleaf.org">
<head>
    <meta charset="UTF-8">
    <title>首页</title>
</head>
<body>
<h1>index.html</h1>
<a th:href="@{/employee}">查询员工信息</a>
</body>
</html>
之后部署Tomcat

点击查询员工信息

(2).分页
修改主页index.html,增加分页的入口
<a th:href="@{/employee/page/1}">查询员工信息(分页)</a>
修改EmployeeController.java
    @RequestMapping(value = "/employee/page/{pageNum}", method = RequestMethod.GET)
    public String getEmployeePage(Map<String, Object> map, @PathVariable("pageNum") Integer pageNum) {
        // 获取员工的分页信息
        PageInfo<Employee> pageInfo = employeeService.getEmployeePage(pageNum);
        // 在请求域中共享
        map.put("pageInfo", pageInfo);
        // 跳转界面
        return "employee_list_page";
    }
修改EmployeeService.java
 /**
     * @param
     * @return com.github.pagehelper.PageInfo<com.atguigu.pojo.Employee>
     * @description //查询所有员工信息(分页)
     * @param: pageNum
     * @date 2023/2/3 14:21
     * @author wty
     **/
    PageInfo<Employee> getEmployeePage(Integer pageNum);
修改EmployeeServiceImpl.java
 @Override
    public PageInfo<Employee> getEmployeePage(Integer pageNum) {
        // 开启分页功能,2个参数是当前页页码pageNum以及每页的条数6
        Page<Object> page = PageHelper.startPage(pageNum, 6);
        // 查询所有的员工信息
        List<Employee> list = employeeMapper.getAllEmployee();
        // list后开启分页功能,另一个参数比如设置5,导航分页是2,3,4,5,6
        PageInfo<Employee> pageInfo = new PageInfo<>(list, 5);

        return pageInfo;
    }
修改employee_list_page.html
<!DOCTYPE html>
<html lang="en" xmlns:th="http://www.thymeleaf.org">
<head>
    <meta charset="UTF-8">
    <title>员工列表(分页)</title>
    <link rel="stylesheet" th:href="@{/static/css/index_work.css}">
</head>
<body>
<div id="app">
    <table>
        <tr>
            <th colspan="6">员工列表(分页)</th>
        </tr>
        <tr>
            <th>流水号</th>
            <th>员工姓名</th>
            <th>年龄</th>
            <th>性别</th>
            <th>邮箱</th>
            <th>操作</th>
        </tr>
        <tr th:each="employee,status:${pageInfo.list}">
            <td th:text="${status.count}"></td>
            <td th:text="${employee.empName}"></td>
            <td th:text="${employee.age}"></td>
            <t
            d th:text="${employee.gender}"></td>
            <td th:text="${employee.email}"></td>
            <td>
                <a href="">修改</a>
                <a href="">删除</a>
            </td>
        </tr>
    </table>
</div>

</body>
</html>
重新部署Tomcat

点击超链接后跳转

更改地址,可以实现页面的跳转
http://localhost:8080/ssm/employee/page/2
这种方式明显是不可取的,我们不能让用户手动输入。
那我们需要修改employee_list_page.html
<!DOCTYPE html>
<html lang="en" xmlns:th="http://www.thymeleaf.org">
<head>
    <meta charset="UTF-8">
    <title>员工列表(分页)</title>
    <link rel="stylesheet" th:href="@{/static/css/index_work.css}">
</head>
<body>
<div id="app">
    <table>
        <tr>
            <th colspan="6">员工列表(分页)</th>
        </tr>
        <tr>
            <th>流水号</th>
            <th>员工姓名</th>
            <th>年龄</th>
            <th>性别</th>
            <th>邮箱</th>
            <th>操作</th>
        </tr>
        <tr th:each="employee,status:${pageInfo.list}">
            <td th:text="${status.count}"></td>
            <td th:text="${employee.empName}"></td>
            <td th:text="${employee.age}"></td>
            <td th:text="${employee.gender}"></td>
            <td th:text="${employee.email}"></td>
            <td>
                <a href="">修改</a>
                <a href="">删除</a>
            </td>
        </tr>
    </table>
</div>
<div style="text-align: center">
    <a th:if="${pageInfo.hasPreviousPage}" th:href="@{/employee/page/1}">首页</a>
    <a th:if="${pageInfo.hasPreviousPage}" th:href="@{'/employee/page/'+${pageInfo.prePage}}">上一页</a>
    <a th:if="${pageInfo.hasNextPage}" th:href="@{'/employee/page/'+${pageInfo.nextPage}}">下一页</a>
    <a th:if="${pageInfo.hasNextPage}" th:href="@{'/employee/page/'+${pageInfo.pages}}">尾页</a>
</div>

</body>
</html>
重新部署Tomcat,看第二页即可

设置导航分页employee_list_page.html
    <span th:each="pages:${pageInfo.navigatepageNums}">
        <a th:href="@{'/employee/page/'+${pages}}" th:text="${pages}"></a>
    </span>
重新部署

为当前选定页改变样式,修改employee_list_page.html
    <span th:each="pages:${pageInfo.navigatepageNums}">
        <a th:if="${pageInfo.pageNum} == ${pages}" th:href="@{'/employee/page/'+${pages}}" th:text="'['+${pages}+']'"
           style="color: red"></a>
        <a th:if="${pageInfo.pageNum} != ${pages}" th:href="@{'/employee/page/'+${pages}}" th:text="${pages}"></a>
    </span>
重新部署Tomcat

后续完善添加和删除还有修改功能
(3).添加
员工列表中添加超链接跳转
employee_list_page.html
<th>操作(<a th:href="@{/to/add}">+</a>)</th>
修改springmvc.xml增加跳转添加的页面
<mvc:view-controller path="/to/add" view-name="employee_add"></mvc:view-controller>
新增添加员工的页面employee_add.html
<!DOCTYPE html>
<html lang="en" xmlns:th="http://www.thymeleaf.org">
<head>
    <meta charset="UTF-8">
    <title>添加员工</title>
    <link rel="stylesheet" th:href="@{/static/css/index_work.css}">
</head>
<body>
<form th:action="@{/employee}" method="post">
    <table>
        <tr>
            <th colspan="4">添加员工</th>
        </tr>

        <tr>
            <td>员工姓名:</td>
            <td>
                <input type="text" name="empName">
            </td>
        </tr>

        <tr>
            <td>年龄:</td>
            <td>
                <input type="text" name="age">
            </td>
        </tr>

        <tr>
            <td>性别:</td>
            <td>
                <input type="radio" value="1" name="gender">男
                <input type="radio" value="0" name="gender">女
            </td>
        </tr>

        <tr>
            <td>邮箱:</td>
            <td>
                <input type="text" name="email">
            </td>
        </tr>
        <tr>
            <td colspan="4">
                <input type="submit" value="添加">
            </td>
        </tr>
    </table>
</form>

</body>
</html>
修改EmployeeController.java
添加方法
    @RequestMapping(value = "/employee", method = RequestMethod.POST)
    public String insertEmployee(Employee employee) {
        // 保存员工的信息
        employeeService.insertEmployee(employee);
        return "redirect:/employee/page/1";
    }
修改EmployeeService.java,增加方法
    /**
     * @param
     * @return int
     * @description //添加员工信息
     * @param: employee
     * @date 2023/2/3 16:02
     * @author wty
     **/
    int insertEmployee(Employee employee);
修改EmployeeServiceImpl.java增加方法
    @Override
    public int insertEmployee(Employee employee) {
        return employeeMapper.insertEmployee(employee);
    }
修改EmployeeMapper.java,增加方法
  /**
     * @param
     * @return int
     * @description //保存员工信息
     * @param: employee
     * @date 2023/2/3 16:01
     * @author wty
     **/
    int insertEmployee(Employee employee);
修改EmployeeMapper.xml
    <!-- int insertEmployee(Employee employee); -->
    <insert id="insertEmployee">
        insert into t_emp
        values (null, #{empName}, #{age}, #{gender}, #{email})
    </insert>
最后部署Tomcat

单击+的超链接跳转

跳转后输入信息

最后点击添加,跳转后,发现添加成功

(4).修改
修改employee_list_page.html
修改增加超链接
<a th:href="@{'/employee/'+${employee.empId}}">修改</a>
修改EmployeeController.java增加跳转页面
@RequestMapping(value = "/employee/{empId}", method = RequestMethod.GET)
    public String toUpdateEmployee(ModelMap map, @PathVariable("empId") Integer empId) {
        // 获取员工的分页信息
        Employee employee = employeeService.getEmployeeByEmpId(empId);
        // 在请求域中共享
        map.put("employeeUpdate", employee);
        // 跳转界面
        return "employee_update";
    }
新增界面employee_update.html
<!DOCTYPE html>
<html lang="en" xmlns:th="http://www.thymeleaf.org">
<head>
    <meta charset="UTF-8">
    <title>添加员工</title>
    <link rel="stylesheet" th:href="@{/static/css/index_work.css}">
</head>
<body>
<div style="text-align: right">
    <a th:href="@{/employee/page/1}">返回列表</a>
</div>

<form th:action="@{/employee}" method="post">
    <input type="hidden" name="_method" value="put">
    <input type="hidden" name="empId" th:value="${employeeUpdate.empId}">
    <table>
        <tr>
            <th colspan="4">添加员工</th>
        </tr>

        <tr>
            <td>员工姓名:</td>
            <td>
                <input type="text" name="empName" th:value="${employeeUpdate.empName}">
            </td>
        </tr>

        <tr>
            <td>年龄:</td>
            <td>
                <input type="text" name="age" th:value="${employeeUpdate.age}">
            </td>
        </tr>

        <tr>
            <td>性别:</td>
            <td>
                <input type="radio" value="1" name="gender" th:field="${employeeUpdate.gender}">男
                <input type="radio" value="0" name="gender" th:field="${employeeUpdate.gender}">女
            </td>
        </tr>

        <tr>
            <td>邮箱:</td>
            <td>
                <input type="text" name="email" th:value="${employeeUpdate.email}">
            </td>
        </tr>
        <tr>
            <td colspan="4">
                <input type="submit" value="添加">
            </td>
        </tr>
    </table>
</form>

</body>
</html>
修改EmployeeController.java增加修改提交
 @RequestMapping(value = "/employee", method = RequestMethod.PUT)
    public String updateEmployee(Employee employee) {
        // 修改员工信息
        employeeService.updateEmployee(employee);
        // 跳转界面
        return "redirect:/employee/page/1";
    }
部署Tomcat

点击之后跳转

修改之后

(5).删除
修改employee_list_page.html
增加删除的超链接
<a @click="deleteEmployee" th:href="@{'/employee/'+${employee.empId}}">删除</a>
增加form表单
employee_list_page.html
<!-- 作用:通过超链接控制表单的提交,将post请求转换为delete请求 -->
    <form method="post" id="delete_form">
        <!-- HiddenHttpMethodFilter要求:必须传输_method请求参数,并且值为最终的请求方式 -->
        <input type="hidden" name="_method" value="delete">
    </form>
引入vue
<script type="text/javascript" th:src="@{/static/js/vue.js}"></script>
<script type="text/javascript">
    var vue = new Vue({
        el: "#app",
        methods: {
            deleteEmployee() {
                if (window.confirm("是否需要删除该员工信息?")) {
                    // 获取表单
                    var form = document.getElementById("delete_form");

                    // 将超链接的href属性赋值给form表单的action属性
                    form.action = event.target.href;

                    // 表单提交
                    form.submit();

                    // 组织超链接的默认行为
                    event.preventDefault();
                } else {
                    console.log("退出!");
                    // 增加事件阻断
                    event.preventDefault();
                    return false;
                }
            }
        }
    });
    <!-- deleteEmployee -->
</script>
修改EmployeeController.java
 @RequestMapping(value = "/employee/{empId}", method = RequestMethod.DELETE)
    public String deleteEmployee(@PathVariable("empId") Integer empId) {
        // 修改员工信息
        employeeService.deleteEmployeeByEmpId(empId);
        // 跳转界面
        return "redirect:/employee/page/1";
    }
修改EmployeeService.java
 /**
     * @param
     * @return int
     * @description //根据员工ID删除员工信息
     * @param: empId
     * @date 2023/2/3 17:32
     * @author wty
     **/
    int deleteEmployeeByEmpId(Integer empId);
修改EmployeeServiceImpl.java
@Override
    public int deleteEmployeeByEmpId(Integer empId) {
        return employeeMapper.deleteEmployeeByEmpId(empId);
    }
修改EmployeeMapper.java
    /**
     * @param
     * @return int
     * @description //根据员工ID删除员工信息
     * @param: empId
     * @date 2023/2/3 17:33
     * @author wty
     **/
    int deleteEmployeeByEmpId(Integer empId);
修改EmployeeMapper.xml
    <!-- int deleteEmployeeByEmpId(Integer empId); -->
    <delete id="deleteEmployeeByEmpId">
        delete
        from t_emp
        where emp_id = #{empId}
    </delete>
重新部署Tomcat

点击删除后,弹出对话框

点击确定后,删除

5.项目结构
5.1项目界面
首页

员工列表

添加员工

修改员工

5.2项目结构
至此所有功能写完,这里附上项目结构

前台界面如下
5.2配置文件
jdbc.properties
jdbc.driver=com.mysql.jdbc.Driver
jdbc.url=jdbc:mysql://localhost:3306/ssm
jdbc.username=root
jdbc.password=hsp
log4j.xml
<?xml version="1.0" encoding="UTF-8" ?>
<!DOCTYPE log4j:configuration SYSTEM "log4j.dtd">
<log4j:configuration xmlns:log4j="http://jakarta.apache.org/log4j/">
    <appender name="STDOUT" class="org.apache.log4j.ConsoleAppender">
        <param name="Encoding" value="UTF-8"/>
        <layout class="org.apache.log4j.PatternLayout">
            <param name="ConversionPattern" value="%-5p %d{MM-dd HH:mm:ss,SSS}%m (%F:%L) \n"/>
        </layout>
    </appender>
    <logger name="java.sql">
        <level value="debug"/>
    </logger>
    <logger name="org.apache.ibatis">
        <level value="info"/>
    </logger>
    <root>
        <level value="debug"/>
        <appender-ref ref="STDOUT"/>
    </root>
</log4j:configuration>
mybatis-config.xml
<?xml version="1.0" encoding="UTF-8" ?>
<!DOCTYPE configuration
        PUBLIC "-//mybatis.org//DTD Config 3.0//EN"
        "http://mybatis.org/dtd/mybatis-3-config.dtd">
<configuration>
    <!-- MyBatis核心配置文件中的标签必须要按照指定顺序配置:
        核心配置文件中configuration标签下的子标签要按照一定的顺序书写
      ● properties => settings => typeAliases => typeHandlers => objectFactory =>
        objectWrapperFactory => reflectorFactory => plugins => environments =>
        databaseIdProvider => mappers
     -->

    <!-- 将下划线映射成驼峰 -->
    <settings>
        <setting name="mapUnderscoreToCamelCase" value="true"/>
    </settings>

    <!-- 配置分页插件 -->
    <plugins>
        <plugin interceptor="com.github.pagehelper.PageInterceptor"></plugin>
    </plugins>
</configuration>
spring.xml
<?xml version="1.0" encoding="UTF-8"?>
<beans xmlns="http://www.springframework.org/schema/beans"
       xmlns:xsi="http://www.w3.org/2001/XMLSchema-instance"
       xmlns:context="http://www.springframework.org/schema/context" xmlns:tx="http://www.springframework.org/schema/tx"
       xsi:schemaLocation="http://www.springframework.org/schema/beans http://www.springframework.org/schema/beans/spring-beans.xsd http://www.springframework.org/schema/context https://www.springframework.org/schema/context/spring-context.xsd http://www.springframework.org/schema/tx http://www.springframework.org/schema/tx/spring-tx.xsd">

    <!-- 配置事务管理器 -->
    <bean id="transactionManager" class="org.springframework.jdbc.datasource.DataSourceTransactionManager">
        <property name="dataSource" ref="dataSource"></property>
    </bean>

    <!--
        开启事务的注解驱动
        将使用注解@Transactional标识的方法或类中所有的方法进行事务管理
     -->
    <tx:annotation-driven transaction-manager="transactionManager"/>

    <!-- 扫描组件除了控制层 -->
    <context:component-scan base-package="com.atguigu">
        <!-- 排除控制层组件 -->
        <context:exclude-filter type="annotation" expression="org.springframework.stereotype.Controller"/>
    </context:component-scan>

    <context:property-placeholder location="classpath:jdbc.properties"></context:property-placeholder>
    <!-- 数据源 -->
    <bean id="dataSource" class="com.alibaba.druid.pool.DruidDataSource">
        <property name="driverClassName" value="${jdbc.driver}"></property>
        <property name="url" value="${jdbc.url}"></property>
        <property name="username" value="${jdbc.username}"></property>
        <property name="password" value="${jdbc.password}"></property>
    </bean>

    <!-- 当前Spring整合MyBatis -->
    <!-- 配置sqlSessionFactoryBean,可以直接在spring的IOC中获取sqlSessionFactory对象 -->
    <bean class="org.mybatis.spring.SqlSessionFactoryBean">
        <!-- 设置mybatis的核心配置文件的路径 -->
        <property name="configLocation" value="classpath:mybatis-config.xml"></property>
        <!-- 设置数据源 -->
        <property name="dataSource" ref="dataSource"></property>
        <!-- 设置类型别名所对应的包 -->
        <property name="typeAliasesPackage" value="com.atguigu.pojo"></property>
        <!-- 设置插件 -->
        <!-- <property name="plugins">
            <array>
                <bean class="com.github.pagehelper.PageInterceptor"></bean>
            </array>
        </property>-->
        <!-- 设置全局配置:驼峰 -->
        <!-- <property name="mapUnderscoreToCamelCase" value="true"> -->
        <!-- 映射文件的路径 -->
        <!--<property name="mapperLocations" value="classpath:mappers/*.xml"></property>-->
    </bean>

    <!-- Mapper扫描配置(核心) -->
    <bean class="org.mybatis.spring.mapper.MapperScannerConfigurer">
        <property name="basePackage" value="com.atguigu.mapper"></property>
    </bean>
</beans>
springmvc.xml
<?xml version="1.0" encoding="UTF-8"?>
<beans xmlns="http://www.springframework.org/schema/beans"
       xmlns:xsi="http://www.w3.org/2001/XMLSchema-instance"
       xmlns:context="http://www.springframework.org/schema/context"
       xmlns:mvc="http://www.springframework.org/schema/mvc"
       xsi:schemaLocation="http://www.springframework.org/schema/beans http://www.springframework.org/schema/beans/spring-beans.xsd http://www.springframework.org/schema/context https://www.springframework.org/schema/context/spring-context.xsd http://www.springframework.org/schema/mvc https://www.springframework.org/schema/mvc/spring-mvc.xsd">

    <!-- 扫描控制层组件 -->
    <context:component-scan base-package="com.atguigu.controller"></context:component-scan>

    <!-- 配置Thymeleaf视图解析器(直接拷贝即可) -->
    <bean id="viewResolver"
          class="org.thymeleaf.spring5.view.ThymeleafViewResolver">
        <property name="order" value="1"/>
        <property name="characterEncoding" value="UTF-8"/>
        <property name="templateEngine">
            <bean class="org.thymeleaf.spring5.SpringTemplateEngine">
                <property name="templateResolver">
                    <bean class="org.thymeleaf.spring5.templateresolver.SpringResourceTemplateResolver">
                        <!--
                            比如当前index的实际位置在/WEB-INF/templates/index.html(物理视图)
                            去掉视图前缀变为 index.html
                            去掉视图后缀变为 index(逻辑视图)
                        -->
                        <!-- 视图前缀 -->
                        <property name="prefix" value="/WEB-INF/templates/"/>
                        <!-- 视图后缀 -->
                        <property name="suffix" value=".html"/>
                        <property name="templateMode" value="HTML5"/>
                        <property name="characterEncoding" value="UTF-8"/>
                    </bean>
                </property>
            </bean>
        </property>
    </bean>


    <!-- 静态资源:默认的Servlet -->
    <mvc:default-servlet-handler/>

    <!-- 开启mvc的注解驱动 -->
    <mvc:annotation-driven/>

    <!-- 配置视图控制器 -->
    <mvc:view-controller path="/" view-name="index"></mvc:view-controller>
    <mvc:view-controller path="/to/add" view-name="employee_add"></mvc:view-controller>

    <!-- 配置文件上传解析器 -->
    <!--必须通过文件解析器的解析才能将文件转换为MultipartFile对象-->
    <bean id="multipartResolver"
          class="org.springframework.web.multipart.commons.CommonsMultipartResolver">
    </bean>

    <!-- 拦截器 -->
    <mvc:interceptors>
        <mvc:interceptor>
            <!-- 配置需要拦截额请求的请求路径 /**所有请求 -->
            <mvc:mapping path="/**"/>
            <!-- 排除拦截 -->
            <mvc:exclude-mapping path="/abc"/>
            <bean class="com.atguigu.interceptor.FirstInterceptor"></bean>
        </mvc:interceptor>
    </mvc:interceptors>


    <!-- 异常处理解析器 -->
    <bean id="SimpleMappingExceptionResolver"
          class="org.springframework.web.servlet.handler.SimpleMappingExceptionResolver">
        <property name="exceptionMappings">
            <props>
                <!-- error是逻辑视图, key设置要处理的异常,value设置出现该异常时要跳转的页面所对应的逻辑视图 -->
                <prop key="java.lang.ArithmeticException">error</prop>
            </props>
        </property>
        <!-- 设置共享在请求域中的异常信息的属性名 -->
        <property name="exceptionAttribute" value="ex"></property>
    </bean>

</beans>
5.3前台界面
index.html首页
<!DOCTYPE html>
<html lang="en" xmlns:th="http://www.thymeleaf.org">
<head>
    <meta charset="UTF-8">
    <title>首页</title>
</head>
<body>
<h1>index.html</h1>
<a th:href="@{/employee}">查询员工信息</a><br/>
<a th:href="@{/employee/page/1}">查询员工信息(分页)</a>
</body>
</html>
employee_add.html添加员工
<!DOCTYPE html>
<html lang="en" xmlns:th="http://www.thymeleaf.org">
<head>
    <meta charset="UTF-8">
    <title>添加员工</title>
    <link rel="stylesheet" th:href="@{/static/css/index_work.css}">
</head>
<body>
<div style="text-align: right">
    <a th:href="@{/employee/page/1}">返回列表</a>
</div>
<form th:action="@{/employee}" method="post">
    <table>
        <tr>
            <th colspan="4">添加员工</th>
        </tr>

        <tr>
            <td>员工姓名:</td>
            <td>
                <input type="text" name="empName">
            </td>
        </tr>

        <tr>
            <td>年龄:</td>
            <td>
                <input type="text" name="age">
            </td>
        </tr>

        <tr>
            <td>性别:</td>
            <td>
                <input type="radio" value="1" name="gender">男
                <input type="radio" value="0" name="gender">女
            </td>
        </tr>

        <tr>
            <td>邮箱:</td>
            <td>
                <input type="text" name="email">
            </td>
        </tr>
        <tr>
            <td colspan="4">
                <input type="submit" value="添加">
            </td>
        </tr>
    </table>
</form>

</body>
</html>
employee_list.html员工列表(无分页)
<!DOCTYPE html>
<html lang="en" xmlns:th="http://www.thymeleaf.org">
<head>
    <meta charset="UTF-8">
    <title>员工列表</title>
    <link rel="stylesheet" th:href="@{/static/css/index_work.css}">
</head>
<body>
<div id="app">
    <table>
        <tr>
            <th colspan="6">员工列表</th>
        </tr>
        <tr>
            <th>流水号</th>
            <th>员工姓名</th>
            <th>年龄</th>
            <th>性别</th>
            <th>邮箱</th>
            <th>操作</th>
        </tr>
        <tr th:each="employee,status:${list}">
            <td th:text="${status.count}"></td>
            <td th:text="${employee.empName}"></td>
            <td th:text="${employee.age}"></td>
            <td th:text="${employee.gender}"></td>
            <td th:text="${employee.email}"></td>
            <td>
                <a href="">修改</a>
                <a href="">删除</a>
            </td>
        </tr>
    </table>
</div>

</body>
</html>
employee_list_page.html员工列表分页
<!DOCTYPE html>
<html lang="en" xmlns:th="http://www.thymeleaf.org">
<head>
    <meta charset="UTF-8">
    <title>员工列表(分页)</title>
    <link rel="stylesheet" th:href="@{/static/css/index_work.css}">
</head>
<body>
<div style="text-align: right">
    <a th:href="@{/}">返回首页</a>
</div>
<div id="app">
    <table>
        <tr>
            <th colspan="6">员工列表(分页)</th>
        </tr>
        <tr>
            <th>流水号</th>
            <th>员工姓名</th>
            <th>年龄</th>
            <th>性别</th>
            <th>邮箱</th>
            <th>操作(<a th:href="@{/to/add}">+</a>)</th>
        </tr>
        <tr th:each="employee,status:${pageInfo.list}">
            <td th:text="${status.count}"></td>
            <td th:text="${employee.empName}"></td>
            <td th:text="${employee.age}"></td>
            <td>
                <div th:switch="${employee.gender}">
                    <span th:case="1">男</span>
                    <span th:case="0">女</span>
                </div>
            </td>
            <td th:text="${employee.email}"></td>
            <td>
                <a th:href="@{'/employee/'+${employee.empId}}">修改</a>
                <a @click="deleteEmployee" th:href="@{'/employee/'+${employee.empId}}">删除</a>
            </td>
        </tr>
    </table>
    <!-- 作用:通过超链接控制表单的提交,将post请求转换为delete请求 -->
    <form method="post" id="delete_form">
        <!-- HiddenHttpMethodFilter要求:必须传输_method请求参数,并且值为最终的请求方式 -->
        <input type="hidden" name="_method" value="delete">
    </form>
</div>
<div style="text-align: center">
    <a th:if="${pageInfo.hasPreviousPage}" th:href="@{/employee/page/1}">首页</a>
    <a th:if="${pageInfo.hasPreviousPage}" th:href="@{'/employee/page/'+${pageInfo.prePage}}">上一页</a>
    <span th:each="pages:${pageInfo.navigatepageNums}">
        <a th:if="${pageInfo.pageNum} == ${pages}" th:href="@{'/employee/page/'+${pages}}" th:text="'['+${pages}+']'"
           style="color: red"></a>
        <a th:if="${pageInfo.pageNum} != ${pages}" th:href="@{'/employee/page/'+${pages}}" th:text="${pages}"></a>
    </span>
    <a th:if="${pageInfo.hasNextPage}" th:href="@{'/employee/page/'+${pageInfo.nextPage}}">下一页</a>
    <a th:if="${pageInfo.hasNextPage}" th:href="@{'/employee/page/'+${pageInfo.pages}}">尾页</a>
</div>
<script type="text/javascript" th:src="@{/static/js/vue.js}"></script>
<script type="text/javascript">
    var vue = new Vue({
        el: "#app",
        methods: {
            deleteEmployee() {
                if (window.confirm("是否需要删除该员工信息?")) {
                    // 获取表单
                    var form = document.getElementById("delete_form");

                    // 将超链接的href属性赋值给form表单的action属性
                    form.action = event.target.href;

                    // 表单提交
                    form.submit();

                    // 组织超链接的默认行为
                    event.preventDefault();
                } else {
                    console.log("退出!");
                    // 增加事件阻断
                    event.preventDefault();
                    return false;
                }
            }
        }
    });
    <!-- deleteEmployee -->
</script>
</body>
</html>
employee_update.html员工信息修改
<!DOCTYPE html>
<html lang="en" xmlns:th="http://www.thymeleaf.org">
<head>
    <meta charset="UTF-8">
    <title>修改员工信息</title>
    <link rel="stylesheet" th:href="@{/static/css/index_work.css}">
</head>
<body>
<div style="text-align: right">
    <a th:href="@{/employee/page/1}">返回列表</a>
</div>

<form th:action="@{/employee}" method="post">
    <input type="hidden" name="_method" value="put">
    <input type="hidden" name="empId" th:value="${employeeUpdate.empId}">
    <table>
        <tr>
            <th colspan="4">修改员工信息</th>
        </tr>

        <tr>
            <td>员工姓名:</td>
            <td>
                <input type="text" name="empName" th:value="${employeeUpdate.empName}">
            </td>
        </tr>

        <tr>
            <td>年龄:</td>
            <td>
                <input type="text" name="age" th:value="${employeeUpdate.age}">
            </td>
        </tr>

        <tr>
            <td>性别:</td>
            <td>
                <input type="radio" value="1" name="gender" th:field="${employeeUpdate.gender}">男
                <input type="radio" value="0" name="gender" th:field="${employeeUpdate.gender}">女
            </td>
        </tr>

        <tr>
            <td>邮箱:</td>
            <td>
                <input type="text" name="email" th:value="${employeeUpdate.email}">
            </td>
        </tr>
        <tr>
            <td colspan="4">
                <input type="submit" value="修改">
            </td>
        </tr>
    </table>
</form>

</body>
</html>
error.html错误页面
<!DOCTYPE html>
<html lang="en" xmlns:th="http://www.thymeleaf.org">
<head>
    <meta charset="UTF-8">
    <title>错误</title>
</head>
<body>
<h1>error.html</h1>
<p th:text="${ex}"></p>
</body>
</html>
5.4后台界面
EmployeeController.java
package com.atguigu.controller;

import com.atguigu.pojo.Employee;
import com.atguigu.service.EmployeeService;
import com.github.pagehelper.PageInfo;
import org.springframework.beans.factory.annotation.Autowired;
import org.springframework.stereotype.Controller;
import org.springframework.ui.Model;
import org.springframework.ui.ModelMap;
import org.springframework.web.bind.annotation.PathVariable;
import org.springframework.web.bind.annotation.RequestMapping;
import org.springframework.web.bind.annotation.RequestMethod;

import java.util.List;
import java.util.Map;

/**
 * @ClassName: EmployeeController
 * @Description: 查询所有员工的信息-->/employee-->GET
 * 更改成分页后:查询所有员工的信息-->/employee/page/1-->GET
 * 根据id查询某个员工的信息-->/employee/id-->GET
 * 跳转到添加界面-->/to/add-->GET
 * 添加员工信息-->/employee-->POST
 * 修改员工的信息-->/employee-->PUT
 * 删除员工的信息-->/employee/1-->DELETE
 * @Author: wty
 * @Date: 2023/2/3
 */
@Controller
public class EmployeeController {
    @Autowired
    private EmployeeService employeeService;

    @RequestMapping(value = "/employee", method = RequestMethod.GET)
    public String getAllEmployee(ModelMap map) {
        // 查询所有的员工信息
        List<Employee> list = employeeService.getAllEmployee();
        // 在请求域中共享
        map.addAttribute("list", list);
        // 跳转界面
        return "employee_list";
    }

    @RequestMapping(value = "/employee/page/{pageNum}", method = RequestMethod.GET)
    public String getEmployeePage(Map<String, Object> map, @PathVariable("pageNum") Integer pageNum) {
        // 获取员工的分页信息
        PageInfo<Employee> pageInfo = employeeService.getEmployeePage(pageNum);
        // 在请求域中共享
        map.put("pageInfo", pageInfo);
        // 跳转界面
        return "employee_list_page";
    }

    @RequestMapping(value = "/employee", method = RequestMethod.POST)
    public String insertEmployee(Employee employee) {
        // 保存员工的信息
        employeeService.insertEmployee(employee);
        return "redirect:/employee/page/1";
    }

    @RequestMapping(value = "/employee/{empId}", method = RequestMethod.GET)
    public String toUpdateEmployee(ModelMap map, @PathVariable("empId") Integer empId) {
        // 获取员工的分页信息
        Employee employee = employeeService.getEmployeeByEmpId(empId);
        // 在请求域中共享
        map.put("employeeUpdate", employee);
        // 跳转界面
        return "employee_update";
    }

    @RequestMapping(value = "/employee", method = RequestMethod.PUT)
    public String updateEmployee(Employee employee) {
        // 修改员工信息
        employeeService.updateEmployee(employee);
        // 跳转界面
        return "redirect:/employee/page/1";
    }

    @RequestMapping(value = "/employee/{empId}", method = RequestMethod.DELETE)
    public String deleteEmployee(@PathVariable("empId") Integer empId) {
        // 修改员工信息
        employeeService.deleteEmployeeByEmpId(empId);
        // 跳转界面
        return "redirect:/employee/page/1";
    }
}
ExceptionController.java
package com.atguigu.controller;

import org.springframework.web.bind.annotation.ControllerAdvice;
import org.springframework.web.bind.annotation.ExceptionHandler;
import org.springframework.web.servlet.ModelAndView;

/**
 * @ClassName: ExceptionController
 * @Description:
 * @Author: wty
 * @Date: 2023/2/3
 */
// 将当前类标识为异常处理的组件
@ControllerAdvice
public class ExceptionController {
    // 设置要处理的异常信息
    @ExceptionHandler(ArithmeticException.class)
    // ex表示控制器方法出现的异常
    public ModelAndView handleException(Throwable ex) {
        ModelAndView mav = new ModelAndView();
        //向请求域共享数据
        mav.addObject("ex", ex);
        //设置视图,实现页面跳转
        mav.setViewName("error");
        return mav;
    }
}
FirstInterceptor.java
package com.atguigu.interceptor;

import org.springframework.stereotype.Component;
import org.springframework.web.servlet.HandlerInterceptor;
import org.springframework.web.servlet.ModelAndView;

import javax.servlet.http.HttpServletRequest;
import javax.servlet.http.HttpServletResponse;

/**
 * @ClassName: FirstInterceptor
 * @Description:
 * @Author: wty
 * @Date: 2023/2/3
 */
@Component
public class FirstInterceptor implements HandlerInterceptor {
    @Override
    public boolean preHandle(HttpServletRequest request, HttpServletResponse response, Object handler) throws Exception {
        System.out.println("FirstInterceptor.preHandle");
        return true;
    }

    @Override
    public void postHandle(HttpServletRequest request, HttpServletResponse response, Object handler, ModelAndView modelAndView) throws Exception {
        System.out.println("FirstInterceptor.postHandle");
    }

    @Override
    public void afterCompletion(HttpServletRequest request, HttpServletResponse response, Object handler, Exception ex) throws Exception {
        System.out.println("FirstInterceptor.afterCompletion");
    }
}
EmployeeMapper.java
package com.atguigu.mapper;

import com.atguigu.pojo.Employee;
import com.github.pagehelper.PageInfo;

import java.util.List;

/**
 * @InterfaceName: EmployeeMapper
 * @Description:
 * @Author: wty
 * @Date: 2023/2/3
 */

public interface EmployeeMapper {
    /**
     * @param
     * @return java.util.List<com.atguigu.pojo.Employee>
     * @description //查询所有员工
     * @date 2023/2/3 13:35
     * @author wty
     **/
    List<Employee> getAllEmployee();

    /**
     * @param
     * @return int
     * @description //保存员工信息
     * @param: employee
     * @date 2023/2/3 16:01
     * @author wty
     **/
    int insertEmployee(Employee employee);

    /**
     * @param
     * @return com.atguigu.pojo.Employee
     * @description //根据EmpId获取员工信息
     * @param: empId
     * @date 2023/2/3 16:38
     * @author wty
     **/
    Employee getEmployeeByEmpId(Integer empId);


    /**
     * @param
     * @return int
     * @description //更新员工信息
     * @param: employee
     * @date 2023/2/3 17:01
     * @author wty
     **/
    int updateEmployee(Employee employee);


    /**
     * @param
     * @return int
     * @description //根据员工ID删除员工信息
     * @param: empId
     * @date 2023/2/3 17:33
     * @author wty
     **/
    int deleteEmployeeByEmpId(Integer empId);
}
Employee.java
package com.atguigu.pojo;

/**
 * @ClassName: Employee
 * @Description:
 * @Author: wty
 * @Date: 2023/2/3
 */

public class Employee {
    private Integer empId;
    private String empName;
    private Integer age;
    // 1:男,0女
    private String gender;
    private String email;

    public Employee() {
    }

    public Employee(Integer empId, String empName, Integer age, String gender, String email) {
        this.empId = empId;
        this.empName = empName;
        this.age = age;
        this.gender = gender;
        this.email = email;
    }

    public Integer getEmpId() {
        return empId;
    }

    public void setEmpId(Integer empId) {
        this.empId = empId;
    }

    public String getEmpName() {
        return empName;
    }

    public void setEmpName(String empName) {
        this.empName = empName;
    }

    public Integer getAge() {
        return age;
    }

    public void setAge(Integer age) {
        this.age = age;
    }

    public String getGender() {
        return gender;
    }

    public void setGender(String gender) {
        this.gender = gender;
    }

    public String getEmail() {
        return email;
    }

    public void setEmail(String email) {
        this.email = email;
    }

    @Override
    public String toString() {
        return "Employee{" +
                "empId=" + empId +
                ", empName='" + empName + '\'' +
                ", age=" + age +
                ", gender='" + gender + '\'' +
                ", email='" + email + '\'' +
                '}';
    }
}
EmployeeServiceImpl.java
package com.atguigu.service.impl;

import com.atguigu.mapper.EmployeeMapper;
import com.atguigu.pojo.Employee;
import com.atguigu.service.EmployeeService;
import com.github.pagehelper.Page;
import com.github.pagehelper.PageHelper;
import com.github.pagehelper.PageInfo;
import org.springframework.beans.factory.annotation.Autowired;
import org.springframework.stereotype.Service;
import org.springframework.transaction.annotation.Transactional;

import java.util.List;

/**
 * @ClassName: EmployeeImpl
 * @Description:
 * @Author: wty
 * @Date: 2023/2/3
 */
@Service
@Transactional
public class EmployeeServiceImpl implements EmployeeService {
    @Autowired
    private EmployeeMapper employeeMapper;

    @Override
    public List<Employee> getAllEmployee() {
        return employeeMapper.getAllEmployee();
    }

    @Override
    public PageInfo<Employee> getEmployeePage(Integer pageNum) {
        // 开启分页功能,2个参数是当前页页码pageNum以及每页的条数6
        Page<Object> page = PageHelper.startPage(pageNum, 6);
        // 查询所有的员工信息
        List<Employee> list = employeeMapper.getAllEmployee();
        // list后开启分页功能,另一个参数比如设置5,导航分页是2,3,4,5,6
        PageInfo<Employee> pageInfo = new PageInfo<>(list, 5);

        return pageInfo;
    }

    @Override
    public int insertEmployee(Employee employee) {
        return employeeMapper.insertEmployee(employee);
    }

    @Override
    public Employee getEmployeeByEmpId(Integer empId) {
        return employeeMapper.getEmployeeByEmpId(empId);
    }

    @Override
    public int updateEmployee(Employee employee) {
        return employeeMapper.updateEmployee(employee);
    }

    @Override
    public int deleteEmployeeByEmpId(Integer empId) {
        return employeeMapper.deleteEmployeeByEmpId(empId);
    }

}
EmployeeService.java
package com.atguigu.service;

import com.atguigu.pojo.Employee;
import com.github.pagehelper.PageInfo;

import java.util.List;

/**
 * @InterfaceName: EmployeeService
 * @Description:
 * @Author: wty
 * @Date: 2023/2/3
 */

public interface EmployeeService {
    /**
     * @param
     * @return java.util.List<com.atguigu.pojo.Employee>
     * @description //查询所有员工信息
     * @date 2023/2/3 13:32
     * @author wty
     **/
    List<Employee> getAllEmployee();

    /**
     * @param
     * @return com.github.pagehelper.PageInfo<com.atguigu.pojo.Employee>
     * @description //查询所有员工信息(分页)
     * @param: pageNum
     * @date 2023/2/3 14:21
     * @author wty
     **/
    PageInfo<Employee> getEmployeePage(Integer pageNum);

    /**
     * @param
     * @return int
     * @description //添加员工信息
     * @param: employee
     * @date 2023/2/3 16:02
     * @author wty
     **/
    int insertEmployee(Employee employee);

    /**
     * @param
     * @return com.atguigu.pojo.Employee
     * @description //根据EmpId获取员工信息
     * @param: empId
     * @date 2023/2/3 16:37
     * @author wty
     **/
    Employee getEmployeeByEmpId(Integer empId);

    /**
     * @param
     * @return int
     * @description //更新员工信息
     * @param: employee
     * @date 2023/2/3 17:00
     * @author wty
     **/
    int updateEmployee(Employee employee);

    /**
     * @param
     * @return int
     * @description //根据员工ID删除员工信息
     * @param: empId
     * @date 2023/2/3 17:32
     * @author wty
     **/
    int deleteEmployeeByEmpId(Integer empId);

}