前面我们构建好了Spring源码,接下来肯定迫不及待来调试啦,来一起看看大名鼎鼎
ApplicationContext
新建模块
1、基础步骤
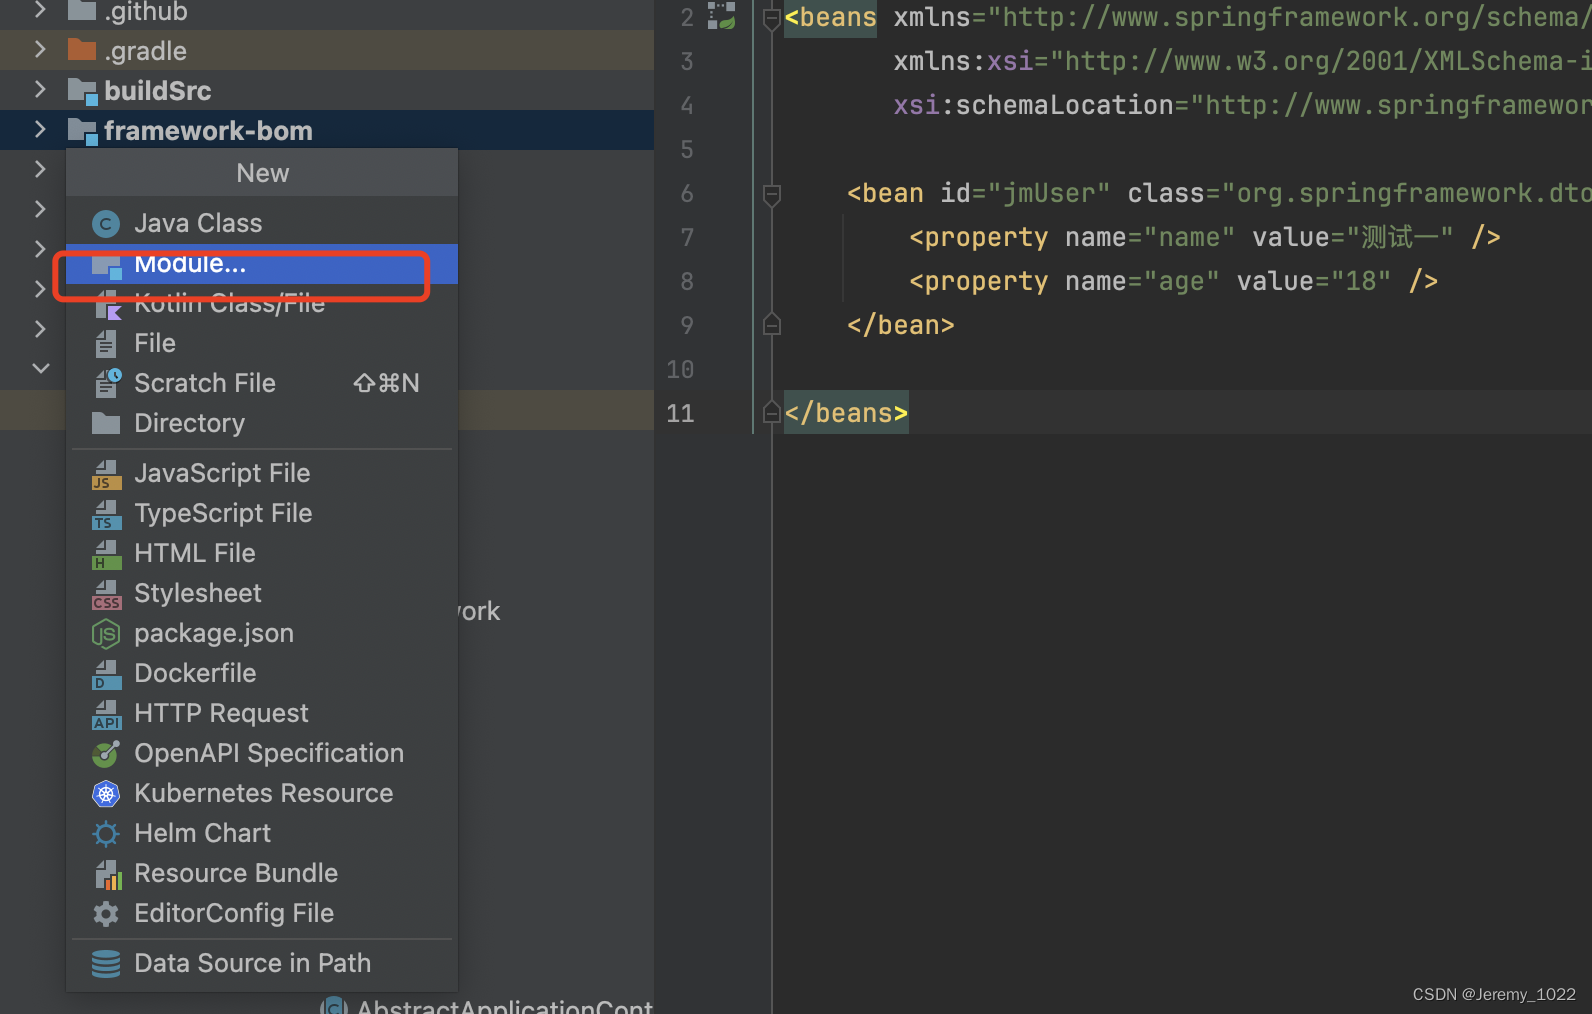
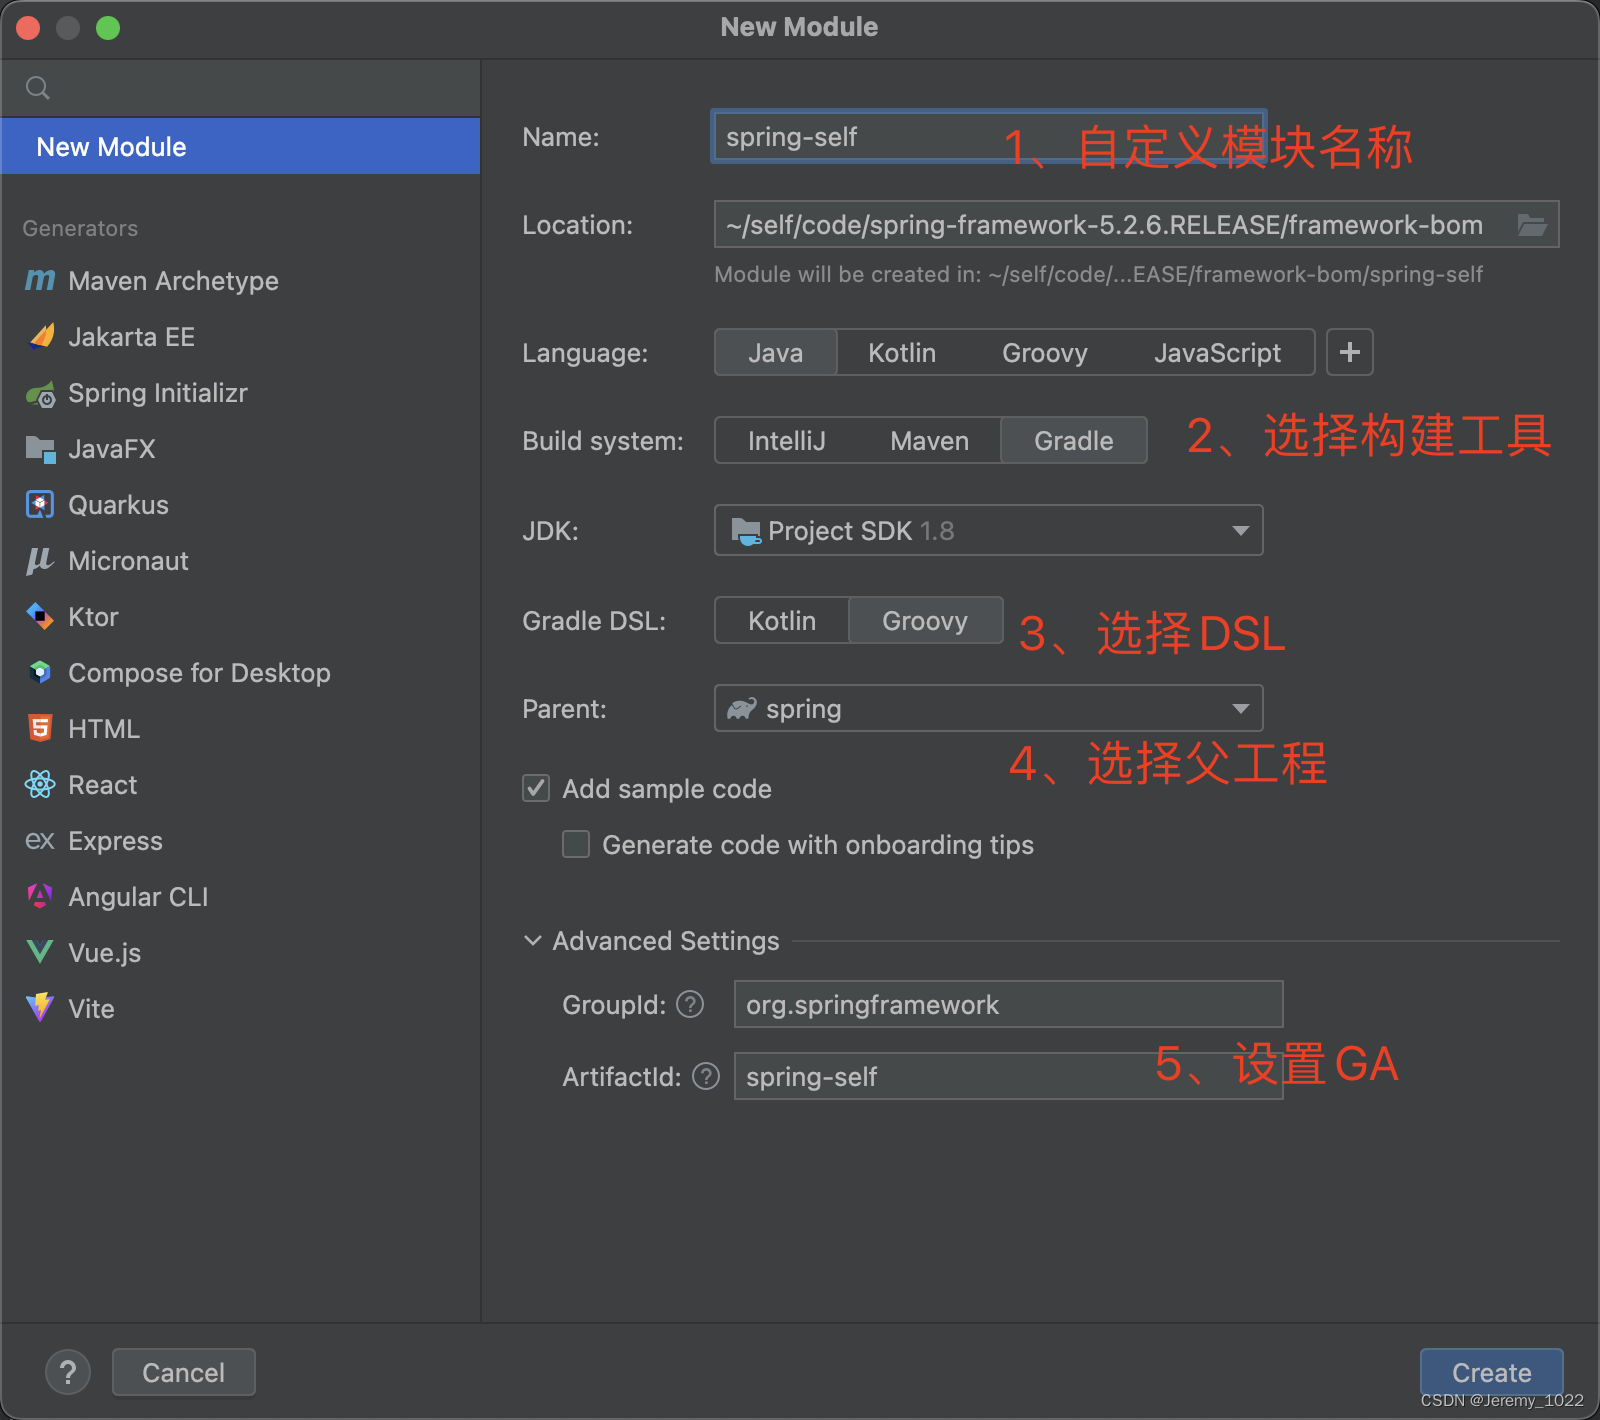
1.1 自定义模块名称如:spring-self
1.2 选择构建工具因为spring使用的是gradle,所以这边需要我们切换默认选择
1.3 选择DSL,这个也和源码保持一致
1.4 这个看自己,如果不想选择的话,记得父工程引用的时候修改下对应的名称和依赖
1.5 设置组织id与别名。
2、重要文件
build.gradle
plugins {
    id 'java'
}

group = 'org.springframework'
version = '5.2.6.RELEASE'

repositories {
    mavenCentral()
}
// 引入依赖
dependencies {
    testImplementation platform('org.junit:junit-bom:5.9.1')
    testImplementation 'org.junit.jupiter:junit-jupiter'
    compile(project(":spring-context"))
    optional(project(":spring-context"))

}

test {
    useJUnitPlatform()
}
这里我们目前只使用到了context所以先只是引入了context;后续需要引用不同模块的是在添加即可,修改了依赖引入以后记得构建下工程,防止因为缓存导致项目没有引入依赖的。
setting.gradle
pluginManagement {
	repositories {
		maven { url 'https://maven.aliyun.com/repository/public/' }
		gradlePluginPortal()
		maven { url 'https://repo.spring.io/plugins-release' }
	}
}
apply from: "$rootDir/gradle/build-cache-settings.gradle"

include "spring-aop"
include "spring-aspects"
include "spring-beans"
include "spring-context"
include "spring-context-support"
include "spring-context-indexer"
include "spring-core"
include "kotlin-coroutines"
project(':kotlin-coroutines').projectDir = file('spring-core/kotlin-coroutines')
include "spring-expression"
include "spring-instrument"
include "spring-jcl"
include "spring-jdbc"
include "spring-jms"
include "spring-messaging"
include "spring-orm"
include "spring-oxm"
include "spring-test"
include "spring-tx"
include "spring-web"
include "spring-webmvc"
include "spring-webflux"
include "spring-websocket"
include "framework-bom"
include "integration-tests"

rootProject.name = "spring"
rootProject.children.each {project ->
	project.buildFileName = "${project.name}.gradle"
}
include 'spring-self'
spring-self.gradle
有个小细节,如果想和spring源码的gradle保持一致,重点看这段代码:
rootProject.name = "spring"
rootProject.children.each {project ->
project.buildFileName = "${project.name}.gradle"
}
此时我们只要将include 'spring-self' 放到这段代码上方即可,这样我们的build.gradle 就可以改成与spring同样的命令风格spring-self.gradle
3、代码编写
代码目录
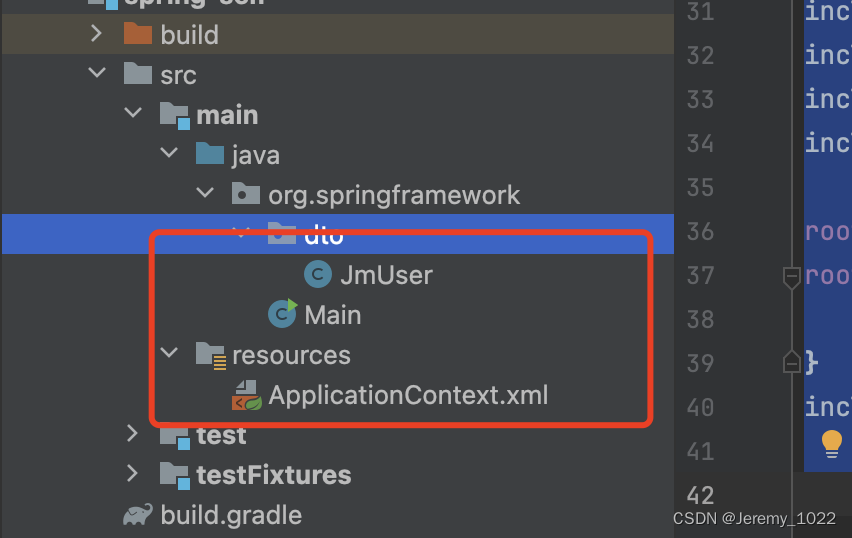
实体类
public class JmUser {
	private String name;

	private String age;

	public String getName() {
		return name;
	}

	public void setName(String name) {
		this.name = name;
	}

	public String getAge() {
		return age;
	}

	public void setAge(String age) {
		this.age = age;
	}
}
Xml
<?xml version="1.0" encoding="UTF-8"?>
<beans xmlns="http://www.springframework.org/schema/beans"
xmlns:xsi="http://www.w3.org/2001/XMLSchema-instance"
xsi:schemaLocation="http://www.springframework.org/schema/beans http://www.springframework.org/schema/beans/spring-beans.xsd">
<bean id="jmUser" class="org.springframework.dto.JmUser">
<property name="name" value="测试一" />
<property name="age" value="18" />
</bean>
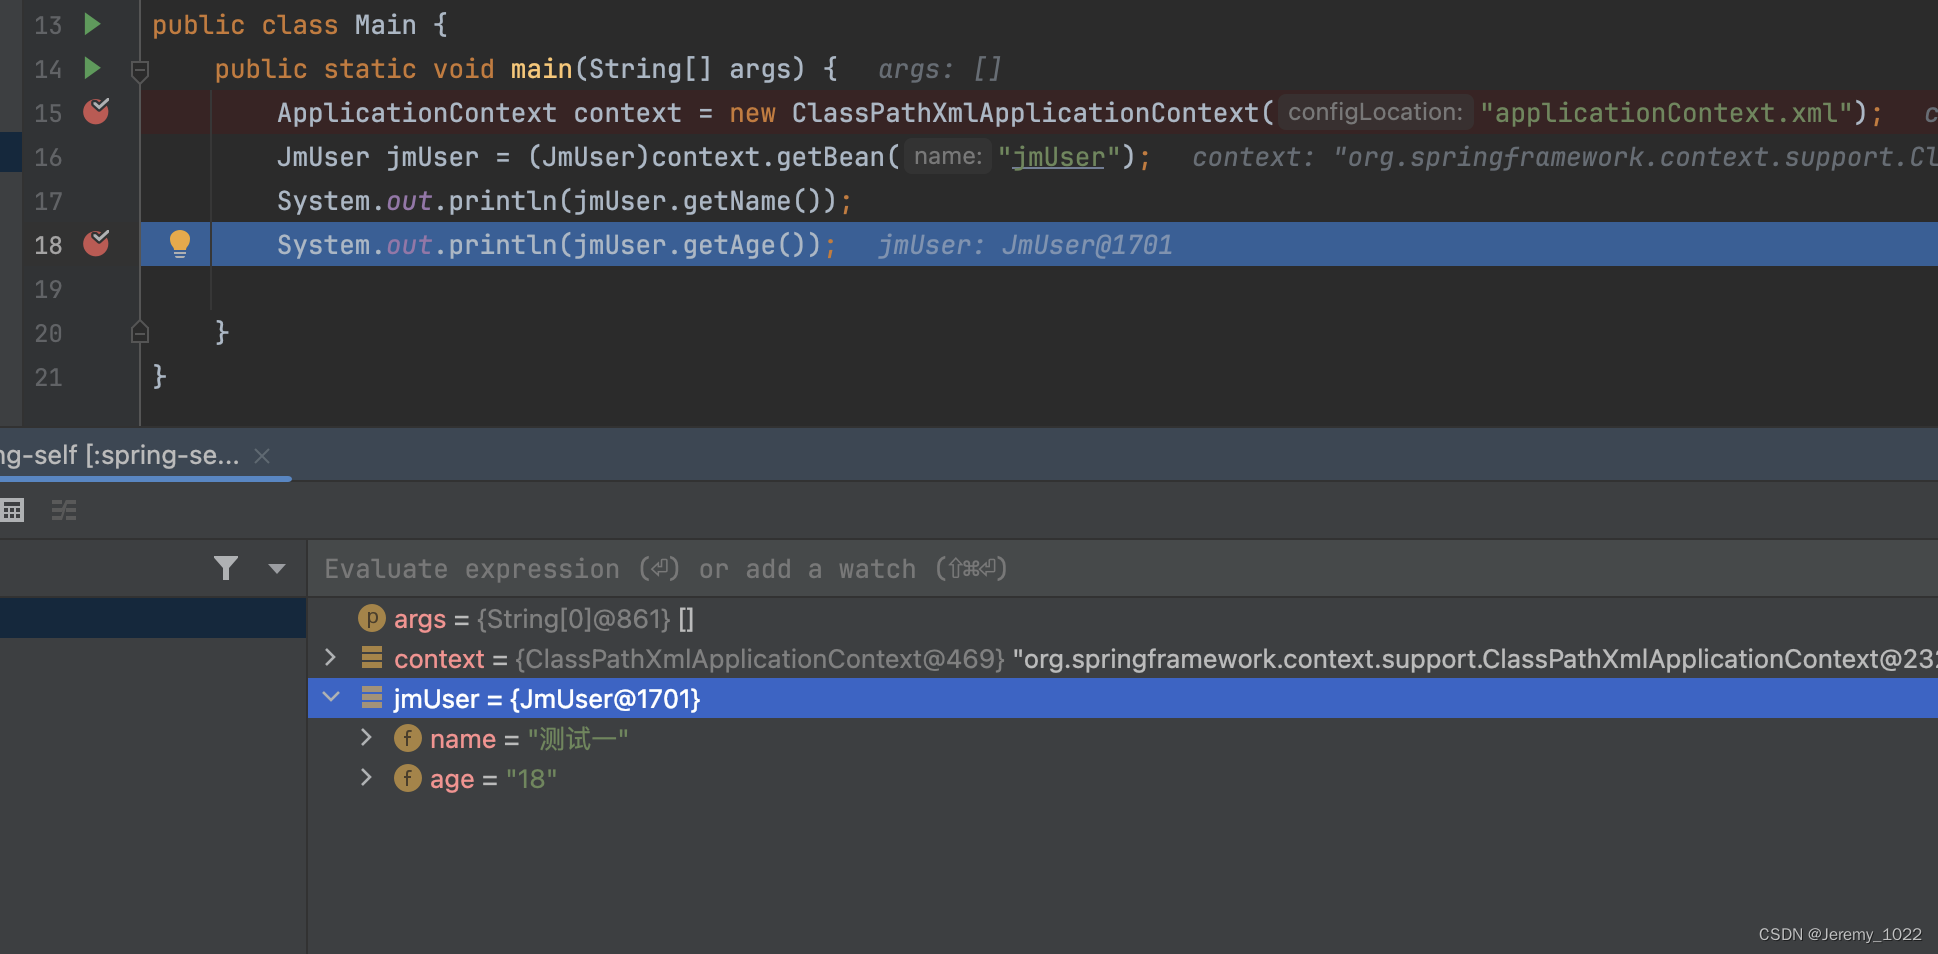
</beans>主方法
public class Main {
	public static void main(String[] args) {
		ApplicationContext context = new ClassPathXmlApplicationContext("applicationContext.xml");
		JmUser jmUser = (JmUser)context.getBean("jmUser");
		System.out.println(jmUser.getName());
		System.out.println(jmUser.getAge());

	}
}
运行结果
模块代码流程梳理
在Spring框架中,为ApplicationContext设置配置位置是初始化过程中的一个重要步骤。以下是如何为AbstractApplicationContext设置配置位置的步骤:
使用构造函数设置配置位置
当创建ApplicationContext的实例时,可以通过构造函数传递配置文件的位置。例如,使用ClassPathXmlApplicationContext:
ApplicationContext context = new ClassPathXmlApplicationContext("ApplicationContext.xml");这里,"configLocations.xml"是配置文件的名称,它应该位于类路径(classpath)下。
使用setConfigLocations方法
如果你需要在创建ApplicationContext实例后设置配置位置,可以使用setConfigLocations方法:
import org.springframework.context.support.AbstractApplicationContext;
import org.springframework.core.io.ClassPathResource;

public class SpringApp {
    public static void main(String[] args) {
        AbstractApplicationContext context = new ClassPathXmlApplicationContext();

        // 设置配置文件的位置
        String[] configLocations = new String[] {"configLocations.xml"};
        context.setConfigLocations(configLocations);

        // 初始化ApplicationContext
        context.refresh();

        // ... 应用上下文已经初始化,可以获取Bean等操作 ...

        // 关闭ApplicationContext
        context.close();
    }
}在这个例子中,首先创建了一个ClassPathXmlApplicationContext的实例,然后使用setConfigLocations方法设置了配置文件的位置。注意,refresh()方法在设置配置位置之后调用,以确保配置被加载。
默认配置位置
如果未设置配置位置,某些ApplicationContext的实现可能会使用默认的配置文件位置。例如,ClassPathXmlApplicationContext如果没有指定配置位置,会尝试查找类路径下的applicationContext.xml文件。
注意事项
- 确保配置文件的路径是正确的,并且文件是可访问的。
- 如果配置文件使用了相对路径,请注意它是基于类路径的。
- 在调用
refresh()方法之前设置配置位置,以确保配置被正确加载。
通过上述步骤,你可以为Spring的ApplicationContext设置配置位置,并根据需要进行初始化。
下一章节,我将进入源码,一步一图源码注释给大家看。