1、组件的生命周期
1.1、认识生命周期
什么是生命周期呢?
- 生物学上,生物生命周期指得是一个生物体在生命开始到结束周而复始所历经的一系列变化过程;
- 每个组件都可能会经历从创建、挂载、更新、卸载等一系列的过程;
- 在这个过程中的某一个阶段,我们可能会想要添加一些属于自己的代码逻辑(比如组件创建完后就请求一些服务器数据);
- 但是我们如何可以知道目前组件正在哪一个过程呢?Vue给我们提供了组件的生命周期函数;
生命周期函数:
- 生命周期函数是一些钩子函数(回调函数),在某个时间会被Vue源码内部进行回调;
- 通过对生命周期函数的回调,我们可以知道目前组件正在经历什么阶段;
- 那么我们就可以在该生命周期中编写属于自己的逻辑代码了;
1.2、生命周期流程
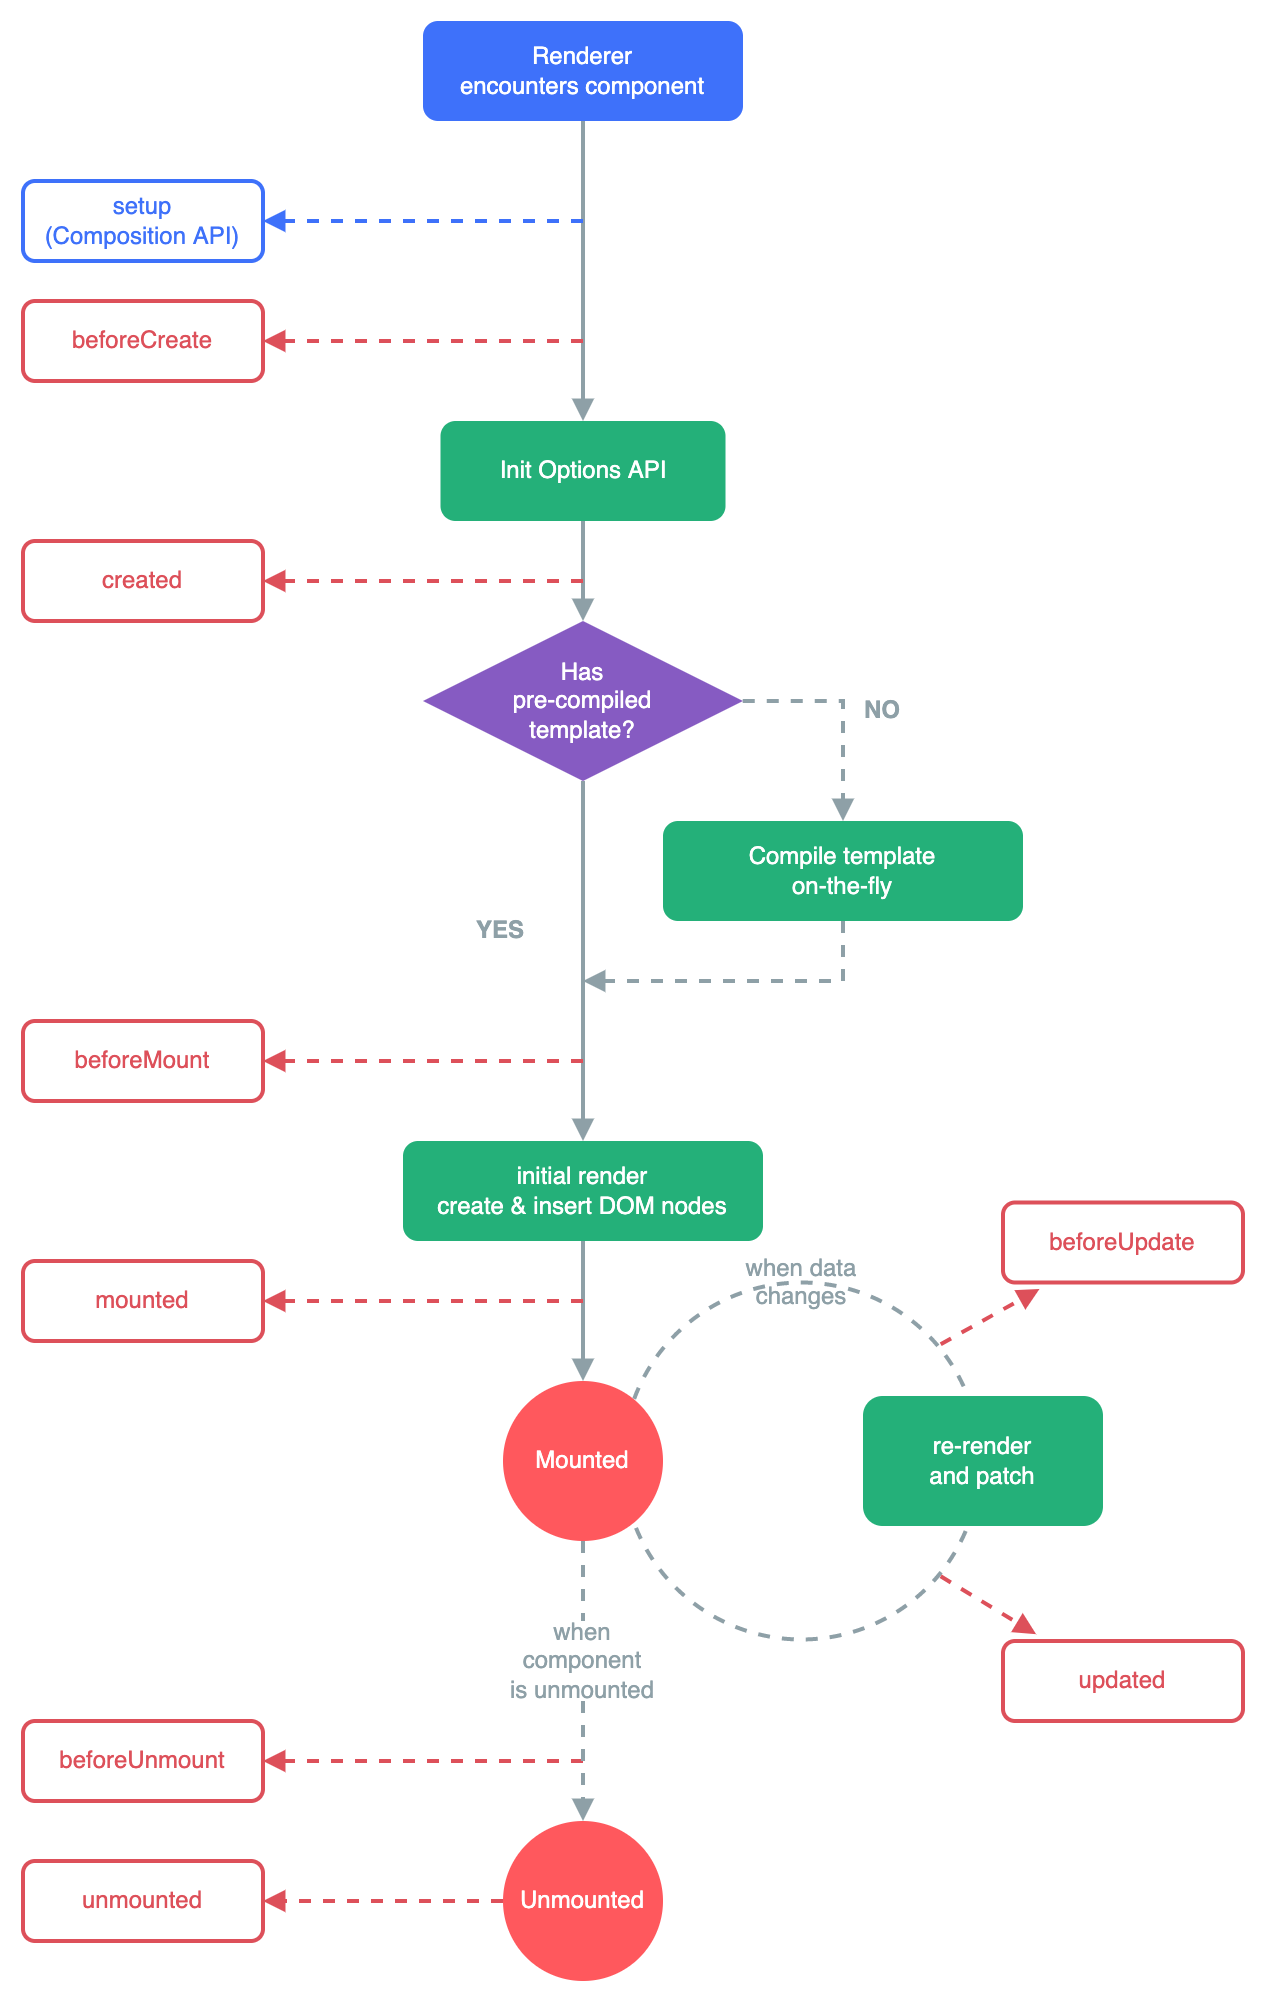
1.3、生命周期的过程分析
App/Home/Banner/ShowMessage
- 创建组件实例前
beforeCreate
- 创建组件实例
created(重要:1、发送网络请求;2、事件监听;3、this.$watch())
- template模板编译
beforeMount
- 挂载到虚拟DOM,虚拟DOM->真实的DOM->界面看到 h2/div
mounted(重要:元素已经被挂载,获取DOM,使用DOM)
- 数据更新:message改变
beforeUpdate
- 根据最新数据生成新的VNode,生成新的虚拟DOM -> 真实的DOM
updated
- 不在使用 v-if="false"
beforeUnmount
- 将之前挂载在虚拟DOM中VNode从虚拟DOM移除
unmounted(相对重要:回收操作(取消事件监听))
- 将组件实例销毁掉
1.4、示例:
Home.vue
<template>
  <h2>Home</h2>
</template>

<script>
  export default {
    beforeUnmount() {
      console.log("home beforeUnmount")
    },
    unmounted() {
      console.log("home unmounted")
    }
  }
</script>

<style scoped>
</style>
App.vue
<template>
  <h2>message: {{message}}-{{counter}}</h2>
  <button @click="message = 'Hello World'">修改message</button>
  <button @click="counter++">+1</button>

  <div>
    <button @click="isShowHome = !isShowHome">显示Home</button>
    <home v-if="isShowHome"></home>
  </div>
</template>

<script>
  import Home from "./Home.vue"

  export default {
    components: {
      Home
    },
    data() {
      return {
        message: "Hello App",
        counter: 0,
        isShowHome: true
      }
    },
    // 1.组件被创建之前
    beforeCreate() {
      console.log("beforeCreate")
    },
    // 2.组件被创建完成
    created() {
      console.log("created")
      console.log("1.发送网络请求, 请求数据")
      console.log("2.监听eventbus事件")
      console.log("3.监听watch数据")
    },
    // 3.组件template准备被挂载
    beforeMount() {
      console.log("beforeMount")
    },
    // 4.组件template被挂载: 虚拟DOM -> 真实DOM
    mounted() {
      console.log("mounted")
      console.log("1.获取DOM")
      console.log("2.使用DOM")
    },
    // 5.数据发生改变
    // 5.1. 准备更新DOM
    beforeUpdate() {
      console.log("beforeUpdate")
    },
    // 5.2. 更新DOM
    updated() {
      console.log("updated")
    },

    // 6.卸载VNode -> DOM元素
    // 6.1.卸载之前
    beforeUnmount() {
      console.log("beforeUnmount")
    },
    // 6.2.DOM元素被卸载完成
    unmounted() {
      console.log("unmounted")
    }
  }
</script>

<style scoped>
</style>
2、ref获取元素组件
2.1、$refs的使用
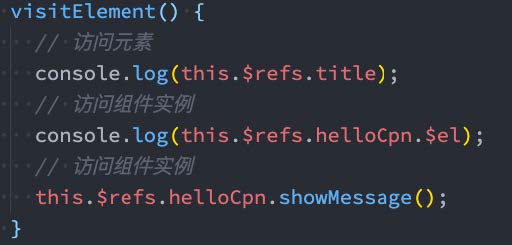
- 某些情况下,我们在组件中想要直接获取到元素对象或者子组件实例:
- 在Vue开发中我们是不推荐进行DOM操作的;
- 这个时候,我们可以给元素或者组件绑定一个ref的attribute属性;
- 组件实例有一个$refs属性:
- 它一个对象Object,持有注册过 ref attribute 的所有 DOM 元素和组件实例。
2.2、$parent和$root
- 我们可以通过$parent来访问父元素。
- HelloWorld.vue的实现:
这里我们也可以通过$root来实现,因为App是我们的根组件;
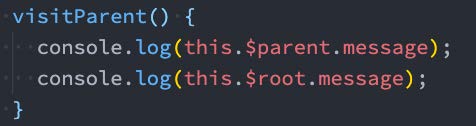
注意:在Vue3中已经移除了$children的属性,所以不可以使用了。
2.3、示例
Banner.vue
<template>
  <div class="banner">
    <h2>Banner</h2>
  </div>
</template>

<script>
  export default {
    created() {

    },
    methods: {
      bannerClick() {
        console.log("bannerClick")
      }
    }
  }
</script>

<style scoped>
</style>
App.vue
<template>
  <div class="app">
    <!--ref属性绑定值,然后下面我们就能轻易的获取-->
    <h2 ref="title" class="title" :style="{ color: titleColor }">{{ message }}</h2>
    <button ref="btn" @click="changeTitle">修改title</button>

    <banner ref="banner"/>
  </div>
</template>

<script>
  import Banner from "./Banner.vue"

  export default {
    components: {
      Banner
    },
    data() {
      return {
        message: "Hello World",
        titleColor: "red"
      }
    },
    methods: {
      changeTitle() {
        // 1.不要主动的去获取DOM, 并且修改DOM内容
        // this.message = "你好啊, 李银河!"
        // this.titleColor = "blue"

        // 2.获取h2/button元素
        console.log(this.$refs.title)
        console.log(this.$refs.btn)

        // 3.获取banner组件: 组件实例
        console.log(this.$refs.banner)

        // 3.1.在父组件中可以主动的调用子组件的对象方法
        this.$refs.banner.bannerClick()

        // 3.2.获取banner组件实例, 获取banner中的元素
        console.log(this.$refs.banner.$el)

        // 3.3.如果banner template是多个根, 拿到的是第一个node节点
        // 注意: 开发中不推荐一个组件的template中有多个根元素
        // console.log(this.$refs.banner.$el.nextElementSibling)

        // 4.组件实例还有两个属性(了解):
        console.log(this.$parent) // 获取父组件
        console.log(this.$root) // 获取根组件
      }
    }
  }
</script>

<style scoped>
</style>
3、动态组件的使用
3.1、切换组件案例
比如我们现在想要实现了一个功能:
点击一个tab-bar,切换不同的组件显示;

这个案例我们可以通过两种不同的实现思路来实现:
- 方式一:通过v-if来判断,显示不同的组件;
- 方式二:动态组件的方式;
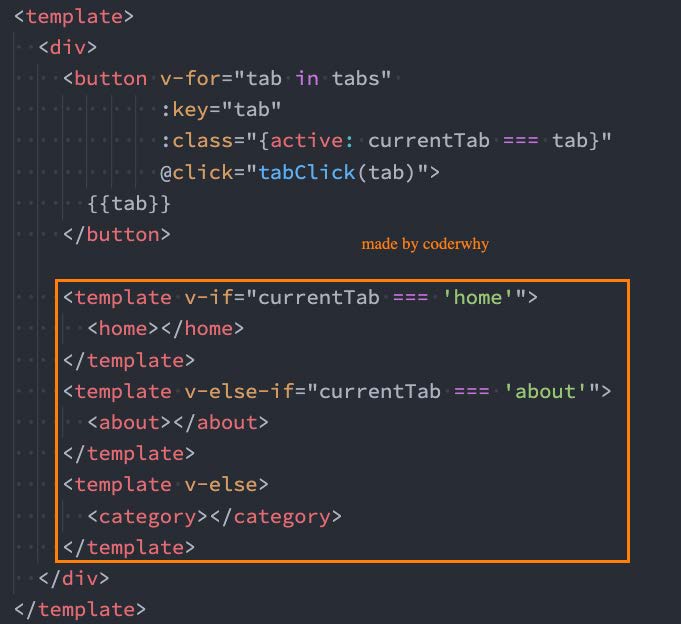
3.2、v-if显示不同的组件
我们可以先通过v-if来判断显示不同的组件,这个可以使用我们之前讲过的知识来实现:
3.3、动态组件的实现
动态组件是使用 component 组件,通过一个特殊的attribute is 来实现:

这个currentTab的值需要是什么内容呢?
- 全局注册:可以是通过component函数注册的组件;
- 布局注册:在一个组件对象的components对象中注册的组件;
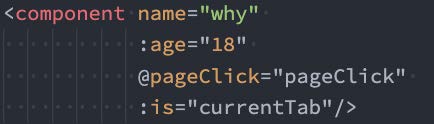
3.4、动态组件的传值
如果是动态组件我们可以给它们传值和监听事件吗?
- 也是一样的;
- 只是我们需要将属性和监听事件放到component上来使用;
3.5、示例
About.vue
<template>
  <div>
    <h2>About组件</h2>
  </div>
</template>

<script>
  export default {

  }
</script>

<style scoped>
</style>
Home.vue
<template>
  <div>
    <h2>Home组件: {{ name }} - {{ age }}</h2>
    <button @click="homeBtnClick">homeBtn</button>
  </div>
</template>

<script>
  export default {
    props: {
      name: {
        type: String,
        default: ""
      },
      age: {
        type: Number,
        default: 0
      }
    },
    emits: ["homeClick"],
    methods: {
      homeBtnClick() {
        this.$emit("homeClick", "home")
      }
    }
  }
</script>

<style scoped>
</style>
Category.vue
<template>
  <div>
    <h2>Category组件</h2>
  </div>
</template>

<script>
  export default {

  }
</script>

<style scoped>
</style>
App.vue
<template>
  <div class="app">
    <div class="tabs">
      <template v-for="(item, index) in tabs" :key="item">
        <button :class="{ active: currentTab === item }"
                @click="itemClick(item)">
          {{ item }}
        </button>
      </template>
    </div>
    <div class="view">
      <!-- 1.第一种做法: v-if进行判断逻辑, 决定要显示哪一个组件 -->
      <!-- <template v-if="currentIndex === 0">
        <home></home>
      </template>
      <template v-else-if="currentIndex === 1">
        <about></about>
      </template>
      <template v-else-if="currentIndex === 2">
        <category></category>
      </template> -->

      <!-- 2.第二种做法: 动态组件 component -->
      <!-- is中的组件需要来自两个地方: 1.全局注册的组件 2.局部注册的组件 -->
      <!-- <component :is="tabs[currentIndex]"></component> -->
      <component name="why"
                 :age="18"
                 @homeClick="homeClick"
                 :is="currentTab">
      </component>
    </div>
  </div>
</template>

<script>
  import Home from './views/Home.vue'
  import About from './views/About.vue'
  import Category from './views/Category.vue'

  export default {
    components: {
      Home,
      About,
      Category
    },
    data() {
      return {
        tabs: ["home", "about", "category"],
        // currentIndex: 0
        currentTab: "home"
      }
    },
    methods: {
      itemClick(tab) {
        this.currentTab = tab
      },
      homeClick(payload) {
        console.log("homeClick:", payload)
      }
    }
  }
</script>

<style scoped>
  .active {
    color: red;
  }
</style>
4、keep-alive组件
4.1、认识keep-alive
我们先对之前的案例中About组件进行改造:
- 在其中增加了一个按钮,点击可以递增的功能;

比如我们将counter点到10,那么在切换到home再切换回来about时,状态是否可以保持呢?
- 答案是否定的;
- 这是因为默认情况下,我们在切换组件后,about组件会被销毁掉,再次回来时会重新创建组件;
但是,在开发中某些情况我们希望继续保持组件的状态,而不是销毁掉,这个时候我们就可以使用一个内置组件:keep-alive。

4.2、keep-alive属性
keep-alive有一些属性:
- include - string | RegExp | Array。只有名称匹配的组件会被缓存;
- exclude - string | RegExp | Array。任何名称匹配的组件都不会被缓存;
- max - number | string。最多可以缓存多少组件实例,一旦达到这个数字,那么缓存组件中最近没有被访问的实例会被销毁;
include 和 exclude prop 允许组件有条件地缓存:
- 二者都可以用逗号分隔字符串、正则表达式或一个数组来表示;
- 匹配首先检查组件自身的 name 选项;

4.3、缓存组件的生命周期
对于缓存的组件来说,再次进入时,我们是不会执行created或者mounted等生命周期函数的:
- 但是有时候我们确实希望监听到何时重新进入到了组件,何时离开了组件;
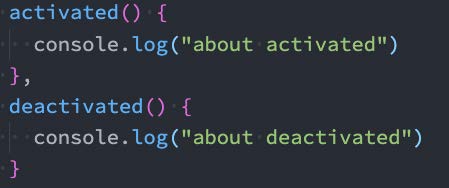
- 这个时候我们可以使用activated 和 deactivated 这两个生命周期钩子函数来监听;
4.4、示例
Home.vue
<template>
  <div>
    <h2>Home组件</h2>
    <h2>当前计数: {{ counter }}</h2>
    <button @click="counter++">+1</button>
  </div>
</template>

<script>
  export default {
    name: "home",
    data() {
      return {
        counter: 0
      }
    },
    created() {
      console.log("home created")
    },
    unmounted() {
      console.log("home unmounted")
    },
    // 对于保持keep-alive组件, 监听有没有进行切换
    // keep-alive组件进入活跃状态
    activated() {
      console.log("home activated")
    },
    deactivated() {
      console.log("home deactivated")
    }
  }
</script>

<style scoped>
</style>
App.vue
<template>
  <div class="app">
    <div class="tabs">
      <template v-for="(item, index) in tabs" :key="item">
        <button :class="{ active: currentTab === item }"
                @click="itemClick(item)">
          {{ item }}
        </button>
      </template>
    </div>
    <div class="view">
      <!-- include: 组件的名称来自于组件定义时name选项  -->
      <keep-alive include="home,about">
        <component :is="currentTab"></component>
      </keep-alive>
    </div>
  </div>
</template>

<script>
  import Home from './views/Home.vue'
  import About from './views/About.vue'
  import Category from './views/Category.vue'

  export default {
    components: {
      Home,
      About,
      Category
    },
    data() {
      return {
        tabs: ["home", "about", "category"],
        // currentIndex: 0
        currentTab: "home"
      }
    },
    methods: {
      itemClick(tab) {
        this.currentTab = tab
      },
      homeClick(payload) {
        console.log("homeClick:", payload)
      }
    }
  }
</script>

<style scoped>
  .active {
    color: red;
  }
</style>
5、异步组件的使用
5.1、Webpack的代码分包
默认的打包过程:
- 默认情况下,在构建整个组件树的过程中,因为组件和组件之间是通过模块化直接依赖的,那么webpack在打包时就会将组件模块打包到一起(比如一个app.js文件中);
- 这个时候随着项目的不断庞大,app.js文件的内容过大,会造成首屏的渲染速度变慢;
打包时,代码的分包:
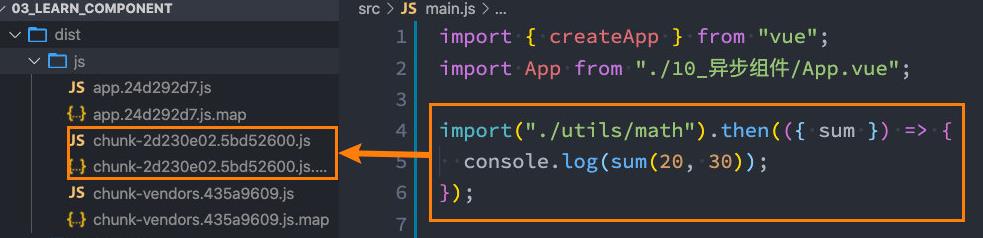
- 所以,对于一些不需要立即使用的组件,我们可以单独对它们进行拆分,拆分成一些小的代码块chunk.js;
- 这些chunk.js会在需要时从服务器加载下来,并且运行代码,显示对应的内容;
那么webpack中如何可以对代码进行分包呢?
使用import函数,这是返回一个promise对象
5.2、Vue中实现异步组件
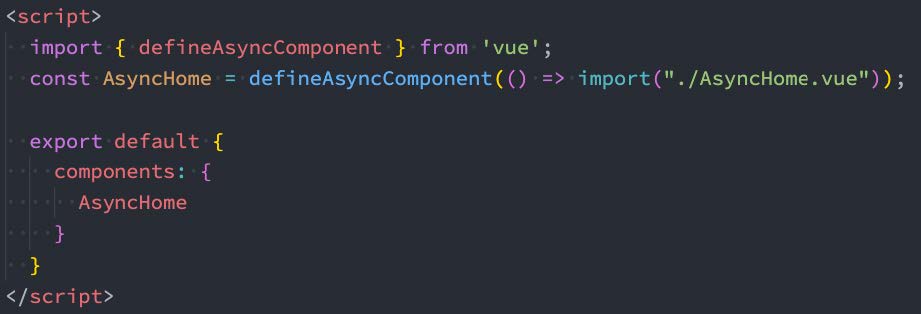
- 如果我们的项目过大了,对于某些组件我们希望通过异步的方式来进行加载(目的是可以对其进行分包处理),那么Vue中给我们提供了一个函数:defineAsyncComponent。
- defineAsyncComponent接受两种类型的参数:
- 类型一:工厂函数,该工厂函数需要返回一个Promise对象;
- 类型二:接受一个对象类型,对异步函数进行配置;
- 工厂函数类型一的写法:
5.3、异步组件的写法二(了解)

5.4、示例
App.vue
<template>
  <div class="app">
    <div class="tabs">
      <template v-for="(item, index) in tabs" :key="item">
        <button :class="{ active: currentTab === item }"
                @click="itemClick(item)">
          {{ item }}
        </button>
      </template>
    </div>
    <div class="view">
      <!-- include: 组件的名称来自于组件定义时name选项  -->
      <keep-alive include="home,about">
        <component :is="currentTab"></component>
      </keep-alive>
    </div>
  </div>
</template>

<script>
  import { defineAsyncComponent } from 'vue'

  import Home from './views/Home.vue'
  import About from './views/About.vue'
  // import Category from './views/Category.vue'
  // const Category = import("./views/Category.vue")  // 导出的是promise对象
  const AsyncCategory = defineAsyncComponent(() => import("./views/Category.vue"))

  export default {
    components: {
      Home,
      About,
      Category: AsyncCategory
    },
    data() {
      return {
        tabs: ["home", "about", "category"],
        // currentIndex: 0
        currentTab: "home"
      }
    },
    methods: {
      itemClick(tab) {
        this.currentTab = tab
      },
      homeClick(payload) {
        console.log("homeClick:", payload)
      }
    }
  }
</script>

<style scoped>
  .active {
    color: red;
  }
</style>
6、组件的v-model
前面我们在input中可以使用v-model来完成双向绑定:
- 这个时候往往会非常方便,因为v-model默认帮助我们完成了两件事;
- v-bind:value的数据绑定和@input的事件监听;
如果我们现在封装了一个组件,其他地方在使用这个组件时,是否也可以使用v-model来同时完成这两个功能呢?
- 也是可以的,vue也支持在组件上使用v-model;
当我们在组件上使用的时候,等价于如下的操作:
- 我们会发现和input元素不同的只是属性的名称和事件触发的名称而已;

6.1、组件v-model的实现
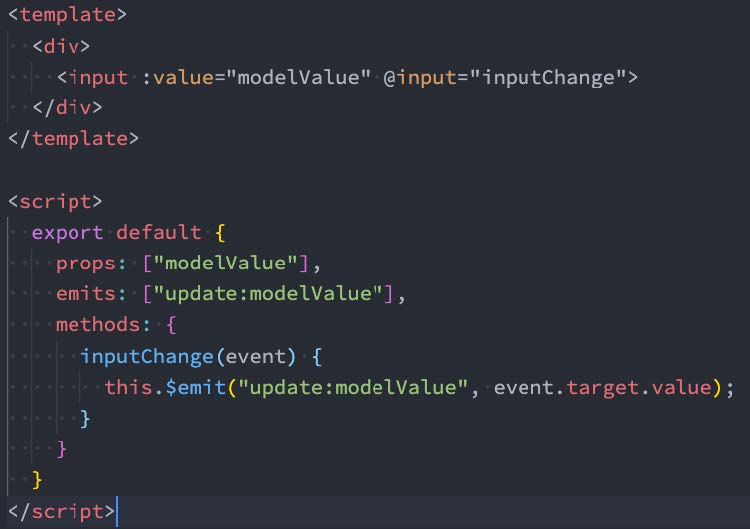
那么,为了我们的MyInput组件可以正常的工作,这个组件内的 <input> 必须:
- 将其 value attribute 绑定到一个名叫 modelValue 的 prop 上;
- 在其 input 事件被触发时,将新的值通过自定义的 update:modelValue 事件抛出;
MyInput.vue的组件代码如下:

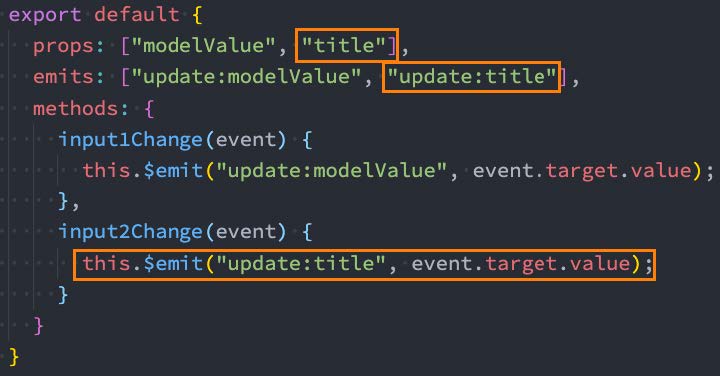
6.2、绑定多个属性
我们现在通过v-model是直接绑定了一个属性,如果我们希望绑定多个属性呢?
- 也就是我们希望在一个组件上使用多个v-model是否可以实现呢?
- 我们知道,默认情况下的v-model其实是绑定了 modelValue 属性和 @update:modelValue的事件;
- 如果我们希望绑定更多,可以给v-model传入一个参数,那么这个参数的名称就是我们绑定属性的名称;
注意:这里我是绑定了两个属性的

v-model:title相当于做了两件事:
- 绑定了title属性;
- 监听了 @update:title的事件;
6.3、示例
Counter.vue
<template>
  <div>
    <h2>Counter: {{ modelValue }}</h2>
    <button @click="changeCounter">修改counter</button>
  </div>
</template>

<script>
  export default {
    props: {
      modelValue: {
        type: Number,
        default: 0
      }
    },
    emits: ["update:modelValue"],
    methods: {
      changeCounter() {
        this.$emit("update:modelValue", 999)
      }
    }
  }
</script>

<style scoped>
</style>
Counter2.vue
<template>
  <div>
    <h2>Counter: {{ counter }}</h2>
    <button @click="changeCounter">修改counter</button>

    <!-- why绑定 -->
    <hr>
    <h2>why: {{ why }}</h2>
    <button @click="changeWhy">修改why的值</button>
  </div>
</template>

<script>
  export default {
    props: {
      counter: {
        type: Number,
        default: 0
      },
      why: {
        type: String,
        default: ""
      }
    },
    emits: ["update:counter", "update:why"],
    methods: {
      changeCounter() {
        this.$emit("update:counter", 999)
      },
      changeWhy() {
        this.$emit("update:why", "kobe")
      }
    }
  }
</script>

<style scoped>
</style>
App.vue
<template>
  <div class="app">
    <!-- 1.input v-model -->
    <!-- <input v-model="message">
    <input :value="message" @input="message = $event.target.value"> -->

    <!-- 2.组件的v-model: 默认modelValue -->
    <counter v-model="appCounter"></counter>
    <counter :modelValue="appCounter" @update:modelValue="appCounter = $event"></counter>

    <!-- 3.组件的v-model: 自定义名称counter -->
    <!-- <counter2 v-model:counter="appCounter" v-model:why="appWhy"></counter2> -->
  </div>
</template>

<script>
  import Counter from './Counter.vue'
  import Counter2 from './Counter2.vue'

  export default {
    components: {
      Counter,
      Counter2
    },
    data() {
      return {
        message: "Hello World",
        appCounter: 100,
        appWhy: "coderwhy"
      }
    }
  }
</script>

<style scoped>
</style>
7、组件的混入Mixin
7.1、认识Mixin
- 目前我们是使用组件化的方式在开发整个Vue的应用程序,但是组件和组件之间有时候会存在相同的代码逻辑,我们希望对相同的代码逻辑进行抽取。
- 在Vue2和Vue3中都支持的一种方式就是使用Mixin来完成:
- Mixin提供了一种非常灵活的方式,来分发Vue组件中的可复用功能;
- 一个Mixin对象可以包含任何组件选项;
- 当组件使用Mixin对象时,所有Mixin对象的选项将被 混合 进入该组件本身的选项中;
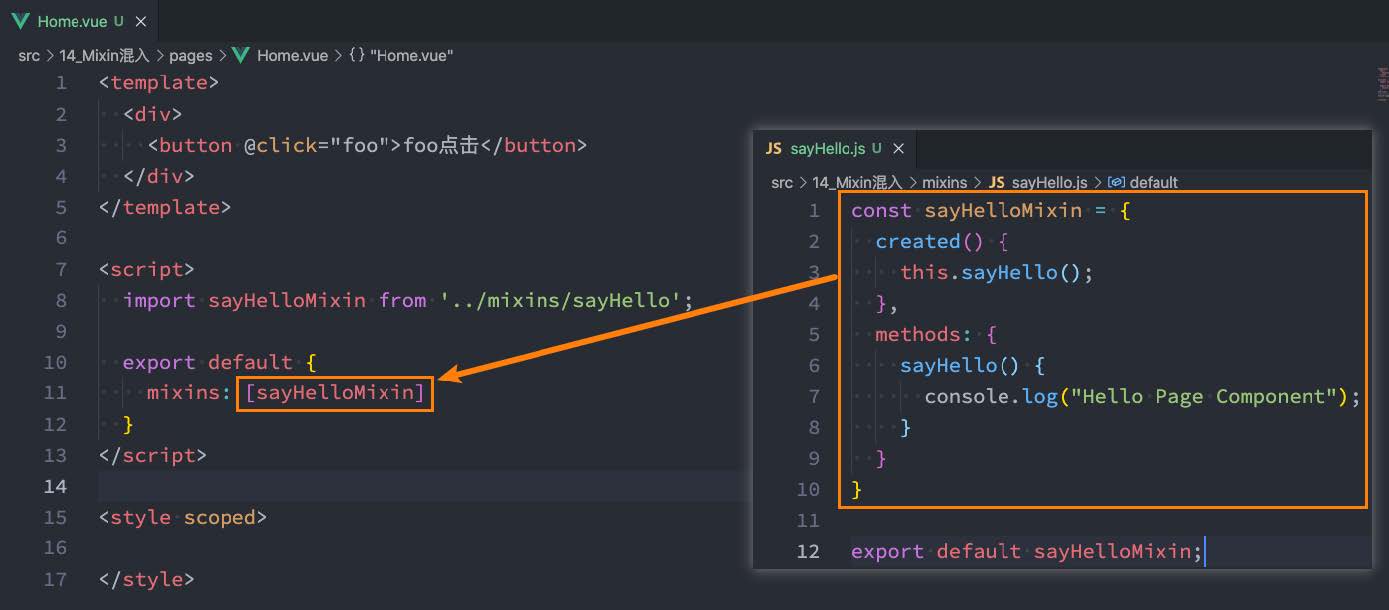
7.2、Mixin的基本使用
7.3、Mixin的合并规则
如果Mixin对象中的选项和组件对象中的选项发生了冲突,那么Vue会如何操作呢?
- 这里分成不同的情况来进行处理;
情况一:如果是data函数的返回值对象
- 返回值对象默认情况下会进行合并;
- 如果data返回值对象的属性发生了冲突,那么会保留组件自身的数据;
情况二:如果是生命周期钩子函数
- 生命周期的钩子函数会被合并到数组中,都会被调用;
情况三:值为对象的选项,例如 methods、components 和 directives,将被合并为同一个对象。
- 比如都有methods选项,并且都定义了方法,那么它们都会生效;
- 但是如果对象的key相同,那么会取组件对象的键值对;
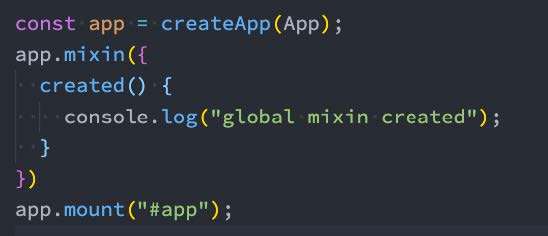
7.4、全局混入Mixin
如果组件中的某些选项,是所有的组件都需要拥有的,那么这个时候我们可以使用全局的mixin:
- 全局的Mixin可以使用 应用app的方法 mixin 来完成注册;
- 一旦注册,那么全局混入的选项将会影响每一个组件;
7.5、示例
message-mixin.js
export default {
  data() {
    return {
      message: "Hello World"
    }
  },
  created() {
    console.log("message:", this.message)
  }
}
Home.vue
<template>
  <h2>Home组件</h2>
</template>

<script>
  import messageMixin from '../mixins/message-mixin'

  export default {
    // options api
    components: {

    },
    mixins: [messageMixin],
    data() {
      return {
        homeNames: [ "abc", "cba" ]
      }
    },
    methods: {

    },
    created() {
      console.log("home created")
    }
  }
</script>

<style scoped>
</style>
About.vue
<template>
  <h2>About组件</h2>
</template>

<script>
  import messageMixin from '../mixins/message-mixin'

  export default {
    mixins: [messageMixin]
  }
</script>

<style scoped>
</style>
Category.vue
<template>
  <h2>Category组件</h2>
</template>

<script>
  import messageMixin from '../mixins/message-mixin'

  export default {
    mixins: [messageMixin]
  }
</script>

<style scoped>
</style>
App.vue
<template>
  <div>
    <home></home>
    <about></about>
    <category></category>
  </div>
</template>

<script>
  import Home from './views/Home.vue'
  import About from './views/About.vue'
  import Category from './views/Category.vue'

  export default {
    components: {
      Home,
      About,
      Category
    }
  }
</script>

<style scoped>
</style>