重生之 SpringBoot3 入门保姆级学习(07、整合 Redis 案例)
- 导入 Maven 依赖并刷新 Maven
<dependencies>
    <!--springboot3 Web 依赖-->
    <dependency>
        <groupId>org.springframework.boot</groupId>
        <artifactId>spring-boot-starter-web</artifactId>
    </dependency>

    <!--redis starter 依赖-->
    <dependency>
        <groupId>org.springframework.boot</groupId>
        <artifactId>spring-boot-starter-data-redis</artifactId>
    </dependency>
</dependencies>
- 查看相关可改写的配置
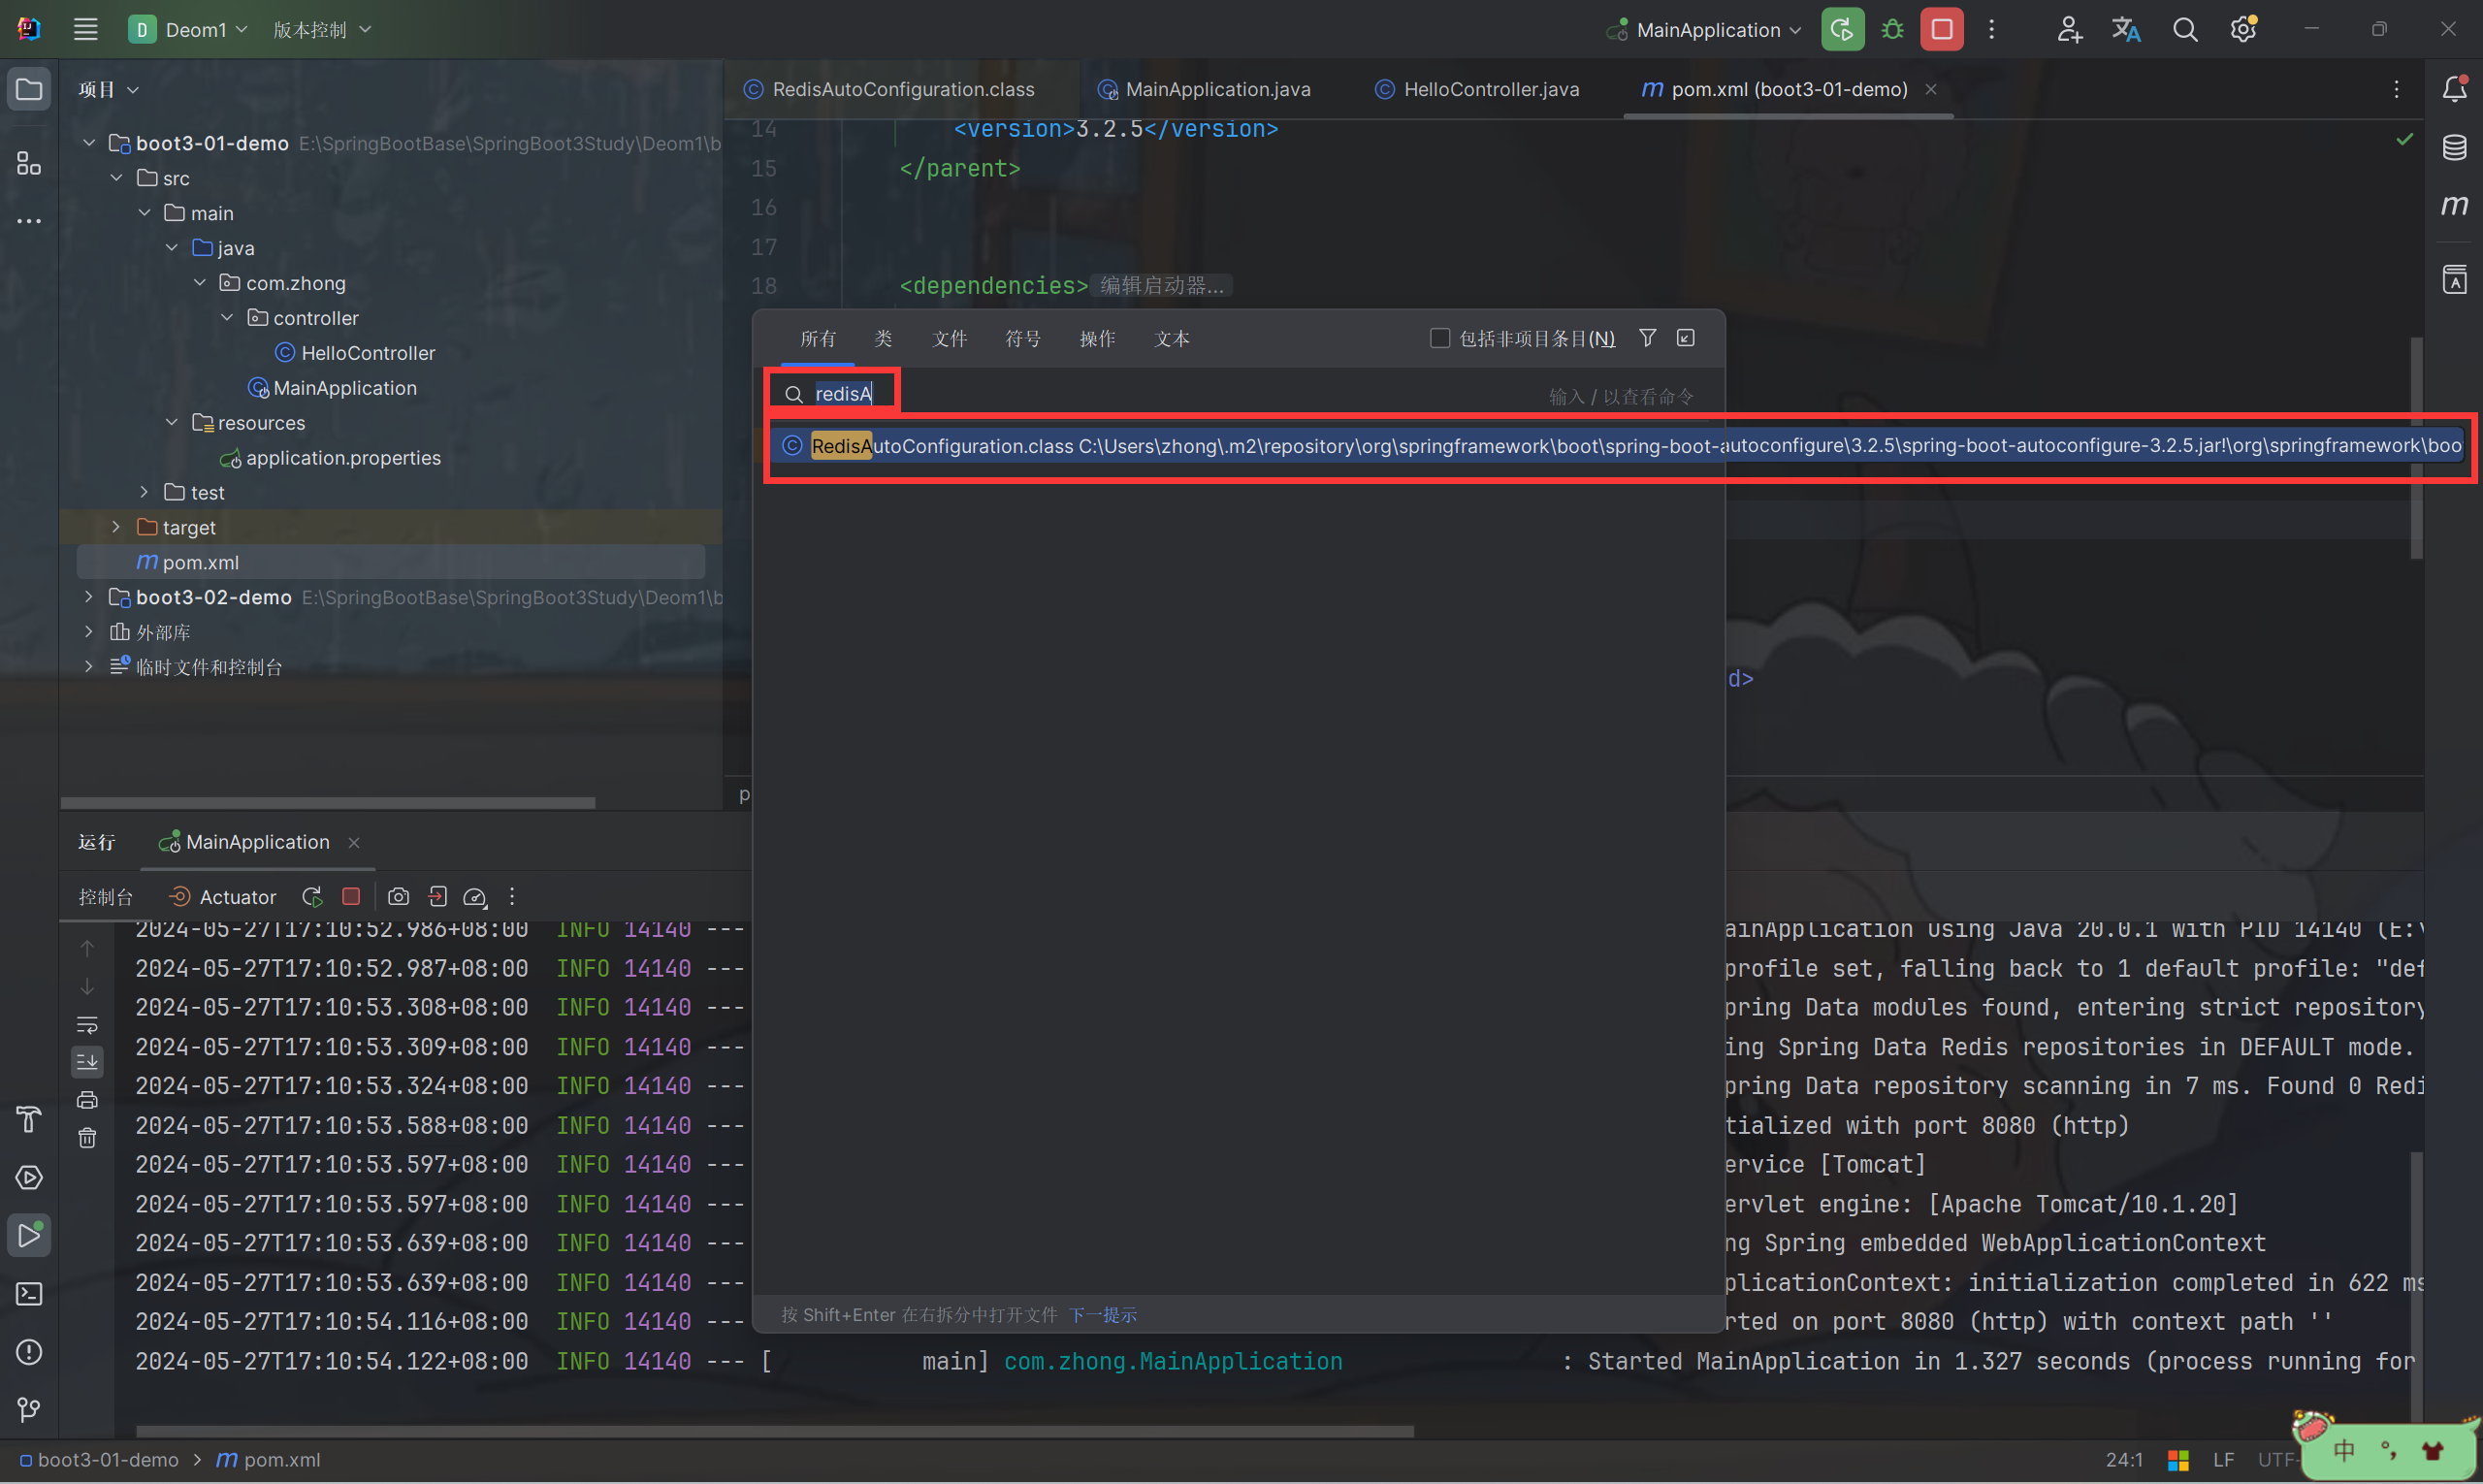
1、按两下 shift 键输入 redisA 下面则有提示 然后我们点击进入
2、找到 @EnableConfigurationProperties 注解里面的类 按住 Ctrl 键点击查看配置项
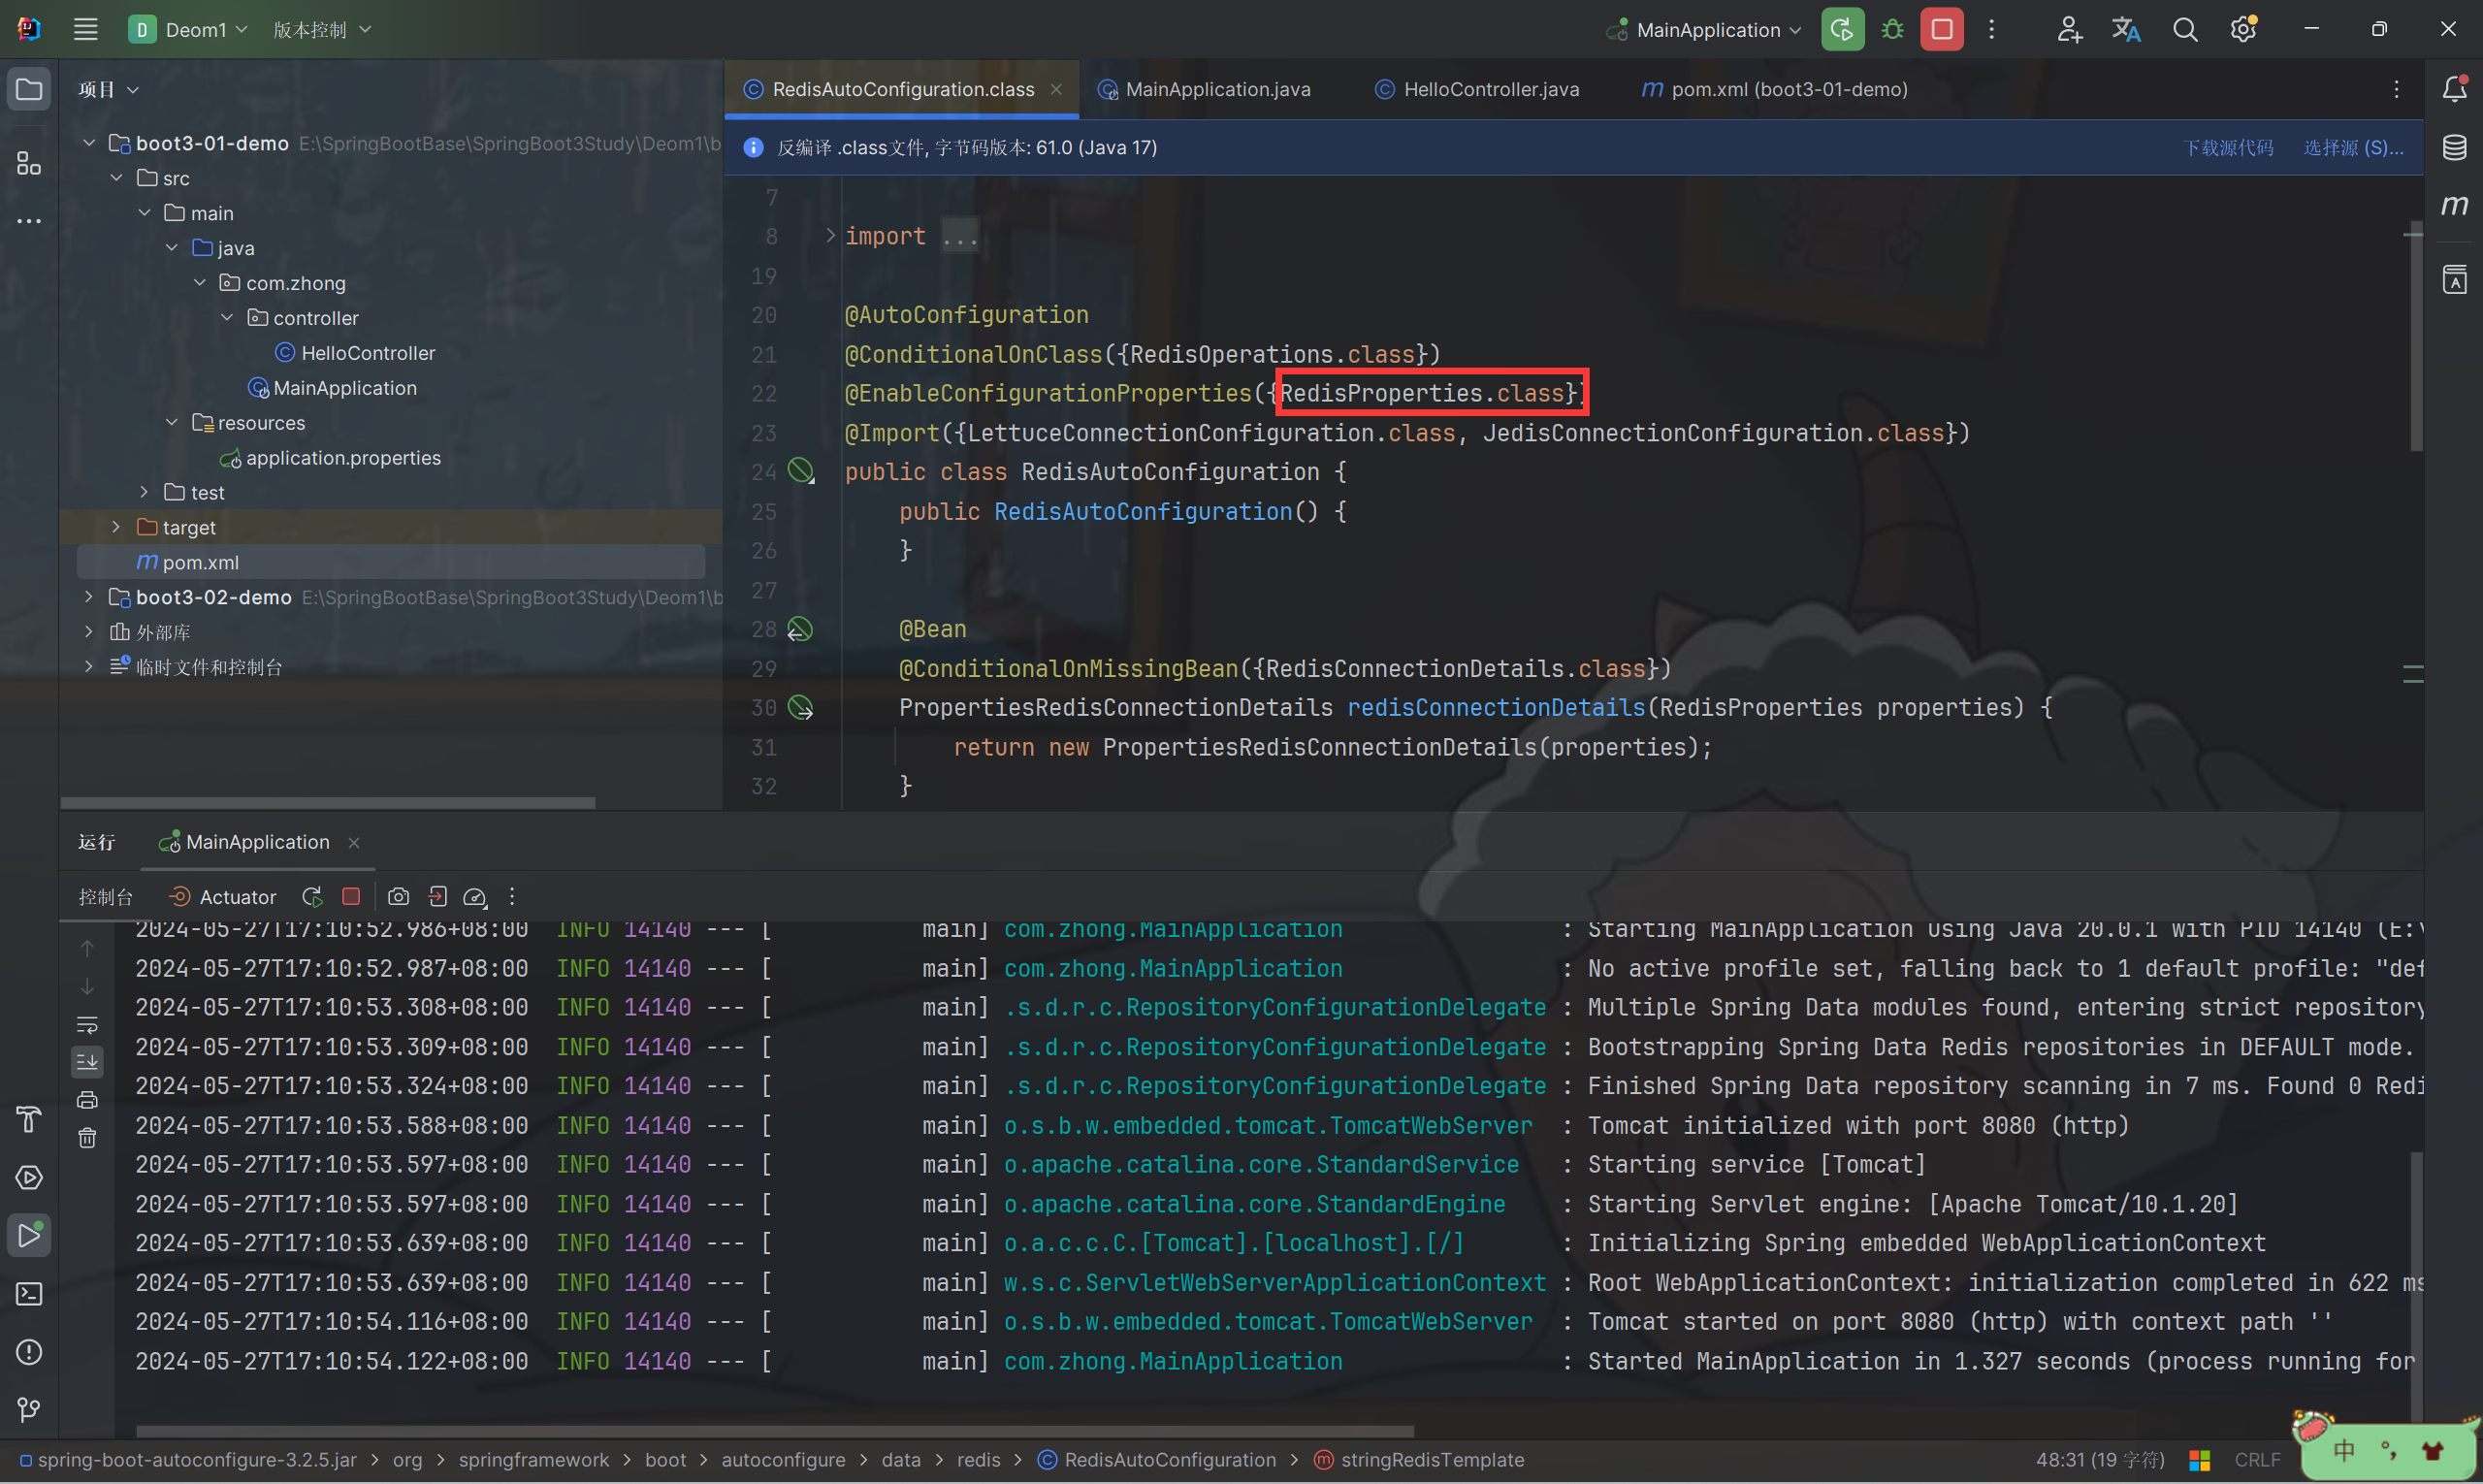
3、可以看到 Redis 是基于 spring.data.redis.xxxx 进行配置的 以及 RedisProperties 的一些默认配置
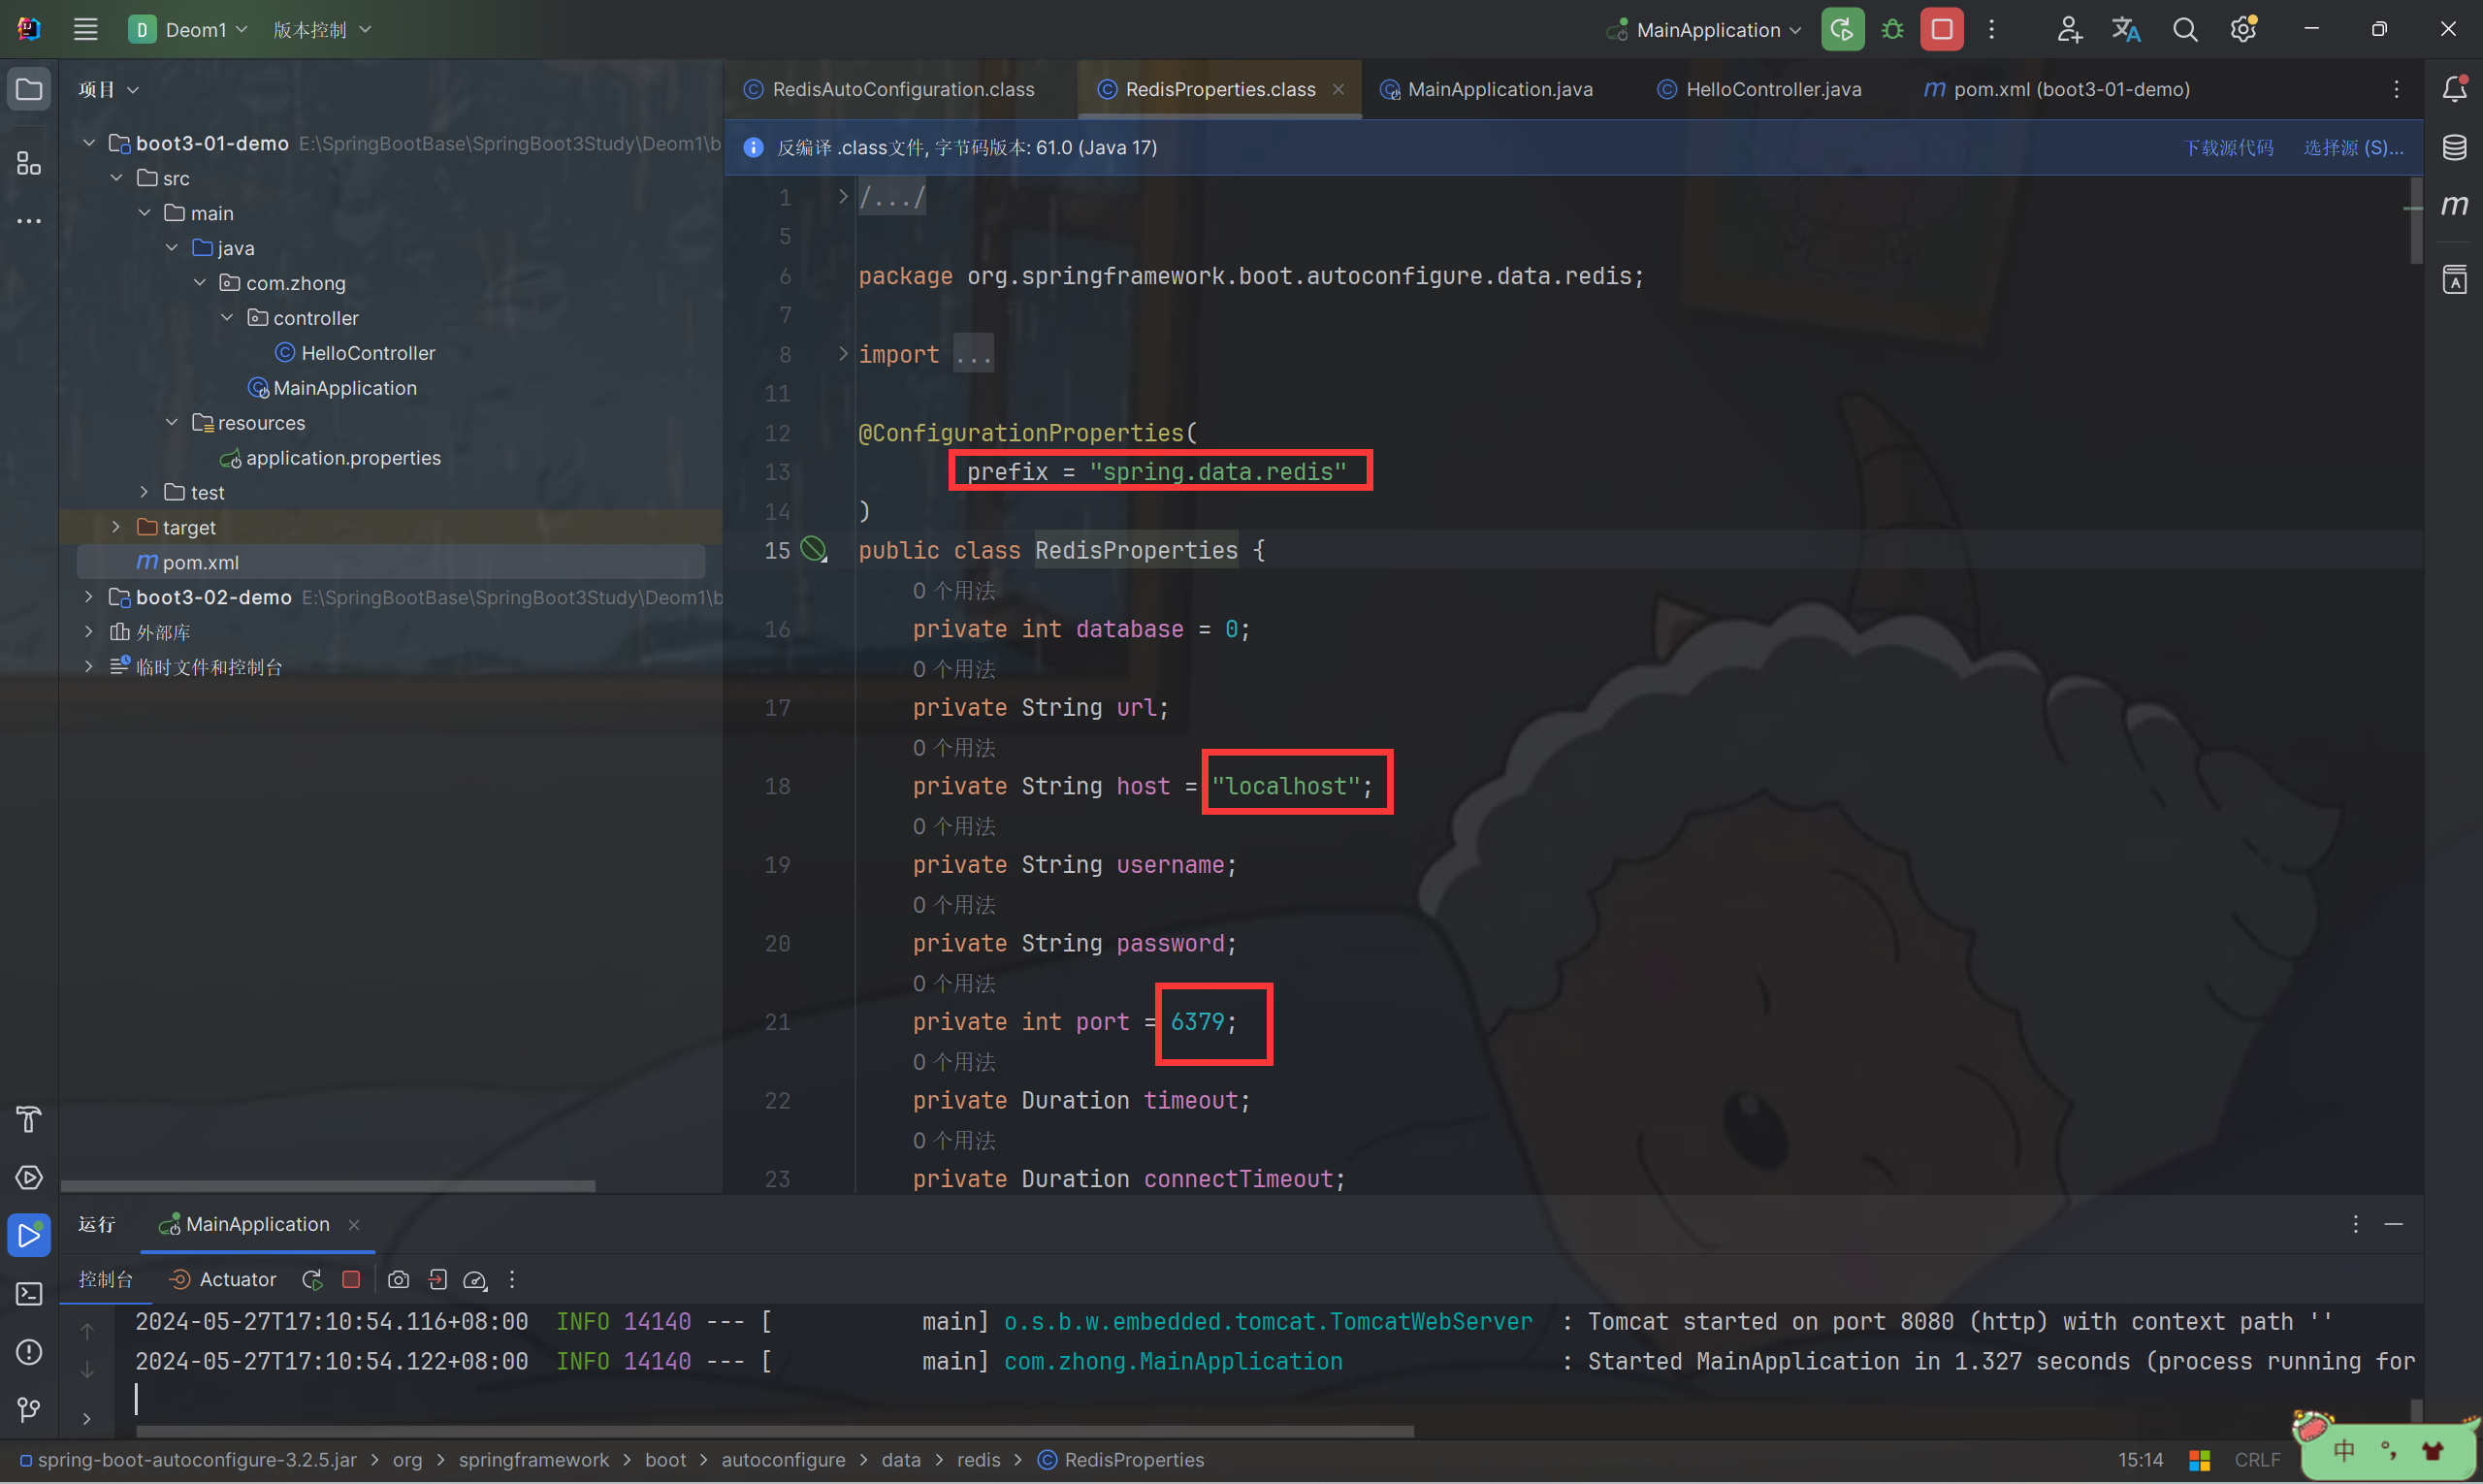
4、在 application.properties 编写相关配置
# 此配置项仅为演示与默认配置相同 可根据自己项目进行更改地址或者端口号以及其他配置
spring.data.redis.host=localhost
spring.data.redis.port=6379
- 编写相关逻辑
package com.zhong.controller;
import org.springframework.beans.factory.annotation.Autowired;
import org.springframework.data.redis.core.StringRedisTemplate;
import org.springframework.stereotype.Controller;
import org.springframework.web.bind.annotation.GetMapping;
import org.springframework.web.bind.annotation.RequestBody;
import org.springframework.web.bind.annotation.RestController;
/**
* @ClassName : HelloController
* @Description : 测试类
* @Author : zhx
* @Date: 2024-05-21 19:27
*/
@RestController // 包含 @RequestBody 和 @Controller 标识这是一个请求接口合集
public class HelloController {
@Autowired
StringRedisTemplate redisTemplate; // 自动注入 redis 的相关操作
@GetMapping("/hello") // get 请求访问 http://localhost:8080/hello 即可得到 return 的值
public String Hello() {
return "Hello,SpringBoot3";
}
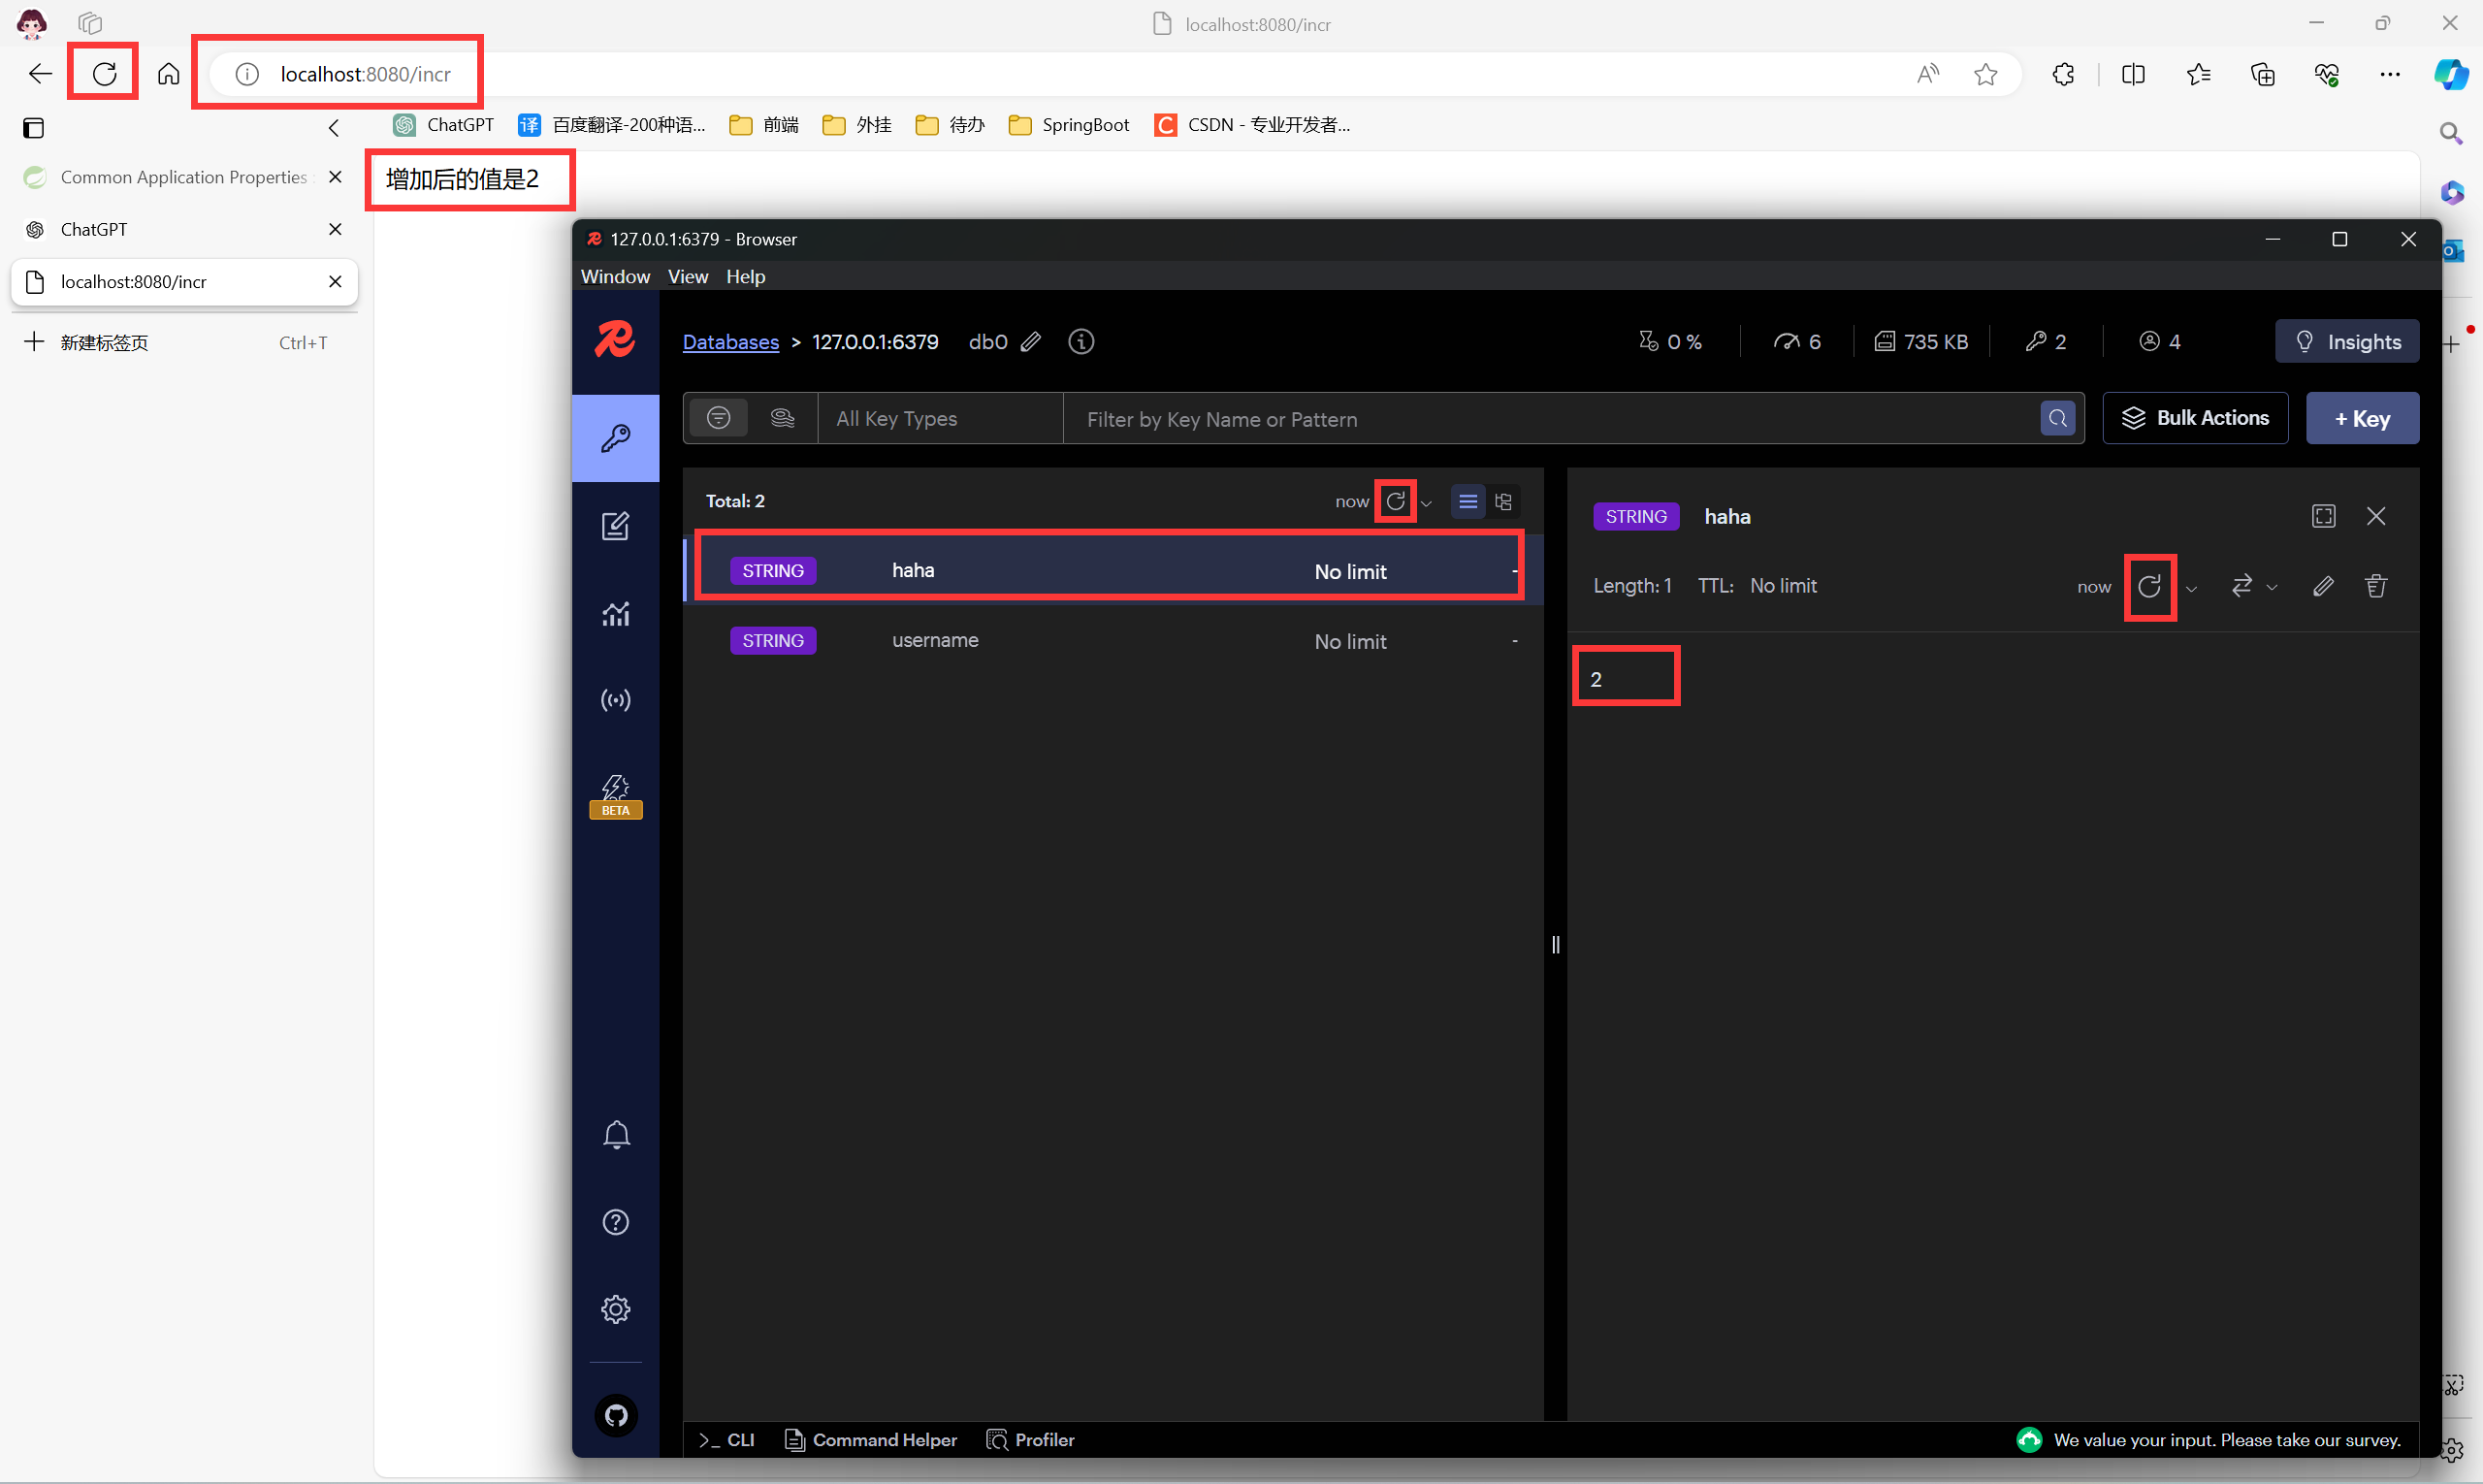
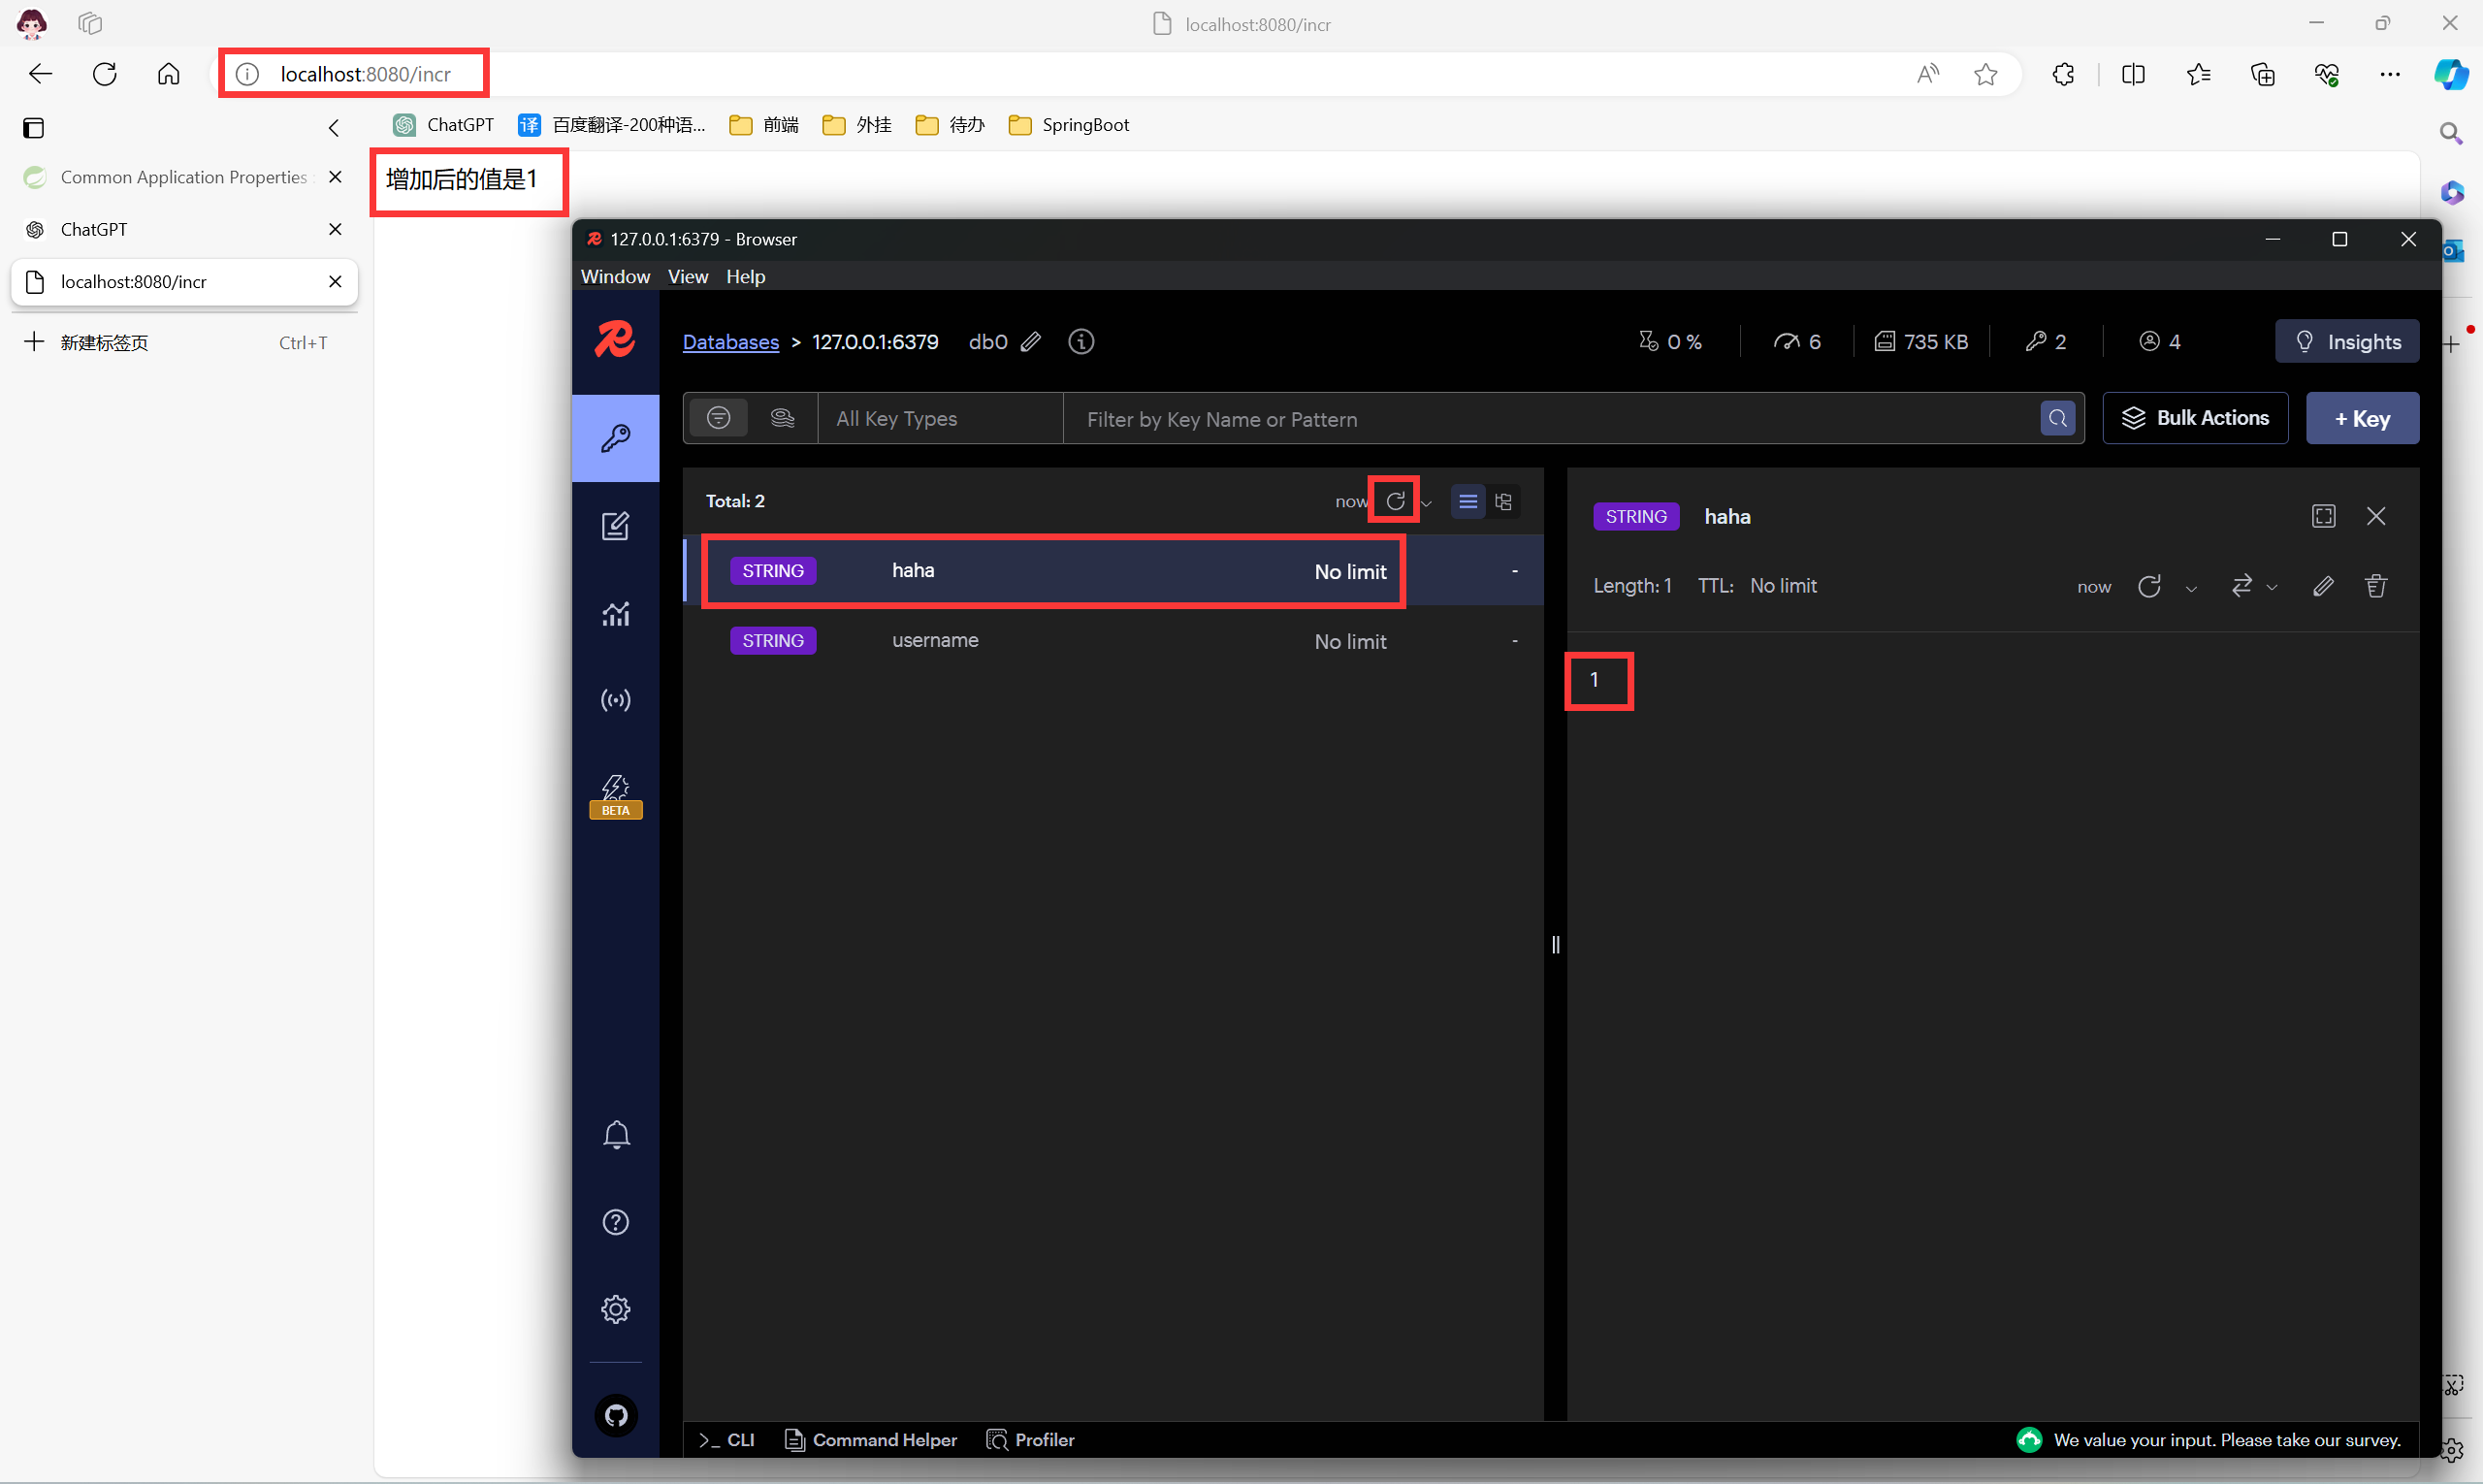
@GetMapping("/incr")
public String incr() {
// 每次请求这个地址 key 为 haha 的 value 自动 +1
Long haha = redisTemplate.opsForValue().increment("haha");
return "增加后的值是" + haha;
}
}
- 重新运行后访问 localhost:8080/incr
http://localhost:8080/incr
如果 Redis 可视化工具 RedisInsight 没有出现 haha 点击刷新
RedisInsight 的安装可以参考我的这篇博客 Redis 可视化工具 RedisInsight 的保姆级安装以及使用(最新)-CSDN博客
- 再次刷新浏览器