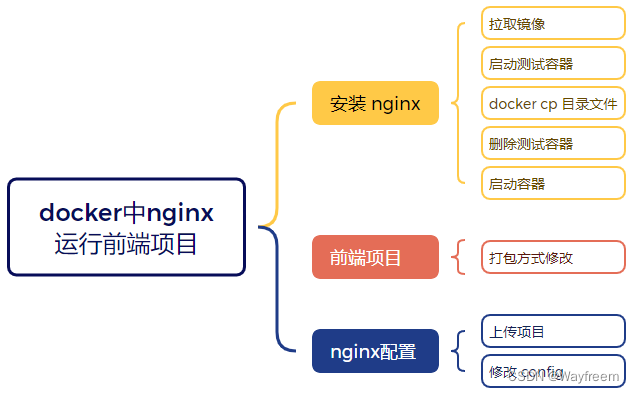
docker 运行 Nginx
第一步:搜索下镜像
首先可以使用 docker search nginx 搜索 nginx 服务
docker search nginx
相关控制台输出:
NAME                              DESCRIPTION                                     STARS               OFFICIAL    AUTOMATED
nginx                             Official build of Nginx.                        11468               [OK]
jwilder/nginx-proxy               Automated Nginx reverse proxy for docker con    1603
richarvey/nginx-php-fpm           Container running Nginx + PHP-FPM capable of    715                                [OK]
bitnami/nginx                     Bitnami nginx Docker Image                      66                                 [OK]
linuxserver/nginx                 An Nginx container, brought to you by LinuxS    62
tiangolo/nginx-rtmp               Docker image with Nginx using the nginx-rtmp    45                                 [OK]
nginx/nginx-ingress               NGINX Ingress Controller for Kubernetes         20
schmunk42/nginx-redirect         A very simple container to redirect HTTP tra    16                                 [OK]
...
第二步: 安装
这里我们安装官方的 nginx 服务
# 安装
docker pull nginx

# 查看本地镜像
第三步:使用挂载的方式安装
使用挂载的方式将 nginx 的配置文件、html 目录挂载到宿主机上面
# 第一步: 创建挂载文件夹
mkdir -p /apps/nginx/html
mkdir -p /apps/nginx/logs

# 第二步:启动一个 nginx
docker run -d -p 80:80 --name nginx --net host nginx

# 第三步:copy 文件到指定的挂载路径  docker cp 容器id:容器的文件 需要拷贝到的地方
docker cp nginx:/etc/nginx/conf.d/ /apps/nginx/
docker cp nginx:/etc/nginx/nginx.conf /apps/nginx/
docker cp nginx:/usr/share/nginx/html/ /apps/nginx/
docker cp nginx:/var/log/nginx/ /apps/nginx/logs/

# 第四步:停止容器
docker stop nginx

# 第五步:删除容器
docker rm nginx

# 第六步:重新运行容器
docker run --name=nginx \
           -p 80:80 \
           -p 443:443 \
           -v /apps/nginx/conf.d:/etc/nginx/conf.d \
           -v /apps/nginx/nginx.conf:/etc/nginx/nginx.conf \
           -v /apps/nginx/html:/usr/share/nginx/html \
           -v /apps/nginx/logs:/var/log/nginx \
           -v /apps/nginx/cert:/etc/nginx/cert \
           -e TZ=Asia/Shanghai \
           --privileged=true \
           --restart=always \
           -d nginx
这里我们是访问 80端口 就可以访问到 nginx 了。
测试配置文件格式
docker exec nginx nginx -t
重启 nginx
docker exec nginx nginx -s reload
前端项目打包
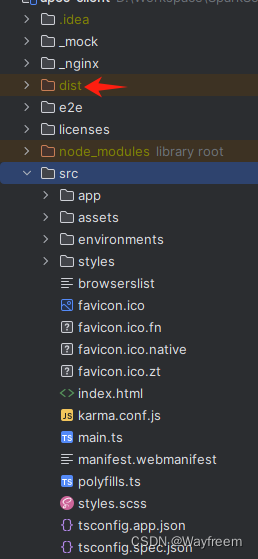
我这边是之前的一个 angular 项目,公司使用的一个老项目了,用于测试下,具体的打包方式可以按照大伙的实际项目来就好了,这个都不算特别复杂的。
我们正常情况下是在访问的 ip 后面加上工程名去访问,这样子就可以访问到对应的工程了。那么如果现在是一个官网,或者是就是想访问 ip 就可以工程呢?
# 打包的时候增加工程名,这个是访问 http://ip/erp
ng build --base-href /erp/ --prod
为了能实现我们的需求,那么我们打包的时候需要这样子打包,将 --base-href 设置为 /.
ng build --base-href /. --prod
Nginx 配置
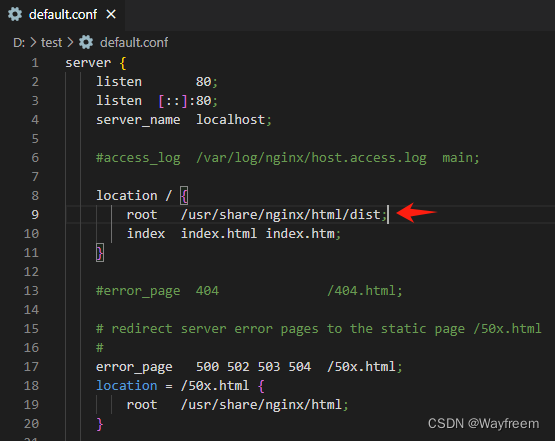
实际修改
修改 default.conf, 如果比较熟悉的话,就看到这里就可以了,后面的具体部分是可以省略的。

location / {
    root   /usr/share/nginx/html/dist;
    index  index.html index.htm;
}
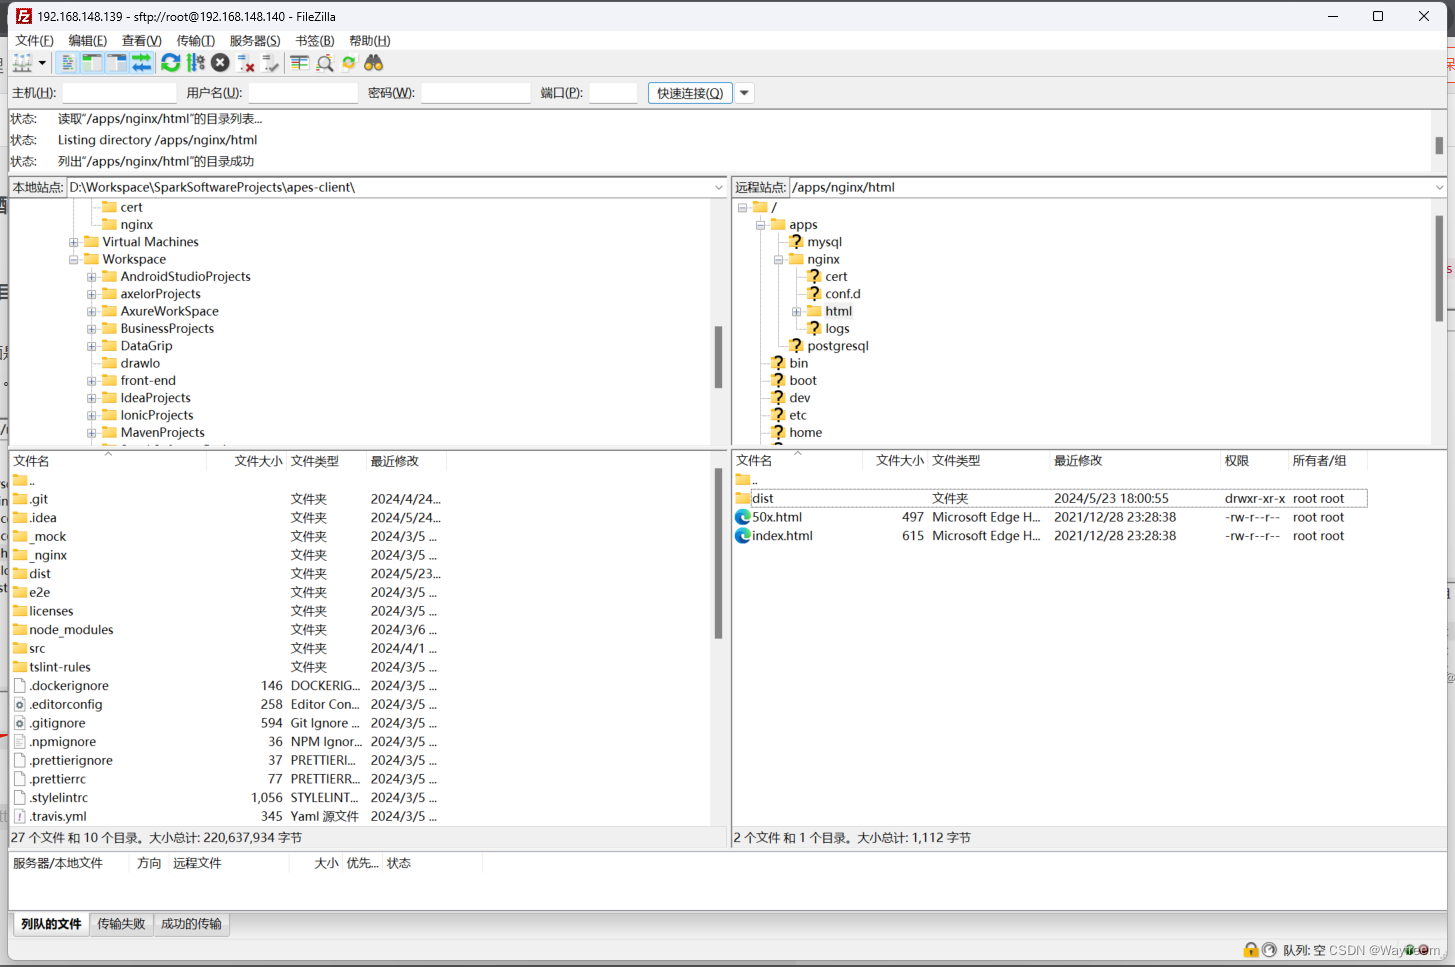
上传项目文件到服务器上面
由于我们上面是挂载了 html 文件的路径,这个就是类似于 tomcat 目录下面的 webapps 路径(如果不清楚的,可以忽略,这个不重要)。这里我使用的是 FileZilla 这个工具
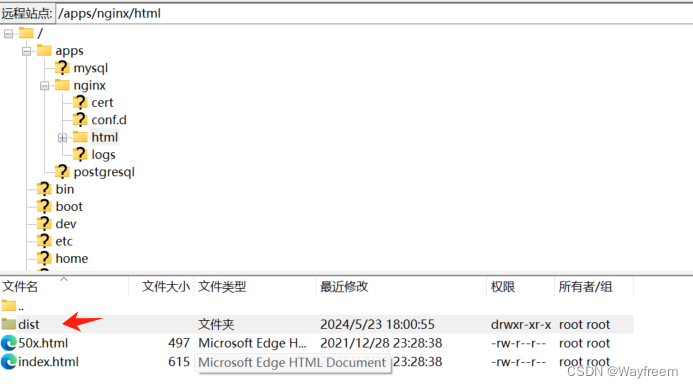
完整的工具截图
修改 nginx 配置
这里先总结下哈,我们修改的是 nginx/conf.d/default.conf 这个文件内容,具体怎么回事,就向下看把。
首先我们看到有这个配置文件 nginx.conf,我们先看看具体的内容是啥?

nginx.conf 文件内容
user  nginx;
worker_processes  auto;

error_log  /var/log/nginx/error.log notice;
pid        /var/run/nginx.pid;


events {
    worker_connections  1024;
}


http {
    include       /etc/nginx/mime.types;
    default_type  application/octet-stream;

    log_format  main  '$remote_addr - $remote_user [$time_local] "$request" '
                      '$status $body_bytes_sent "$http_referer" '
                      '"$http_user_agent" "$http_x_forwarded_for"';

    access_log  /var/log/nginx/access.log  main;

    sendfile        on;
    #tcp_nopush     on;

    keepalive_timeout  65;

    #gzip  on;

	# 这里是引入了我们的各个配置文件
    include /etc/nginx/conf.d/*.conf;
}
从 include /etc/nginx/conf.d/*.conf; 可以看到就是需要去找 conf.d 下的 conf 文件,这个时候有细心的同学就会说,怎么这个路径是 /etc/nginx/conf.d/ 下的,我们不是挂载出来了吗?其实这个地方是在 docker 容器中的地址,并不是我们宿主机上面的。
default.conf
然后我们修改下对应的配置文件 default.conf
location / {
    root   /usr/share/nginx/html/dist;
    index  index.html index.htm;
}
这里需要改的是 docker 容器中的路径,如果不是的话,这里就会报错,最开始我没有意思到这个问题,在重启 nginx 的时候发现报错,看了日志才发现这个问题。
最后上传一张搞定的图片: