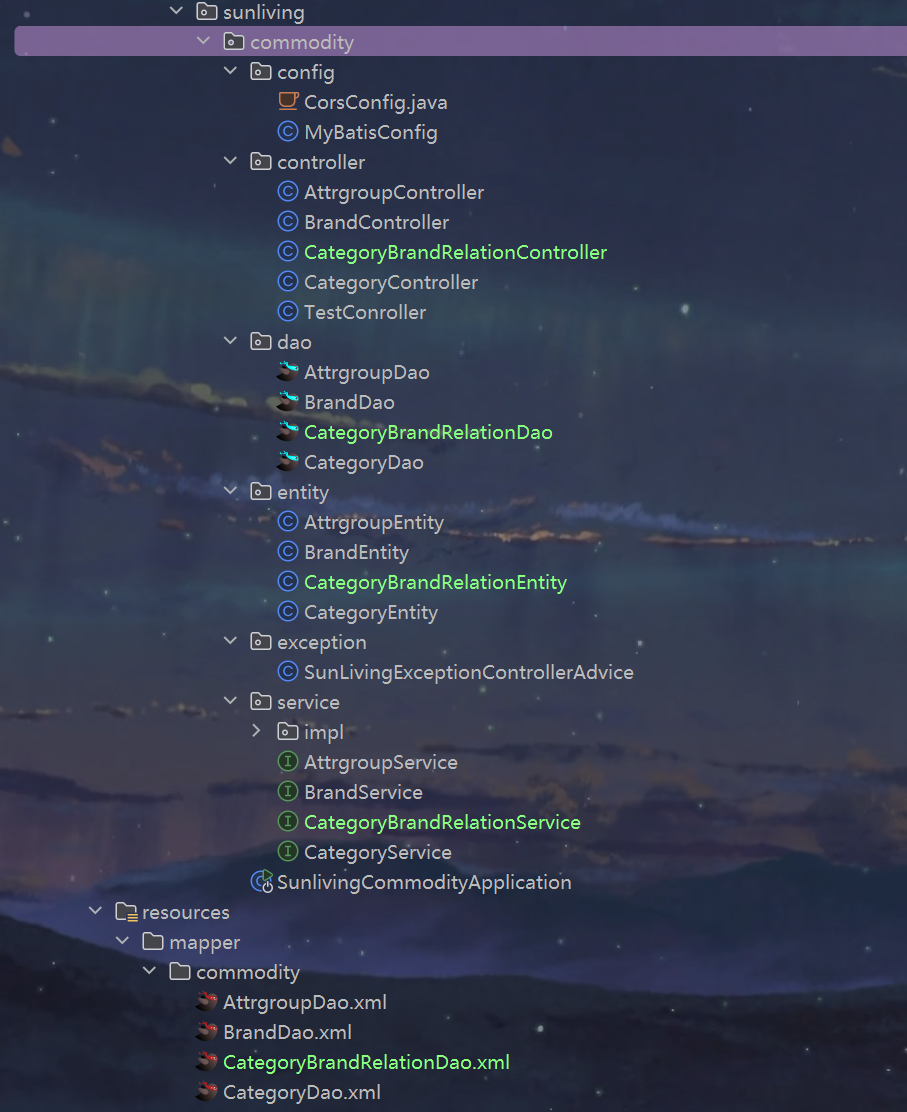
1.数据库表设计
1.多表关联设计
2.创建表
use sunliving_commodity;
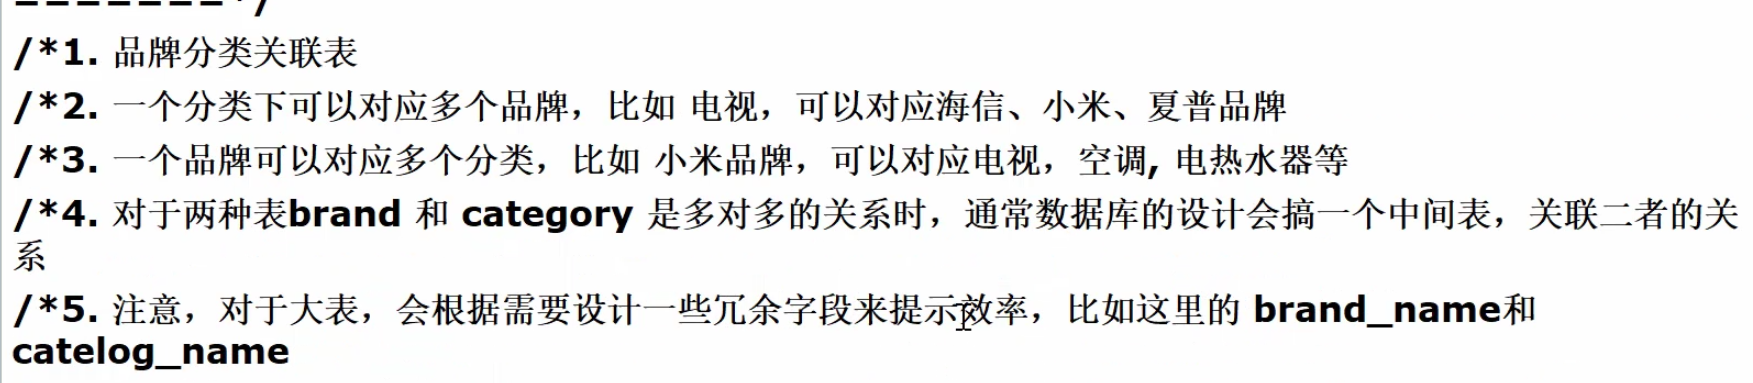
CREATE TABLE commodity_category_brand_relation
(
id BIGINT NOT NULL AUTO_INCREMENT,
brand_id BIGINT COMMENT '品牌 id',
category_id BIGINT COMMENT '分类 id',
brand_name VARCHAR(255) COMMENT '品牌名称',
category_name VARCHAR(255) COMMENT '分类名称',
PRIMARY KEY (id)
) CHARSET = utf8mb4 COMMENT ='品牌分类关联表';
SELECT *
FROM `commodity_category_brand_relation`;
2.使用renren-generator生成CRUD
1.基本配置检查
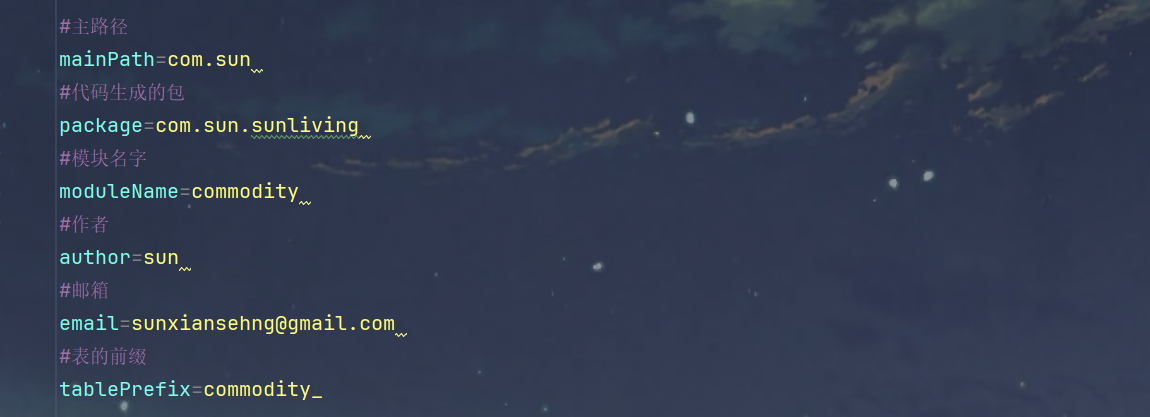
1.generator.properties
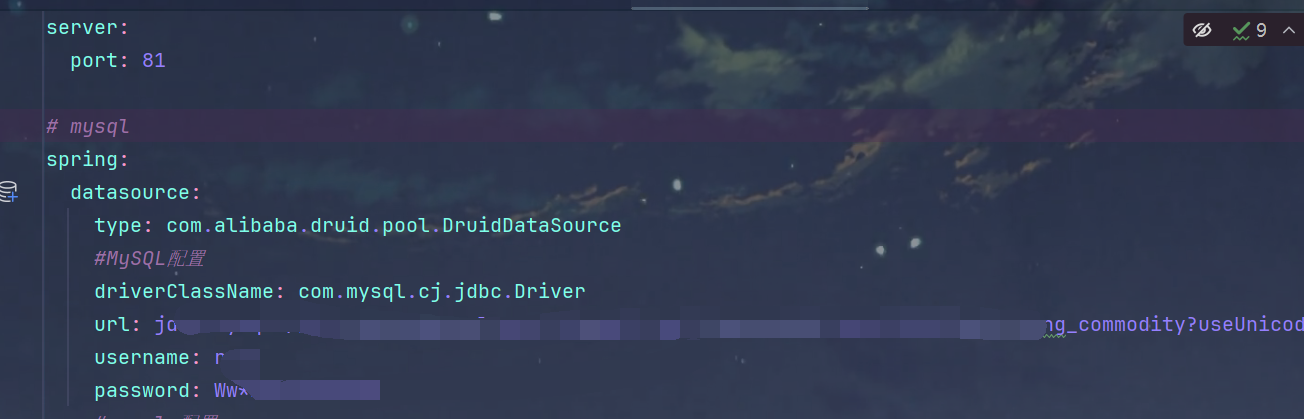
2.application.yml
2.生成代码
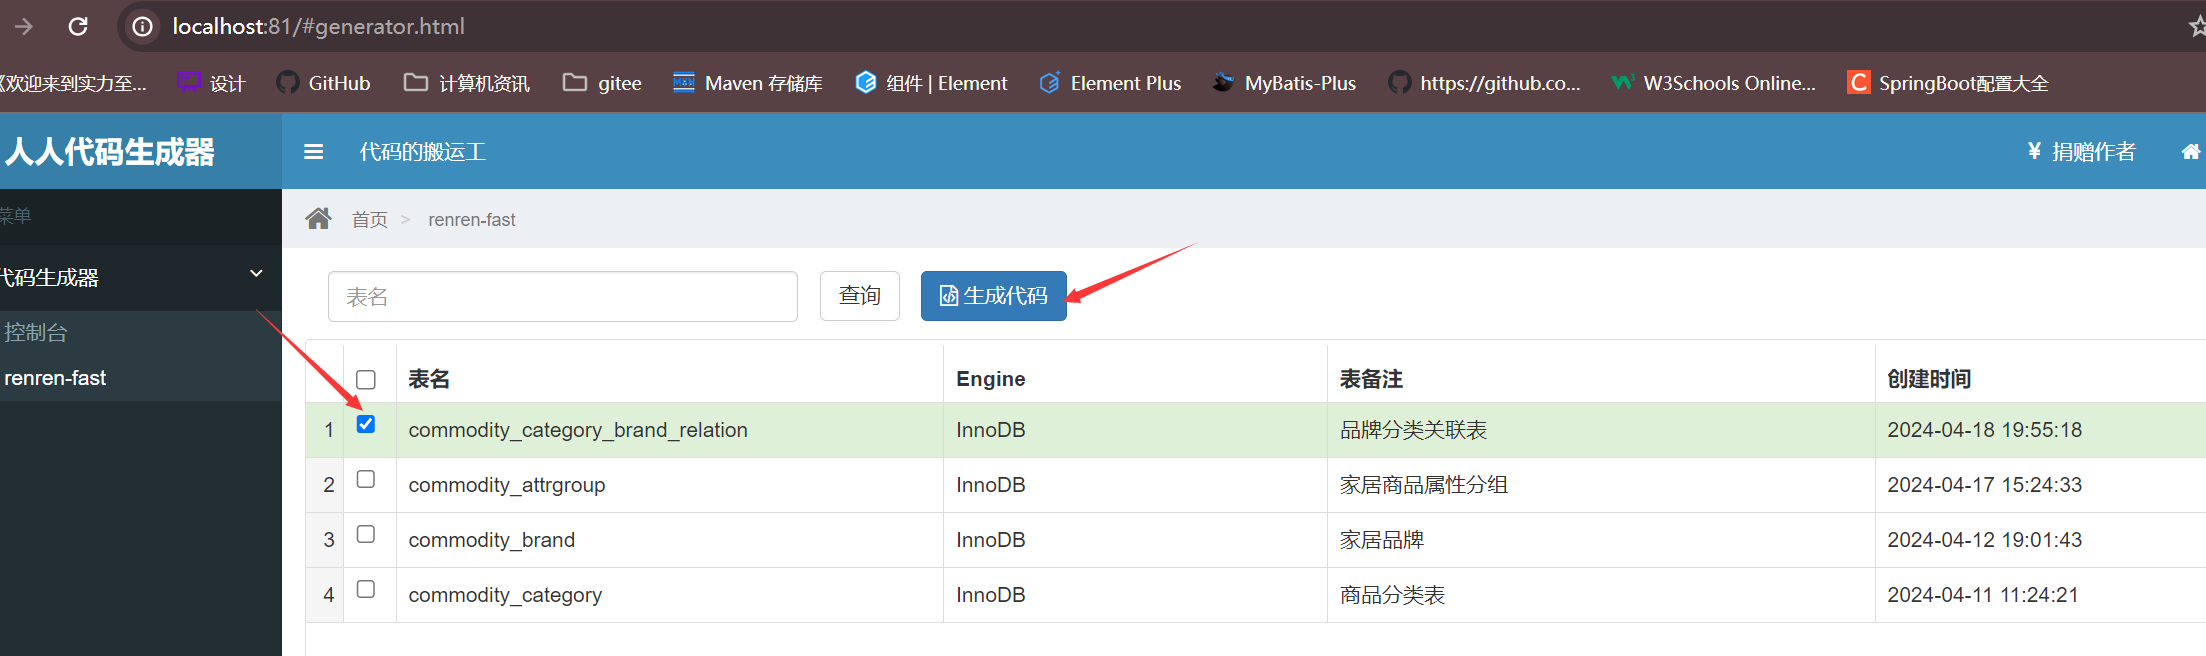
1.进入localhost:81生成代码
2.将main目录覆盖sunliving-commodity模块的main目录

3.代码检查
1.注释掉CategoryBrandRelationController.java的@RequiresPermissions注解即可
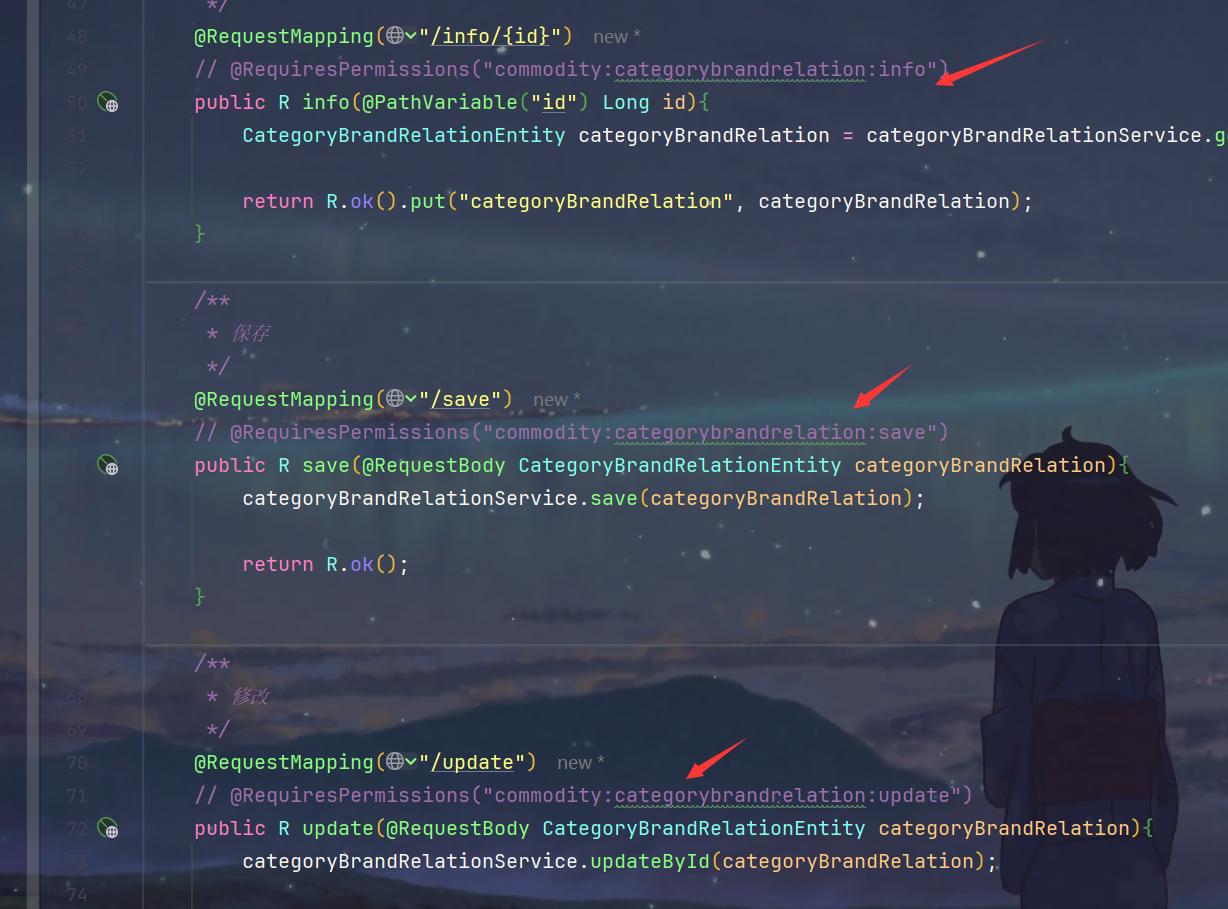
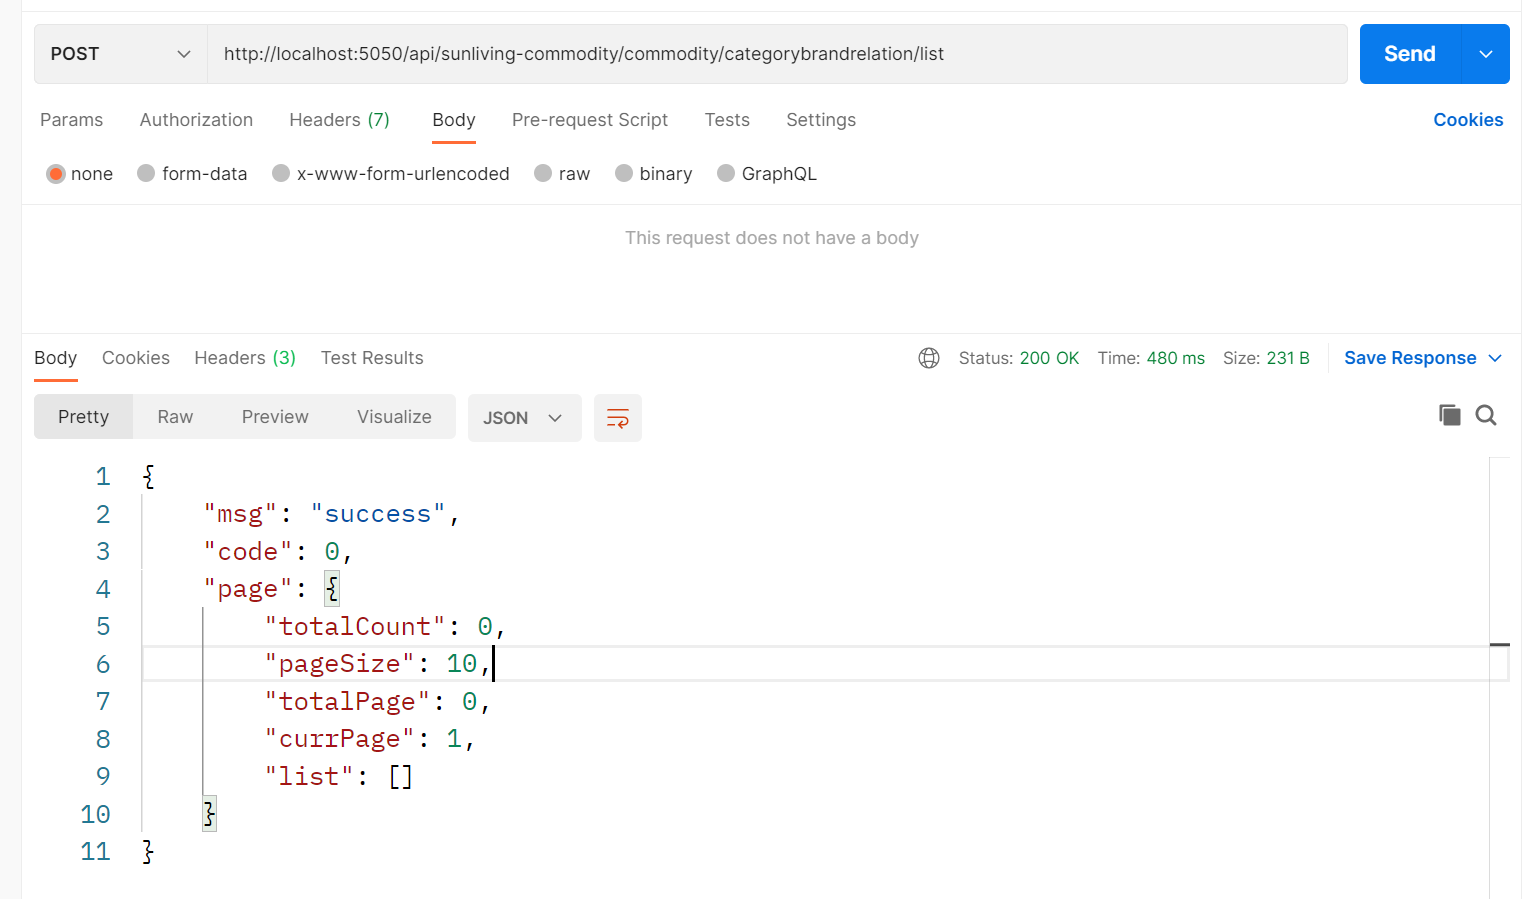
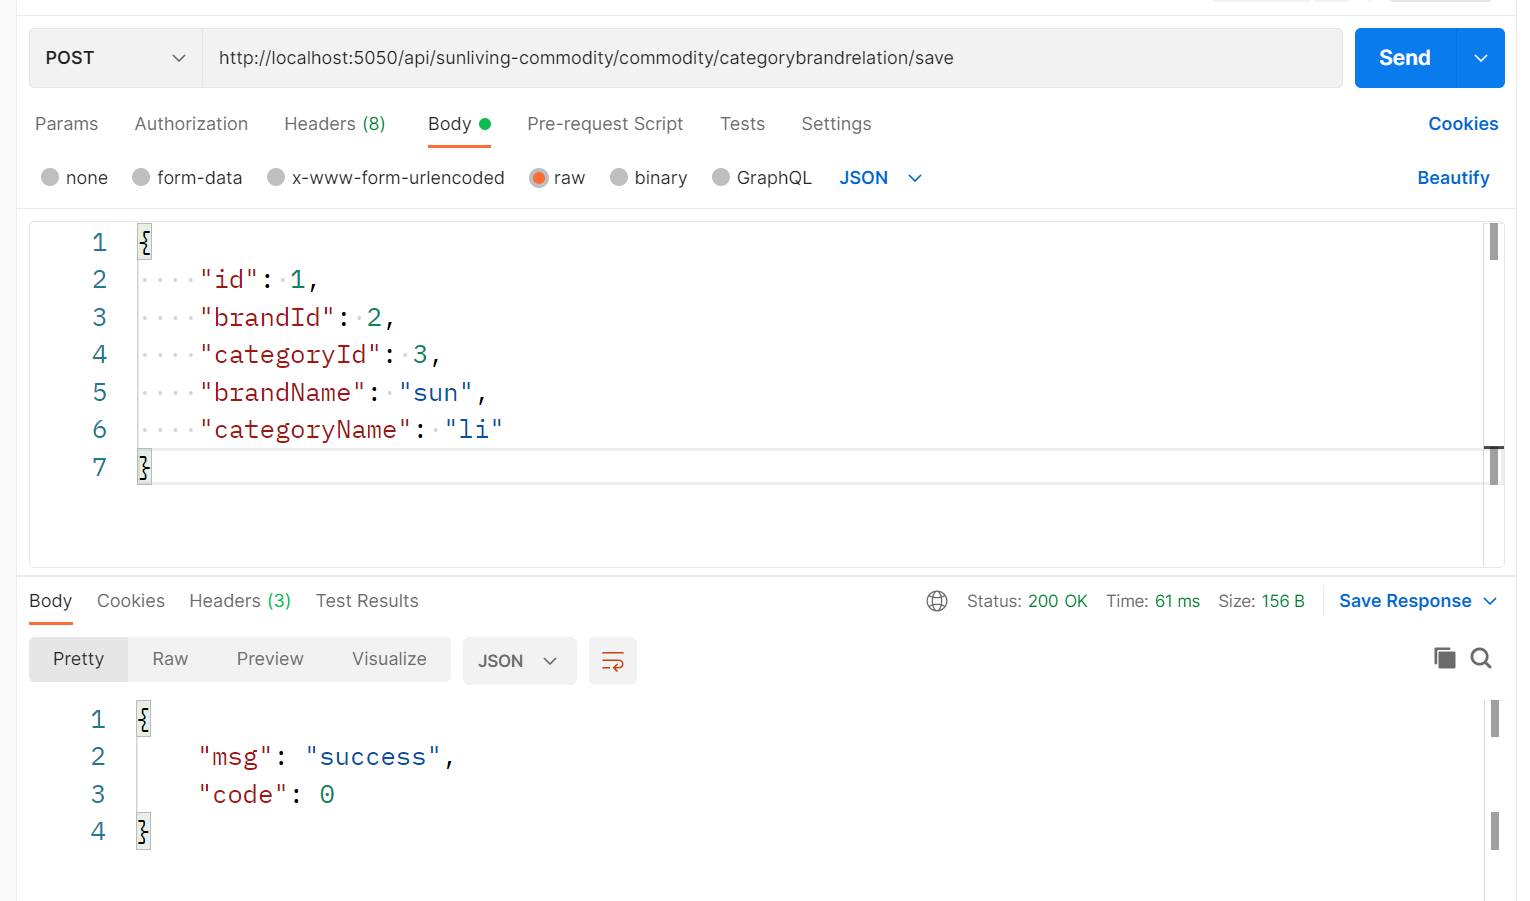
2.接口测试(通过网关访问)
1.http://localhost:5050/api/sunliving-commodity/commodity/categorybrandrelation/list
2.http://localhost:5050/api/sunliving-commodity/commodity/categorybrandrelation/save
3.第五次部署
1.后端部署
1.由于没有添加新模块,所以不需区分多环境,网关也不需要改
2.将sunliving-commodity模块激活为prod
3.maven打包
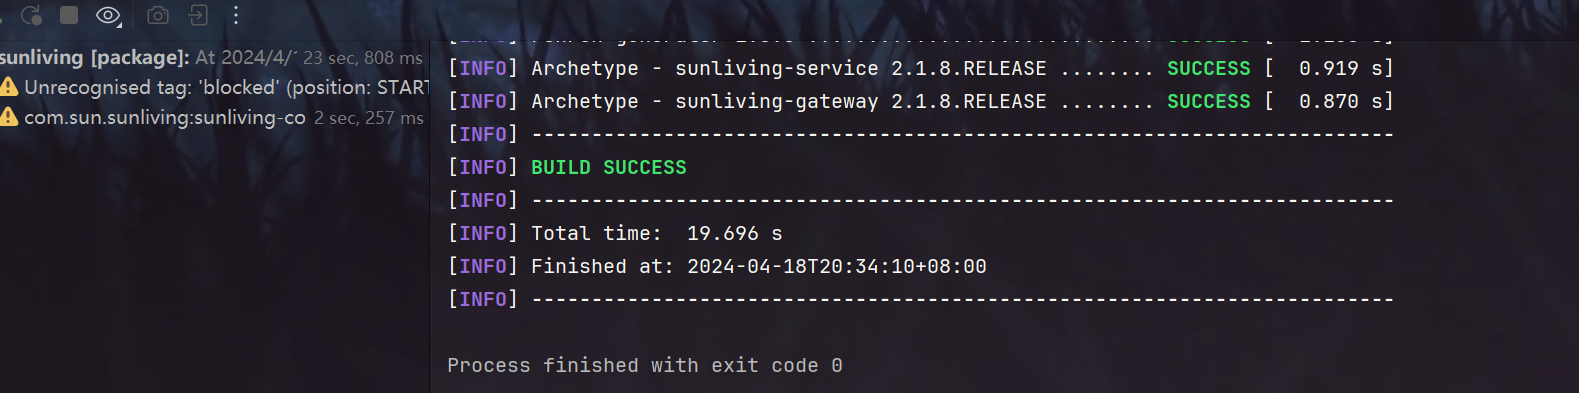
4.测试执行

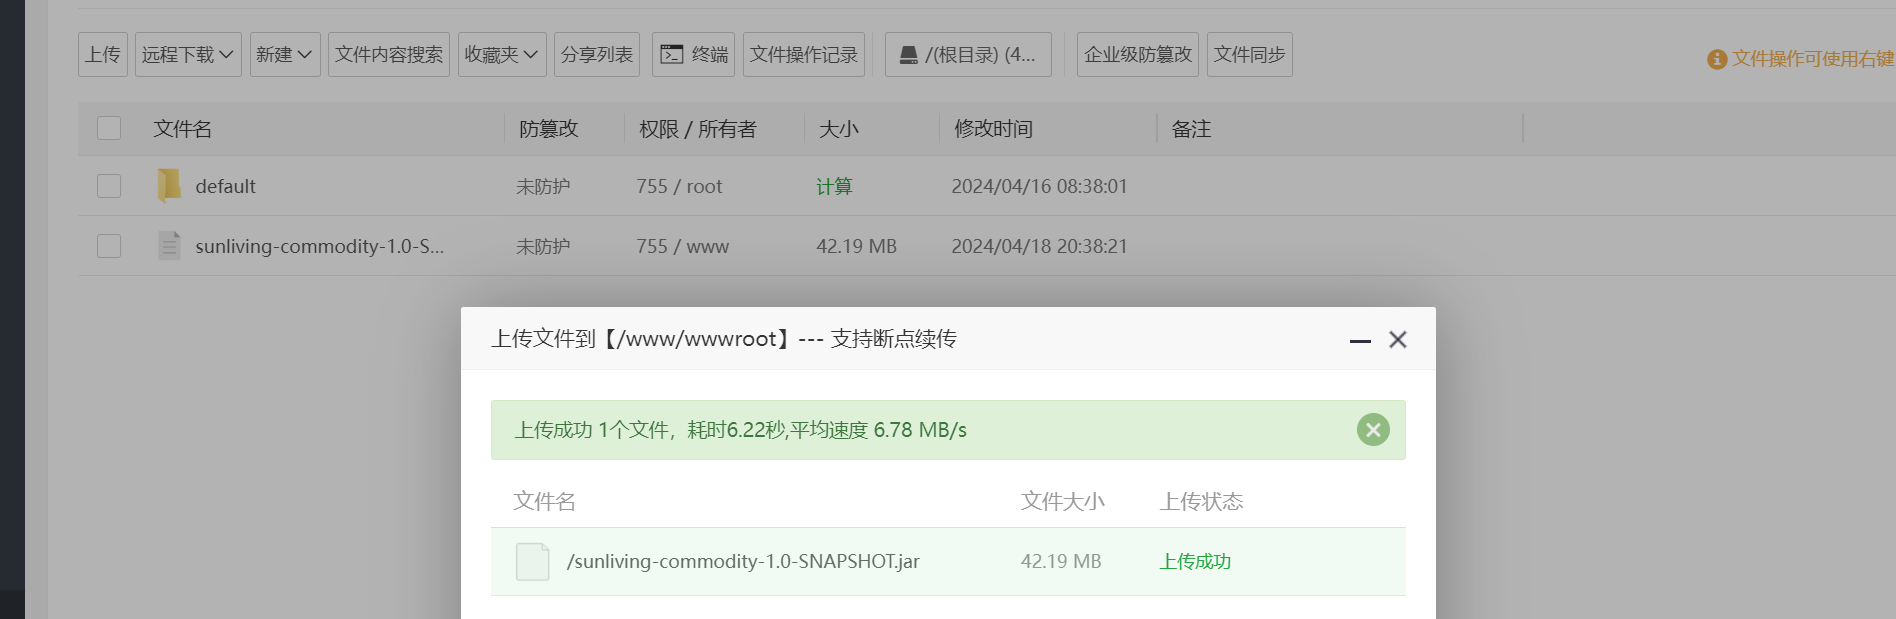
5.部署上线
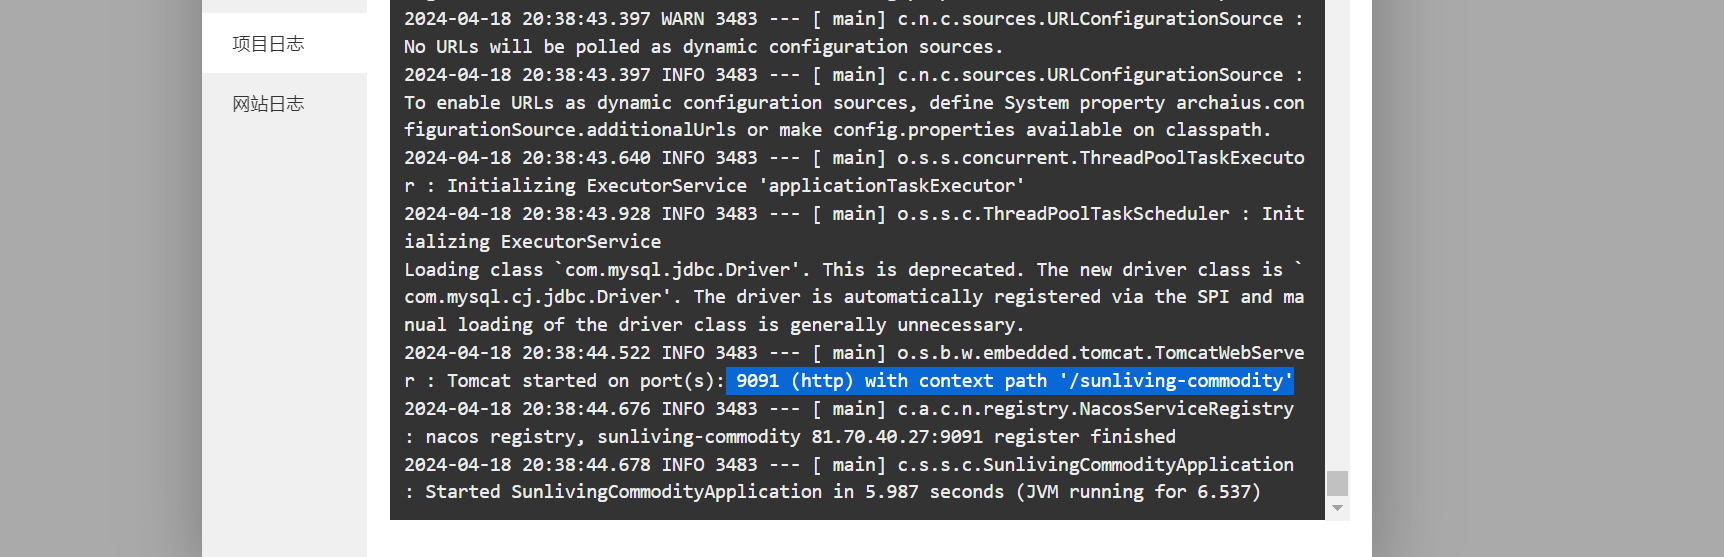
6.启动成功
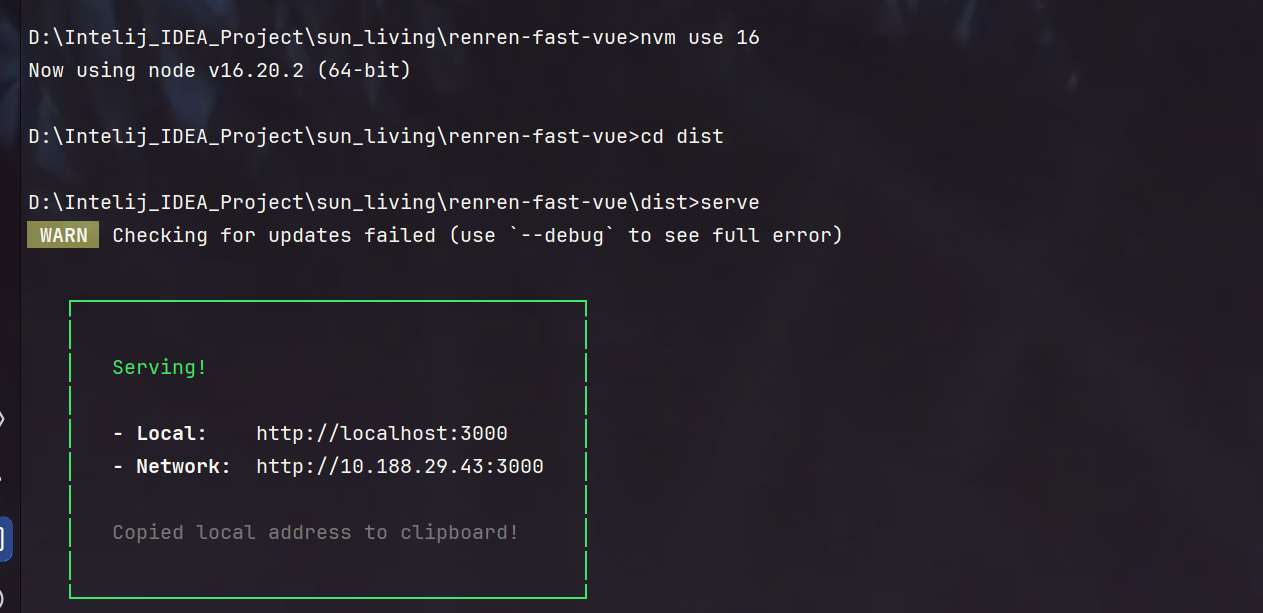
2.前端部署
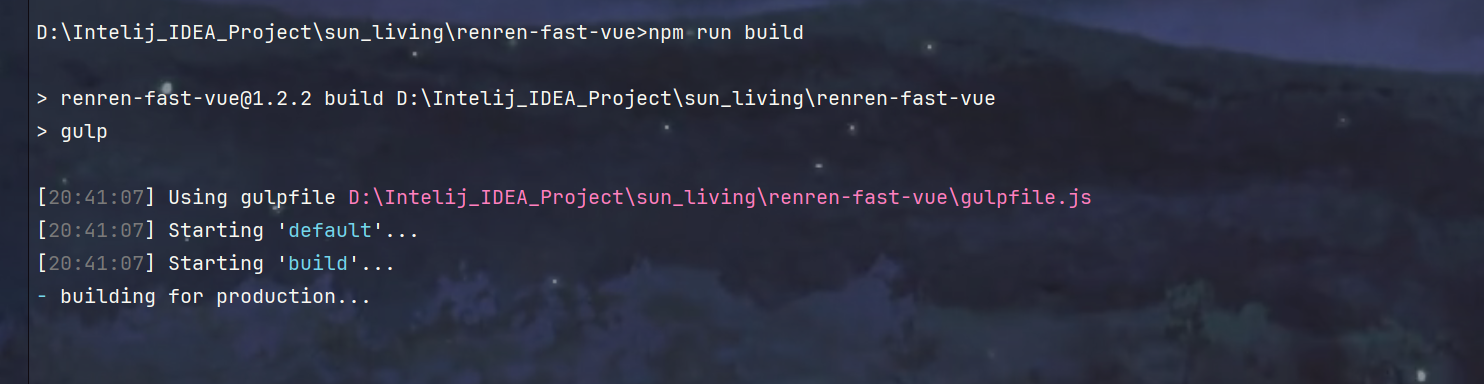
1.根目录打包
2.切换到node16,dist目录执行serve
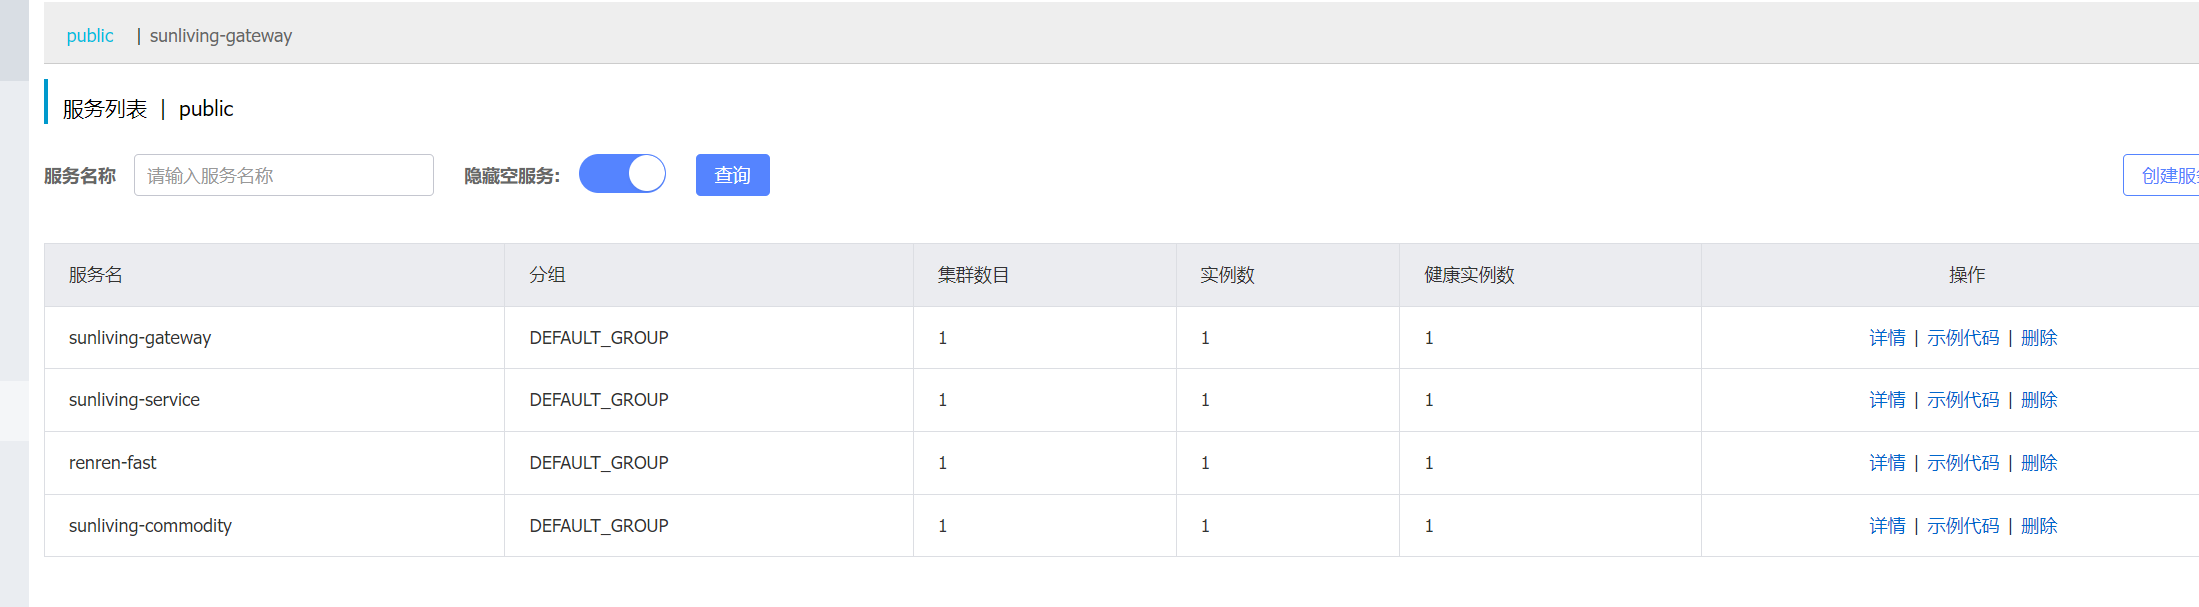
3.Nacos将上线四个后端项目
4.测试无误
5.部署上线
6.测试依然无误
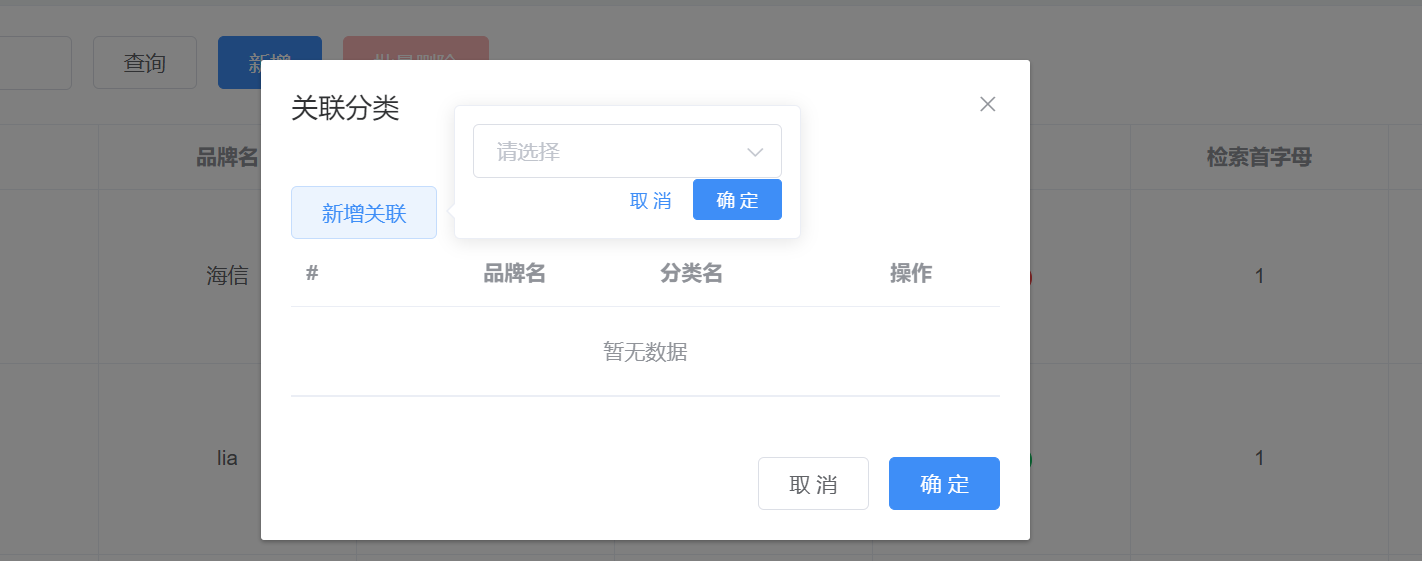
4.前端显示界面 brand.vue
1.新增关联分类的按钮
1.新增按钮

2.实现方法

2.引入品牌和分类关联的对话框
1.最后的div前面引入
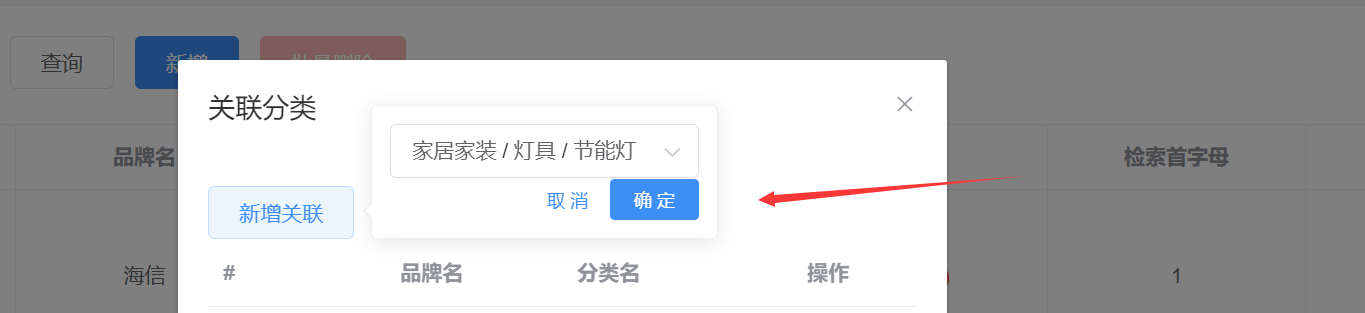
<!-- 品牌和分类关联的对话框 -->
<el-dialog title="关联分类" :visible.sync="cateRelationDialogVisible" width="30%">
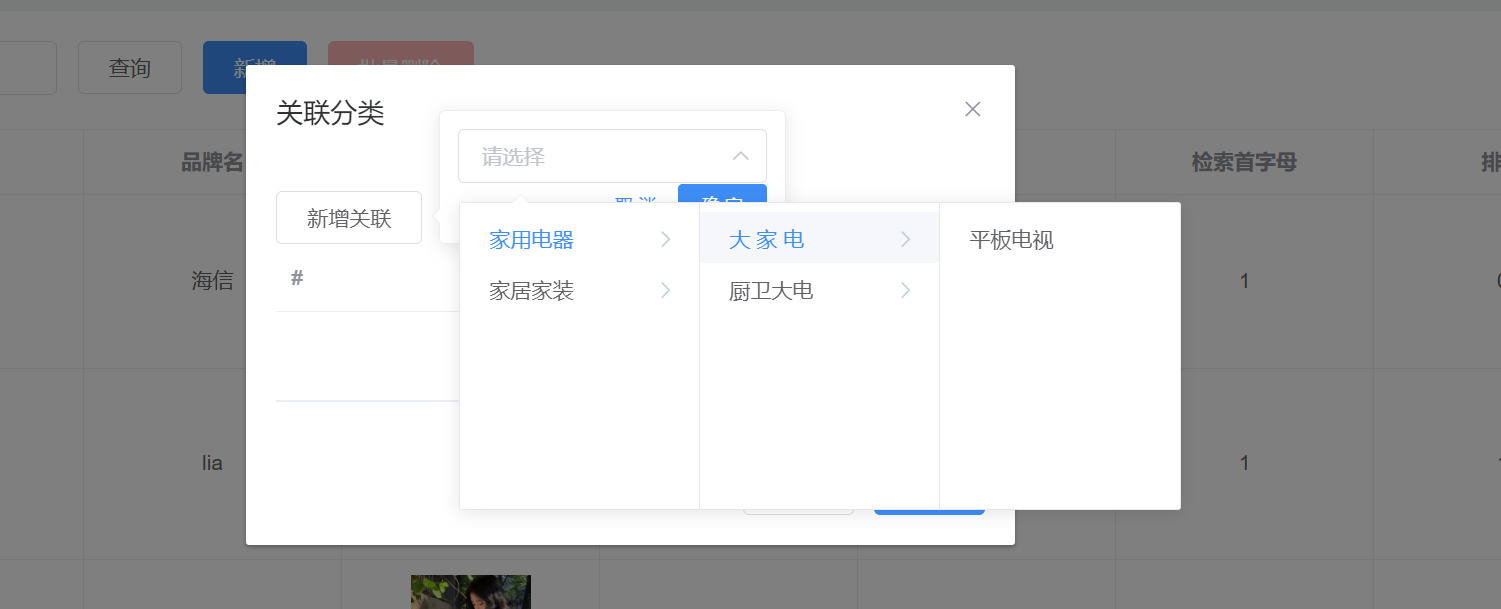
<el-popover placement="right-end" v-model="popCatelogSelectVisible">
<!-- <category-cascader :catelogPath.sync="catelogPath"></category-cascader>-->
<!-- 这里我们加入分类的 Cascader 级联选择器, 前面我们使用过 -->
<el-cascader
v-model="cascadedCategoryId" :options="categorys" :props="props"></el-cascader>
<div style="text-align: right; margin: 0">
<el-button size="mini" type="text" @click="popCatelogSelectVisible = false">取 消
</el-button>
<el-button type="primary" size="mini" @click="addBrandCategoryRelation"> 确 定
</el-button>
</div>
<el-button slot="reference">新增关联</el-button>
</el-popover>
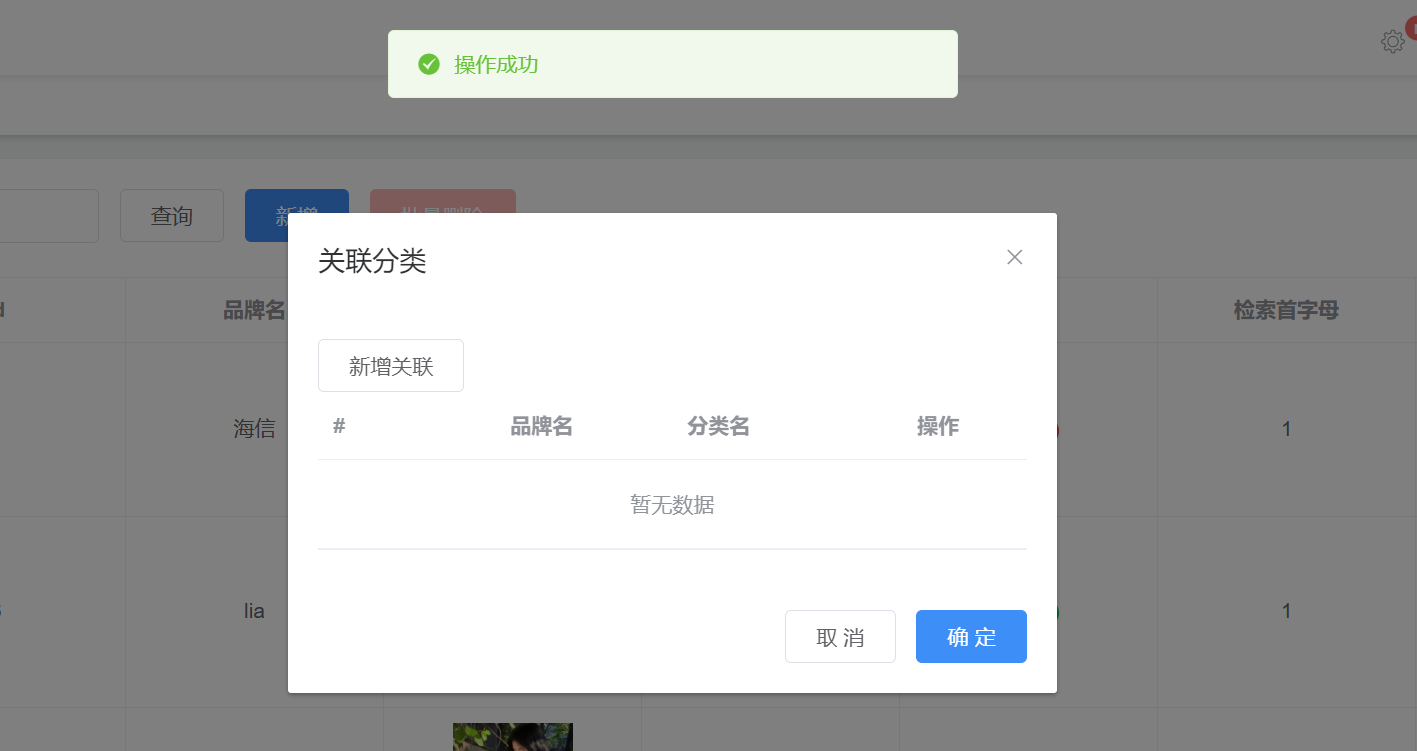
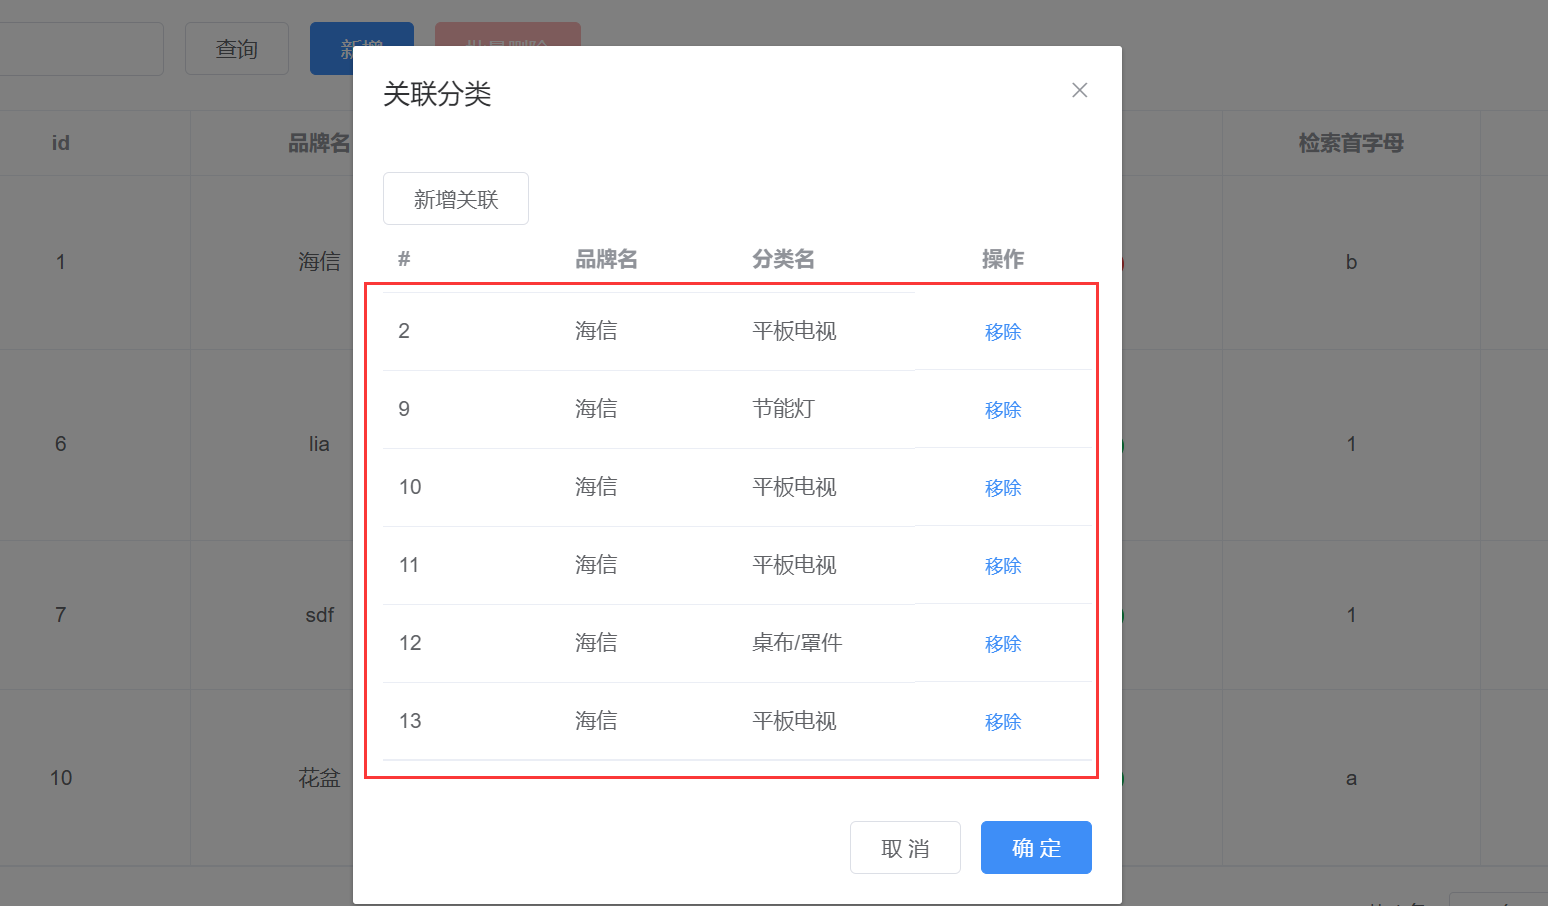
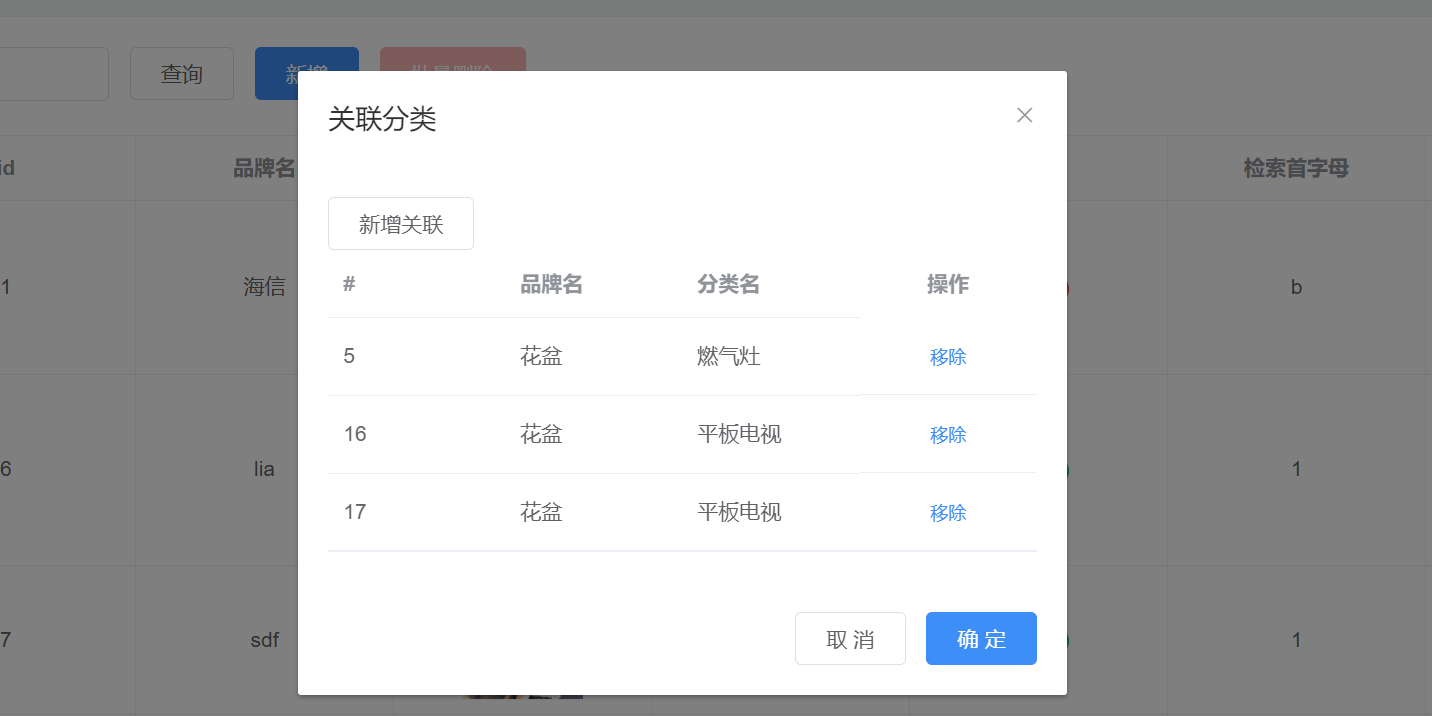
<el-table :data="cateRelationTableData" style="width: 100%">
<el-table-column prop="id" label="#"></el-table-column>
<el-table-column prop="brandName" label="品牌名"></el-table-column>
<el-table-column prop="categoryName" label="分类名"></el-table-column>
<el-table-column fixed="right" header-align="center" align="center" label="操作">
<template slot-scope="scope">
<el-button
type="text" size="small" @click="deleteCateRelationHandle(scope.row.id,scope.row.brandId)">移除
</el-button>
</template>
</el-table-column>
</el-table>
<span slot="footer" class="dialog-footer">
<el-button @click="cateRelationDialogVisible = false">取 消</el-button>
<el-button type="primary" @click="cateRelationDialogVisible = false"> 确 定
</el-button>
</span>
</el-dialog>
2.数据池中定义信息
cateRelationDialogVisible: false,
cateRelationTableData: [],
cascadedCategoryId: [],
popCatelogSelectVisible: false,
props: {
value: "id",
label: "name",
children: "childrenCategories"
},
categorys: [],
brandId: 0,
3.方法显示对话框

3.显示关联分类的级联菜单
1.添加方法,获取分类列表,带层级
getCategories() {
this.$http({
url: process.env.COMMODITY_BASEPATH + '/commodity/category/list/tree',
method: 'get'
}).then(({data}) => {
this.categorys = data.data;
})
}
2.初始化时调用这个方法

3.结果展示
5.添加分类关联
1.前端 brand.vue
1.点击关联分类按钮,将品牌id放到数据池的brandId中

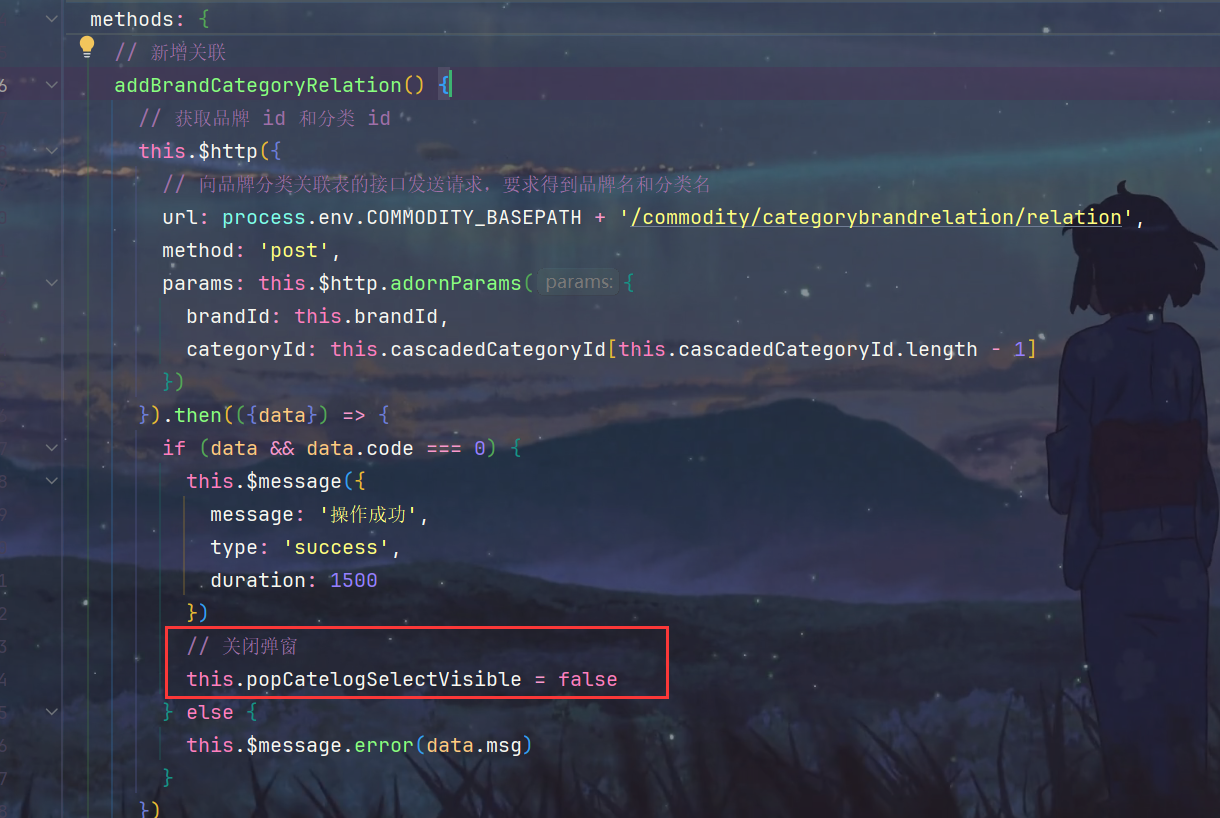
2.编写addBrandCategoryRelation,发送新增关联的请求
addBrandCategoryRelation() {
this.$http({
url: process.env.COMMODITY_BASEPATH + '/commodity/categorybrandrelation/relation',
method: 'post',
params: this.$http.adornParams({
brandId: this.brandId,
categoryId: this.cascadedCategoryId[this.cascadedCategoryId.length - 1]
})
}).then(({data}) => {
if (data && data.code === 0) {
this.$message({
message: '操作成功',
type: 'success',
duration: 1500
})
this.cateRelationDialogVisible = false
} else {
this.$message.error(data.msg)
}
})
}
2.后端 sunliving-commodity模块
1.service层
1.CategoryBrandRelationService.java 新增方法
void saveRelationById(Long brandId, Long categoryId);
2.CategoryBrandRelationServiceImpl.java 实现方法

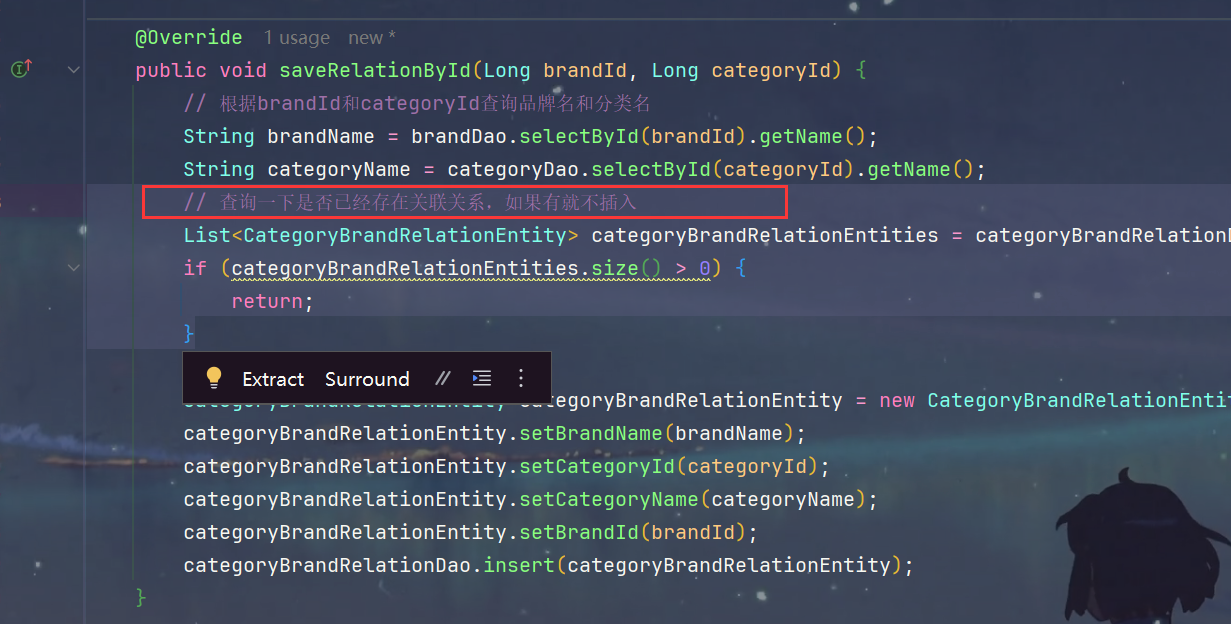
@Override
public void saveRelationById(Long brandId, Long categoryId) {
String brandName = brandDao.selectById(brandId).getName();
String categoryName = categoryDao.selectById(categoryId).getName();
CategoryBrandRelationEntity categoryBrandRelationEntity = new CategoryBrandRelationEntity();
categoryBrandRelationEntity.setBrandName(brandName);
categoryBrandRelationEntity.setCategoryId(categoryId);
categoryBrandRelationEntity.setCategoryName(categoryName);
categoryBrandRelationEntity.setBrandId(brandId);
categoryBrandRelationDao.insert(categoryBrandRelationEntity);
}
2.controller层
CategoryBrandRelationController.java 编写接口
@RequestMapping("/relation")
public R relation(@RequestParam Map<String, Object> params){
long brandId = Long.parseLong(params.get("brandId").toString());
long categoryId = Long.parseLong(params.get("categoryId").toString());
categoryBrandRelationService.saveRelationById(brandId, categoryId);
return R.ok();
}
3.测试

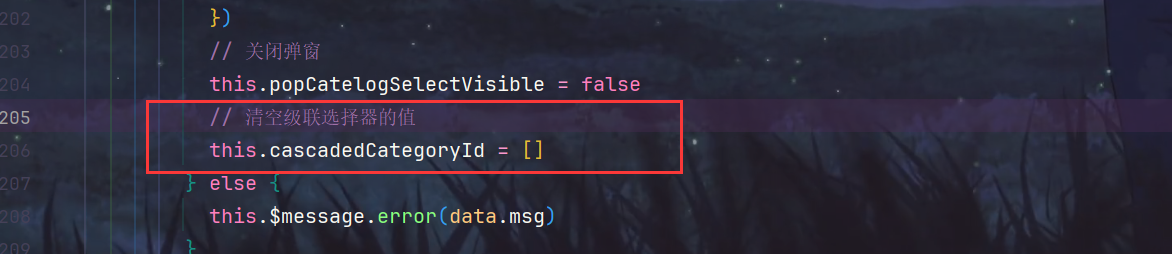
4.两个小问题
1.添加成功之后关闭弹窗
2.下一次点击新增关联时不保存上一次记录
6.显示分类关联列表
1.后端sunliving-commodity模块
1.service层
1.CategoryBrandRelationService.java
List<CategoryBrandRelationEntity> getCateRelationTableDataById(Long brandId);
2.CategoryBrandRelationServiceImpl.java
    @Override
    public List<CategoryBrandRelationEntity> getCateRelationTableDataById(Long brandId) {
        return categoryBrandRelationDao.selectList(new QueryWrapper<CategoryBrandRelationEntity>().eq("brand_id", brandId));
    }
2.controller层
@RequestMapping("/list/{brandId}")
public R getCateRelationTableDataById(@PathVariable("brandId") Long brandId){
return R.ok().put("data", categoryBrandRelationService.getCateRelationTableDataById(brandId));
}
3.测试

2.前端 brand.vue
1.找到列表绑定的属性

2.找到点击关联按钮触发的方法,为属性赋值
relateCategoryHandle(id) {
this.$http({
url: process.env.COMMODITY_BASEPATH + '/commodity/categorybrandrelation/list/' + id,
method: 'get'
}).then(({data}) => {
if (data && data.code === 0) {
this.cateRelationTableData = data.data
} else {
this.cateRelationTableData = []
}
})
this.brandId = id
this.cateRelationDialogVisible = true
}
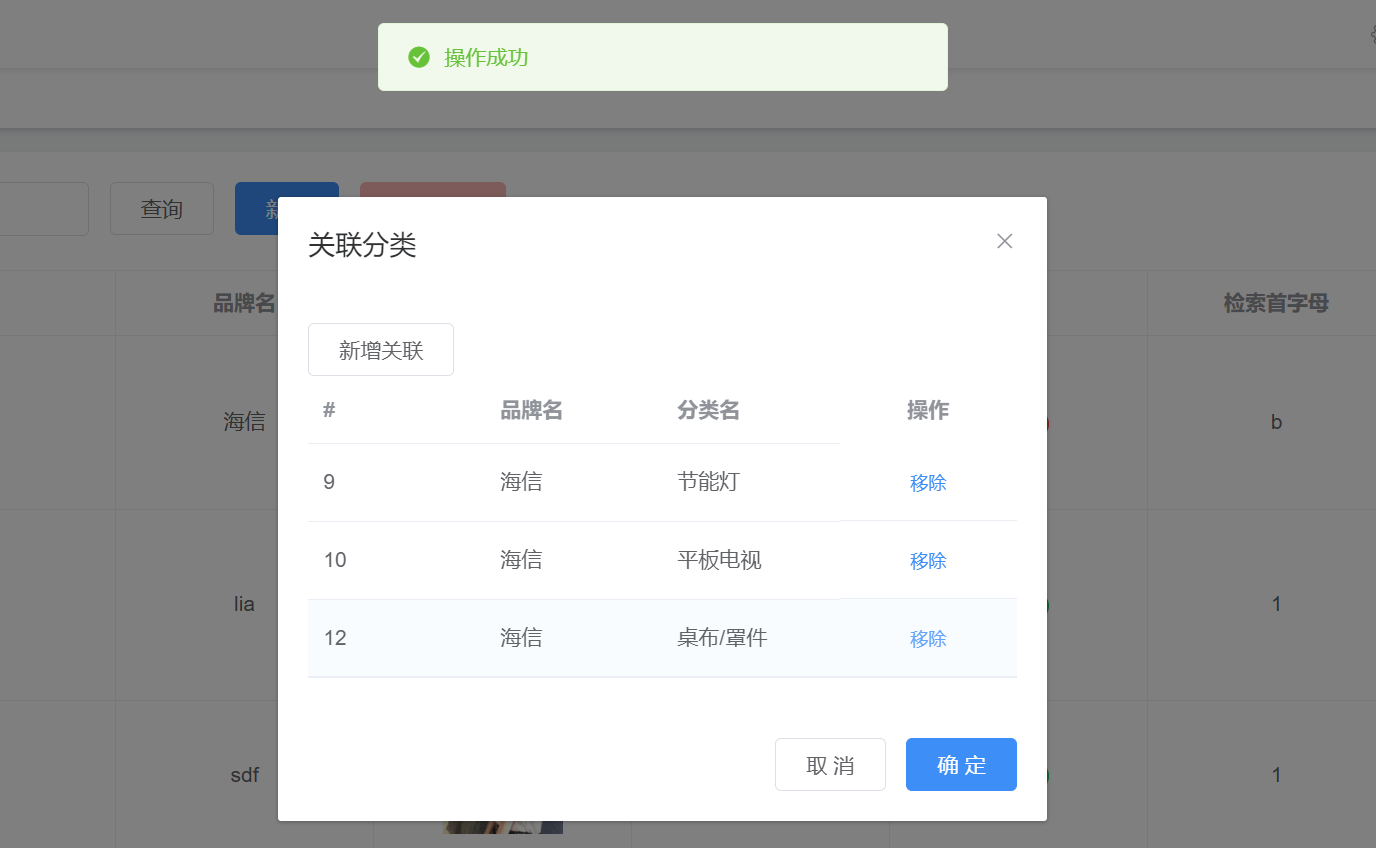
3.查看结果
3.几个小问题
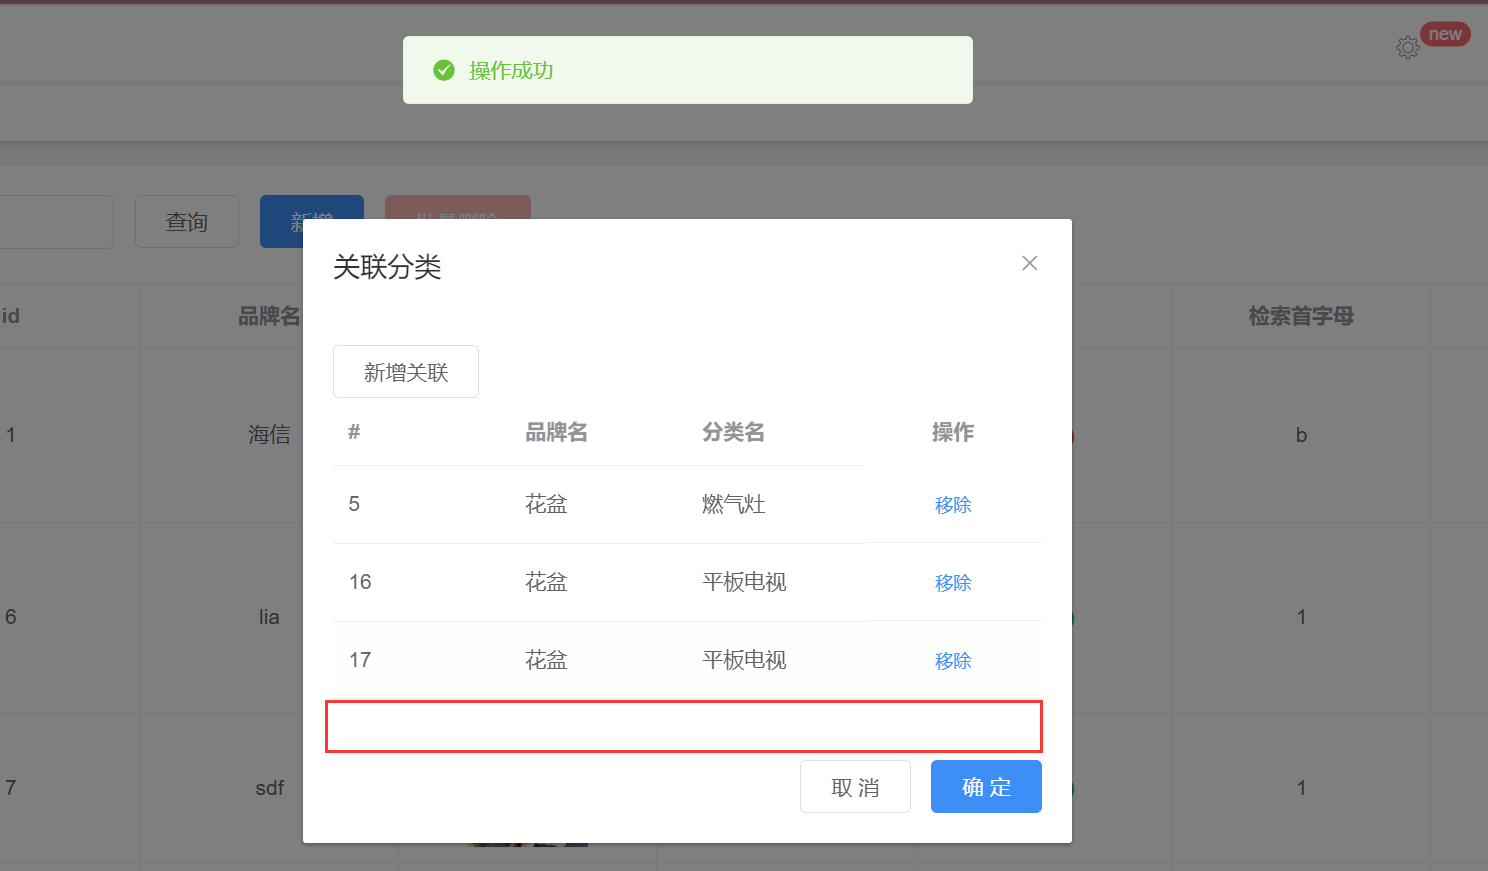
1.在新增关联之后并没有刷新分类列表
1.只需在addBrandCategoryRelation这个新增关联的方法操作成功后刷新表格即可
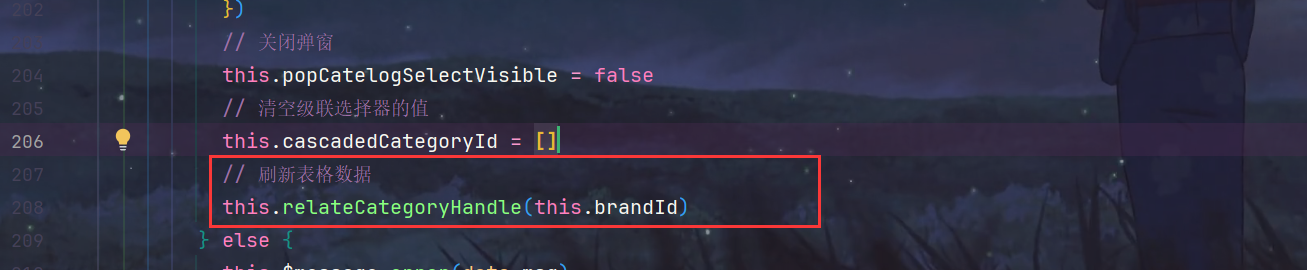
2.展示
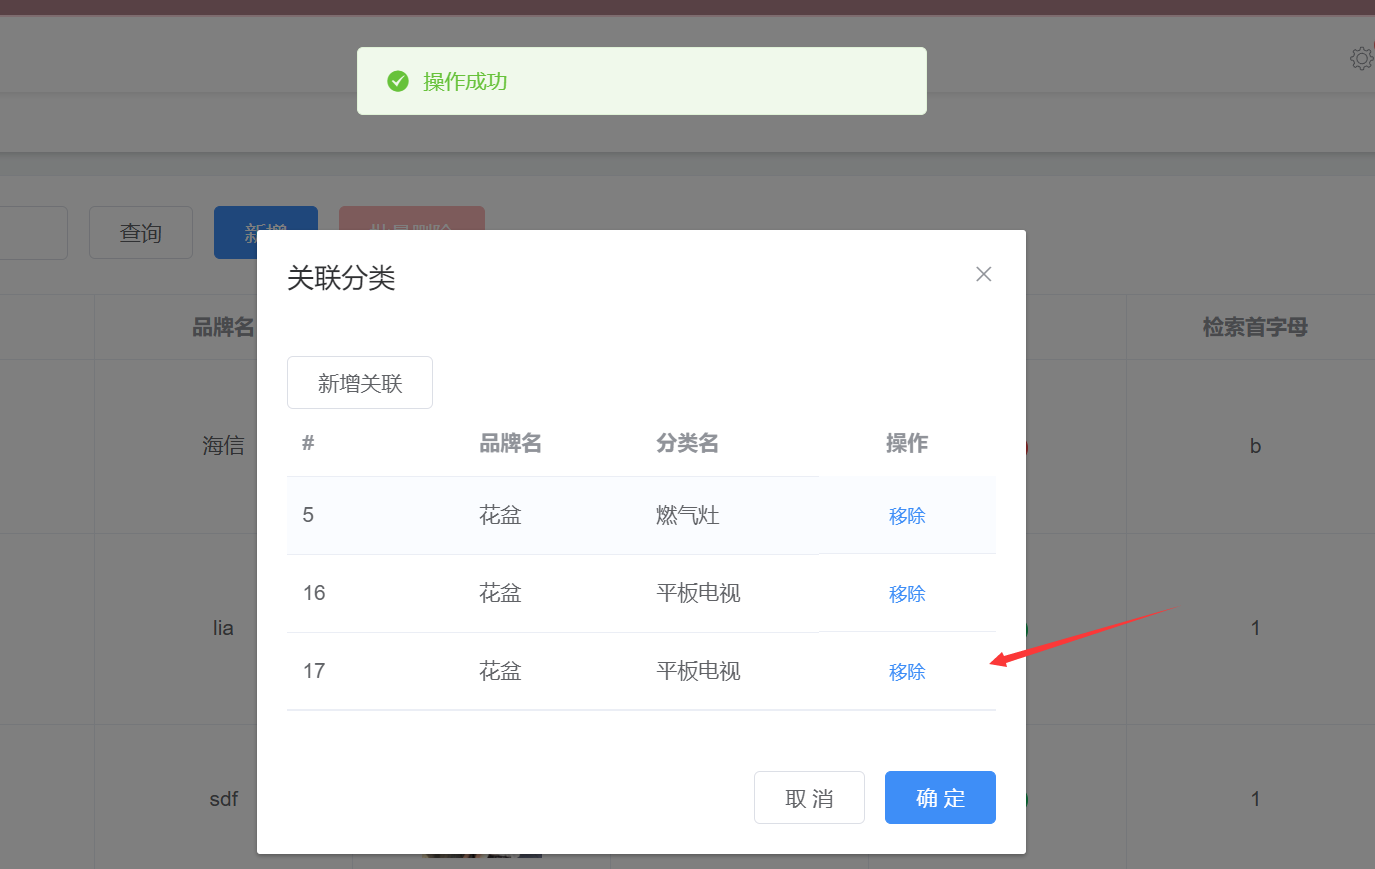
2.已经有关联了,但是还会重复插入的问题
1.修改后端CategoryBrandRelationServiceImpl.java的saveRelationById方法,先检测是否表中已经有关联信息了
List<CategoryBrandRelationEntity> categoryBrandRelationEntities = categoryBrandRelationDao.selectList(new QueryWrapper<CategoryBrandRelationEntity>().eq("brand_id", brandId).eq("category_id", categoryId));
if (categoryBrandRelationEntities.size() > 0) {
return;
}
2.重启测试
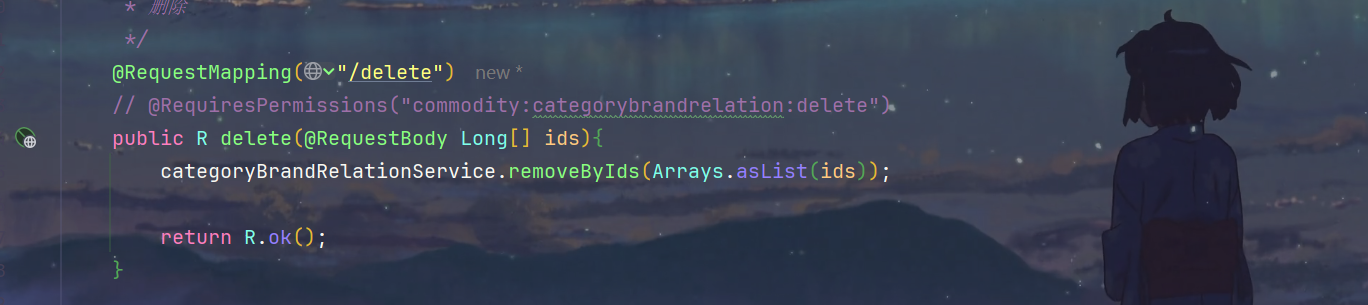
7.删除分类关联列表
1.后端sunliving-commodity模块
1.CategoryBrandRelationController.java 已经提供了根据id删除的接口
2.前端brand.vue
1.发现移除按钮,使用的是插槽机制,可以直接获取当前行的id和brandId
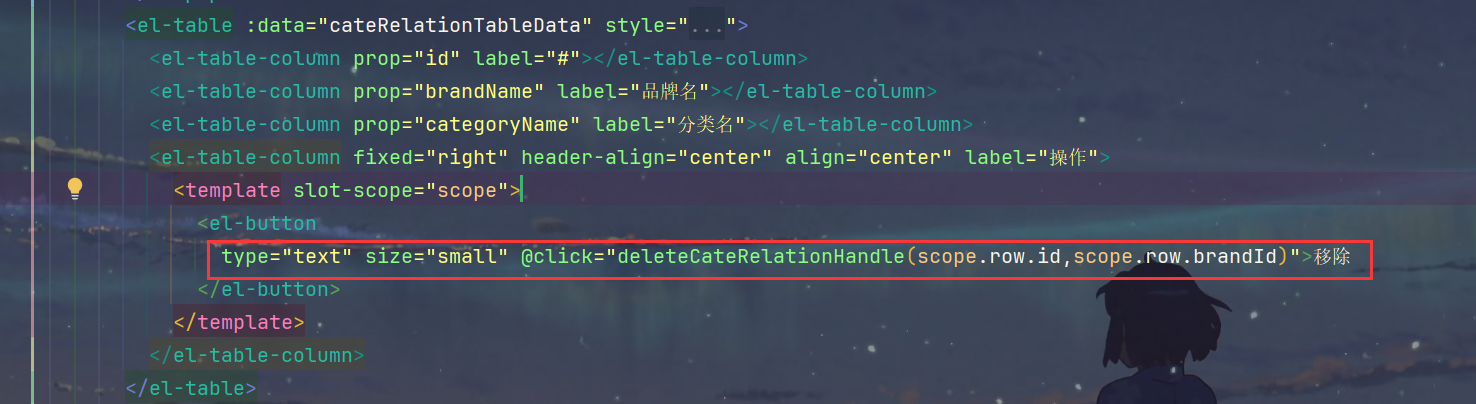
2.编写deleteCateRelationHandle方法
deleteCateRelationHandle(id, brandId) {
this.$http({
url: process.env.COMMODITY_BASEPATH + '/commodity/categorybrandrelation/delete',
method: 'post',
data: this.$http.adornData([id], false)
}).then(({data}) => {
if (data && data.code === 0) {
this.$message({
message: '操作成功',
type: 'success',
duration: 1500
})
this.relateCategoryHandle(brandId)
} else {
this.$message.error(data.msg)
}
})
}
3.测试