【使用首选项实现用户名密码保存获取】
打开src/main/ets/entryability路径下的EntryAbility.ts文件
在
export default class EntryAbility extends UIAbility {
  onCreate(want, launchParam) {
    hilog.info(0x0000, 'testTag', '%{public}s', 'Ability onCreate');
下边添加内容:
// 获取首选项实例对象,然后将实例对象全局处理,这样其他文件可以直接使用
preferences.getPreferences(this.context,'account')
  .then(preference=>{
    // globalThis设置全局变量preference,让这个变量等于上边那个preference
    // 注意:这两个preference不是一个
    globalThis.preference=preference
    console.log("加载成功");
  })
  // 加载不成功catch
  .catch(reason=>{
    console.log(reason)
  })
打开pages文件夹下的index.ets文件:
import preferences from '@ohos.data.preferences'
import router from '@ohos.router'
@Entry
@Component
struct Index {
  @State username: string=''
  @State password: string=''
  pref: preferences.Preferences
  onPageShow(){
    this.pref=globalThis.preference
    // 获取用户名跟密码,如果获取不到那么为空
    this.pref.get('username','')
      .then(value=>{
        this.username=value.toString()
      })
    this.pref.get('password','')
      .then(value=>{
        this.password=value.toString()
      })
  }
build() {
  Row() {
    Column() {
      TextInput({placeholder:'请输入用户名',text:this.username})
        .onChange(value=>{
          this.username=value
        })
      TextInput({placeholder:'请输入密码',text:this.password})
        .onChange(value=>{
          this.password=value
        })
      Button('登录')
        .onClick(()=>{
          this.pref.put('username',this.username)
          this.pref.put('password',this.password)
          this.pref.flush()
          router.pushUrl({url:'pages/Page2'})
        })
      }
      .width('100%')
    }
    .height('100%')
  }
}
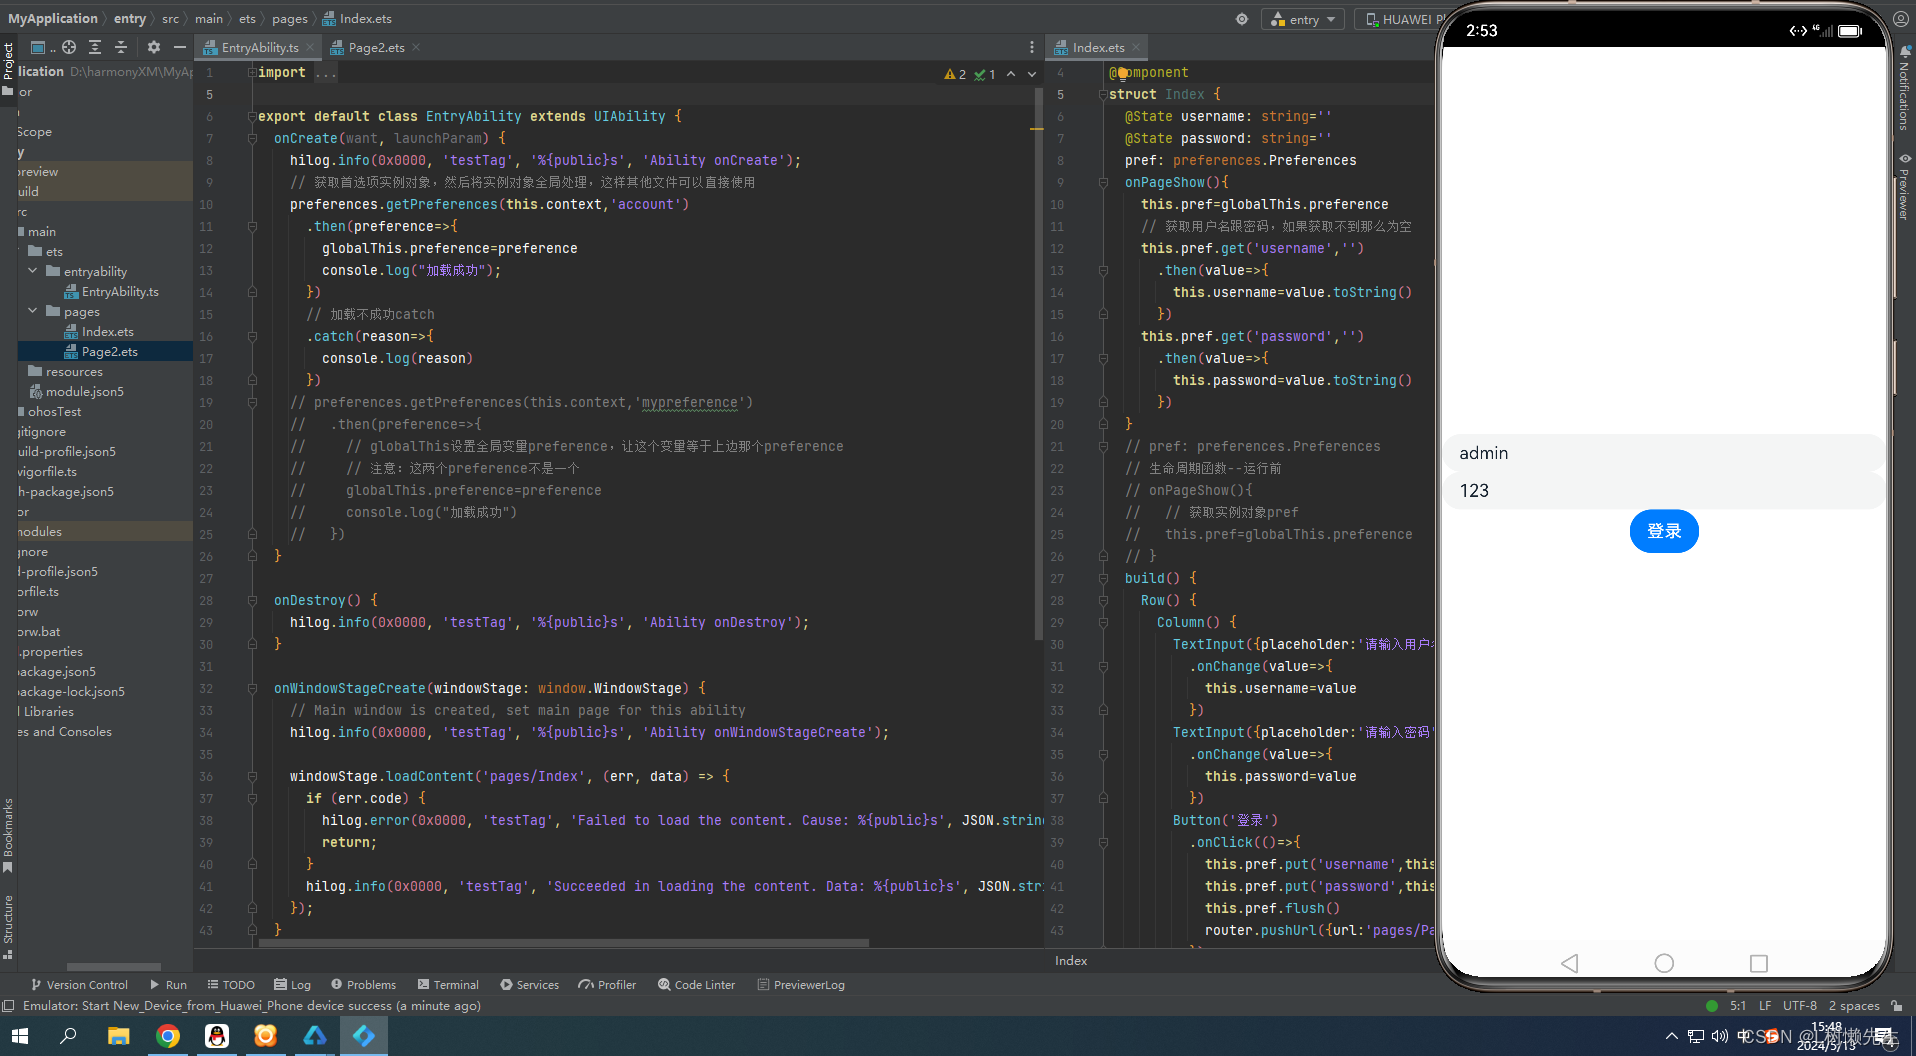
实际效果图: