文章目录
- 链表概述
- 链表的实现
- 链表的节点(单个积木)
- 链表的构建
- 直接构建
- 尾插法构建
- 头插法构建
- 链表的插入
- 总结
链表概述
1,链表(Linked List)是一种常见的数据结构,用于存储一系列元素。它由一系列节点(Node)组成,每个节点包含两部分:数据域(存储数据的部分)和指针域(指向下一个节点的指针)。链表的特点是节点在内存中的存储位置不必是连续的,而是通过指针来相互连接。
具体可以想象成一个很多个积木连接的蛇
画个图大概如下(单链表):

链表可以分为单向链表和双向链表两种常见形式:
单向链表(Singly Linked List):每个节点包含一个指针,指向下一个节点。单向链表只能从头节点开始顺序访问,无法从尾节点快速访问到头节点。(就是上面那种)
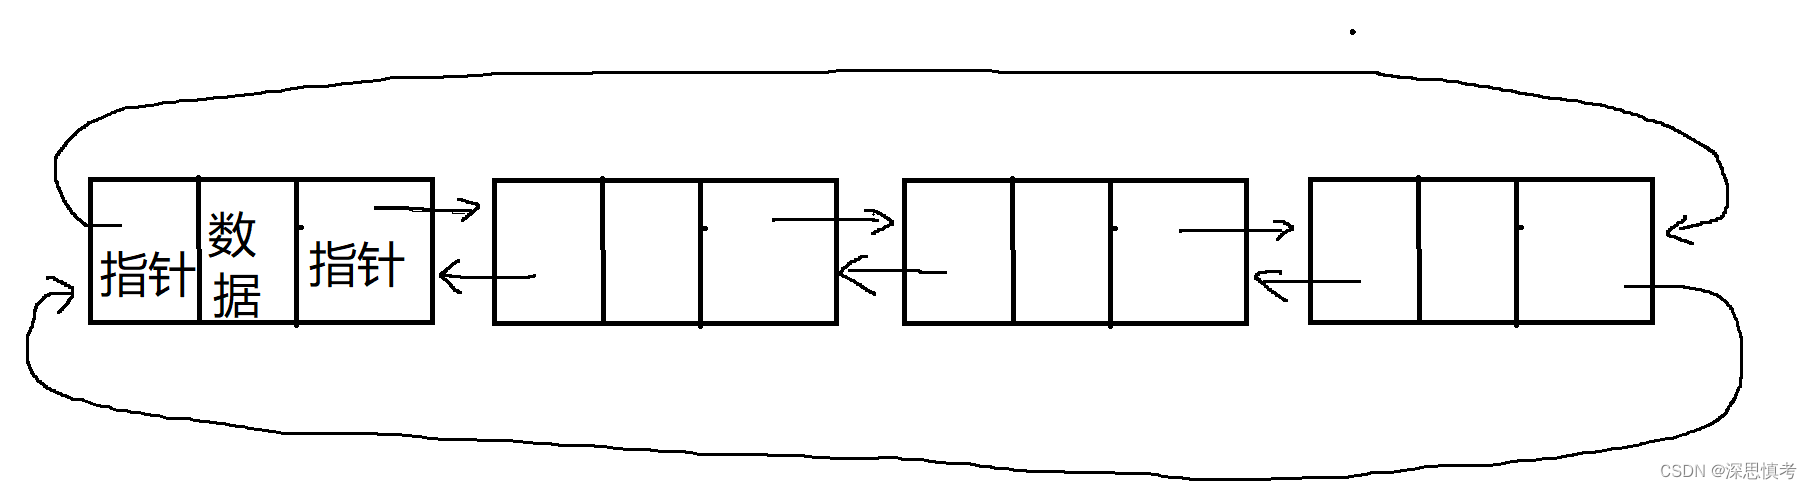
双向链表(Doubly Linked List):每个节点包含两个指针,分别指向前一个节点和后一个节点。双向链表可以从任意节点开始向前或向后遍历,相比单向链表具有更灵活的操作。
双向循环链表如下:
链表的优点是插入和删除操作效率高,时间复杂度为O(1),而查找操作效率相对较低,最坏情况下为O(n)。链表适用于需要频繁插入和删除操作,而对查找操作要求不高的场景。
常见的链表操作包括:插入节点、删除节点、查找节点、反转链表、合并链表等。链表在计算机科学中应用广泛,常见于实现各种数据结构和算法,如栈、队列、图等。
链表的实现
链表的节点(单个积木)
1,链表的节点是自定义的一个结构体,数据域存的东西可以自定义,可以是数字链表,也可以是字符链表等,非常灵活。
struct Node
{
	int val;
	struct Node* next;   //指针域,指向下一个节点
	//双向链表就在加一个指针
	struct Node* Pre;
};
链表的构建
直接构建
1,最直接的就是一个个链表节点直接链接,最后一个节点的指针要置空,方便判断是否到达链表的结尾,如下:
typedef struct Node
{
	int val;
	struct Node* next;
}node;

int main()
{
	node* n1 = (node*)malloc(sizeof(node));
	n1->val = 1;
	node* n2 = (node*)malloc(sizeof(node));
	n2->val = 2;
	n1->next = n2;
	node* n3 = (node*)malloc(sizeof(node));
	n3->val = 3;
	n2->next = n3;
	n3->next = NULL;

	return 0;
}
尾插法构建
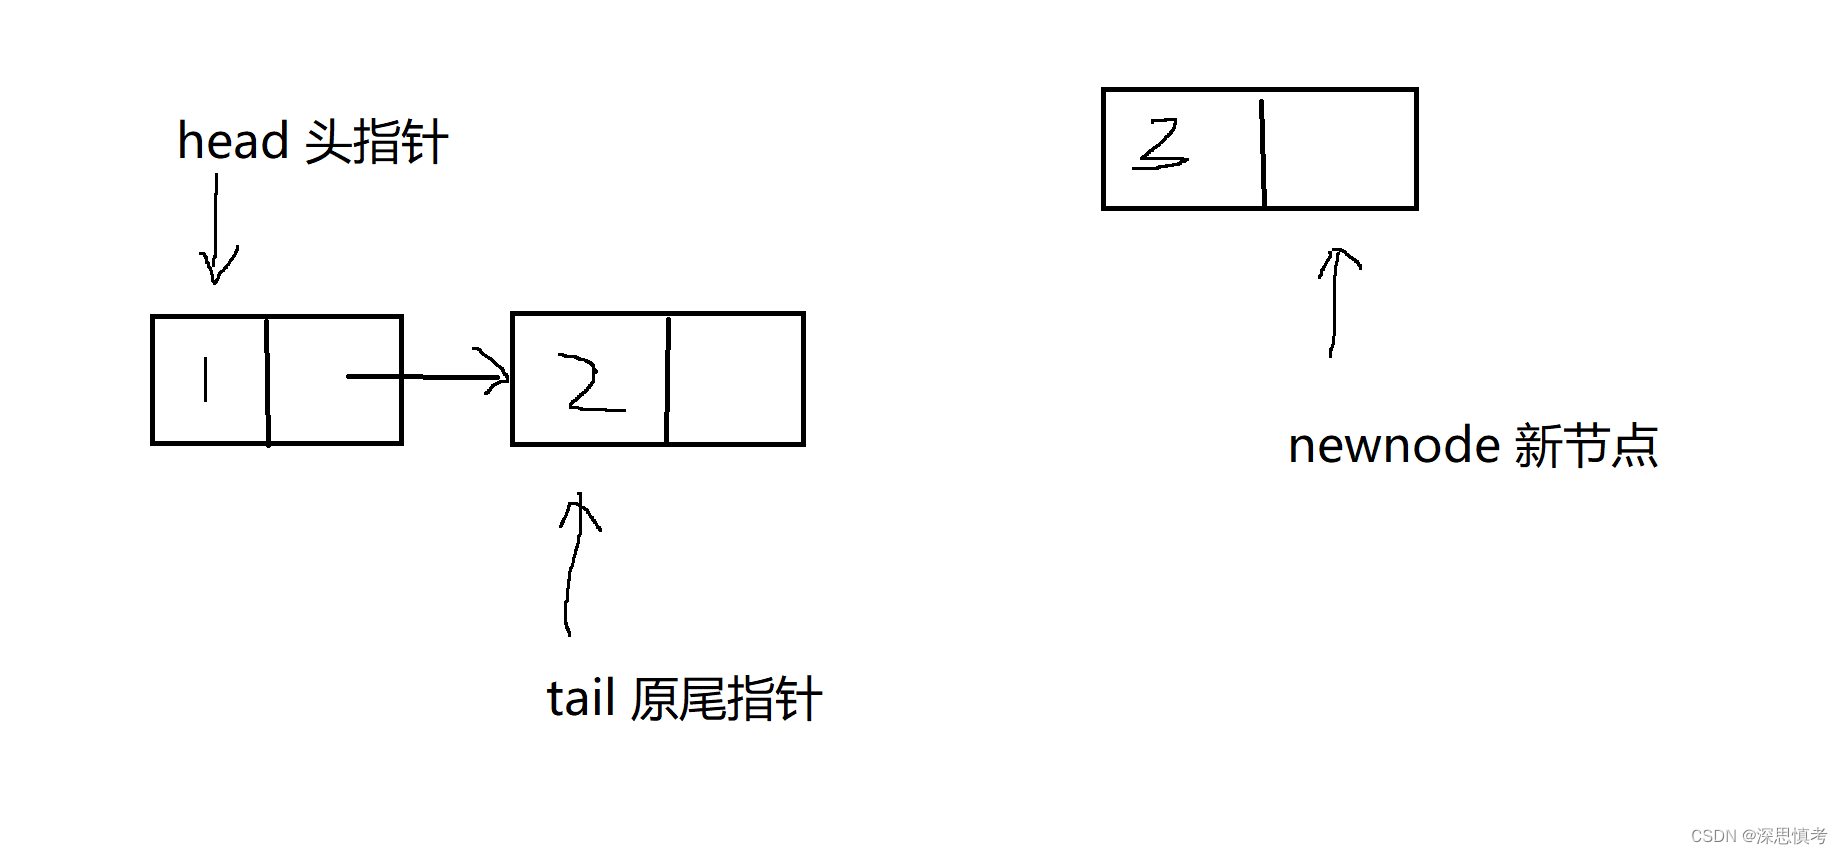
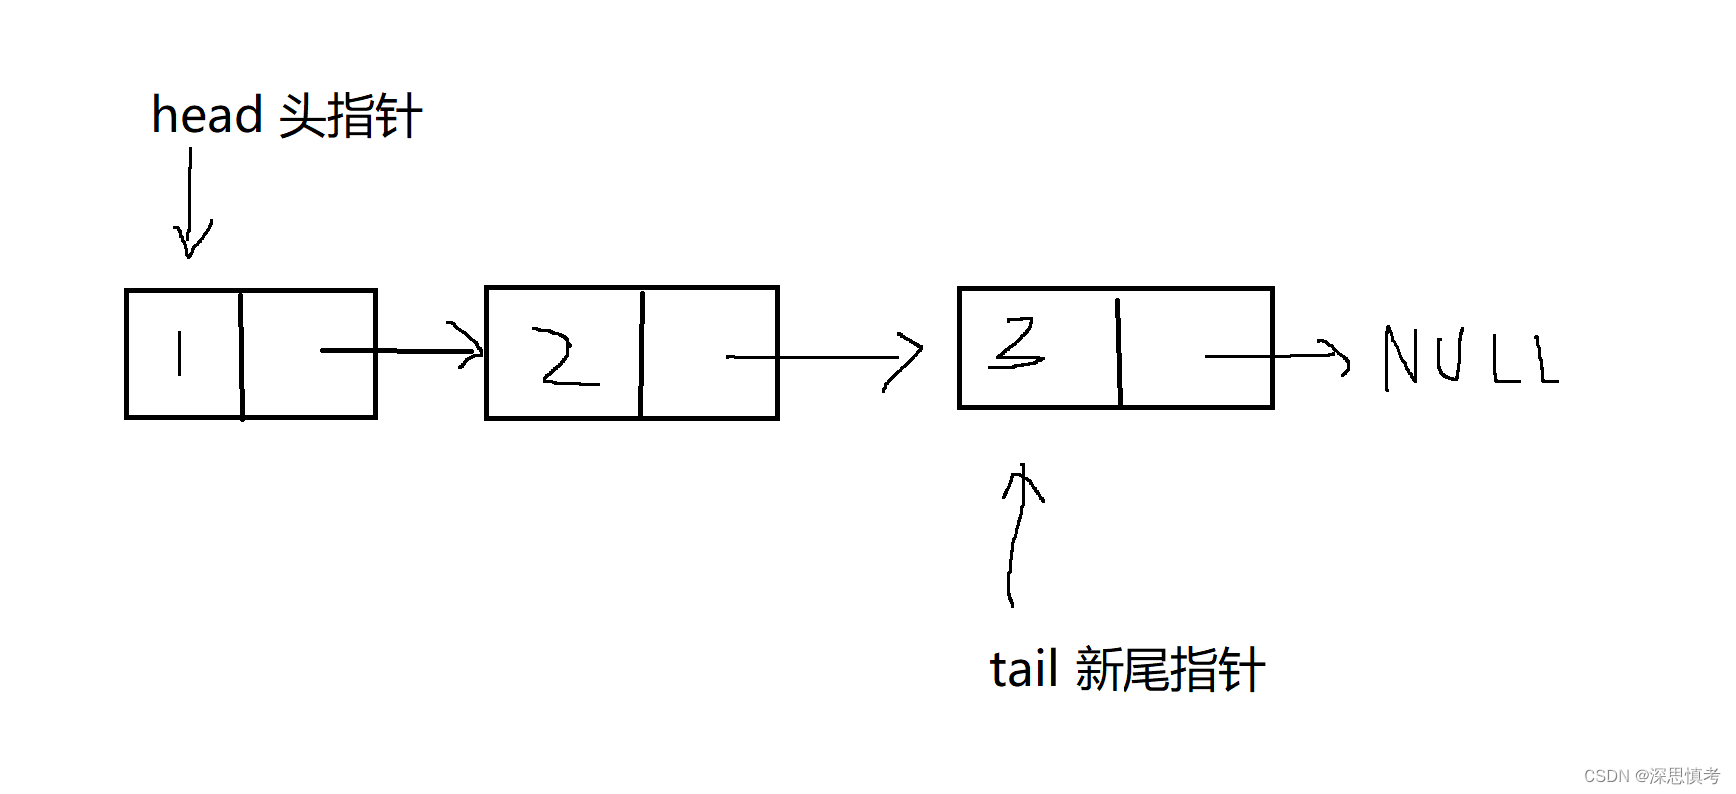
1,尾插即字面意思,构建一个尾指针指向链表最后一个节点,然后创建一个新节点插到尾巴后面,然后更新尾节点为新的尾。
图示:
插入后:
#include <stdio.h>
#include <stdlib.h>

// 定义链表节点结构体
struct Node {
    int data;
    struct Node* next;
};

// 尾插法构建链表
struct Node* createLinkedList(int arr[], int n) {
    struct Node *head = NULL;
    struct Node *tail = NULL;

    for (int i = 0; i < n; i++) {
        // 创建新节点
        struct Node *newNode = (struct Node*)malloc(sizeof(struct Node));
        if (newNode == NULL) {
            printf("Memory allocation failed.\n");
            exit(1);
        }
        newNode->data = arr[i];
        newNode->next = NULL;

        // 如果是第一个节点,则设置为头节点
        if (head == NULL) {
            head = newNode;
            tail = newNode;
        } else {
            // 否则将新节点插入到尾部
            tail->next = newNode;
            tail = newNode;
        }
    }

    return head;
}

// 打印链表
void printLinkedList(struct Node* head) {
    while (head != NULL) {
        printf("%d ", head->data);
        head = head->next;
    }
    printf("\n");
}

// 主函数
int main() {
    int arr[] = {1, 2, 3, 4, 5};
    int n = sizeof(arr) / sizeof(arr[0]);

    // 使用尾插法构建链表
    struct Node *head = createLinkedList(arr, n);

    // 打印链表
    printf("Linked List: ");
    printLinkedList(head);

    return 0;
}
头插法构建
1,头插法也是一种常见的方法,用于构建链表。与尾插法不同,头插法是在链表的头部插入新的节点,使新节点成为链表的新头节点。
原图:
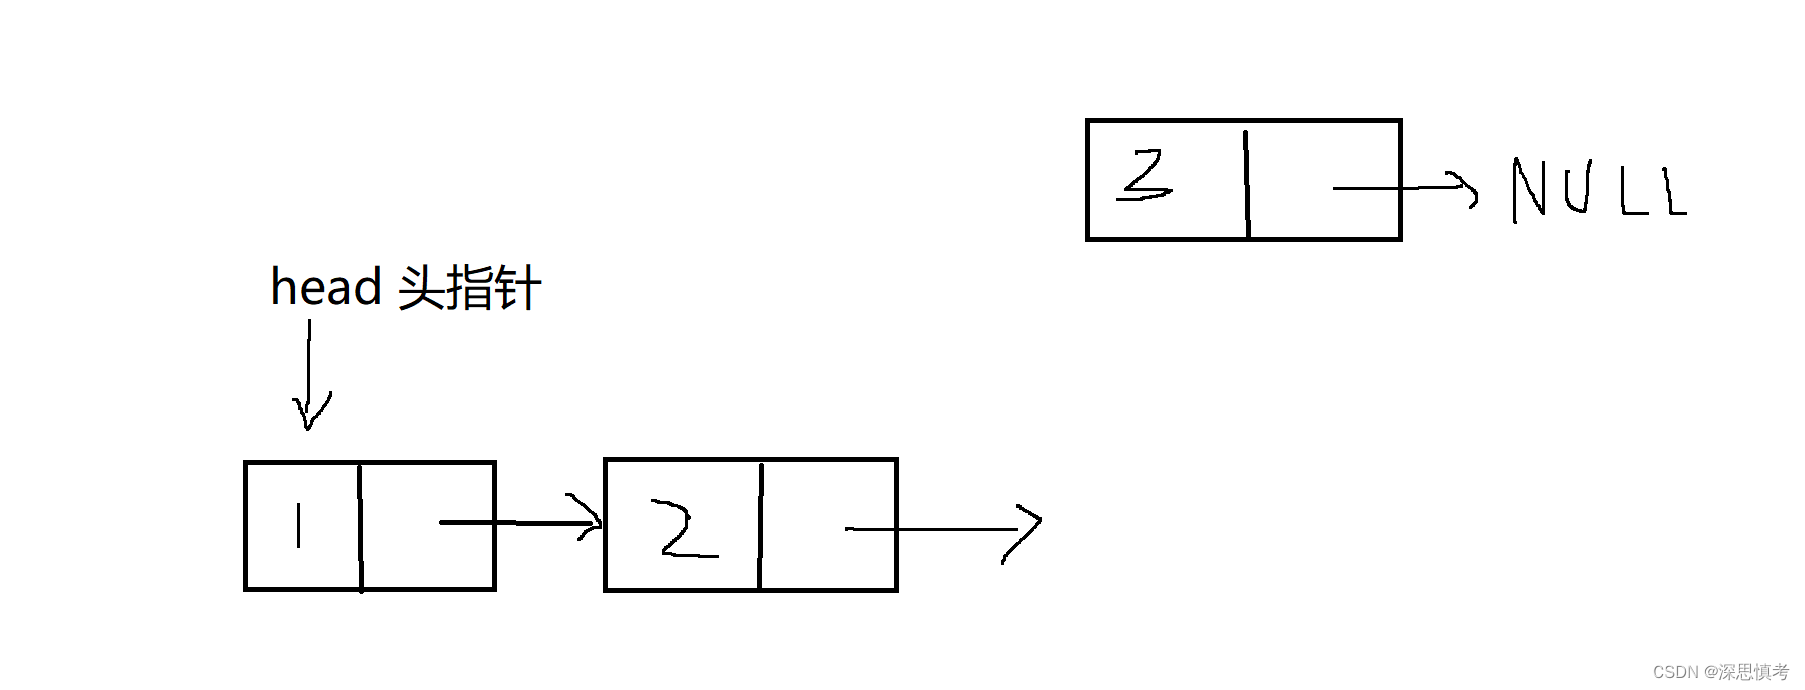
变化:
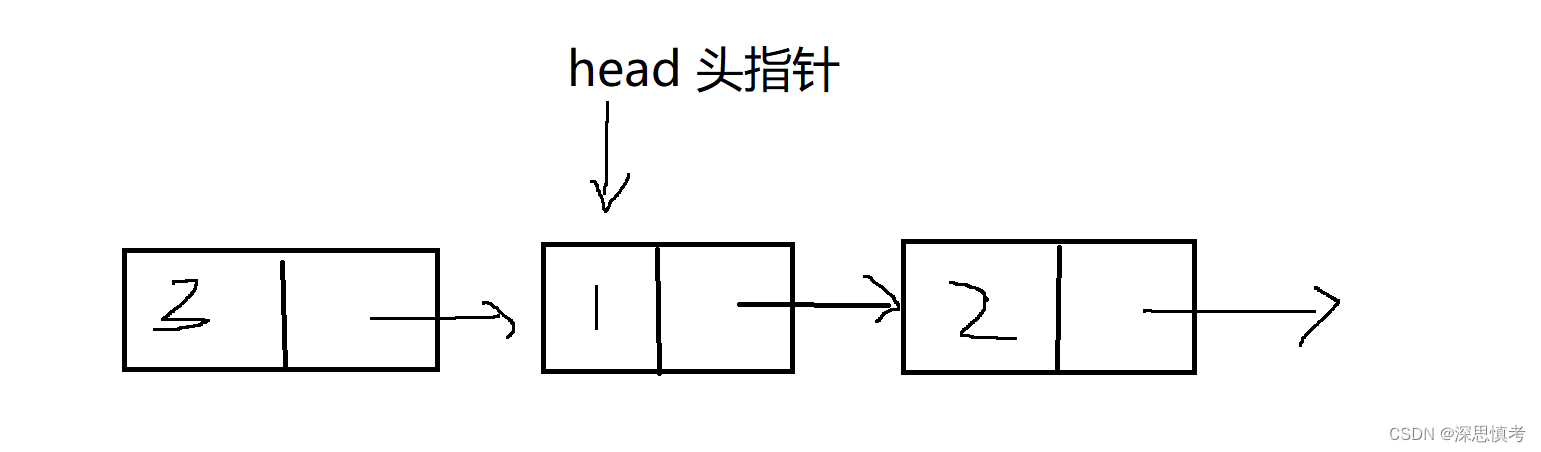
最终:
下面是使用头插法构建链表的C语言示例:
#include <stdio.h>
#include <stdlib.h>

// 定义链表节点结构体
struct Node {
    int data;
    struct Node* next;
};

// 头插法构建链表
struct Node* createLinkedList(int arr[], int n) {
    struct Node *head = NULL;

    for (int i = 0; i < n; i++) {
        // 创建新节点
        struct Node *newNode = (struct Node*)malloc(sizeof(struct Node));
        if (newNode == NULL) {
            printf("Memory allocation failed.\n");
            exit(1);
        }
        newNode->data = arr[i];

        // 将新节点插入到头部
        newNode->next = head;
        head = newNode;
    }

    return head;
}

// 打印链表
void printLinkedList(struct Node* head) {
    while (head != NULL) {
        printf("%d ", head->data);
        head = head->next;
    }
    printf("\n");
}

// 主函数
int main() {
    int arr[] = {1, 2, 3, 4, 5};
    int n = sizeof(arr) / sizeof(arr[0]);

    // 使用头插法构建链表
    struct Node *head = createLinkedList(arr, n);

    // 打印链表
    printf("Linked List: ");
    printLinkedList(head);

    return 0;
}
链表的插入
1,链表的插入操作可以在指定位置或者指定节点之后进行。下面分别介绍两种情况的链表插入操作:
-
在指定位置插入节点:这种情况下,需要知道要插入节点的位置,通常使用节点的索引或者位置来指定。插入操作涉及到节点的连接,需要将新节点插入到指定位置,同时调整前一个节点和后一个节点的连接关系。
-
在指定节点之后插入节点:在这种情况下,需要先找到指定节点,然后在其后插入新节点。这个操作需要确保找到指定节点,然后调整节点的连接关系。
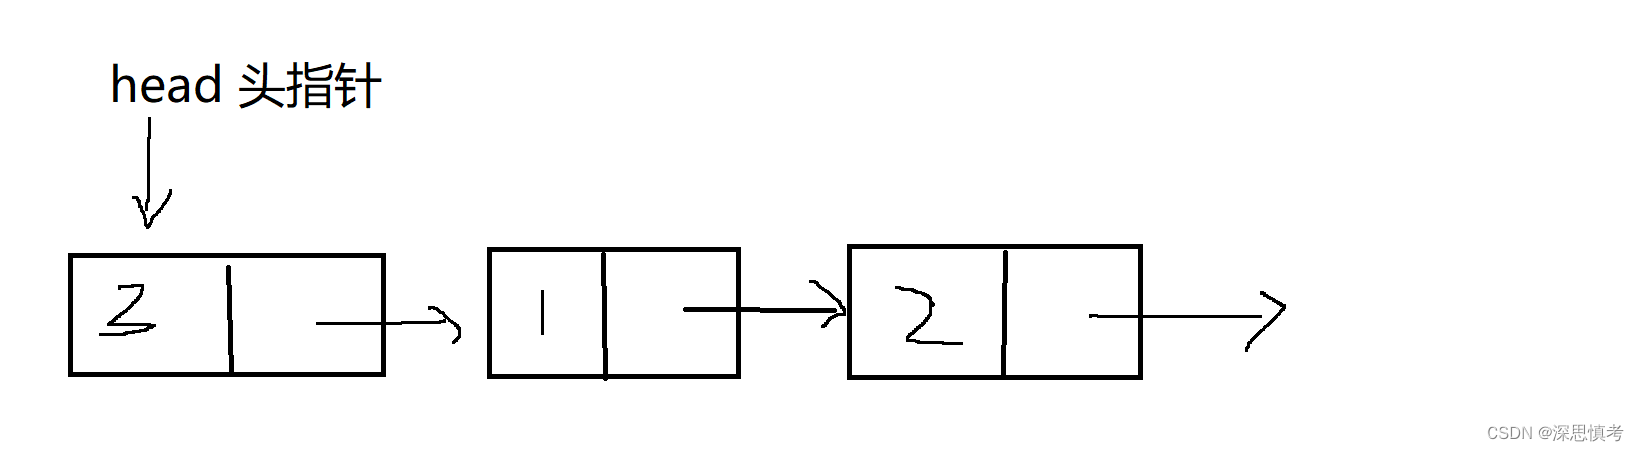
原(插入到1之后):
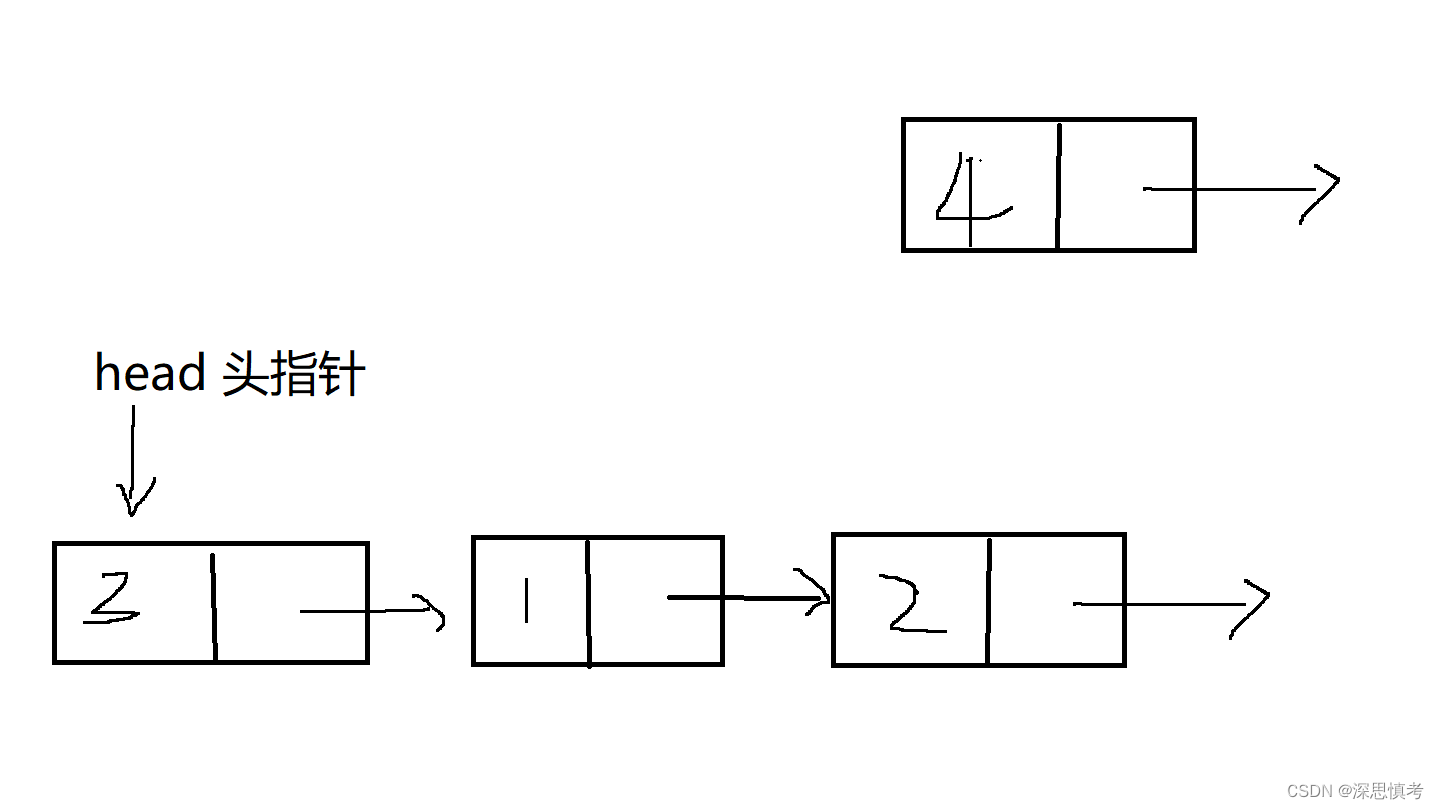
变化:
换成代码就是:
node* newnode;//(代表4节点)
node* cur;//(代表1节点)
newnode->next = cur->next;
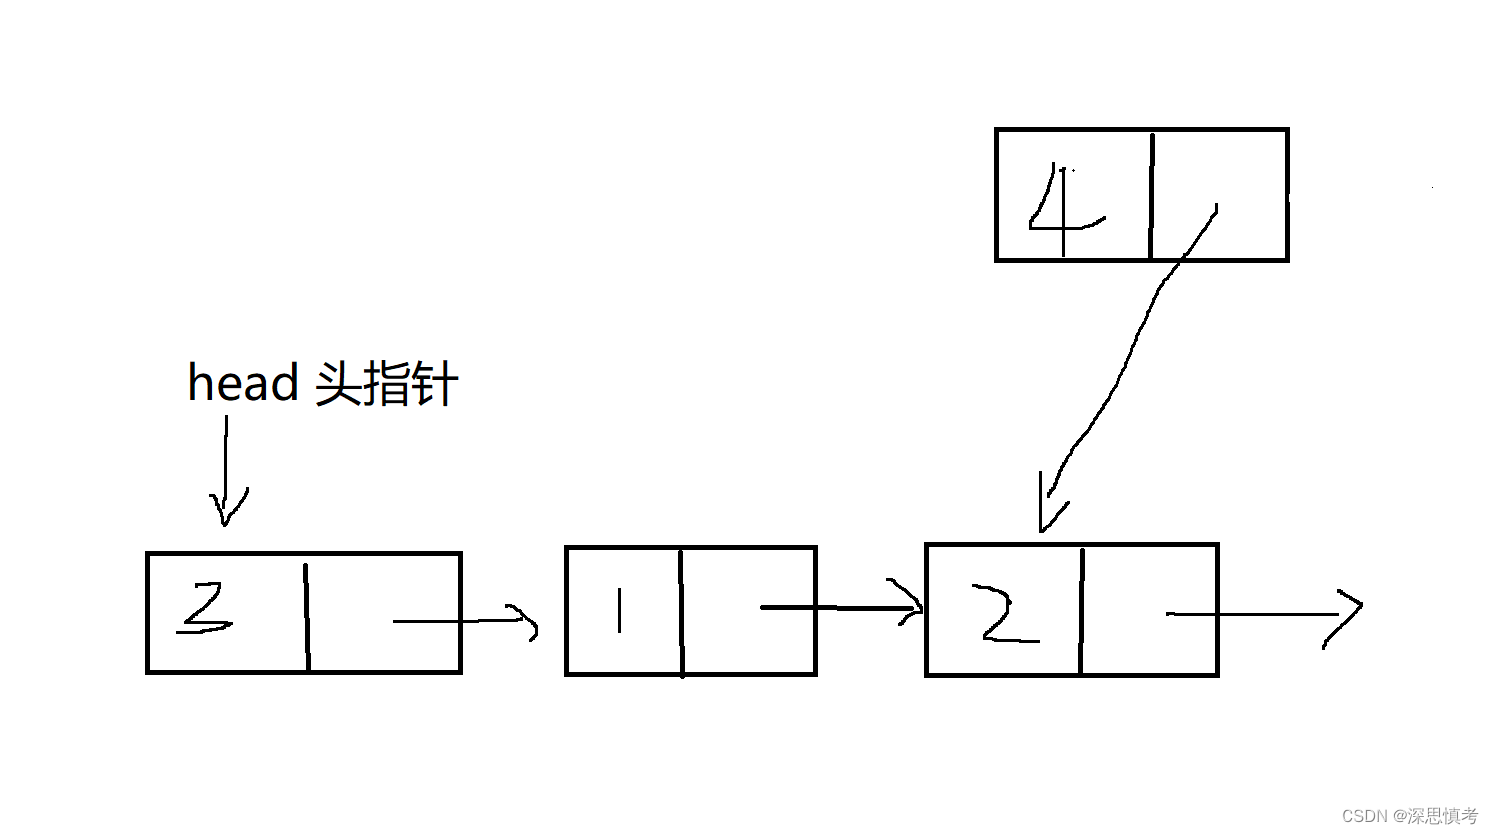
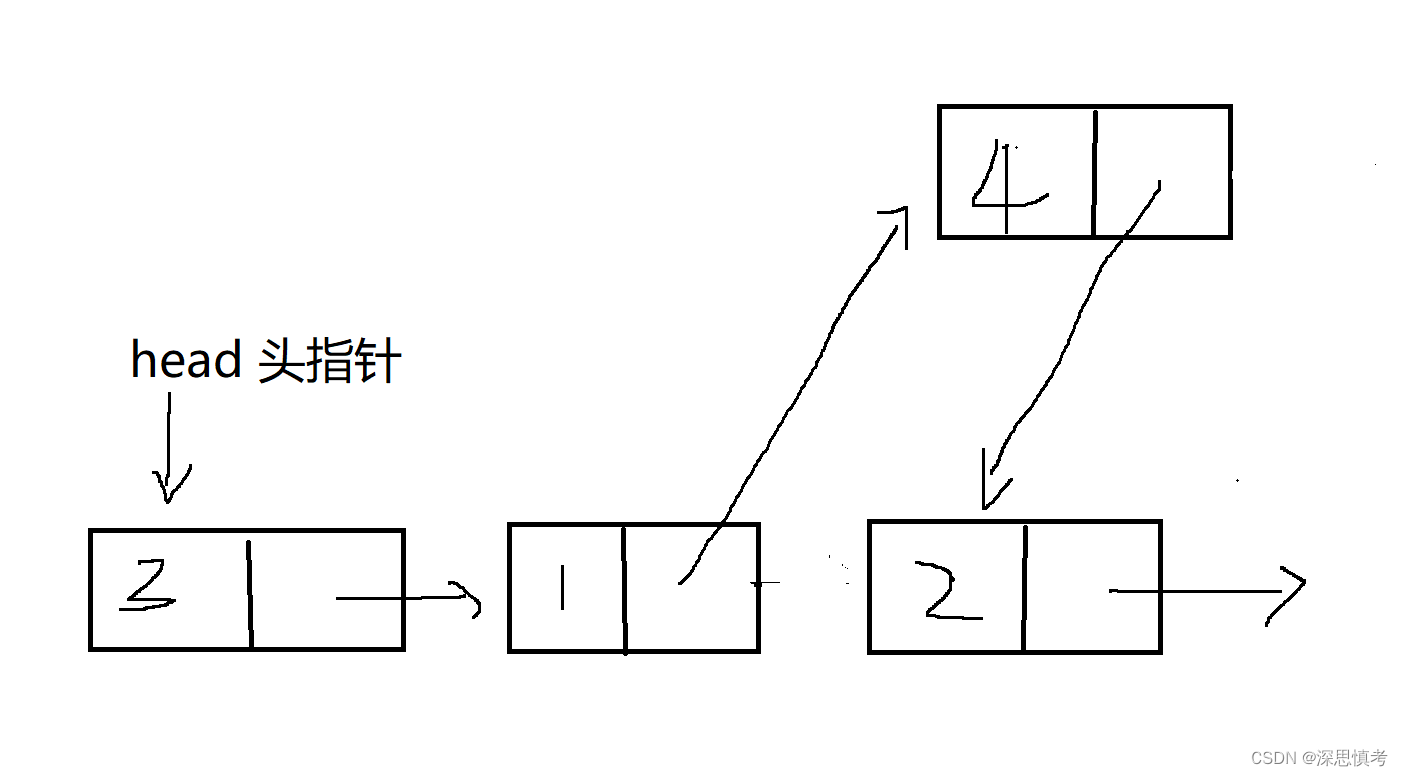
最后:
代码实现:
cur->next = newnode;
下面是C语言示例代码,分别演示了在指定位置和指定节点之后进行插入操作:
#include <stdio.h>
#include <stdlib.h>

// 定义链表节点结构体
struct Node {
    int data;
    struct Node* next;
};

// 在指定位置插入节点
void insertAtIndex(struct Node** headRef, int index, int data) {
    struct Node* newNode = (struct Node*)malloc(sizeof(struct Node));
    if (newNode == NULL) {
        printf("Memory allocation failed.\n");
        exit(1);
    }
    newNode->data = data;

    // 如果插入位置是头节点之前,则直接将新节点作为头节点
    if (index == 0) {
        newNode->next = *headRef;
        *headRef = newNode;
        return;
    }

    // 找到插入位置的前一个节点
    struct Node* current = *headRef;
    for (int i = 0; i < index - 1 && current != NULL; i++) {
        current = current->next;
    }

    // 如果插入位置超出链表长度,则插入失败
    if (current == NULL) {
        printf("Index out of range.\n");
        return;
    }

    // 插入新节点
    newNode->next = current->next;
    current->next = newNode;
}

// 在指定节点之后插入节点
void insertAfterNode(struct Node* prevNode, int data) {
    if (prevNode == NULL) {
        printf("Previous node cannot be NULL.\n");
        return;
    }

    struct Node* newNode = (struct Node*)malloc(sizeof(struct Node));
    if (newNode == NULL) {
        printf("Memory allocation failed.\n");
        exit(1);
    }
    newNode->data = data;

    // 插入新节点
    newNode->next = prevNode->next;
    prevNode->next = newNode;
}

// 打印链表
void printLinkedList(struct Node* head) {
    while (head != NULL) {
        printf("%d ", head->data);
        head = head->next;
    }
    printf("\n");
}

// 主函数
int main() {
    struct Node* head = NULL;

    // 插入节点示例
    insertAtIndex(&head, 0, 1); // 在头部插入节点
    insertAtIndex(&head, 1, 3); // 在索引1位置插入节点
    insertAtIndex(&head, 1, 2); // 在索引1位置插入节点
    insertAfterNode(head->next, 4); // 在节点3之后插入节点

    // 打印链表
    printf("Linked List: ");
    printLinkedList(head);

    return 0;
}
总结
其他操作的本质上也是差不多的,都是建立新节点,修改指针指向的问题,通过画图可以更好理解的。


![解决Pyppeteer下载chromium慢或者失败的问题[INFO] Starting Chromium download.](https://img-blog.csdnimg.cn/direct/8068d2b209ea41a98c08e9a2888e0079.png)