本文创建了gradle项目,用来整合Spring Boot和Redis,用到了gradle + gson + lombok + redisTemplate等技术。
重要文件:
| 文件名 | 说明 |
|---|---|
| build.gradle | gradle配置文件 |
| Redis2Application.java | 启动类 |
| Controller.java | 控制器类 |
| StudentService.java | 业务逻辑类 |
| StudentDao.java | DAO类,用于和Redis直接交互 |
| Student.java | 模型类,用于映射数据和Java对象 |
| application.java | 配置文件 |
初始化
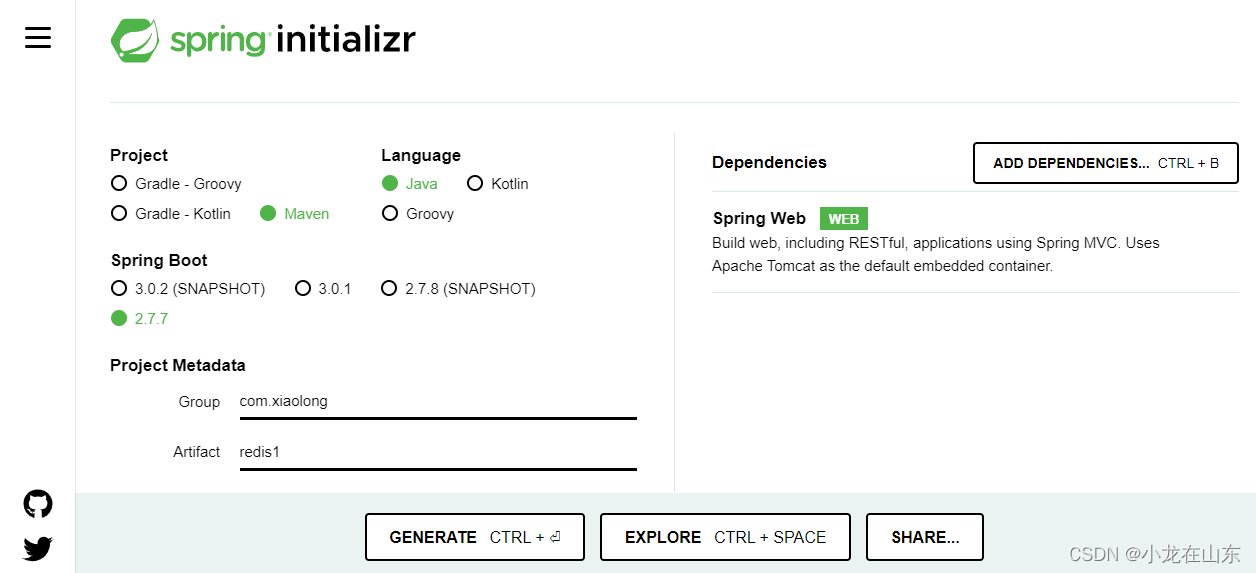
在https://start.spring.io/初始化:
引入依赖
在build.gradle里引入依赖:
plugins {
	id 'java'
	id 'org.springframework.boot' version '2.7.8-SNAPSHOT'
	id 'io.spring.dependency-management' version '1.0.15.RELEASE'
}

group = 'com.xiaolong'
version = '0.0.1-SNAPSHOT'
sourceCompatibility = '1.8'

configurations {
	compileOnly {
		extendsFrom annotationProcessor
	}
}

repositories {
	mavenCentral()
	maven { url 'https://repo.spring.io/milestone' }
	maven { url 'https://repo.spring.io/snapshot' }
}

dependencies {
	implementation 'org.springframework.boot:spring-boot-starter-data-redis'
	implementation 'org.springframework.boot:spring-boot-starter-web'
	implementation 'com.google.code.gson:gson:2.10'
	compileOnly 'org.projectlombok:lombok'
	annotationProcessor 'org.projectlombok:lombok'
	testImplementation 'org.springframework.boot:spring-boot-starter-test'
}

tasks.named('test') {
	useJUnitPlatform()
}
配置文件和启动类
在resources目录下的application.yml文件中配置Redis数据库连接,本地的6379端口:
spring:
  redis:
    host:localhost
    port:6078
如果原来有其他配置文件,可以删掉,新建application.yml。
启动类,这里用注解SpringBootApplication的exclude排除了数据库的驱动程序,免去再去安装数据库驱动,Redis不需要数据库驱动类Redis2Application:
package com.xiaolong.redis2;

import org.springframework.boot.SpringApplication;
import org.springframework.boot.autoconfigure.SpringBootApplication;
import org.springframework.boot.autoconfigure.jdbc.DataSourceAutoConfiguration;

@SpringBootApplication(exclude = DataSourceAutoConfiguration.class)
public class Redis2Application {

	public static void main(String[] args) {
		SpringApplication.run(Redis2Application.class, args);
	}

}
控制类和业务模型类
对外提供接口服务的Controller.java
package com.xiaolong.redis2.controller;

import com.xiaolong.redis2.model.Student;
import com.xiaolong.redis2.service.StudentService;
import org.springframework.beans.factory.annotation.Autowired;
import org.springframework.web.bind.annotation.PathVariable;
import org.springframework.web.bind.annotation.RequestMapping;
import org.springframework.web.bind.annotation.RestController;

@RestController
public class Controller {
    @Autowired
    StudentService studentService;
    @RequestMapping("/saveStudent")
    public void saveStudent(){
        Student newStudent = new Student();
        newStudent.setId("student_001");
        newStudent.setName("Peter");
        newStudent.setScore("100");
        studentService.saveStudent(newStudent);
    }
    @RequestMapping("/findByID/{id}")
    public Student findByID(@PathVariable String id){
        return studentService.findByID(id);
    }
    @RequestMapping("/deleteByID/{id}")
    public void deleteByID(@PathVariable String id){
        studentService.deleteByID(id);
    }
}
这里用注解@RestController注解设置控制器类,用注解@Autowired依赖注入业务逻辑类,用注解@RequestMapping映射路由。
业务模型类:
package com.xiaolong.redis2.model;

import lombok.Data;
@Data
public class Student {
    private String id;
    private String name;
    private String score;
}
这里用到了lombok的注解@Data,无需再去写get和set方法。
业务逻辑类
package com.xiaolong.redis2.service;

import com.xiaolong.redis2.StudentDao;
import com.xiaolong.redis2.model.Student;
import org.springframework.beans.factory.annotation.Autowired;
import org.springframework.stereotype.Service;

@Service
public class StudentService {
    @Autowired
    private StudentDao studentDao;
    public void saveStudent(Student student) {
        studentDao.saveStudent(student.getId(), 3600, student);
    }
    public Student findByID(String id){
        return studentDao.findByID(id);
    }
    public void deleteByID(String id){
        studentDao.deleteByID(id);
    }
}
通过注解@Service设置业务类,注解@Autowired自动注入DAO对象。
Redis DAO数据库交互类
package com.xiaolong.redis2;

import com.google.gson.Gson;
import com.xiaolong.redis2.model.Student;
import org.springframework.beans.factory.annotation.Autowired;
import org.springframework.data.redis.core.RedisTemplate;
import org.springframework.stereotype.Repository;

import java.util.concurrent.TimeUnit;

@Repository
public class StudentDao {
    @Autowired
    private RedisTemplate<String, String> redisTemplate;
    public void saveStudent(String id, int expireTime, Student student) {
        Gson gson = new Gson();
        redisTemplate.opsForValue().set(id, gson.toJson(student), expireTime, TimeUnit.SECONDS);
    }

    public Student findByID(String id) {
        Gson gson = new Gson();
        Student student = null;
        String studentJson = redisTemplate.opsForValue().get(id);
        if(studentJson != null && !studentJson.equals("")) {
            student = gson.fromJson(studentJson, Student.class);
        }
        return student;
    }

    public void deleteByID(String id) {
        redisTemplate.opsForValue().getOperations().delete(id);
    }
}
这里使用redisTemplate与Redis交互,用GSON把数据对象保存成json格式。
结果
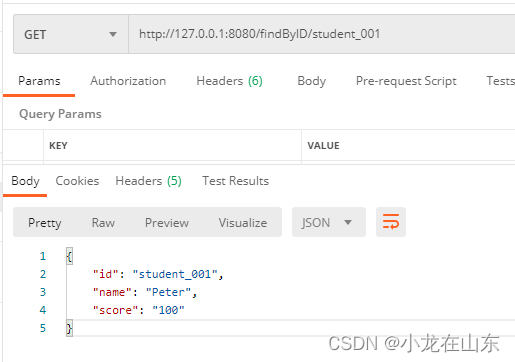
http://127.0.0.1:8080/saveStudent新建数据:

查询:
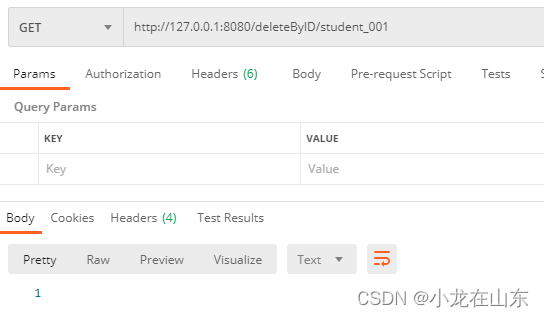
删除数据:


![[LCTF]bestphp2022安洵杯 babyphp](https://img-blog.csdnimg.cn/98d257bb00534a9796c442cb1cd0a2ad.png)
![[极客大挑战 2019]Secret File](https://img-blog.csdnimg.cn/526ac40f7e97411aa1dc2c499a263214.png)