材质
前置准备
![![[Pasted image 20240418191032.png]]](https://img-blog.csdnimg.cn/direct/dfb644a07c2a413bb84b4b8413390154.png)
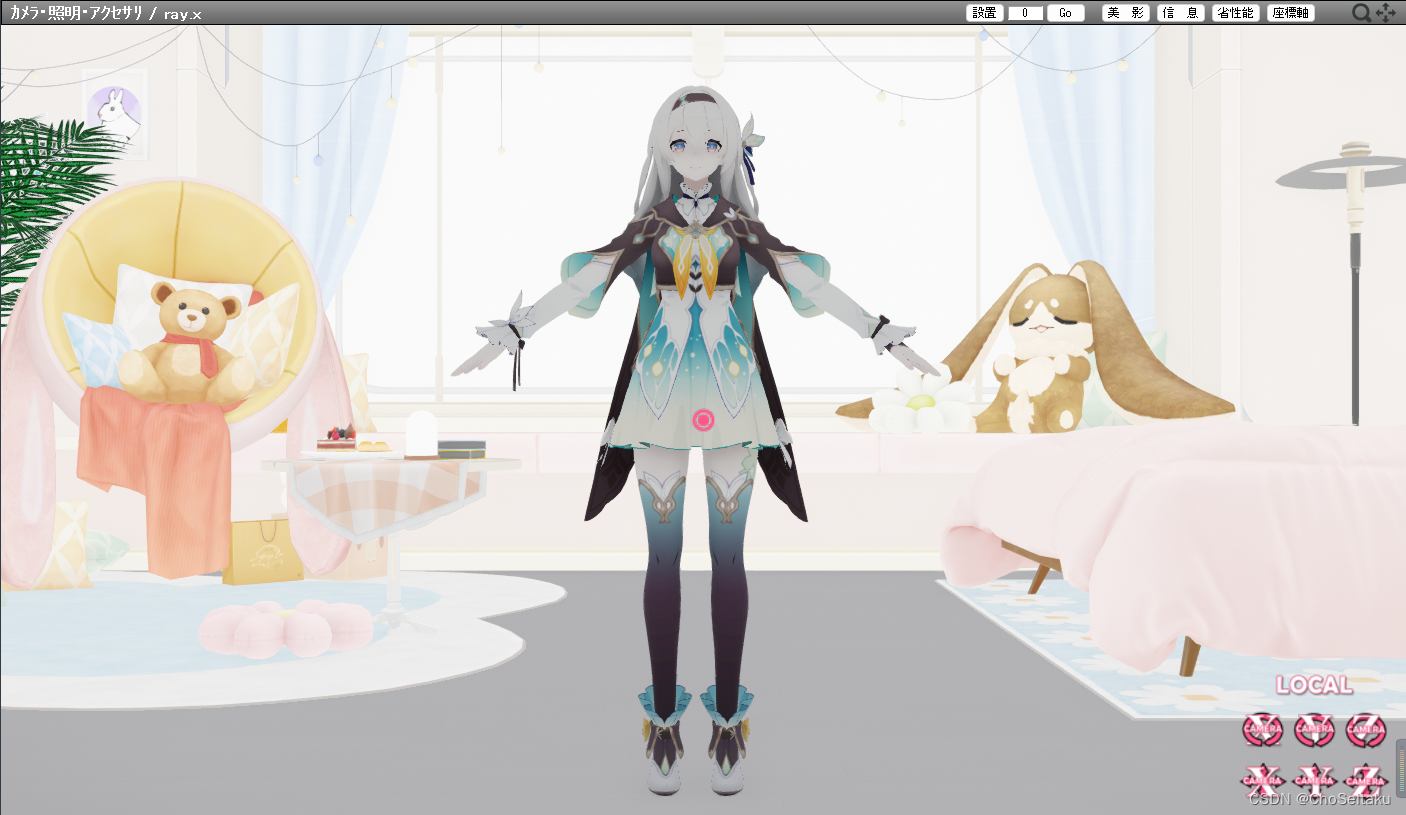
先准备好模型和场景
将ray控制器拖入进去
添加完默认的材质以后的效果
![![[Pasted image 20240418191210.png]]](https://img-blog.csdnimg.cn/direct/5ec4b7b5b30b4e28a0bd4d88fdfe9c7f.png)
-
打开插入材质页面
-
打开MaterialMap栏
![![[Pasted image 20240418191246.png]]](https://img-blog.csdnimg.cn/direct/e3936a83fbd04564a2f6920ca1b88c0f.png)
-
将流萤的模型展开
自发光
- 现在给领带添加一个自发光效果
-
在自发光Emissive里,打开x1,选择albedo,白光
![![[Pasted image 20240418191519.png]]](https://img-blog.csdnimg.cn/direct/dfbe0757d7b044418697fe2840e53a9c.png)
-
现在这个领带就是一闪一闪的效果
![![[Pasted image 20240418192501.png]]](https://img-blog.csdnimg.cn/direct/59e704cc219a472d92775abc6cb76985.png)
-
这个是x4的效果
![![[Pasted image 20240418192956.png]]](https://img-blog.csdnimg.cn/direct/8405648a98474619af4f2fdc2211a4a3.png)
-
选用常发光效果
![![[Pasted image 20240418192920.png]]](https://img-blog.csdnimg.cn/direct/d6c8b6db24c94cf896a12894b91b6843.png)
不闪烁的灯光适合给场景中的灯源加
x124就是亮的倍数
- 给流萤的眼睛一个高光
![![[Pasted image 20240418202338.png]]](https://img-blog.csdnimg.cn/direct/c0d0d2c044a64f10bfcfd511cf3d315b.png)
![![[Pasted image 20240418202410.png]]](https://img-blog.csdnimg.cn/direct/85d6779121754c43ab56d9ba1c38e402.png)
用不闪烁的灯光x1
![![[Pasted image 20240418202421.png]]](https://img-blog.csdnimg.cn/direct/542318874a8e48e29623a1fc33cabac2.png)
这样眼睛就有高光了
- 插件使用
- 在Extension里找到AutoLuminous4
- 把AutoLumious.x拖进去
- 在模型操作界面是照明的情况下
附件操作界面出现了AutoLumious.x
![![[Pasted image 20240418203956.png]]](https://img-blog.csdnimg.cn/direct/03a4bc47ffc549338b8b8d18722603d8.png)
因为流萤模型不适用这个插件,所以这里使用优菈模型演示
![![[Pasted image 20240418221304.png]]](https://img-blog.csdnimg.cn/direct/af55c9c701e84cfe9562a43a26e5ec50.png)
-
这是不显示的样子
![![[Pasted image 20240418221316.png]]](https://img-blog.csdnimg.cn/direct/009cc4131eaf4fe2b17f60a893f4d64d.png)
-
这是显示的样子
![![[Pasted image 20240418221537.png]]](https://img-blog.csdnimg.cn/direct/fec93adfb5e144b78efc56cbf54de795.png)
-
Si调到10,注册一下,效果比1的时候更亮
- 也可以给没有高光的材质上材质
打开MME
找到最后一栏,AL_EmitterRT
比如想让披风亮起来
![![[Pasted image 20240418222041.png]]](https://img-blog.csdnimg.cn/direct/2b7b820268ad48d397149f773947532e.png)
将披风全部右键点击解除
![![[Pasted image 20240418222019.png]]](https://img-blog.csdnimg.cn/direct/5a0cc082755649168c0679cc55fc753b.png)
但是缺点是在阴影部分也会显示亮光,平时能不用就不用,除非遇上一些特殊情况
再打开MME,再点击解除,就会恢复原状
皮肤材质
原本的皮肤在ray的渲染下是灰白的
打开MME,MaterialMap里面将面的材质替换为Skin里的材质
可以挨个试试感觉
比较常用的是TDA里的材质
![![[Pasted image 20240418223035.png]]](https://img-blog.csdnimg.cn/direct/a634a45dad8a4f59867e8085ca97dcf4.png)
![![[Pasted image 20240418223045.png]]](https://img-blog.csdnimg.cn/direct/0082ae009dfc41b88e75f63c3e2d2f8b.png)
把腿部的肌也修改材质
![![[Pasted image 20240418223332.png]]](https://img-blog.csdnimg.cn/direct/b0476745afc5448f9121195018479bc0.png)
金属材质
![![[Pasted image 20240418223627.png]]](https://img-blog.csdnimg.cn/direct/1315cca832484e42894b827c585ff612.png)
换成金材质
![![[Pasted image 20240418223816.png]]](https://img-blog.csdnimg.cn/direct/b4ec0c0a221e4551ad09c30921f8d834.png)
头发材质
![![[Pasted image 20240418224046.png]]](https://img-blog.csdnimg.cn/direct/e2657e25b49f4dfe8fb91c94380a4a7d.png)
![![[Pasted image 20240418224035.png]]](https://img-blog.csdnimg.cn/direct/6eea1726994d4966af7261f517069b6c.png)
打光
可以通过ray_controler模块里
在参数SunLight+和SunLight-修改光的强暗
现在光线比较亮,所以将SunLight-拉满,对场景其他光的影响就不大了,更能表现质感,更能表现其他光源的效果
![![[Pasted image 20240418224723.png]]](https://img-blog.csdnimg.cn/direct/a405540c50c5404d8ed66e507947a0dc.png)
![![[Pasted image 20240418224751.png]]](https://img-blog.csdnimg.cn/direct/c9093c48ca6f40a19edba834ef76730a.png)
SpotLight
打开ray文件夹里的Lighting文件夹
比如添加一个spot light
移动
模型界面换到spot light,点击移动选项
![![[Pasted image 20240418225033.png]]](https://img-blog.csdnimg.cn/direct/c7f32f082bbc42f09ad8567a8d8fcb98.png)
先设置在角色的正前方,看一下效果

先把range+,范围拉高
![![[Pasted image 20240418225241.png]]](https://img-blog.csdnimg.cn/direct/5067e4d9531d410eb33ee020ef95b9b6.png)
在增大强度
再把R+调高,就可以看到光了
![![[Pasted image 20240418225328.png]]](https://img-blog.csdnimg.cn/direct/bccd826c2d1946849ea2cc9569e7e7c3.png)
旋转
如果想要照射其他位置
![![[Pasted image 20240418225400.png]]](https://img-blog.csdnimg.cn/direct/fa8266ccd30f417c9f54530931a56b50.png)
点击旋转,然后调整方向
![![[Pasted image 20240418225539.png]]](https://img-blog.csdnimg.cn/direct/b03186194047422697081f6be8405a72.png)
- 有RGB,红绿蓝,可以调出不同的颜色
![![[Pasted image 20240418225559.png]]](https://img-blog.csdnimg.cn/direct/4e19677e7f074b2da42694fa85ae5b2f.png)
![![[Pasted image 20240418225655.png]]](https://img-blog.csdnimg.cn/direct/d31ecbf9c97e4f78ad70eb4b1047eb81.png)
其他里面
- range 光照的范围,数值越大,照的范围越远
- angle 角度,光源开合的角度
- intensity 强度,数值越大,对物体的影响越强烈
- AttenuationBult 光的衰减度,调大以后,衰减变低,调小衰减变高
- Blink 闪烁,调的越高,闪烁的频率就越快
- Hardness 有了阴影的贴图后会更明显
如何导入阴影
- 打开MME
![![[Pasted image 20240418230158.png]]](https://img-blog.csdnimg.cn/direct/ea48d6994c9048888310e9e1cadba33f.png)
在LightMap一栏
2. 选中SpotLight.pmx
![![[Pasted image 20240418230242.png]]](https://img-blog.csdnimg.cn/direct/f5649273144e497a8443500001f64a74.png)
- 选择Spotlightingwithshadowlow.fx
这样子在SpotLight的照射下会产生阴影
![![[Pasted image 20240418230936.png]]](https://img-blog.csdnimg.cn/direct/536982b3dd39433691a1062694ab9376.png)
切换到照射模式可以看到
Hardness调的越高,阴影就越硬,锐度就越高
![![[Pasted image 20240418231014.png]]](https://img-blog.csdnimg.cn/direct/b56bcbf10c574e9aac5a86bfbf119742.png)
添加雾气效果
打开MME
![![[Pasted image 20240418231141.png]]](https://img-blog.csdnimg.cn/direct/edfd4c901a2a4ff78a465d9968e2a50e.png)
在FogMap里选中光源
![![[Pasted image 20240418231220.png]]](https://img-blog.csdnimg.cn/direct/259782781ff54a5ab7713e1e6c5e1a8f.png)
选择shadowlow.pmx
![![[Pasted image 20240418231345.png]]](https://img-blog.csdnimg.cn/direct/7020639157c44d9eae3265225190e0f5.png)
会看到有雾气效果
因为粒子太多,显得噪点很多
如果想制作高清的视频,不适合使用这个fog
如何让光源的模型消失
![![[Pasted image 20240418231717.png]]](https://img-blog.csdnimg.cn/direct/740564062e61456ebba0e2aa75163189.png)
打开MME,在main中,选中SpotLight将其勾掉
![![[Pasted image 20240418231816.png]]](https://img-blog.csdnimg.cn/direct/b903f806501b4a24887810e9f83742ef.png)
将这里的也选中勾掉
![![[Pasted image 20240418231855.png]]](https://img-blog.csdnimg.cn/direct/6d3c5300403845199230939d54db0c96.png)
切换到照明模式,发现模型不会渲染进去,但是光源效果依然在
SSAO
是一个环境吸收
![![[Pasted image 20240418232048.png]]](https://img-blog.csdnimg.cn/direct/c32828b6957c4c3896f6d8029b26df90.png)
在环境光较强的情况下,选择面部
![![[Pasted image 20240418232127.png]]](https://img-blog.csdnimg.cn/direct/511490d05c4148ae857210cf85dac237.png)
先设置0,发现头部的某些阴影部分就消失掉了
![![[Pasted image 20240418232205.png]]](https://img-blog.csdnimg.cn/direct/41d09fa5c0bd42e78a68c8ee45b60fdd.png)
调成1
![![[Pasted image 20240418232240.png]]](https://img-blog.csdnimg.cn/direct/aecf9cbedc3c46d6bed95f47d5007796.png)
就变黑了
环境吸收就是周围环境的光对选中的地方的影响
一般都是对人物整体,调成0.7~0.8的样子,不会调满
眼睛和面部会比较低,0.1~0.5的样子,0也没有问题
眼睛这样子会更清晰
PSSM
就是摄像机照射的方位对模型造成的阴影
4个选项分别对应4个方位