1 爬虫介绍
爬虫概述: 获取网页并提取和保存信息的自动化程序 1.获取网页 2.提取信息 css选择器 xpath 3.保存数据(大数据时代) 4.自动化 爬虫(资产收集,信息收集)+ 漏扫(帮我发现漏洞)= 钱src hw 逆向工程(必须)
2 urllib模块介绍
urllib 是 Python 标准库中的一个模块,用于执行 HTTP 请求操作。它包含了四个主要的子模块,每个子模块都有其特定的功能:
-
urllib.request模块:这是最基本的 HTTP 请求模块,它提供了打开和读取 URL 的功能。使用此模块,你可以发起 GET 和 POST 请求,处理 cookies 和重定向,以及设置请求头部等。 -
urllib.error模块:这个模块用于处理与urllib.request相关的异常。当你使用urllib.request发起请求时,如果遇到错误(如网络问题、无效的 URL 或服务器错误),该模块会抛出相应的异常,以便你能够捕获并处理这些错误。 -
urllib.parse模块:这是一个工具模块,提供了处理 URL 的方法。你可以使用它来解析 URL,将其分解为各个组件(如协议、主机名、路径等),也可以构建新的 URL。此外,它还提供了编码和解码 URL 参数的功能。 -
urllib.robotparser模块:这个模块用于解析robots.txt文件。robots.txt文件是网站用来告诉爬虫哪些页面可以爬取,哪些页面不能爬取的。urllib.robotparser模块提供了一个RobotFileParser类,用于读取和解析robots.txt文件,并判断一个特定的爬虫(通过其用户代理字符串)是否有权限访问某个 URL。
总结来说,urllib 是 Python 中用于执行 HTTP 请求和处理相关操作的内置库,它包含了请求、异常处理、URL 解析和机器人协议解析等功能的模块,使得开发者能够方便地进行网络请求和数据抓取。
3 第一个爬虫
新建urllib_1.py
#!/usr/bin/env python
import urllib.request
#发送一个最基本的请求
def load_baidu_data():
url='http://www.baidu.com'
response = urllib.request.urlopen(url)
#print(response.code)
data = response.read()
#将data获取到的东西转换为字符串
str_data = data.decode('utf-8')
print(str_data)
#将数据写入文件
with open("baidu.html","w",encoding="utf-8") as f:
f.write(str_data)
load_baidu_data()
效果

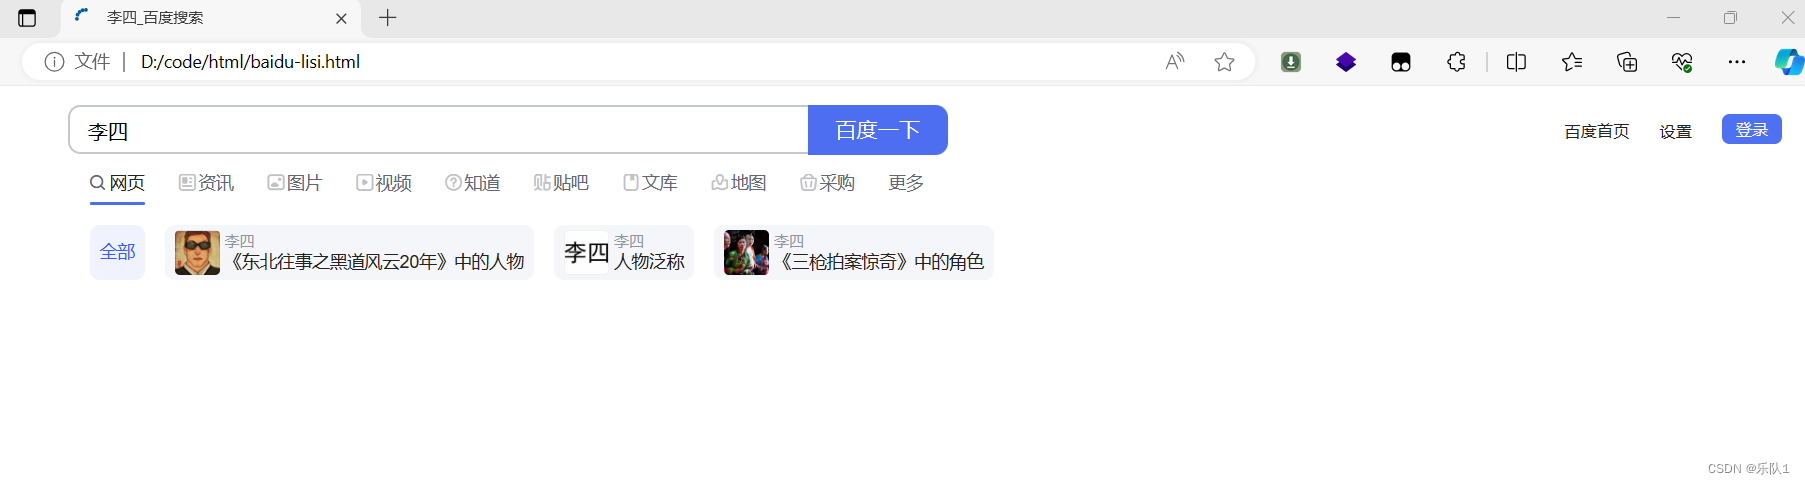
4 get请求拼接
新建urllib_2.py
#!/usr/bin/env python
import urllib.request
import urllib.parse
import string
def load_baidu_data():
url = 'http://www.baidu.com/s?wd='
#url+search
name = "李四"
final_url= url+name
#网址里面包含了汉字 需要进行转码
encode_url = urllib.parse.quote(final_url,safe=string.printable)
print(encode_url)
response = urllib.request.urlopen(encode_url)
# print(response.code)
data = response.read()
#将data获取到的东西转换为字符串
str_data = data.decode('utf-8')
print(str_data)
#将数据写入文件
with open("baidu-lisi.html","w",encoding="utf-8") as f:
f.write(str_data)
load_baidu_data()
效果
5 get请求拼接多个参数
新建urllib_3.py
#!/usr/bin/env python
import urllib.request
import urllib.parse
import string
def load_baidu_data():
url = 'http://www.baidu.com/s?'
params = {
"wd":"猪八戒",
"pn":"80"
}
query_str = urllib.parse.urlencode(params)
final_url= url+query_str
print(final_url)
# encode_url = urllib.parse.quote(query_str,safe=string.printable)
response = urllib.request.urlopen(final_url)
# print(response.code)
data = response.read()
#将data获取到的东西转换为字符串
str_data = data.decode('utf-8')
print(str_data)
#将数据写入文件
with open("baidu-zhubajie-pn20.html","w",encoding="utf-8") as f:
f.write(str_data)
load_baidu_data()
效果

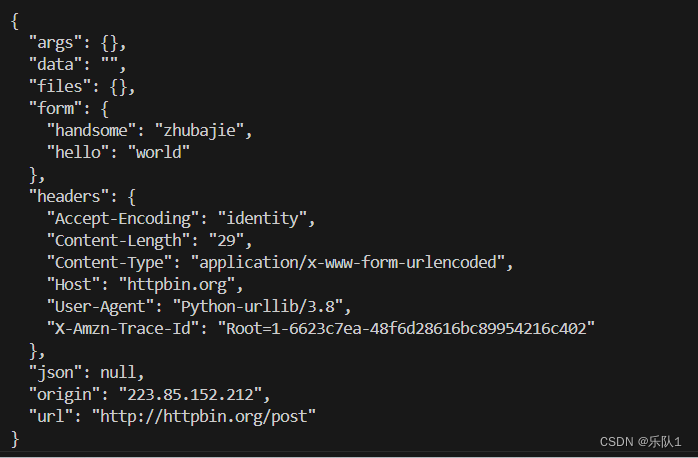
6 post请求
新建urllib_post.py
#!/usr/bin/env python
import urllib.request
import urllib.parse
import urllib.error
#1.定义url
url = 'http://httpbin.org/post'
#创建要发送的数据表单
data = {
'hello':'world',
'handsome':'zhubajie'
}
#data要进行编码
data_encode = urllib.parse.urlencode(data).encode("utf-8")
#加上encode(“utf-8”)-> stt-》bytes
#解码 decode("utf-8") byte-》str
response = urllib.request.urlopen(url=url,data=data_encode)
print(response.read().decode("utf-8"))
效果
7 超时设置
#!/usr/bin/env python
import urllib.request
import urllib.parse
import urllib.error
#1.定义url
url = 'http://httpbin.org/post'
#创建要发送的数据表单
data = {
'hello':'world',
'handsome':'zhubajie'
}
#data要进行编码
data_encode = urllib.parse.urlencode(data).encode("utf-8")
#加上encode(“utf-8”)-> stt-》bytes
#解码 decode("utf-8") byte-》str
try:
response = urllib.request.urlopen(url=url,data=data_encode,timeout=0.1)
print(response.read().decode("utf-8"))
except urllib.error.URLError as e:
print("连接超时!")
效果

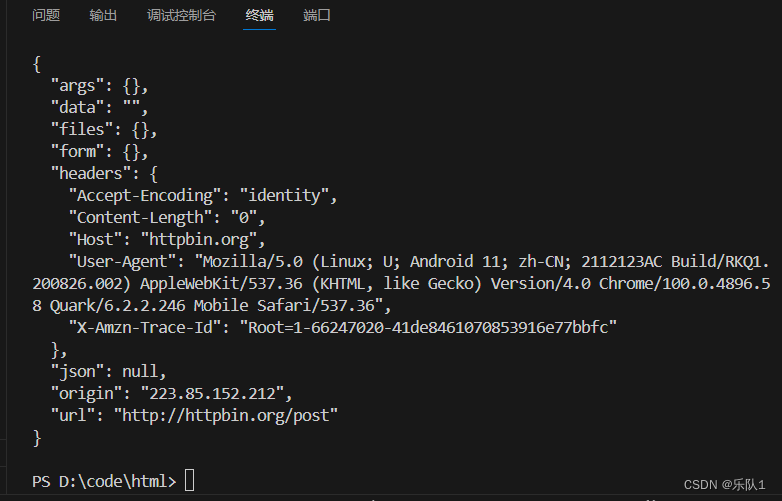
8 自定义user-agent
自定义User-Agent是一种灵活调整浏览器或其他客户端在发送HTTP请求时所携带的身份标识的技术。通过修改User-Agent字符串,用户可以伪装成不同的客户端类型或操作系统,以满足特定需求,如进行兼容性测试、爬虫伪装或数据分析等。但需要注意的是,自定义User-Agent应遵守相关规定,避免滥用导致违反使用协议或法律。总之,自定义User-Agent为用户提供了更多控制和灵活性。
新建request_head.py
#!/usr/bin/env python
import urllib.request
import urllib.parse
import urllib.error
#1.定义url
url = 'http://httpbin.org/post'
#2自定义request 添加一个user-agent
header = {
"User-Agent":"Mozilla/5.0 (Linux; U; Android 11; zh-CN; 2112123AC Build/RKQ1.200826.002) AppleWebKit/537.36 (KHTML, like Gecko) Version/4.0 Chrome/100.0.4896.58 Quark/6.2.2.246 Mobile Safari/537.36"
}
req = urllib.request.Request(url=url,headers=header,method='POST')
response = urllib.request.urlopen(req)
print(response.read().decode("utf-8"))
效果
9 小项目-随机user-agent
新建randm_useragent.py
#!/usr/bin/env python
import urllib.request
import urllib.parse
import urllib.error
import random
def user_agent():
url = 'http://httpbin.org/post'
#搞一堆user-agent
user_agent_list = [
"Mozilla/5.0 (Linux; Android 12; ELS-AN00 Build/HUAWEIELS-AN00; wv) AppleWebKit/537.36 (KHTML, like Gecko) Version/4.0 Chrome/107.0.5304.141 Mobile Safari/537.36 XWEB/5075 MMWEBSDK/20230504 MMWEBID/9308 MicroMessenger/8.0.37.2380(0x2800253D) WeChat/arm64 Weixin NetType/5G Language/zh_CN ABI/arm64 MiniProgramEnv/android",
"Mozilla/5.0 (iPhone; CPU iPhone OS............ile/15E148 MicroMessenger/8.0.34(0x18002234) NetType/4G Language/zh_CN",
"Mozilla/5.0 (Windows; U; Windows NT 5.1; hu; rv:1.8.0.11) Gecko/20070312 Firefox/1.5.0.1120",
"Mozilla/5.0 (Macintosh; Int............ecko) Chrome/114.0.0.0 Safari/537.36 Edg/114.0.1823.67",
"Mozilla/5.0 (X1............7.6) Gecko/20050318 Firefox/1.0.2",
"Mozilla/5.0 (Windows; U; Win............o) Chrome/100.0.4896.58 Safari/537.36 UCBrowser/15.4.8.1238"
]
#每次取一个user-agent
random_user_agent = random.choice(user_agent_list)
header = {
"User-Agent":random_user_agent
}
req = urllib.request.Request(url=url,headers=header,method='POST')
response = urllib.request.urlopen(req)
print(response.read().decode("utf-8"))
user_agent()
效果

10自定义构建opener
新建handler_open.py
#!/usr/bin/env python
import urllib.request
import urllib.parse
import urllib.error
def handler_open():
url = 'http://httpbin.org/get'
#创建自己的opener
handler = urllib.request.HTTPHandler()
opener = urllib.request.build_opener(handler)
response = opener.open(url)
print(response.read().decode("utf-8"))
handler_open()
效果

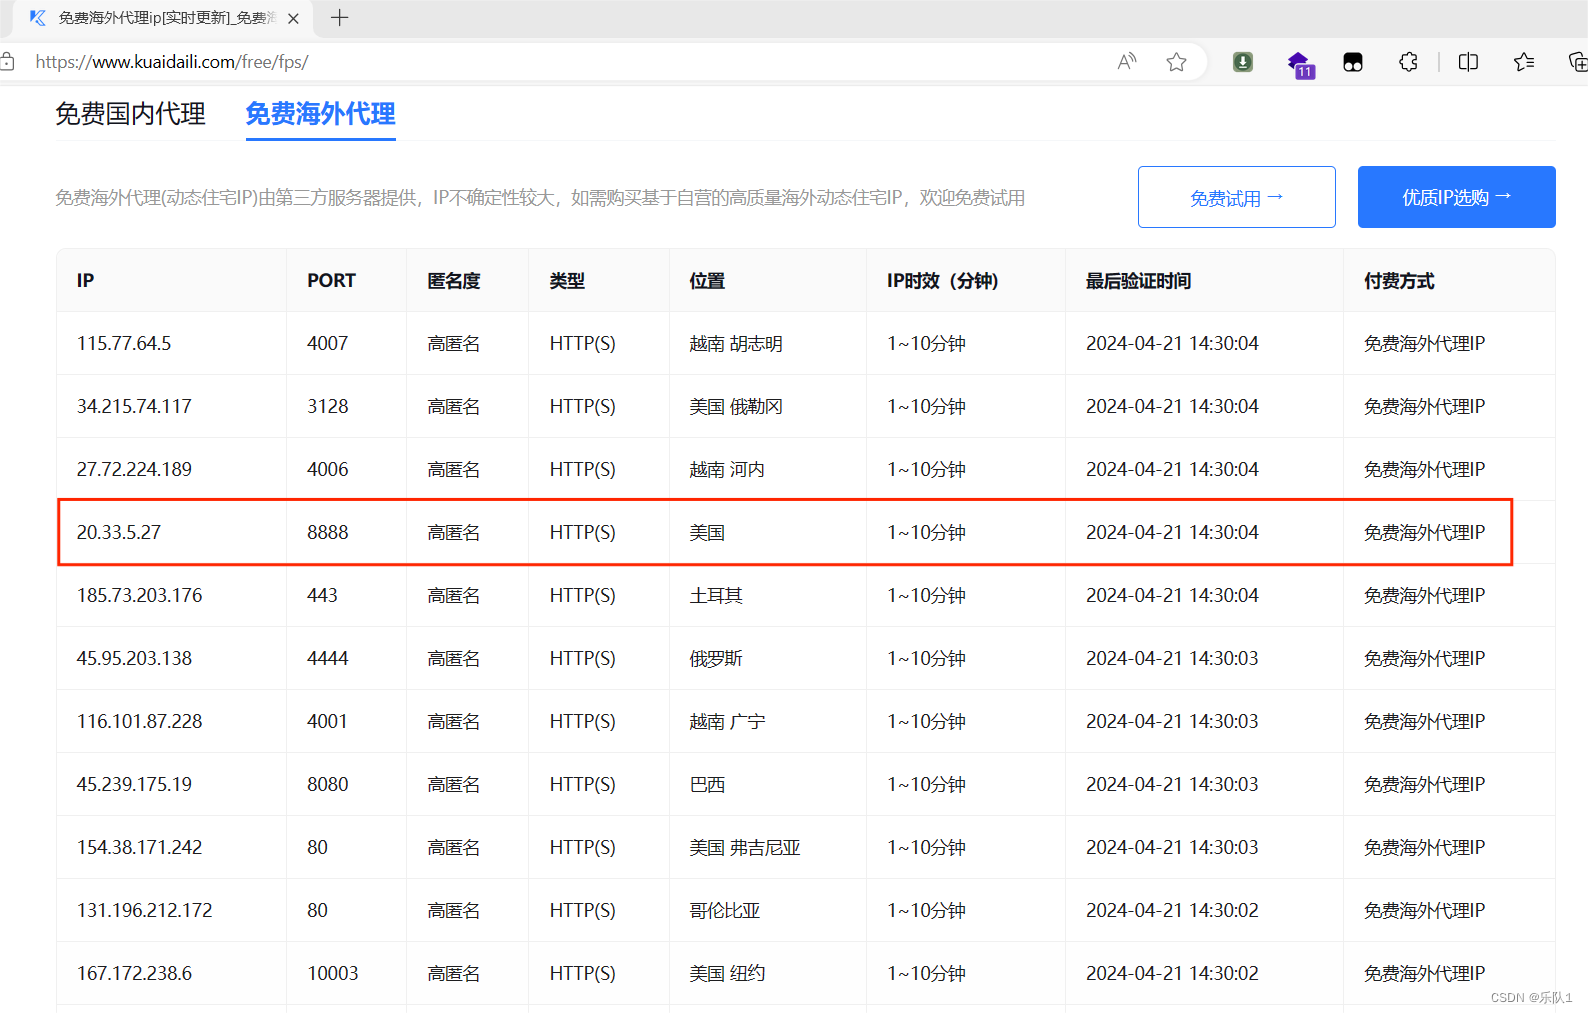
11 配置代理
免费代理
新建proxy_handler.py
#!/usr/bin/env python
import urllib.request
import urllib.parse
import urllib.error
def handler_open():
try:
url = 'http://httpbin.org/get'
#添加代理 代理的ip 端口
proxy = {
"http":"http://115.207.183.169:18784"
}
#创建代理处理器
proxy_handler = urllib.request.ProxyHandler(proxy)
#创建自己的opener
opener = urllib.request.build_opener(proxy_handler)
response = opener.open(url)
print(response.read().decode("utf-8"))
except urllib.error.URLError as e:
print("error: ",e)
handler_open()
效果

12 小项目-随机ip代理
新建random_ip.py
#!/usr/bin/env python
import urllib.request
import urllib.parse
import urllib.error
import random
def proxy_ip():
url = 'https://www.kuaidaili.com/testproxy'
#搞一堆ip
ip_list = [
"http://183.161.45.66:17114",
"http://119.41.198.172:18350",
"http://27.191.60.244:15982",
"http://27.215.237.221:20983",
]
#每次取一个ip
proxy = random.choice(ip_list)
# header = {
# "User-Agent":random_user_agent
# }
print(proxy)
try:
# url = 'http://httpbin.org/get'
# #添加代理 代理的ip 端口
# proxy = {
# "http":"http://115.207.183.169:18784"
# }
#创建代理处理器
proxy_handler = urllib.request.ProxyHandler({'http':proxy,'https':proxy})
#创建自己的opener
opener = urllib.request.build_opener(proxy_handler)
response = opener.open(url)
print(response.read().decode("utf-8"))
except urllib.error.URLError as e:
print("error: ",e)
proxy_ip()
13 授权认证
新建authpassword.py
#!/usr/bin/env python
import urllib.request
from urllib.parse import urlparse
def auth_login():
url = 'https://ssr3.scrape.center/'
#指定用户名and密码
username = 'admin'
password = 'admin'
#创建一个密码管理器
password_mgr = urllib.request.HTTPPasswordMgrWithDefaultRealm()
#添加进目标url,用户名 密码
password_mgr.add_password(None,url,username,password)
#创建一个基本密码认证处理器并将密码管理器传递给他
handler = urllib.request.HTTPBasicAuthHandler(password_mgr)
#创建网络请求的构造器
opener = urllib.request.build_opener(handler)
response = opener.open(url)
# response = urllib.request.urlopen(url)
print(response.read().decode('utf-8'))
auth_login()
效果
14 cookie认证流程
新建Cookie1.py
#!/usr/bin/env python
import urllib.request
from urllib.parse import urlparse
def auth_login():
url = 'https://ssr3.scrape.center/'
headers = {
'User-Agent':'Mozilla/5.0 (Windows NT 10.0; Win64; x64) AppleWebKit/537.36 (KHTML, like Gecko) Chrome/116.0.0.0 Safari/537.36 Edg/116.0.1938.54',
'Authorization':'Basic YWRtaW46YWRtaW4='
}
req = urllib.request.Request(url=url,headers=headers)
response = urllib.request.urlopen(req)
print(response.read().decode('utf-8'))
auth_login()
效果
15 使用cookiejar读写cookie
新建Cookie2.py
#!/usr/bin/env python
import urllib.request
import http.cookiejar
filename = 'cookies.txt'
#定义保存cookie的文件
filename = 'cookies.txt'
cookie = http.cookiejar.LWPCookieJar(filename=filename)
handler = urllib.request.HTTPCookieProcessor(cookie)
opener = urllib.request.build_opener(handler)
response = opener.open('https://www.baidu.com')
cookie.save(ignore_discard=True,ignore_expires=True)
#读:
cookie = http.cookiejar.LWPCookieJar()
cookie.load(filename,ignore_discard=True,ignore_expires=True)
handler = urllib.request.HTTPCookieProcessor(cookie)
opener = urllib.request.build_opener(handler)
response = opener.open('http://www.baidu.com')
print(response.read().decode('utf-8'))
效果
16 小项目-使用cookie登录网页
新建Cookie3.py
#!/usr/bin/env python
import urllib.request
import http.cookiejar
import urllib.parse
#1.用账号密码登录网站
# #登录的url
url = 'https://www.yaozh.com/login'
#登录的参数
login_data = {
"type":"0",
"username":"ppkke007",
"pwd":"Iceropq13315",
"pc_vcode":"",
"country":"86_zh-CN",
"mobile":"",
"vcode":"",
"pincode":"",
"formhash":"CEA7846B38",
"backurl":"https%253A%252F%252Fwww.yaozh.com%252F"
}
#发送登录请求
cookie = http.cookiejar.CookieJar()
handler = urllib.request.HTTPCookieProcessor(cookie)
opener = urllib.request.build_opener(handler)
headers = {
'User-Agent':'Mozilla/5.0 (Windows NT 10.0; Win64; x64) AppleWebKit/537.36 (KHTML, like Gecko) Chrome/116.0.0.0 Safari/537.36 Edg/116.0.1938.54',
}
# #转码
login_str = urllib.parse.urlencode(login_data).encode('utf-8')
req = urllib.request.Request(url=url,headers=headers,data=login_str)
#如果登录成功 cookjar会自动保存cookie
opener.open(req)
#2.代码带着cookie去访问
login_url = "https://www.yaozh.com/member/"
req2 = urllib.request.Request(login_url,headers=headers)
# response = opener.open(login_url)
response = urllib.request.urlopen(login_url)
# print(response.read().decode('utf-8'))
data = response.read()
with open('cookie2.html',"wb") as f:
f.write(data)
效果

17 异常处理
新建urlerror.py
#!/usr/bin/env python
import urllib.request
from urllib.error import *
import socket
try:
url = 'https://www.baidu.com'
response = urllib.request.urlopen(url=url,timeout=0.01)
except URLError as e:
print(e.reason)
if isinstance(e.reason,socket.timeout):
print("Time out!!")
# except URLError as e:
# print(e.reason)
效果