前置工作
进入根目录
cd /
都在/usr/local/src文件夹)
上传压缩包
rz 压缩包
Mysql
1.下载并安装MySQL官方的 Yum Repository
wget http://dev.mysql.com/get/mysql-community-release-el7-5.noarch.rpm
rpm -ivh mysql-community-release-el7-5.noarch.rpm
yum install mysql-community-server -y
2.数据库设置
启动mysql
systemctl start mysqld.service
查看mysql运行状态
systemctl status mysqld.service

不过要想进入mysql还得先找出此时root用户的密码,通过如下命令可以在日志文件中找出密码(可能没有密码):
grep "password" /var/log/mysqld.log
![]()
进入数据库:
mysql -uroot -p # 回车后会提示输入密码
输入上面的密码:

成功登录mysql,修改密码:
create user 'root'@'%' identified by 'qcBY@2021';
grant all privileges on *.* to 'root'@'%' with grant option;
flush privileges;
默认密码策略要求密码必须是大小写字母数字特殊字母的组合,至少八位
3.允许远程登录
use mysql;
grant all privileges on *.* to 'root'@'%' identified by 'qcBY@2021' with grant option;
GRANT ALL ON *.* TO 'root'@'%';
flush privileges;
4.防火墙
需要退出mysql
开启防火墙
systemctl start firewalld.service
查看防火墙端口开放情况
firewall-cmd --list-ports;
开放3306端口
firewall-cmd --zone=public --add-port=3306/tcp --permanent
重启防火墙
firewall-cmd --reload
5.报错注意
可能写的密码比较简单所以会有以下错误:
mysql5.7初始化密码报错 ERROR 1820 (HY000): You must reset your password using ALTER USER statement before
修改validate_password_policy参数的值
mysql> set global validate_password_policy=0;
validate_password_length(密码长度)参数默认为8,我们修改为1
mysql> set global validate_password_length=1;
完成后再次执行修改密码语句即可成功
mysql> alter user 'root'@'localhost' identified by '123456';
Mariadb
Mariadb与Mysql任装其一即可
安装
yum install mariadb-server
启动

停止

重启
systemctl restart mariadb.service
开启开机自启动
![]()
停止开机自启动
![]()
初始化
未初始化的状态

初始化数据库

初始化内容


初始化数据库后必须重启数据库服务
访问
成功远程连接的必要条件:
- 数据库必须开通远程连接权限
- 防火墙必须开放3306端口
开通权限
方式一:在MariaDB的mysql数据库中的user表中,必须有一条host为%表字段

方式二:修改host='localhost'的表字段为host='%'

刷新权限
方式一:重启MariaDB.service
systemctl restart mariadb.service
方式二:在MariaDB中执行权限刷新
flush privileges;
开放3306端口
firewall-cmd --zone=public --add-port=3306/tcp --permanent
firewall-cmd --reload
Redis
1.上传redis.tar.gz到指定目录,进入文件夹
2.编译解压后的redis源文件
![]()
3.执行make install命令
4.配置
修改redis.conf文件

保护模式:
当保护模式开启且Redis没有绑定IP地址或Redis没有设置密码时,Redis只能被IP地址为127.0.0.1(IPv4环回地址)或::1(IPv
当关闭保护模式且Redis没有绑定IP地址或Redis没有设置密码时,Redis可以被联接到其所在主机的其它任意IP的主机访问。
修改为:
protected-mode no
守护进程:
当用作守护进程时,Redis不占用当前控制台。当不用作守护进程时,Redis会占用控制台。默认为不用作守护进程。
修改为:
daemonize yes
5.启动(腾讯云要开启6379端口)
redis-server redis.cof


6.进入和退出redis客户端
前置条件:redis必须启动

7.关闭redis
前置条件:在redis根目录下执行,如果是在redis客户端时,必须退出redis客户端。


tomcat
1.上传压缩包解压,进入文件夹
2.
cd bin
3.
./startup.sh
nginx
1.上传压缩包到/usr/local/src目录,并解压
2.进入解压后的目录
3.编译

4.make
![]()
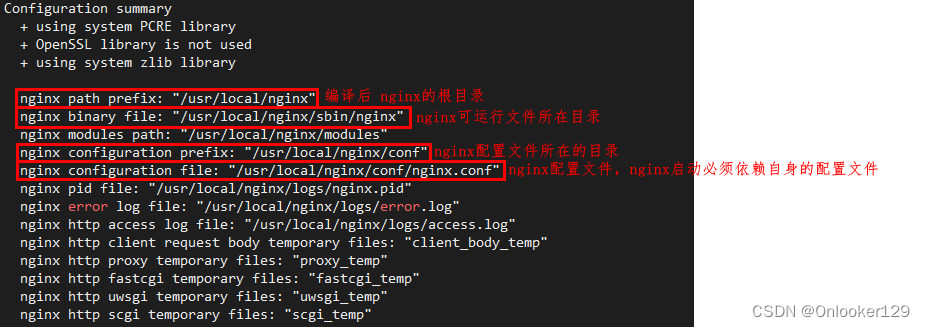
5.make install
![]()
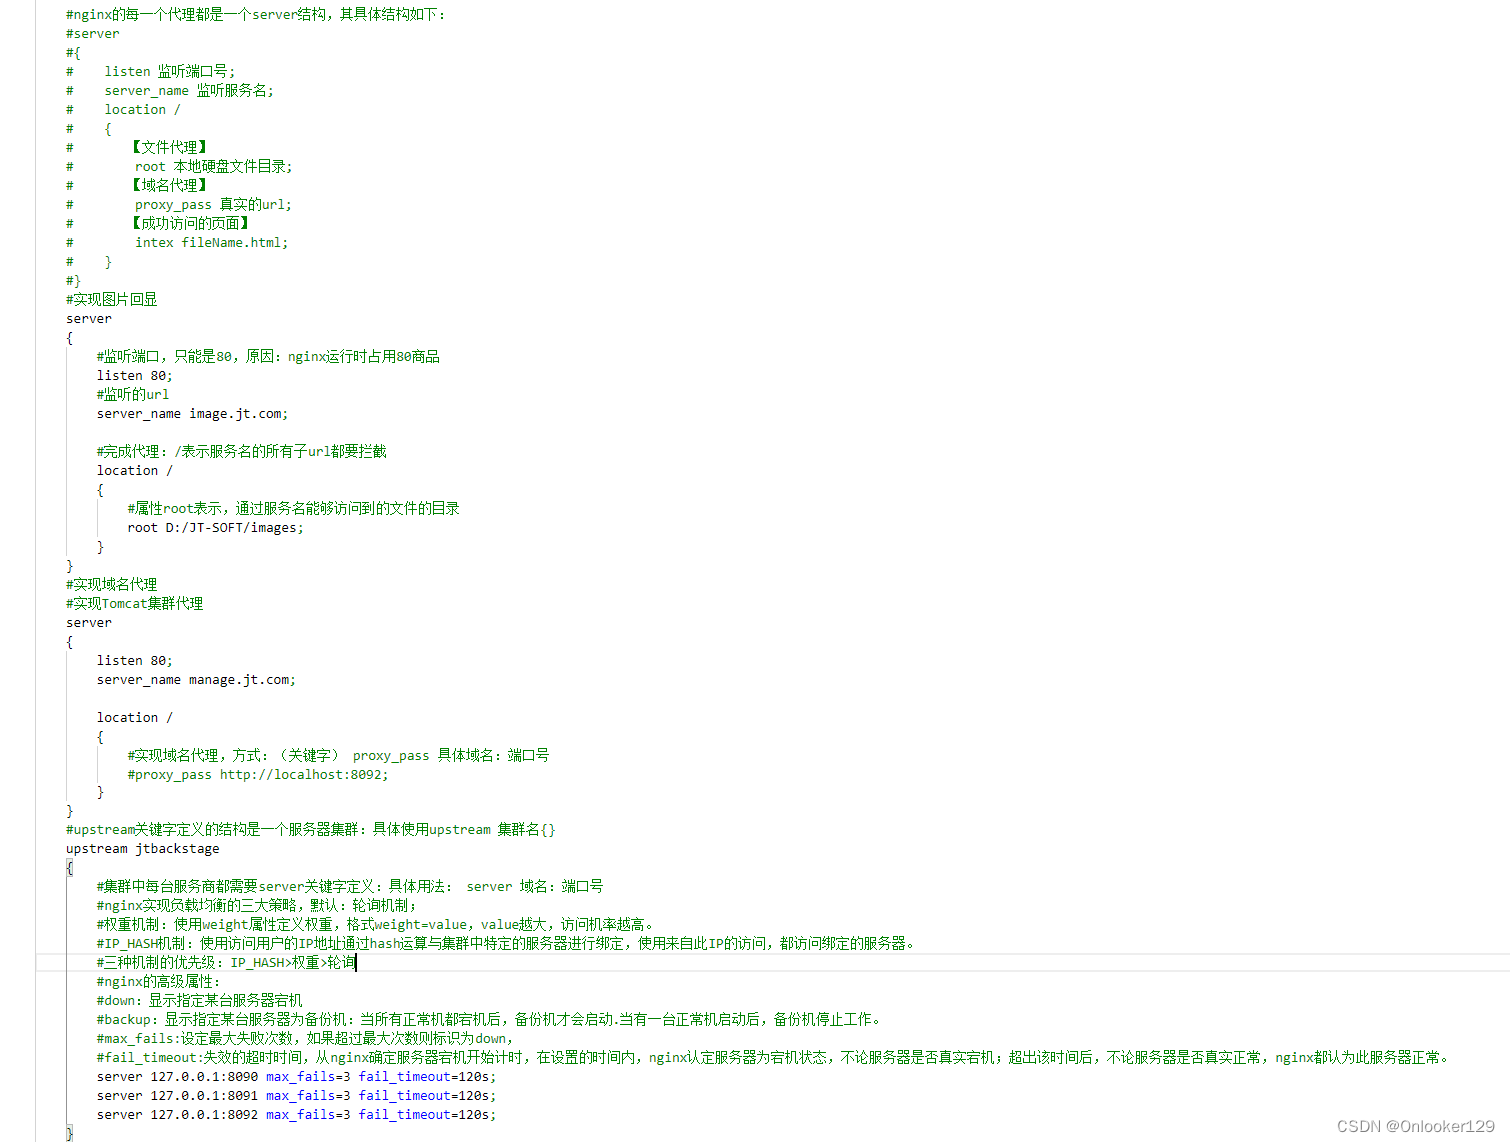
6.配置
进入conf目录

#user  nobody;
worker_processes  1;

#error_log  logs/error.log;
#error_log  logs/error.log  notice;
#error_log  logs/error.log  info;

#pid        logs/nginx.pid;


events {
    worker_connections  1024;
}


http {
    include       mime.types;
    default_type  application/octet-stream;

    #log_format  main  '$remote_addr - $remote_user [$time_local] "$request" '
    #                  '$status $body_bytes_sent "$http_referer" '
    #                  '"$http_user_agent" "$http_x_forwarded_for"';

    #access_log  logs/access.log  main;

    sendfile        on;
    #tcp_nopush     on;

    #keepalive_timeout  0;
    keepalive_timeout  65;

    #gzip  on;

    server {
        listen       80;
        server_name  localhost;

        #charset koi8-r;

        #access_log  logs/host.access.log  main;

        location / {
            root   html;
            index  index.html index.htm;
        }

        #error_page  404              /404.html;

        # redirect server error pages to the static page /50x.html
        #
        error_page   500 502 503 504  /50x.html;
        location = /50x.html {
            root   html;
        }

        # proxy the PHP scripts to Apache listening on 127.0.0.1:80
        #
        #location ~ \.php$ {
        #    proxy_pass   http://127.0.0.1;
        #}

        # pass the PHP scripts to FastCGI server listening on 127.0.0.1:9000
        #
        #location ~ \.php$ {
        #    root           html;
        #    fastcgi_pass   127.0.0.1:9000;
        #    fastcgi_index  index.php;
        #    fastcgi_param  SCRIPT_FILENAME  /scripts$fastcgi_script_name;
        #    include        fastcgi_params;
        #}

        # deny access to .htaccess files, if Apache's document root
        # concurs with nginx's one
        #
        #location ~ /\.ht {
        #    deny  all;
        #}
    }


    # another virtual host using mix of IP-, name-, and port-based configuration
    #
    #server {
    #    listen       8000;
    #    listen       somename:8080;
    #    server_name  somename  alias  another.alias;

    #    location / {
    #        root   html;
    #        index  index.html index.htm;
    #    }
    #}


    # HTTPS server
    #
    #server {
    #    listen       443 ssl;
    #    server_name  localhost;

    #    ssl_certificate      cert.pem;
    #    ssl_certificate_key  cert.key;

    #    ssl_session_cache    shared:SSL:1m;
    #    ssl_session_timeout  5m;

    #    ssl_ciphers  HIGH:!aNULL:!MD5;
    #    ssl_prefer_server_ciphers  on;

    #    location / {
    #        root   html;
    #        index  index.html index.htm;
    #    }
    #}

}
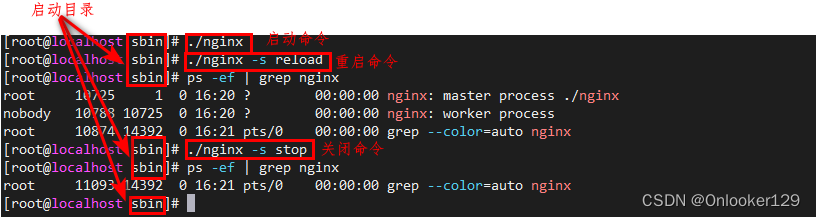
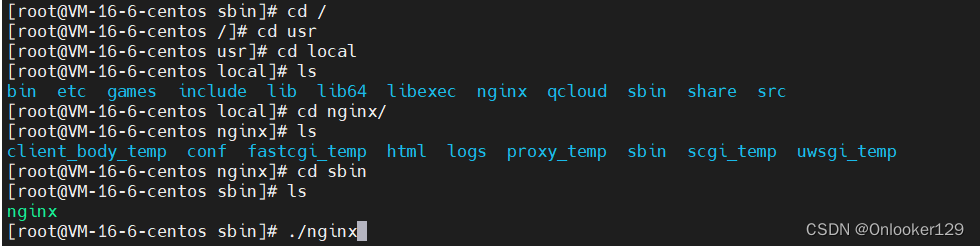
7.进入nginx/sbin目录中
启动
重启:./nginx -s reload
关闭:./nginx -s stop