1、事件类型
①、HTML事件
| 事件 | 说明 |
| load | 当页面完全加载后在window上面触发,或当框架集加载完毕后在框架集上触发; |
| unload | 当页面完全卸载后在window上面触发,或当框架集卸载后在框架集上触发; |
| select | 当用户选择文本框(input或textarea)中的一个或多个字符触发; |
| change | 当文本框(input或textarea)内容改变且失去焦点后触发; |
| input | 输入; |
| focus | 当页面或者元素获得焦点时在window及相关元素上面触发; |
| blur | 当页面或元素失去焦点时在window及相关元素上触发; |
| submit | 当用户点击提交按钮在<form>元素上触发; |
| reset | 当用户点击重置按钮在<form>元素上触发; |
| resize | 当窗口或框架的大小变化时在window或框架上触发; |
| scroll | 当用户滚动带滚动条的元素时触发; |
1、select
<!DOCTYPE html>
<head>
    <meta charset="UTF-8">
    <title>Document</title>
</head>
<body>
    <textarea cols="30" rows="10"></textarea>
    <script>
        let b=document.querySelector("textarea")
        b.innerHTML="选择内容时候触发哈哈哈"
        b.addEventListener("select",()=>{
            b.style.backgroundColor="yellow"

        })

    </script>
</body>
</ht
2、change
搭配使用文本框(input或textarea)
<!DOCTYPE html>
<head>
    <meta charset="UTF-8">
    <title>Document</title>
</head>
<body>
    <textarea cols="30" rows="10"></textarea>
    <script>
        let b=document.querySelector("textarea")
        b.innerHTML="当输入内容改变且失去焦点后触发;"
        b.addEventListener("change",()=>{
            b.style.backgroundColor="yellow"

        })

    </script>
</body>
</ht
3、input
一输入就触发
<!DOCTYPE html>
<head>
    <meta charset="UTF-8">
    <title>Document</title>
</head>
<body>
    <textarea cols="30" rows="10"></textarea>
    <script>
        let b=document.querySelector("textarea")
        b.innerHTML="输入"
        b.addEventListener("input",()=>{
            b.style.backgroundColor="yellow"

        })

    </script>
</body>
</ht
4、focus与blur
<!DOCTYPE html>
<head>
    <meta charset="UTF-8">
    <title>Document</title>
</head>
<body>
    <textarea cols="30" rows="10"></textarea>
    <script>
        let b=document.querySelector("textarea")
        b.addEventListener("focus",()=>{
            b.style.backgroundColor="aqua"
            b.innerHTML="获得焦点"
        })
        b.addEventListener("blur",()=>{
            b.style.backgroundColor="yellow"
            b.innerHTML="失去焦点"
        })

    </script>
</body>
</html>
5、 submit与reset
注意
获取元素对象一定是<form action=""> </form>标签,提交与重置按钮一定也要包含在<form>标签中
<!DOCTYPE html>
<head>
    <meta charset="UTF-8">
    <title>Document</title>
    <style>
        div{
            height: 100px;
            width: 200px;
            background-color: aqua;
        }
    </style>
</head>
<body>
    <form action="">
        <input type="submit" value="提交">
        <input type="reset" value="重置">
        <div></div>
    </form>

    <script>
        const box=document.querySelector("div")
        const f = document.querySelector("form");
        f.addEventListener("submit",()=>{
            box.style.backgroundColor="yellow"
        })
        f.addEventListener("reset",()=>{
            box.style.backgroundColor="red"
        })
    </script>
</body>
</html>
6、resize尺寸大小事件
<!DOCTYPE html>
<head>
    <meta charset="UTF-8">
    <title>Document</title>
    <style>
        div{
            height: 100px;
            width: 200px;
            background-color: aqua;
        }
    </style>
</head>
<body>
        <div></div>
    <script>
        const box=document.querySelector("div")
       window.addEventListener("resize",()=>{
        box.style.backgroundColor="green"
       })

    </script>
</body>
</html>
7、scroll滚动事件
scrollTop\scrollLeft 获取元素向上滚出的高度,向左滚出的宽度
<!DOCTYPE html>
<html lang="en">
<head>
    <meta charset="UTF-8">
    <meta name="viewport" content="width=device-width, initial-scale=1.0">
    <title>Document</title>
    <style>
        body {
            height: 3000px;
            width: 2000px;
        }
    </style>
</head>
<body>

    <script>
        window.addEventListener("scroll", function () {
            console.log(document.documentElement.scrollTop)
            console.log(document.documentElement.scrollLeft)
        })
    </script>
</body>

②、键盘事件
键盘事件最好与输入相关的文本元素或者输入元素搭配使用
| 事件 | 说明 |
| keydown | 当用户按下键盘上任意键时触发,如果按住不放,会重复触发; |
| keyup | 当用户释放键盘上的键触发; |
| keypress | 当按下并松开按键时触发 |
1、keydown与keyup
<!DOCTYPE html>
<head>
    <meta charset="UTF-8">
    <title>Document</title>
</head>
<body>
    <textarea cols="30" rows="10"></textarea>
    <script>
        let b=document.querySelector("textarea")
        b.addEventListener("keydown",()=>{
            b.style.backgroundColor="blue"
            b.style.color="white"
            console.log("按下")
        })
        b.addEventListener("keyup",()=>{
            b.style.backgroundColor="pink"
            console.log("松开")
        })

    </script>
</body>
</html>
2、keypress
<!DOCTYPE html>
<head>
    <meta charset="UTF-8">
    <title>Document</title>
</head>
<body>
    <textarea name="" id="" cols="30" rows="10"></textarea>
    <script>
        let b=document.querySelector("textarea")
        b.addEventListener("keypress",()=>{
            b.style.backgroundColor="green"
            b.style.color="white"
            console.log("按下并松开")
        })

    </script>
</body>
</html>
③、鼠标事件
| 事件 | 说明 |
| click | 单击鼠标按钮时触发 |
| dblclick | 当用户双击主鼠标按钮时触发 |
| mousedown | 当用户按下鼠标还未弹起时触发 |
| mouseup | 当用户释放鼠标按钮时触发 |
| mouseover | 当鼠标移到某个元素上方时触发 |
| mouseout | 当鼠标移出某个元素上方时触发 |
| mousemove | 当鼠标指针在元素上移动时触发 |
| mouseenter | 在鼠标光标从元素外部首次移动至元素范围内触发,不参与冒泡 |
| mouseleave | 鼠标移出 |
1、click
<!DOCTYPE html>
<head>
    <meta charset="UTF-8">
    <title>Document</title>
    <style>
        div{
            height: 100px;
            width: 200px;
            background-color: aqua;
        }
    </style>
</head>
<body>
    <button>点击</button>
    <div></div>
    <script>
        let box=document.querySelector("div")
        let btn=document.querySelector("button")
        btn.addEventListener("click",()=>{
            box.style.backgroundColor="yellow"
        })
    </script>
</body>
</html>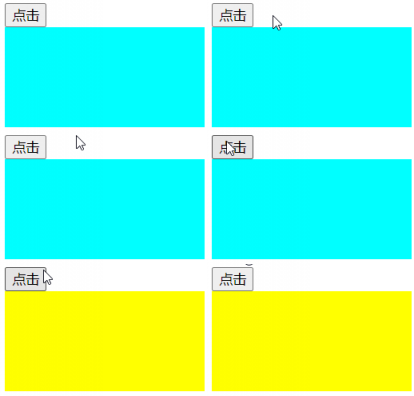
2、dblclick
<!DOCTYPE html>
<head>
    <meta charset="UTF-8">
    <title>Document</title>
    <style>
        div{
            height: 100px;
            width: 200px;
            background-color: aqua;
        }
    </style>
</head>
<body>
    <button>点击</button>
    <div></div>
    <script>
        let box=document.querySelector("div")
        let btn=document.querySelector("button")
        btn.addEventListener("dblclick",()=>{
            box.style.backgroundColor="yellow"
            box.innerHTML="双击鼠标触发"
        })
    </script>
</body>
</html>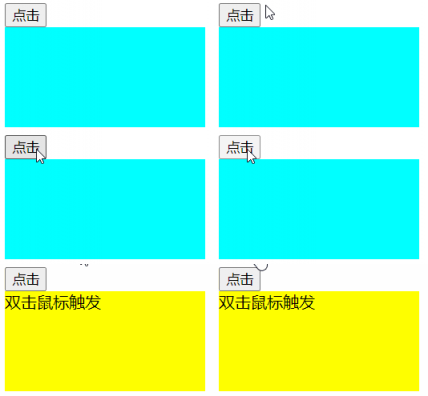
3、mousedown与mouseup
<!DOCTYPE html>
<head>
    <meta charset="UTF-8">
    <meta name="viewport" content="width=device-width, initial-scale=1.0">
    <title>Document</title>
    <style>
       textarea{
           height: 200px;
           width: 300px;
           resize: both;
       }
    </style>
</head>
<body>
    <textarea cols="40" rows="20"></textarea>
    <script>
        let t=document.querySelector("textarea")
        t.addEventListener("mousedown",()=>{
            t.style.backgroundColor="yellow"
            t.innerHTML="当用户按下鼠标还未弹起时触发"
        })
        t.addEventListener("mouseup",()=>{
            t.style.backgroundColor="yellowgreen"
            t.innerHTML="当用户释放鼠标按钮时触发"
        })
    </script>
</body>
4、mouseenter与mouseleave
移进移出鼠标时,要点击才有效果
<!DOCTYPE html>
<head>
    <meta charset="UTF-8">
    <meta name="viewport" content="width=device-width, initial-scale=1.0">
    <title>Document</title>
    <style>
       .dad{
           height: 280px;
           width: 280px;
           background-color: green;
       }
       .son{
           height: 150px;
           width: 150px;
           background-color: yellow
       }
    </style>
</head>
<body>
    <div class="dad">
        <div class="son"></div>
    </div>
    <script>
        let t1=document.querySelector(".dad")
        let t2=document.querySelector(".son")
        t1.addEventListener("mouseenter",()=>{
            console.log("鼠标在元素上")
        })
        t1.addEventListener("mouseleave",()=>{
            console.log("鼠标移除元素外")
        })
    </script>
</body>
</html>
5、mouseover与mouseout
只要鼠标指针移入事件所绑定的元素或其子元素,都会触发该事件
<!DOCTYPE html>
<head>
    <meta charset="UTF-8">
    <title>Document</title>
    <style>
       .dad{
           height: 280px;
           width: 280px;
           background-color: green;
       }
       .son{
           height: 150px;
           width: 150px;
           background-color: yellow
       }
    </style>
</head>
<body>
    <div class="dad">
        <div class="son"></div>
    </div>
    <script>
        let t1=document.querySelector(".dad")
        let t2=document.querySelector(".son")
        t1.addEventListener("mouseover",()=>{
            console.log("鼠标在元素上")
        })
        t1.addEventListener("mouseout",()=>{
            console.log("鼠标移除元素外")
        })
    </script>
</body>
</html>
6、mouseover ,mouseout ,mouseenter,mouseleave的区别
其实主要是mouseover与mouseout会引起冒泡,多次触发
7、mousemove
<head>
<style>
       div{
           height: 200px;
           width: 200px;
           background-color: rgb(136, 238, 136);
       }

    </style>
</head>
<body>
        <div></div>
    <script>
        let b=document.querySelector("div")
        b.addEventListener("mouseover",()=>{
            b.innerHTML="当鼠标指针在元素上移动时触发"
            b.style.backgroundColor="pink"
        })

    </script>
2、事件对象
- 在Javascript中发生事件时,都会产生一个事件对象event,这个对象中包含着所有与事件相关的信息
- 记录触发事件的所有记录,所有信息
//event.code键码值
对象.addEventListener("事件",(event或者e)=>{
事件对象操作
}
时间对象的使用可以让客户知道,在进行什么事件
<!DOCTYPE html>
<head>
    <meta charset="UTF-8">
    <title>Document</title>
</head>
<body>
    <textarea cols="30" rows="10"></textarea>
    <script>
        const txt=document.querySelector("textarea")
        //记录关于事件的所有信息
        txt.addEventListener("keydown",(event)=>{
            console.log(event)
        } )
    </script>
</body>
</html>
keydown事件, 在文本框输入按下键盘,控制台就出现了一次事件触发的具体信息

//事件由用户行为是否触发
isTrusted: true,
//按键标识符
key: '1',
按键标识符是表示键盘按钮的字符串,该属性的返回值可以是:
- 单个字母 (如 "a", "W", "4", "+" 或 "$")
- 多个字母 (如 "F1", "Enter", "HOME" 或 "CAPS LOCK")
//键码值
code: 'Digit1',
//返回按键在设备上的位置
location: 0
//用户的按键编码
keyCode: 49
//触发发生的元素容器
target: textarea
//事件类型
type: "keydown"
//以页面的左上角为原点。鼠标离浏览器可视区域左上角的距离,不随滚动条滚动而改变;
clientX: 135
clientY: 114
//鼠标位置相对于目标节点的位置
offsetX: 126
offsetY: 106
//以页面的左上角为原点。鼠标离浏览器可视区域左上角的距离,随滚动条滚动而改变;
pageX: 135
pageY: 114
//发生事件时,以显示器屏幕的左上角为原点,鼠标距离显示器屏幕左上角的坐标
screenX: 832
screenY: 239
//鼠标类型:小手
pointerType: "mouse"
- altKey:是否按下Alt键
- ctrlKey:是否按下Ctrl键
- shiftKey:是否按下Shift键
- metaKey:是否按下Meta键
<body>
    <textarea cols="30" rows="10"></textarea>
    <script>
        const txt=document.querySelector("textarea")
        txt.addEventListener("keydown",(event)=>{
            console.log(event.code)
            if (event.key=="Enter"){
                console.log("回车键")
            }

        })
    </script>
</body>
利用事件,可以打印出你键盘敲下了什么

3、捕获与冒泡
Dom事件标准描述了事件传播的 3 个阶段:
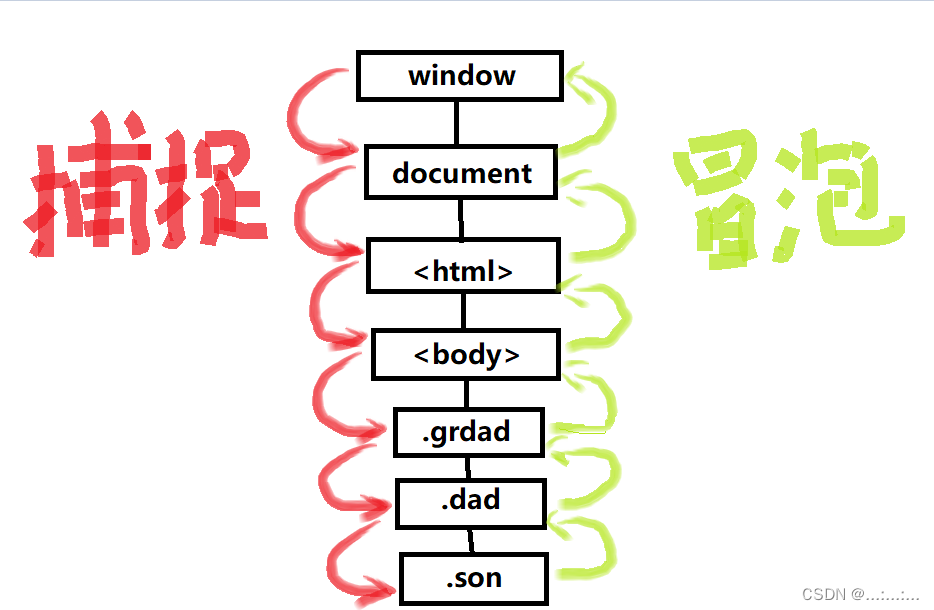
- 捕获阶段(Capturing phase)—— 事件(从 Window)向下走近元素。
- 目标阶段(Target phase)—— 事件到达目标元素。
- 冒泡阶段(Bubbling phase)—— 事件从元素上开始冒泡。
可以用事件对象方法event.eventPhase()返回事件传播当前的阶段
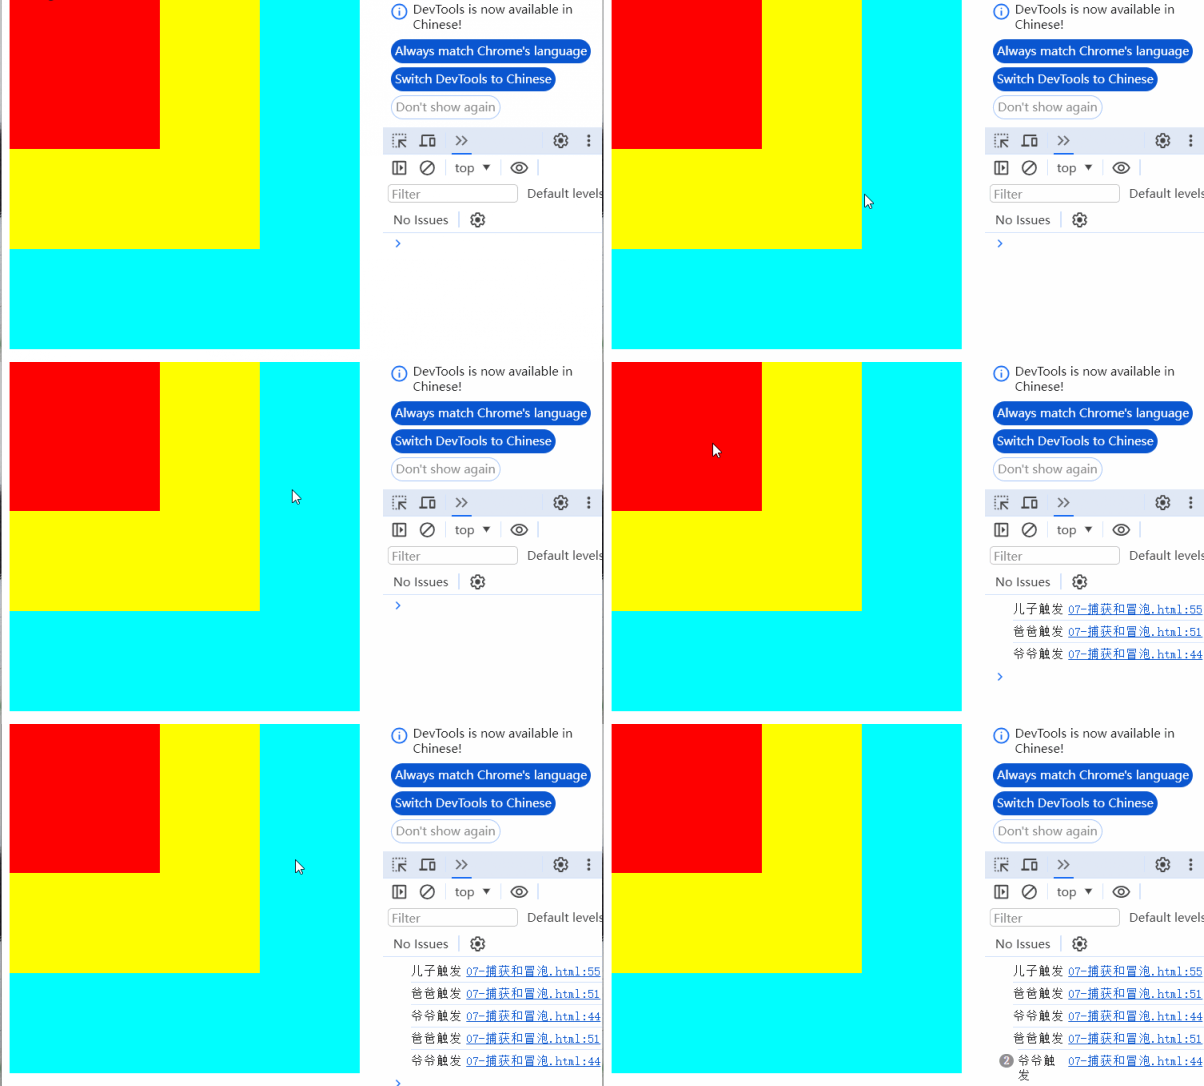
冒泡:当一个事件发生在一个元素上,它会首先运行在该元素上的处理程序,然后运行其父元素上的处理程序,然后一直向上到其他祖先上的处理程序。
几乎所有事件都会冒泡。
<!DOCTYPE html>
<head>
    <meta charset="UTF-8">
    <title>Document</title>
    <style>
        .grdad {
            width: 350px;
            height: 350px;
            background-color: aqua;
        }

        .dad {
            width: 250px;
            height:250px;
            background-color:yellow;
        }

        .son {
            width: 150px;
            height: 150px;
            background-color: red;
        }
    </style>
</head>
<body>
    <div class="grdad">
        <div class="dad">
            <div class="son"></div>
        </div>
    </div>
    <script>
        const g = document.querySelector(".grdad")
        const d = document.querySelector(".dad")
        const s = document.querySelector(".son")


        g.addEventListener("click", function (e) {
            console.log("爷爷触发")
        })
        d.addEventListener("click", function (e) {
            console.log("爸爸触发")
        })
        s.addEventListener("click", function (e) {
            console.log("儿子触发")
        })

    </script>
</body>

</html>
也就是说:点击 .son,事件首先通过祖先链向下到达元素(捕获阶段),然后到达目标(目标阶段),最后上升(冒泡阶段),在途中调用处理程序。
-
停止冒泡
用于停止冒泡的方法是
event.stopPropagation()。
  g.addEventListener("click", function (e) {
            console.log("爷爷触发")
           e.stopPropagation()
        })
        d.addEventListener("click", function (e) {
            console.log("爸爸触发")
           e.stopPropagation()
        })
        s.addEventListener("click", function (e) {
            console.log("儿子触发")
           e.stopPropagation()
        })
我们在使用时间监听的时候,第三个参数决定冒泡
第三个参数选项有两个可能的值:
- 如果为
false(默认值),则在冒泡阶段设置处理程序。- 如果为
true,则在捕获阶段设置处理程序。比如:
要是事件监听第三个参数是true,盒子触发顺序会从爷爷开始,到父亲,最后到儿子
 g.addEventListener("click", function (e) {
            console.log("爷爷触发")
        },true)
        d.addEventListener("click", function (e) {
            console.log("爸爸触发")
        },true)
        s.addEventListener("click", function (e) {
            console.log("儿子触发")
        },true)
4、组止表单提交
event.preventDefault() :阻止默认行为
元素对象.addEventListener("click", function (e或者event) {
e或者event.preventDefault()
})
元素对象.on事件 =(e或者event) =>{
e或者event.preventDefault()
})
 <form action="">
        <input type="text" name="name="佳人们你们好我作业还没写完555啊"">
        <button>提交</button>
    </form>


    <script>
        const btn = document.querySelector("button")
        btn.addEventListener("click", function () {
            console.log("点击")
    </script>
点击提交,山面的路径栏发生了变化

<!DOCTYPE html>
<head>
    <meta charset="UTF-8">
    <title>Document</title>
</head>

<body>
    <form action="">
        <input type="text" name="佳人们你们好我作业还没写完555啊" >
        <button>提交</button>
    </form>

    <script>
        const b = document.querySelector("button")
        b.addEventListener("click", function (e) {
            e.preventDefault()
        })
    </script>
</body>

</html>
点击提交,山面的路径栏发生了变化

5、全选案例
<!DOCTYPE html>

<html>

<head lang="en">
    <meta charset="UTF-8">
    <title></title>
    <style>
        table,th,td{
          border: 3px solid grey;
        }

        table {
            width: 100px;
            margin: 100px auto;
        }

        th {
            height: 25px;
        }


    </style>
</head>

<body>
    <table>
        <tr>
            <th>
                <input type="checkbox" class="a"> <span>全选</span>
            </th>
        </tr>
        <tr>
            <td>
                <input type="checkbox"  class="c">
            </td>
        </tr>
        <tr>
            <td>
                <input type="checkbox"  class="c">
            </td>
        </tr>

        <tr>
            <td>
                <input type="checkbox"  class="c">
            </td>
        </tr>
    </table>

    <script>
        const a = document.querySelector(".a")
        const c = document.querySelectorAll(".c")
        a.onclick=()=>{
            if (a.checked == true) {
                for (let i = 0; i < c.length; i++) {
                    c[i].checked = true
                }

            } else {
                for (let i = 0; i < c.length; i++) {
                    c[i].checked = false
                }
            }
        }

        for (let i = 0; i < c.length; i++) {
            c[i].onclick=()=>{
                let b = document.querySelectorAll(".c:checked")
                if (b.length == c.length) {
                    a.checked = true
                } else {
                    a.checked = false

                }
            }
        }

    </script>
</body>
</html>
6、事件委托
利用默认存在的冒泡,委托父级元素获取多数相同的元素对象
可以使用事件对象属性even.target---->返回触发此事件的的元素(事件的目标节点)
通俗一点讲,就是获取我们点击的对象
<!DOCTYPE html>
<head>
    <meta charset="UTF-8">
    <title>Document</title>
</head>
<body>
    <ul>
        <li>111</li>
        <li>222</li>
        <li>333</li>
        <li>444</li>
    </ul>
    <script>
        const ul=document.querySelector("ul")
        ul.onclick=(e)=>{
            e.target.style.backgroundColor="yellow"
        }
    </script>
</body>
</html>
选中的变成黄色

- 若是父级元素里的子元素不都是相同的,有混入其他元素,但是只想让特定的子元素被选中,该怎么办呢?
- 使用tagName属性获取标签名 JavaScript提供了一个名为 tagName 的属性,可以用来获取元素的标签名。
- 首先选中父级,后面交给父级的事件监听的事件对象属性去选中
<body>
    <ul>
        <li>111</li>
        <li>222</li>
        <li>333</li>
        <li>444</li>
        <h3>佳人们你们好啊</h3>
    </ul>
    <script>
        const ul=document.querySelector("ul")
        ul.onclick=(e)=>{
            if(e.target.tagName ==="LI"){
                e.target.style.backgroundColor="blue"
            }
        }
    </script>
</body>

7、client.offset
假如你想了解一个元素的宽和高,但是一些元素的宽高是由内容撑起来的,于是该如何获取宽高
- 元素.clientWidth //获取元素自身的宽高,不包含边框、margin、滚动条
- 元素.clientHeight
- 元素.offsetWidth //获取元素自身的宽高,包含padding、border
- 元素.offsetHeight
首先来个行内块元素,不设宽度,设高度,让他的宽度被内容撑大
<!DOCTYPE html>
<head>
    <meta charset="UTF-8">
    <title>Document</title>
    <style>
        div {
            display: inline-block;
            height: 100px;
            background-color: yellowgreen;
        }
    </style>
</head>
<body>
    <div>撸起袖子加油炫</div>
    <script>
        const b = document.querySelector("div")
        console.log(b.clientWidth)
        console.log(b.clientHeight)
    </script>
</body>
</html>
即使不设宽度,盒子被撑大的宽度也显现出来

div {
display: inline-block;
/* width: 200px; */
height: 100px;
background-color: yellowgreen;
padding: 10px;
} 让全局属性增加内边距
我们发现,宽度增加了20px,.client会含有内边距

增加了边框与外边距我们发现,宽度还是20px ,说明.client不含有边框与外边距

将js的输出换成:
- console.log(b.offsetWidth)
- console.log(b.offsetHeight)
div有内边距与边框
div {
display: inline-block;
height: 100px;
background-color: yellowgreen;
border: 10px dashed green;
padding: 10px;
}
我们可以看到,宽度增加了40,所以.offset包含边框与内边距

8、获取元素位置
获取自己与有定位的父级的左、上角距离
元素对象.offsetTop
元素对象.offsetLeft
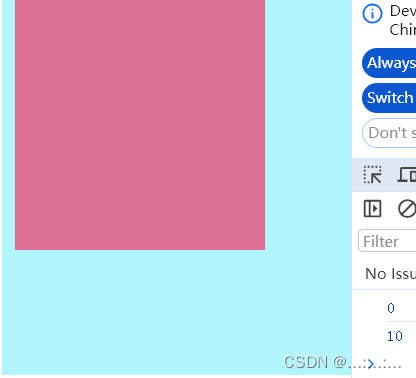
1、 一个简单的盒子
    <style>
        div {

            width: 200px;
            height: 200px;
            background-color: palevioletred;
        }


    </style>

<body>
    <div></div>
    <script>
        const b = document.querySelector("div")
        console.log(b.offsetTop)
        console.log(b.offsetLeft)
    </script>
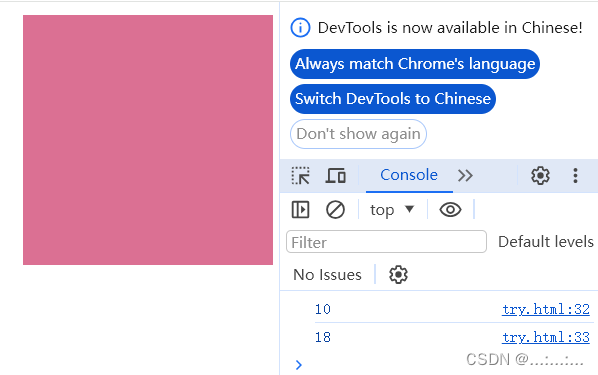
距离页面左上角距离都是8,因为body默认内边距8px

2、盒子加了10pxd外边距
距离顶部是10(上下外边距与边距合并,以外边距大的为准),距离坐标变成了18不,外边距与左右边距可以合并
3、加一个没有定位的父盒子
我们可以看到距离啥都没变

4、让父盒子有定位
距离左边是10px,因为外边距,距离顶部0px,因为上下的外边距塌陷
9、创建节点
委托父节点,首先创造节点,然后追加节点内容,父节点添加创造的新节点
追加节点:
// 父元素.appendChild(新的节点)
<!DOCTYPE html>
<head>
    <meta charset="UTF-8">
    <title>Document</title>
</head>

<body>
    <button>点击添加li</button>
    <ul>
        <li>111</li>
        <li>222</li>
        <li>333</li>
    </ul>

    <script>
        const b = document.querySelector("button")
        const u = document.querySelector("ul")
        b.onclick=()=> {
           let lli=document.createElement("li")
           lli.innerHTML='我是新的li'
           u.appendChild(lli)
        }
   </script>
</body>
</html>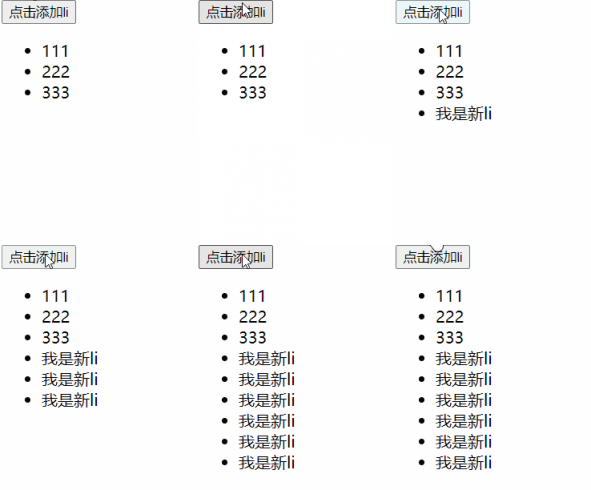
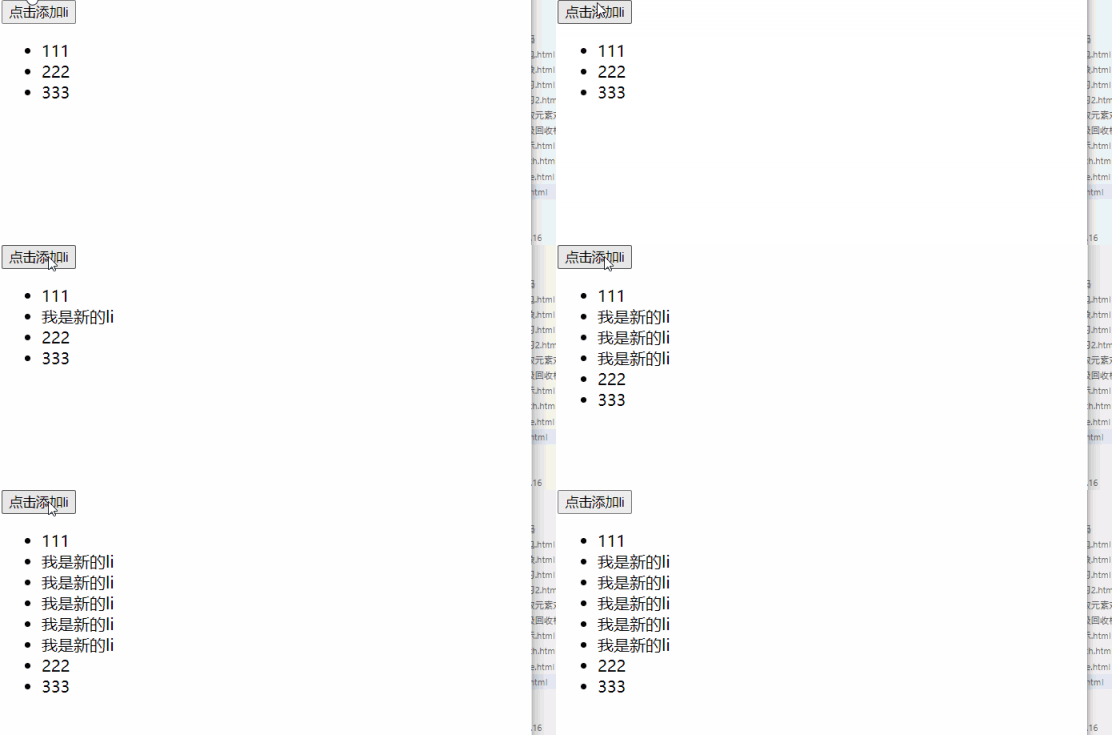
除了在默认在后面添加,还可以在父级内选择下标插到想要插进的位置
父级元素.insertBefore(新的节点,追加的位置)
//追加节点改成这个
u.insertBefore(lli,u.children[1])
10、克隆节点
元素对象.cloneNode(bool) bool=true或者false
true表示会将后代节点一起克隆,默认false,文字也是节点
<!DOCTYPE html>
<head>
    <meta charset="UTF-8">
    <title>Document</title>
</head>
<body>
    <ul>
        <li>我是一个li</li>
    </ul>
    <script>
        const li =document.querySelector("ul li")
        const newl=li.cloneNode(true)
        console.log(newl)//如果克隆了,就从控制台输出
    </script>
</body>
</html>
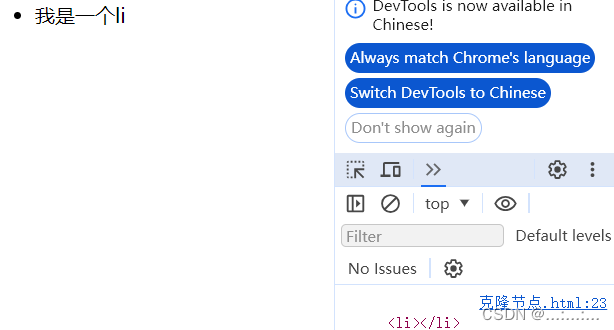
控制台得到输出

如果里面的布尔参数没有,默认为false,const newl=li.cloneNode()
获得的li没有文字
11、删除节点
父元素.removeChild(父元素,删除的位置)
//删除的操作必须依靠父元素
<body>
    <ul>
        <li>1</li>
        <li>2</li>
        <li>3</li>
        <li>4</li>
    </ul>
    <script>
        const ul = document.querySelector("ul")
        ul.removeChild(ul.children[2])
    </script>
</body>
12、setTimeout()
主要用来指定函数后者某段代码,在多长时间之后执行 .会返回一个整数,作为定时器的编号,方便后期清除定时器
- setTimeout(function或者code,time)-->用户未对第二个参数进行传参,则默认是0
- 本质上是-->window.setTimeout(function或者code)
计时器编号与两种定义方式:
<script>
let t = setTimeout(()=>{
'console.log("哈哈哈佳人们好困")'
}, 3000)
console.log(t)
let t1 = setTimeout('console.log("你们看到这句话的时候我早已身价百万!!")', 4000)
console.log(t1)
</script>3秒,四秒后出来的东西,出现前会返回计时器编号

清除计时器 :
  <script>
let t = setTimeout('console.log("你们看到这句话的时候我早已身价百万!!")', 4000)
        console.log(t)
        clearTimeout(t)
   </script>
清除计时器后,控制台除了返回一个定时器编号之外啥都没有出现

以函数为参数:
function t2() {
            console.log("好了烦躁冈抑云")
        }
window.setTimeout(t2)
没有返回定时器编号

可以传参数:
setTimeout(function (a, b, c) {
            console.log(a + b*c)
        }, 3000, 3, 2, 3)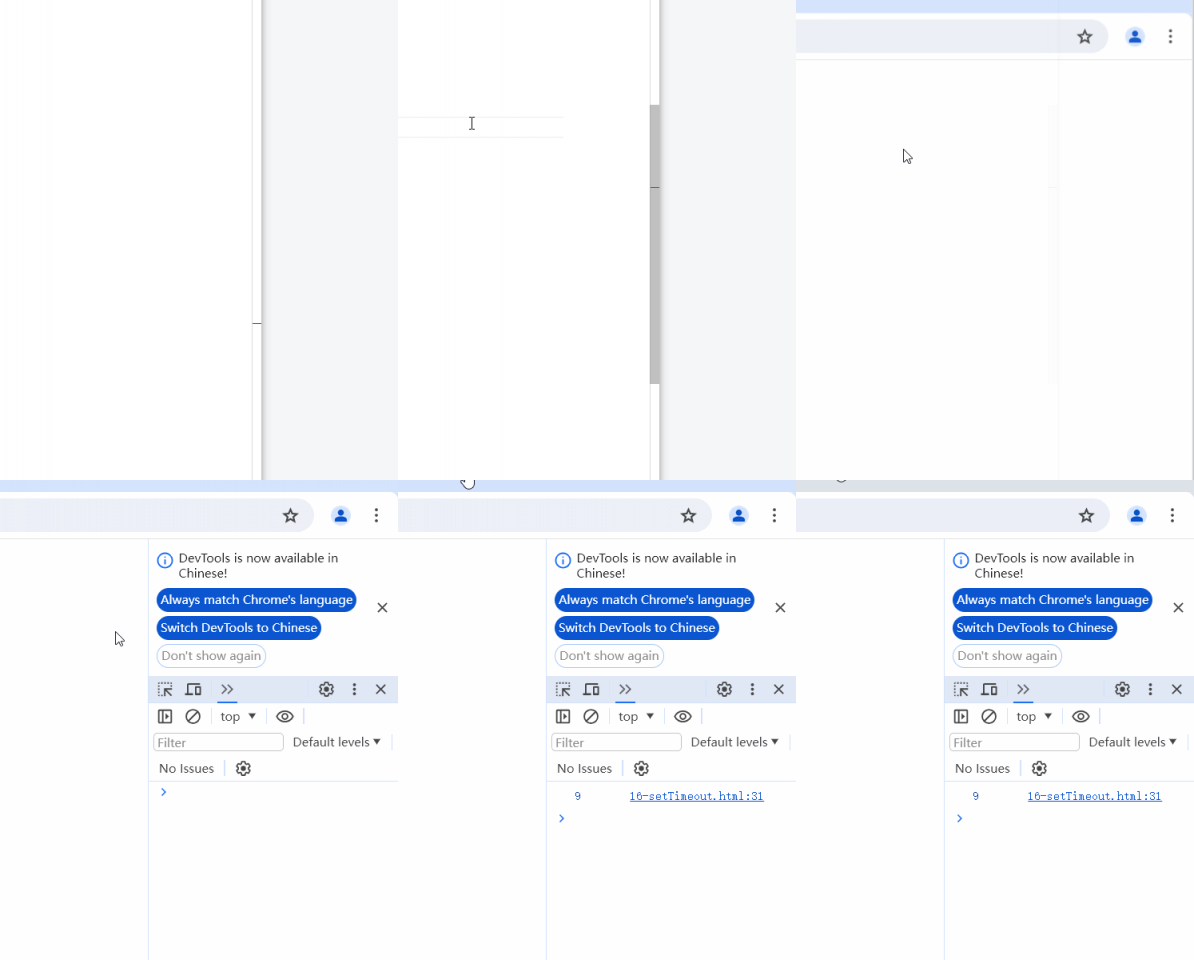
关于this
// 在全局作用域下,this关键字指向的是window
// 对象中的this,默认指向对象本身
// 箭头函数没有this的作用域
 <script>
setTimeout(function (a) {
             console.log(this)
        }, 3000, 3)

console.log(this)
 </script>
  x = 111
        let obj = {
            x: 2,
            sing: function () {
                console.log(this.x)
            }
        }
obj.sing()
setTimeout(obj.sing.bind(obj), 3000)![]()
13、setInterva()
每个一段时间执行代码
// 每个一段时间执行一次代码
        let t= setInterval(function () {
            console.log("hello,setInterval")

        }, 1500)
        console.log(t)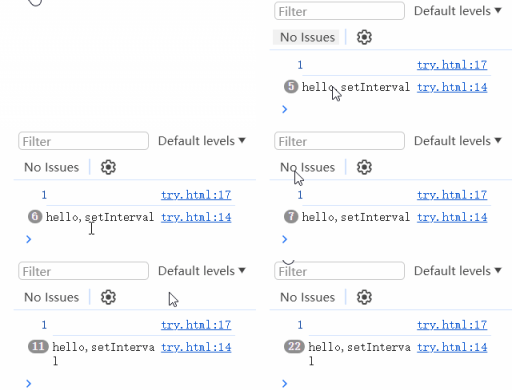
可以传参:
let t2 = setInterval(function (a, b) {
console.log("喀喀喀")
console.log(a)
console.log(b)
}, 1000, 9, 5)
console.log(t2)
清除计时器:
clearInterval(t2)

