1、组件的作用用途
目的:
提高代码的复用度,和便于维护,通过封装将复杂的功能代码拆分为更小的模块,方便管理,
当我们需要实现相同的功能时,我们只需要复用已经封装好的组件,而不需要重新编写相同的代码
好处:
代码复用:我们可以在多个地方复用封装好的组件,而不需要在每个地方都写相同的代码。
易于维护:当我们需要修改某个功能时,我们只需要在一个地方修改即可,而不需要在多个地方修改。
易于理解:通过将复杂的功能分解为更小的部分,我们可以更容易地理解和管理代码
单一职责:组件应该只做一件事情,而不是承担多个无关的职责,避免过度封装,导致功能复杂化
2、组件的分类
2.1. 全局组件
好处:只需要在main.ts 中挂载注册,不用在使用页面中一个一个的引入注册,减少了代码的冗杂;
坏处:会导致组件之间的依赖关系不明确,导致组件之间查找调试错误时候难以追踪具体位置;
同时,由于全局组件会被打包的打包后的文件中,导致初始化首屏加载时间长,编译和预处理时间长,从而影响用户的体验;谨慎使用全局组件
首先我们会先将一个vue组件定义在一个单独的.vue文件中,这就是单文件组件
如:定义一个全局的顶部搜索栏 headerForm.vue 文件
// headerForm.vue
<template>
  <div class="header-form">
    全局顶部搜索栏
    name:{{ defineProps.name }}
    <el-row>
      <el-col :span="6">
        <el-form :inline="true" :model="formInline" class="demo-form-inline">
          <el-form-item label="用户名">
            <el-input v-model="formInline.user" placeholder="请输入用户名"></el-input>
          </el-form-item>
        </el-form>
      </el-col>
    </el-row>
  </div>
</template>
<script setup>
import { ref, watch, onMounted } from 'vue'
// defineProps 是vue3中新增的宏,用于处理接收 props 的属性,不需要引入,可以直接在setup 语法糖中使用;后续文章会专门介绍
const defineProps = defineProps({
  name: {
    type: String,
    default: ''
  }
})
// 此处使用了 ref() 函数 创建了 对象,为什么不用reactive() 函数呢?因为使用reactive() 函数,要使用嵌套函数保持响应式 需要使用 toRefs() 将其转换ObjectRefImpl 对象,详情请看 第五节
let formInline = ref({
  user: defineProps.name // 将user默认值设置为父组件传入的name 属性值
})
// watch 的相关内容请看第六节 watch
watch(() => defineProps.name, (n,o) => {
  // 监听name 的变化,用于同步更新user属性;
  formInline.value.user = defineProps.name
})
</script>
<style lang='scss' scoped>
.header-form{
  width: 100vw;
  height: 46px;
}
</style>
// main.ts
import { createApp } from 'vue'
import ElementPlus from 'element-plus'
import App from './App.vue'
<!-- 引入全局组件 -->
import HeaderFrom from './components/headerForm.vue'
import 'element-plus/dist/index.css'
import './style.css'
const app = createApp(App)
<!-- 挂载全局组件 -->
// app.component('注册的组件名称', 引入的单文件组件)
app.component('HeaderFrom', HeaderFrom) // 支持链式调用

<!-- 如果全局组件比较多,可以这样使用,将element的所有图标注册到项目中,非必要勿用 -->
import * as ElementPlusIconsVue from '@element-plus/icons-vue'
for (const [key, component] of Object.entries(ElementPlusIconsVue)) {
  app.component(key, component)
}

app.use(ElementPlus)
app.mount('#app')
<!-- App.vue -->
<template>
<div class="par">
  //  直接使用 HeaderFrom 即可,不需要再次引入
  <HeaderFrom :name="name"></HeaderFrom>

  <Provide></Provide>
  <button @click="handleChangeName">父组件change name</button>
  </div>
</template>
<script setup>
import Provide from './components/provide1.vue'
import { ref, provide, inject } from 'vue'
let msg = ref('Andy start')
let name = ref('Andy')

const handleChangeName = () => {
  name.value = 'Andy change'
}
const sChangeName = () => {
  msg.value = 'Andy sChangeName'
}
provide('pName', {msg, sChangeName})
</script>

<style lang="scss">
.img-box{
  display: inline-block;
  width: 100px;
  height: 100px;
}
</style>
注意:如果声明的组件不是项目中绝大多数页面共用的,请勿注册全局组件,应为即使在页面中没有使用该组件,也会导致引入的组件被打包到打包后的文件中,无法通过 tree-shaking 自动移除,因为组件被挂载到app实例上;
tree-shaking:消除无用的js代码;
1、在webpack中,通过配置 optimization.usedExports: true,开启tree-shaking功能
2、在vite中,通过配置 rollup-plugin-commonjs,开启tree-shaking功能;
2.2. 局部组件
好处:
1、可以非常清晰父子组件之间的依赖关系,便于维护;
2、同时只有在页面加载时候才会使用组件,可以更好的支持tree-shaking减少打包体积;
坏处:
需要每次使用时候导入一次,增加文件的导入语句;
<!-- 定义局部组件 dialogForm.vue -->
<template>
<div class="dialog-container">
  <div class="dialog-form">
    <div class="dialog-header">
      <div class="dialog-title">新增用户</div>
      <el-icon class="dialog-close"><Close /></el-icon>
    </div>
    <el-form :model="formData" label-width="80px" ref="formDataRef">
      <el-form-item label="用户名:" prop="username">
        <el-input v-model="formData.username" placeholder="请输入用户名" />
      </el-form-item>
      <el-form-item label="职位:" prop="post">
        <el-input v-model="formData.username" placeholder="请输入职位" />
      </el-form-item>
      <el-button @click="submit" type="primary">提交</el-button>
    </el-form>
  </div>
</div>
</template>
<script setup>
import { reactive, ref } from 'vue'

const formDataRef = ref()
let formData = ref({
  username: '',
  post: ''
})

const submit = () => {
  console.log('==', formData.value)
}

</script>
<!-- 在父组件myComponents.vue 中引入使用 -->
<template>
  <div class="my-components">
      页面类型:{{pageNameType}}
      <DialogForm></DialogForm>
  </div>
  </template>
  <script setup>
  import { ref, reactive } from 'vue'
  // 在setup 中直接引入组件即可,打包编译时会自动编译成组件,不需要再次使用components
  import DialogForm from './dialogForm.vue'
  const pageNameType = ref('局部组件')
  </script>
2.3. 动态组件
动态组件,当一个页面中的内容需要通过不同的组件来进行展示时,可以通过动态组件的切换来实现;
需要注意的是:vue3中 需要使用markRaw() 或者 shallowReactive() 来创建组件,否则页面会发出警告,导致页面不更新
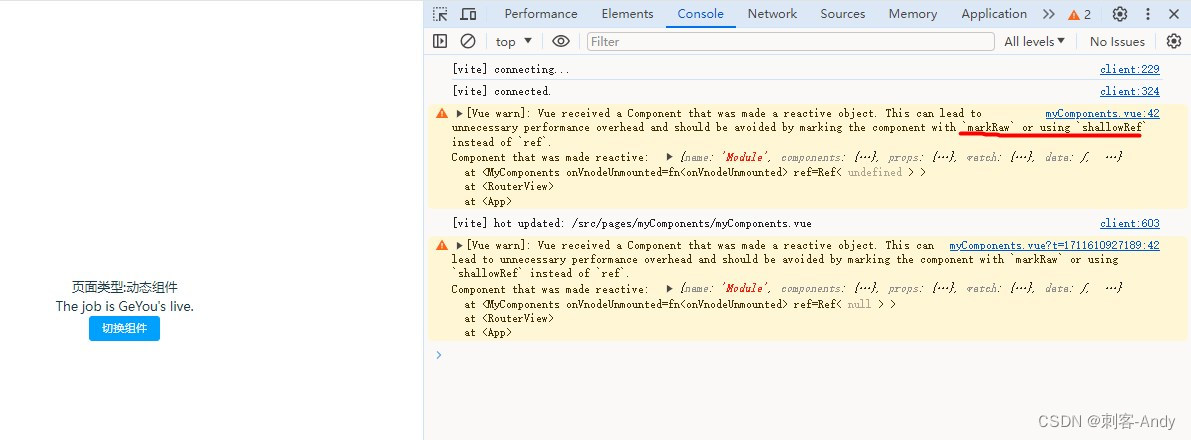
动态组件是通过 :is 属性来实现组件之间的切换的;
<component :is="组件名"></component>
如下实现:
<template>
  <div class="my-components">
      页面类型:{{pageNameType}}
      <component :is="comName"></component>
      <el-button type="primary" @click="handleChangeCom">切换组件</el-button>
  </div>
</template>
<script setup>
  import { ref, markRaw } from 'vue'
  import Work from './work.vue' // 组件内容: The job is GeYou's live.
  import UserInfo from './userInfo.vue' // 组件内容:用户信息
  const pageNameType = ref('动态组件')
  const workRaw = markRaw(Work) // 使用markRaw进行标记,避免转换为响应式对象
  const userInfoRaw = markRaw(UserInfo)
  let comName = ref(workRaw) // 默认展示组件为 Work
  const handleChangeCom = () => {
    console.log('===', comName)
    if (comName.value === workRaw) {
      comName.value = userInfoRaw
    } else {
      comName.value = workRaw
    }
  }
</script>
2.4. 递归组件
vue2 中是通过组件中的name属性来区分组件的,直接在自己组件中使用自己同名组件即可实现递归;
如:
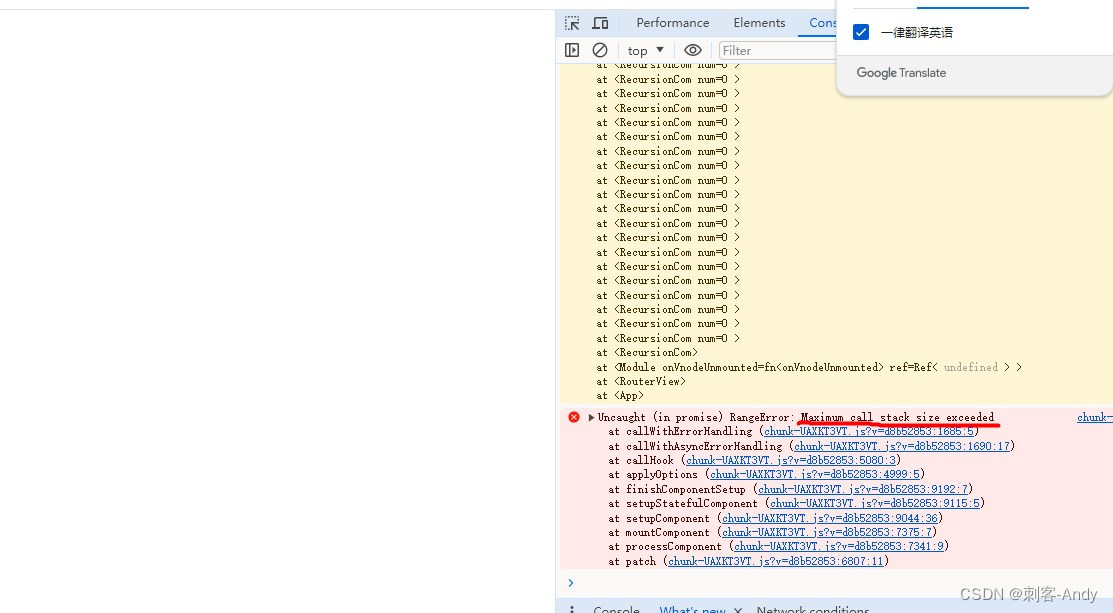
递归组件注意需要有跳出循环的出口,不然会导致死循环,进而栈溢出; 跳出条件:v-if=“endNum < 4”
若不跳出循环将会报错:
<template>
  <div class="recursion-com" v-if="endNum < 4">
    <span>{{name}}--{{ num }}--{{ endNum }}</span>
      <div >
      // 此处调用直接与自己的组件名称保持一致即可
        <RecursionCom :num="endNum" ></RecursionCom>
    </div>
  </div>
</template>
<script>
export default {
  name: 'RecursionCom', // 注意:需要声明组件名称
  components: {},
  props: {
    num: {
      type: Number,
      default: 0
    }
  },
  data() {
    return {
      name: 'vue2递归组件',
      list: [22, 33],
      endNum: 0
    }
  },
  created() {
    this.endNum = this.num
    this.endNum++
  }
}
</script>
vue3 中
父组件中:
<template>
<div>
  vue3 父组件
  <RecursionComV3 :data="data"></RecursionComV3>
</div>
</template>
<script setup>
import { ref } from 'vue'
import RecursionComV3 from './recursionComV3.vue';
// 声明一个data 变量数据
const data = ref([
  {
    id: '1-1',
    name: '张家',
    children: [
      {
        id: '1-1-2',
        name: '张三',
        children: [
          {
            id: '1-1-3',
            name: '张三郎',
          }
        ]
      }
    ]
  },
  {
    id: '1-2',
    name: '李家',
    children: [
      {
        id: '1-2-2',
        name: '李四',
        children: [
          {
            id: '1-2-3',
            name: '李四郎',
          }
        ]
      }
    ]
  }
])
</script>
<!-- 子组件中 -->
使用js 书写时:
<template>
<div class="my-recursion">
    <div v-for="(item, index) in props.data" :key="item.id">
      <div class="item">{{ item.id }}:{{item.name}}</div>
      <myTreeV3 v-if="item.children && item.children.length" :data="item.children"></myTreeV3>
    </div>
</div>
</template>
<script>
// 如果使用js 需要在子组件中使用export default{} 给组件命名name;
export default {
  name: 'myTreeV3',
}
</script>
<script setup>
import { ref, reactive, toRefs, onMounted, watch, computed } from 'vue'
const props = defineProps({
  data: {
    type: Array,
    default: () => ([]),
  },
})
</script>
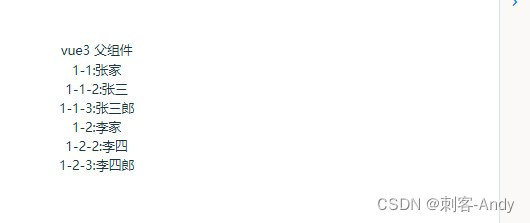
最终运行结果如下图
若子组件使用ts 书写:
注意:ts 中需要使用到递归组件,需要使用到递归类型,需要将数据类型进行声明,
同时 调用的递归组件名称 需要与 自己的文件名保持一致,否则不生效:比如文件名为recursionComV3Ts.vue,则调用时需要使用:
如下:
<template>
<div class="my-recursion">
    <div v-for="(item) in data" :key="item.id">
      <div class="item">{{ item.id }}:{{item.name}}</div>
      <!-- 使用ts 写递归组件时,调用的必须与自己的文件名保持一致 -->
      <recursionComV3Ts v-if="item?.children && item?.children?.length" :data="item?.children"></recursionComV3Ts>
    </div>
</div>
</template>
<script setup lang="ts">
// TreeData 声明接口类型
interface TreeData{
  id: string
  name: string
  children?:TreeData[] // children 是可以选项
}
defineProps<{
  data?:TreeData[]
}>()
</script>
3、组件的使用 注意事项
a、单文件组件结构、
b、命名规范,便于管理;
c、props属性传递声明类型,明确;
d、emit事件机制;
e、slot插槽,非常重要的部分,可以动态的将内容html插入到组件中;
下节 单独介绍 组件之间的传参,事件等