概述
本篇Codelab是基于TS扩展的声明式开发范式编程语言编写的一个分布式邮件系统,可以由一台设备拉起另一台设备,每次改动邮件内容,都会同步更新两台设备的信息。效果图如下:

说明: 本示例涉及使用系统接口,需要手动替换Full SDK才能编译通过。
搭建OpenHarmony开发环境
完成本篇Codelab我们首先要完成开发环境的搭建,本示例以Hi3516DV300开发板为例,参照以下步骤进行:
- 获取OpenHarmony系统版本:标准系统解决方案(二进制)。
以3.0版本为例:

2.搭建烧录环境。
- 完成DevEco Device Tool的安装
- 完成Hi3516开发板的烧录
3.搭建开发环境。
- 开始前请参考工具准备,完成DevEco Studio的安装和开发环境配置。
- 开发环境配置完成后,请参考使用工程向导创建工程(模板选择“Empty Ability”),选择JS或者eTS语言开发。
- 工程创建完成后,选择使用真机进行调测。
分布式组网
本章节以系统自带的音乐播放器为例,介绍如何完成两台设备的分布式组网。
- 硬件准备:准备两台烧录相同的版本系统的Hi3516DV300开发板A、B、一根网线及TYPE-C转USB线。
- 保证开发板A、B上电开机状态,网线两端分别连接开发板A、B的网口,将TYPE-C转USB线先连接A,使用hdc_std.exe,在命令行输入hdc_std shell ifconfig eth0 192.168.3.125,设置成功后,将TYPE-C转USB线连接B,在命令行输入hdc_std shell ifconfig eth0 192.168.3.126即可。
- 将设备A,B设置为互相信任的设备。
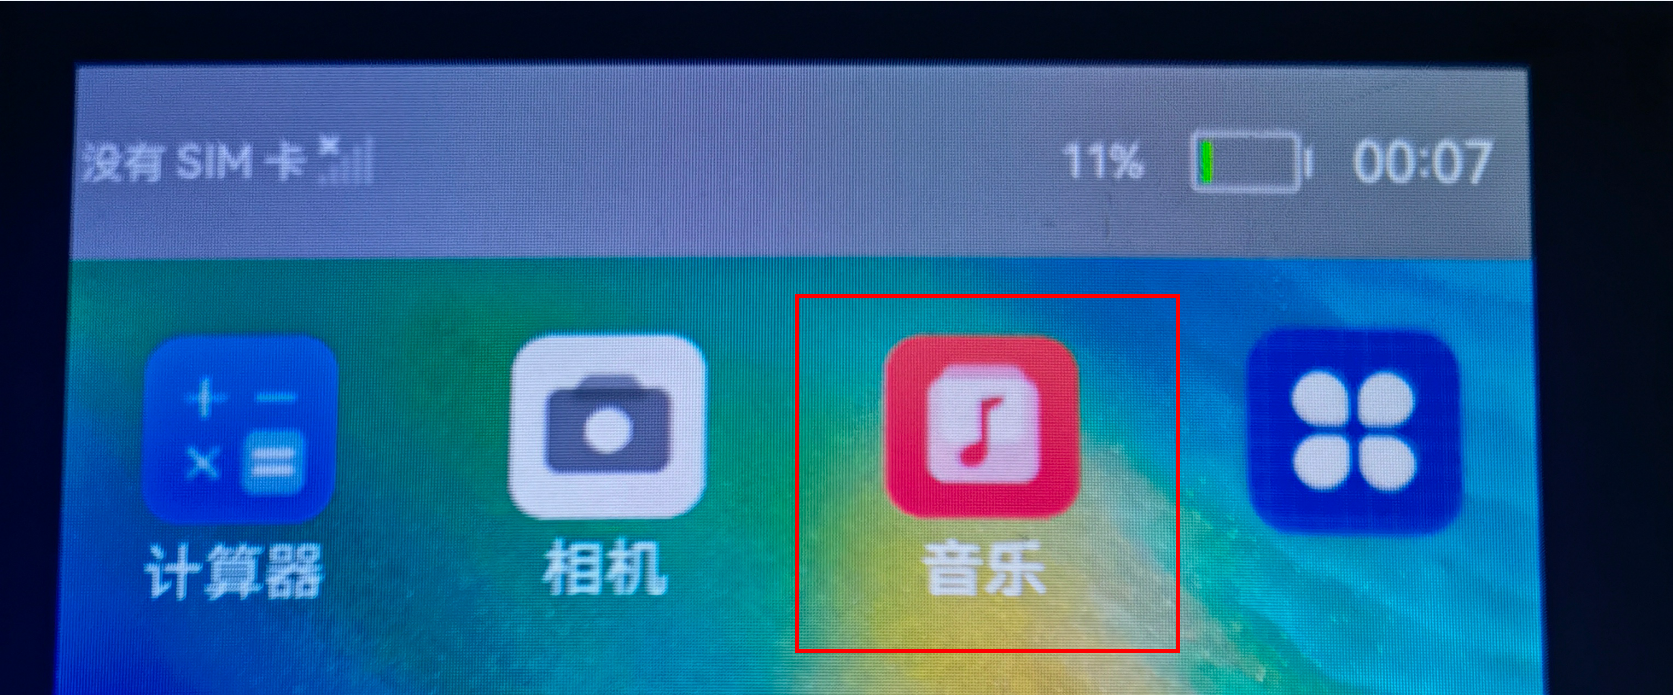
- 找到系统应用“音乐”。
- 设备A打开音乐,点击左下角流转按钮,弹出列表框,在列表中会展示远端设备的id。

- 选择远端设备B的id,另一台开发板(设备B)会弹出验证的选项框。

- 设备B点击允许,设备B将会弹出随机PIN码,将设备B的PIN码输入到设备A的PIN码填入框中。

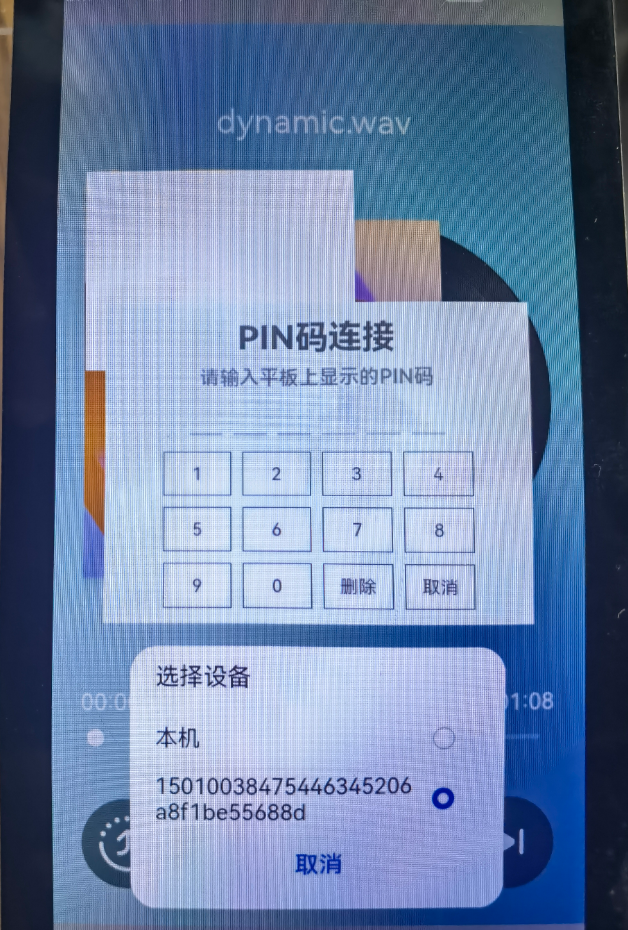
- 配网完毕。
代码结构解读
本篇Codelab只对核心代码进行讲解,首先来介绍下整个工程的代码结构:
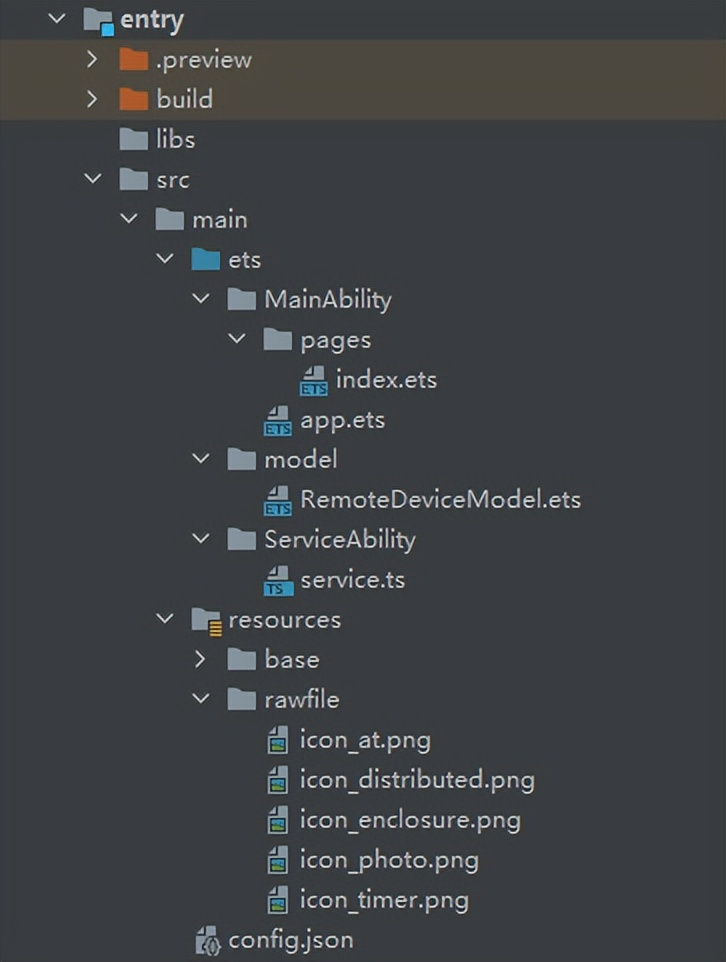
- MainAbility:存放应用主页面。
- pages/index.ets:应用主页面。
- model:存放获取组网内的设备列表相关文件。
- RemoteDeviceModel.ets:获取组网内的设备列表。
- ServiceAbility:存放ServiceAbility相关文件。
- service.ts:service服务,用于跨设备连接后通讯。
- resources :存放工程使用到的资源文件。
- resources/rawfile:存放工程中使用的图片资源文件。
- config.json:配置文件。
实现页面布局和样式
在本章节中,您将学会如何制作一个简单的邮件界面。
- 实现主页面布局和样式。
- 在MainAbility/pages/index.ets 主界面文件中布局整个邮件页面,包括收件人、发件人、主题、内容等等,代码如下:
@Entry
@Component
struct Index {
  private imageList: any[]= []
  @Provide dataList: string[]= ['xiaohua@128.com','xiaoming@128.com','假期温馨提示','2022年新春佳节即将来临,请同学们细读节前相关温馨提示,保持办公场所环境整洁,假期期间注意信息及个人安全,预祝全体同学新春快乐,虎虎生威!']

  dialogController: CustomDialogController = new CustomDialogController({
    builder: CustomDialogExample({ cancel: this.onCancel, confirm: this.onAccept }),
    cancel: this.existApp,
    autoCancel: true
  })

  build() {
    Flex({ direction: FlexDirection.Column, justifyContent: FlexAlign.SpaceBetween }) {
      Column() {
        Row() {
          Flex({ direction: FlexDirection.Row, justifyContent: FlexAlign.SpaceBetween, alignItems: ItemAlign.Center }) {
            Text('✕').fontSize(20).fontColor('#000000')
            Button('发送').width(70).fontSize(14).fontColor('#ffffff').backgroundColor('#fc4646')
              .onClick(() => {
                RegisterDeviceListCallback();
                this.dialogController.open();
              })
          }
          .height(50)
          .padding({ top: 10, right: 15, bottom: 10, left: 15 })
        }

        Column() {
          Flex({ direction: FlexDirection.Row, alignItems: ItemAlign.Center }) {
            Text('收件人').width(70).height(30).fontSize(15).fontColor('#969393')
            Text(this.dataList[0]).width('100%').height(30).fontSize(15).fontColor('#000000')
          }
          .padding({ top: 5, right: 15, bottom: 5, left: 15 })

          Text().width('100%').height(1).backgroundColor('#f8f6f6')

          Flex({ direction: FlexDirection.Row, alignItems: ItemAlign.Center }) {
            Text('发件人').width(70).height(30).fontSize(15).fontColor('#969393')
            Text(this.dataList[1]).width('100%').height(30).fontSize(15).fontColor('#000000')
          }
          .padding({ top: 5, right: 15, bottom: 5, left: 15 })

          Text().width('100%').height(1).backgroundColor('#f8f6f6')

          Flex({ direction: FlexDirection.Row, alignItems: ItemAlign.Center }) {
            Text('主题').width(50).height(30).fontSize(15).fontColor('#969393')
            Text(this.dataList[2]).width('100%').height(30).fontSize(15).fontColor('#000000')
          }
          .padding({ top: 5, right: 15, bottom: 5, left: 15 })

          Text().width('100%').height(1).backgroundColor('#f8f6f6')
          TextArea({ placeholder: 'input your word', text: this.dataList[3]}).height('100%').width('100%')
            .onChange((value: string) => {
              this.dataList[3] = value
              if(mRemote){
                sendMessageToRemoteService(JSON.stringify(this.dataList));
              }
                onDisconnectService();
          })
        }
      }

      Column() {
        Flex({ direction: FlexDirection.Row }) {
          List() {
            ForEach(this.imageList, (item) => {
              ListItem() {
                Image(item).width(50).height(50).objectFit(ImageFit.Contain)
              }.editable(true)
            }, item => item)
          }
          .listDirection(Axis.Horizontal) // 排列方向
          .divider({ strokeWidth: 2, color: 0xFFFFFF, startMargin: 20, endMargin: 20 }) // 每行之间的分界线
        }.width('100%').height(50).backgroundColor('#ccc')

        Text().width('100%').height(1).backgroundColor('#f8f6f6')
        Flex({ direction: FlexDirection.Row, justifyContent: FlexAlign.SpaceBetween }) {
          Flex({ direction: FlexDirection.Row, alignItems: ItemAlign.Center }) {
            Button({ stateEffect: false }) {
              Image($rawfile('icon_photo.png')).width(20).height(20)
            }.backgroundColor('#ffffff').margin({ right: 20 })
            .onClick(() => {
              RegisterDeviceListCallback();
              this.dialogController.open();
            })

            Button({ stateEffect: false }) {
              Image($rawfile('icon_at.png')).width(20).height(20)
            }.backgroundColor('#ffffff')
          }

          Flex({ direction: FlexDirection.Row, justifyContent: FlexAlign.End }) {
            Button({ stateEffect: false }) {
              Image($rawfile('icon_distributed.png')).width(20).height(20)
            }.backgroundColor('#ffffff')
            .onClick(() => {
               this.getDeviceList()
            })

            Button({ stateEffect: false }) {
              Image($rawfile('icon_timer.png')).width(20).height(20)
            }.backgroundColor('#ffffff').margin({ left: 10, right: 10 })

            Button({ stateEffect: false }) {
              Image($rawfile('icon_enclosure.png')).width(20).height(20)
            }.backgroundColor('#ffffff')
          }
        }.height(50).padding(15)
      }
    }.width('100%').padding({ top: 5, bottom: 15 })
  }
}
在入口组件的生命周期函数aboutToAppear()中调用订阅事件。如果Ability是被其他设备拉起的,在aboutToAppear()中调用featureAbility.getWant(),可通过want中的参数重新初始化dataList数组,入口组件的生命周期函数aboutToAppear()代码如下:
async aboutToAppear() {
    this.subscribeEvent();
    let self = this;
    // 当被拉起时,通过want传递的参数同步对端界面UI
    await featureAbility.getWant((error, want) => {
      var status = want.parameters;
      if (want.parameters.dataList) {
        self.dataList = JSON.parse(status.dataList)
        // 远端被拉起后,连接对端的service
        if (want.parameters.remoteDeviceId) {
          let remoteDeviceId = want.parameters.remoteDeviceId
          onConnectRemoteService(remoteDeviceId)
        }
      }
    });
  }
2.给"发送"按钮添加点击事件。
点击"发送"按钮,调用拉起弹窗函数,弹窗中显示可拉起的同局域网下的设备,代码如下:
Button('发送').width(70).fontSize(14).fontColor('#ffffff').backgroundColor('#fc4646')
      .onClick(() => {
        RegisterDeviceListCallback();
        this.dialogController.open();
      })
3.给内容区域Textarea添加onChange事件。
内容区域文字变化会调用onChange()方法,每一次的变化都会调用sendMessageToRemoteService()方法去同步另一个设备的数据。其中onChange()和sendMessageToRemoteService()方法代码如下:
TextArea({ placeholder: 'input your word', text: this.dataList[3]}).height('100%').width('100%')
    .onChange((value: string) => {
      this.dataList[3] = value
      if(mRemote){
        sendMessageToRemoteService(JSON.stringify(this.dataList));
      }
      onDisconnectService();
  })
async function sendMessageToRemoteService(dataList) {
if (mRemote == null) {
prompt.showToast({
message: "mRemote is null"
});
return;
}
let option = new rpc.MessageOption();
let data = new rpc.MessageParcel();
let reply = new rpc.MessageParcel();
data.writeStringArray(JSON.parse(dataList));
prompt.showToast({
message: "sendMessageToRemoteService" + dataList,
duration: 3000
});
await mRemote.sendRequest(1, data, reply, option);
let msg = reply.readInt();
}拉起远端FA及连接远端Service服务
在本章节中,您将学会如何拉起在同一组网内的设备上的FA,并且连接远端Service服务。
- 调用featureAbility.startAbility()方法,拉起远端FA,并同步界面UI。
- 点击"分布式拉起"按钮,调用RegisterDeviceListCallback()发现设备列表,并弹出设备列表选择框CustomDialogExample,选择设备后拉起远端FA。CustomDialogExample()代码如下:
// 设备列表弹出框
@CustomDialog
struct CustomDialogExample {
  @State editFlag: boolean = false
  @Consume imageIndexForPosition : number[]
  @Consume pictureList: string[]
  controller: CustomDialogController
  cancel: () => void
  confirm: () => void
  build() {
    Column() {
      List({ space: 10, initialIndex: 0 }) {
        ForEach(DeviceIdList, (item) => {
          ListItem() {
            Row() {
              Text(item)
                .width('87%').height(50).fontSize(10)
                .textAlign(TextAlign.Center).borderRadius(10).backgroundColor(0xFFFFFF)
                .onClick(() => {
                  onStartRemoteAbility(item,this.imageIndexForPosition,this.pictureList);
                  this.controller.close();
                })
              Radio({value:item})
                .onChange((isChecked) => {
                  onStartRemoteAbility(item,this.imageIndexForPosition,this.pictureList);
                  this.controller.close();
                }).checked(false)
            }
          }.editable(this.editFlag)
        }, item => item)
      }
    }.width('100%').height(200).backgroundColor(0xDCDCDC).padding({ top: 5 })
  }
}
点击Text组件或者Radio组件都会调用onStartRemoteAbility()方法拉起远端FA,onStartRemoteAbility()代码如下:
function onStartRemoteAbility(deviceId,imageIndexForPosition,pictureList: string[]) {
  AuthDevice(deviceId);
  let numDevices = remoteDeviceModel.deviceList.length;
  if (numDevices === 0) {
    prompt.showToast({
      message: "onStartRemoteAbility no device found"
    });
    return;
  }

  var params = {
    imageIndexForPosition: JSON.stringify(imageIndexForPosition),
    pictureList : JSON.stringify(pictureList),
    remoteDeviceId : localDeviceId
  }
  var wantValue = {
    bundleName: 'com.huawei.cookbook',
    abilityName: 'com.example.openharmonypicturegame.MainAbility',
    deviceId: deviceId,
    parameters: params
  };
  featureAbility.startAbility({
    want: wantValue
  }).then((data) => {
    // 拉起远端后,连接远端service
    onConnectRemoteService(deviceId)
  });
}
2.调用featureAbility.connectAbility方法,连接远端Service服务,连接成功后返回remote对象。
在featureAbility.startAbility()成功的回调中调用onConnectRemoteService()方法,onConnectRemoteService()方法代码如下:
// 连接远端Service
async function onConnectRemoteService(deviceId) {
  // 连接成功的回调
  async function onConnectCallback(element, remote) {
     mRemote = remote;
  }
  // Service异常死亡的回调
  function onDisconnectCallback(element) {
  }
  // 连接失败的回调
  function onFailedCallback(code) {
    prompt.showToast({
      message: "onConnectRemoteService onFailed: " + code
    });
  }
  let numDevices = remoteDeviceModel.deviceList.length;
  if (numDevices === 0) {
    prompt.showToast({
      message: "onConnectRemoteService no device found"
    });
    return;
  }
  connectedAbility = await featureAbility.connectAbility(
    {
      deviceId: deviceId,
      bundleName: "com.huawei.cookbook",
      abilityName: "com.example.openharmonypicturegame.ServiceAbility",
    },
    {
      onConnect: onConnectCallback,
      onDisconnect: onDisconnectCallback,
      onFailed: onFailedCallback,
    },
  );
}
在配置文件config.json需要设置ServiceAbility的属性visible为true,代码如下:
"abilities": [
      ...
      {
        "visible": true,
        "srcPath": "ServiceAbility",
        "name": ".ServiceAbility",
        "icon": "$media:icon",
        "srcLanguage": "ets",
        "description": "$string:description_serviceability",
        "type": "service"
      }
],
同时,Service侧也需要在onConnect()时返回IRemoteObject,从而定义与Service进行通信的接口。onConnect()需要返回一个IRemoteObject对象,OpenHarmony提供了IRemoteObject的默认实现,通过继承rpc.RemoteObject来创建自定义的实现类。
Service侧把自身的实例返回给调用侧的代码如下:
import rpc from "@ohos.rpc";
import commonEvent from '@ohos.commonEvent';
class FirstServiceAbilityStub extends rpc.RemoteObject{
    constructor(des) {
        if (typeof des === 'string') {
            super(des);
        } else {
            return null;
        }
    }
    onRemoteRequest(code, data, reply, option) {
        if (code === 1) {
            let arr = data.readIntArray();
            reply.writeInt(100);
            // 发布公共事件相关流程
	    ...


        } else {
        }
        return true;
    }
}

export default {
    // 创建Service的时候调用,用于Service的初始化
    onStart() {
    },
    // 在Service销毁时调用。Service应通过实现此方法来清理任何资源,如关闭线程、注册的侦听器等。
    onStop() {
    },
    // 在Ability和Service连接时调用,该方法返回IRemoteObject对象,开发者可以在该回调函数中生成对应Service的IPC通信通道
    onConnect(want) {
        try {
            let value = JSON.stringify(want);
        } catch(error) {
        }
        return new FirstServiceAbilityStub("[pictureGame] first ts service stub");
    },
    // 在Ability与绑定的Service断开连接时调用
    onDisconnect(want) {
        let value = JSON.stringify(want);
    },
    // 在Service创建完成之后调用,该方法在客户端每次启动该Service时都会调用
    onCommand(want, startId) {
        let value = JSON.stringify(want);
    }
};
RPC跨设备通讯
在本章节中,您将学会在成功连接远端Service服务的前提下,如何利用RPC进行跨设备通讯。
- 成功连接远端Service服务的前提下,在正文部分增删文字,都会完成一次跨设备通讯,假如在设备A端输入文字,消息的传递是由设备A端的FA传递到设备B的Service服务,发送消息的方法sendMessageToRemoteService()代码如下:
// 连接成功后发送消息
async function sendMessageToRemoteService(imageIndexForPosition) {
  if (mRemote == null) {
    prompt.showToast({
      message: "mRemote is null"
    });
    return;
  }
  let option = new rpc.MessageOption();
  let data = new rpc.MessageParcel();
  let reply = new rpc.MessageParcel();
  data.writeIntArray(JSON.parse(imageIndexForPosition));
  await mRemote.sendRequest(1, data, reply, option);
  let msg = reply.readInt();
}
2.在B端的Service接收消息,当A端成功连接B端Service服务后,在A端会返回一个remote对象,当A端remote对象调用sendRequest()方法后,在B端的Service中的onRemoteRequest()方法中会接收到发送的消息,其中继承rpc.RemoteObject的类和onRemoteRequest()方法代码如下:
class FirstServiceAbilityStub extends rpc.RemoteObject{
    constructor(des) {
        if (typeof des === 'string') {
            super(des);
        } else {
            return null;
        }
    }

    onRemoteRequest(code, data, reply, option) {
        if (code === 1) {
            // 从data中接收数据
            let arr = data.readIntArray();
            // 回复接收成功标识
            reply.writeInt(100);
            // 发布公共事件相关流程
           ...

        } else {
        }
        return true;
    }
}
FA订阅公共事件
在本章节中,您将学会如何通过CommonEvent订阅公共事件,详细信息请参考CommonEvent开发指南。在九宫格组件PictureGrid的生命周期函数aboutToAppear()中,调用订阅公共事件方法subscribeEvent(),用来订阅"publish_moveImage"公共事件,subscribeEvent()代码如下:
 subscribeEvent(){
    let self = this;
    // 用于保存创建成功的订阅者对象,后续使用其完成订阅及退订的动作
    var subscriber;
    // 订阅者信息
    var subscribeInfo = {
      events: ["publish_moveImage"],
      priority: 100

    };

    // 设置有序公共事件的结果代码回调
    function SetCodeCallBack(err) {
    }
    // 设置有序公共事件的结果数据回调
    function SetDataCallBack(err) {
    }
    // 完成本次有序公共事件处理回调
    function FinishCommonEventCallBack(err) {
    }
    // 订阅公共事件回调
    function SubscribeCallBack(err, data) {
      let msgData = data.data;
      let code = data.code;
      // 设置有序公共事件的结果代码
      subscriber.setCode(code, SetCodeCallBack);
      // 设置有序公共事件的结果数据
      subscriber.setData(msgData, SetDataCallBack);
      // 完成本次有序公共事件处理
      subscriber.finishCommonEvent(FinishCommonEventCallBack)
      // 处理接收到的数据data
      self.imageIndexForPosition = data.parameters.imageIndexForPosition;
      self.pictureList = [];
      self.imageIndexForPosition.forEach(value => {
        if (value == 9) {
          self.pictureList.push("--")
        } else {
          self.pictureList.push(`picture_0` + value + `.png`)
        }
      });

      self.onFinish();
    }

    // 创建订阅者回调
    function CreateSubscriberCallBack(err, data) {
      subscriber = data;
      // 订阅公共事件
      commonEvent.subscribe(subscriber, SubscribeCallBack);
    }

    // 创建订阅者
    commonEvent.createSubscriber(subscribeInfo, CreateSubscriberCallBack);
 }
在FA中订阅到Service服务发布的"publish_moveImage"事件后,在SubscribeCallBack()回调中重新赋值imageIndexForPosition数组与pictureList数组,从而同步更新界面UI。
service发布公共事件
在本章节中,您将学会如何通过CommonEvent发布公共事件,详细信息请参考CommonEvent开发指南。
当Service服务接收到消息后,在onRemoteRequest()发布公共事件,代码如下:
onRemoteRequest(code, data, reply, option) {
    if (code === 1) {
	// 从data中接收数据
	let arr = data.readIntArray();
	// 回复接收成功标识
	reply.writeInt(100);
	// 公共事件相关信息
	var params ={
	    imageIndexForPosition: arr
	}
	var options = {
            // 公共事件的初始代码
	    code: 1,
            // 公共事件的初始数据
	    data: 'init data',、
            // 有序公共事件
	    isOrdered: true,
	    bundleName: 'com.huawei.cookbook',
	    parameters: params

        }
	// 发布公共事件回调
	function PublishCallBack() {
	}
	// 发布公共事件
	commonEvent.publish("publish_moveImage", options, PublishCallBack);

	} else {
	}
	return true;
 }
在接收到消息后,把接收到的图片位置数组放入params中,然后发布名称为"publish_moveImage"的有序公共事件。
总结
- 应用间跨设别通讯是通过featureAbility.connectAbility连接远端Service服务成功后,再通过RPC相关API来进行消息传递。
- 应用内Service与FA之间可通过CommonEvent发布与订阅公共事件来完成通讯。
- 本篇Codelab在设备A与设备B通讯流程如下:
- 设备A与设备B在组网成功的前提下,设备A通过featureAbility.startAbility()拉起设备B的Ability,并把设备A的deviceId作为参数传递给设备B的Ability,在设备B接收到参数的同时,通过featureAbility.connectAbility()连接设备A的Service服务,在设备B中返回一个remote对象,该remote对象可将设备B的消息发送到设备A的Service服务。
- 在设备A侧,拉起设备B的Ability的成功回调中,设备A通过featureAbility.connectAbility()连接设备B的Service服务,在设备A中返回一个remote对象,该remote对象可将设备A的消息发送到设备B的Service服务。
- 设备A侧通过remote.sendRequest()将消息发送到设备B侧Service服务,设备B侧的Service服务中的onRemoteRequest()接收消息。
- 设备B侧的Service中的onRemoteRequest()接收到消息后,通过CommonEvent发布公共事件,将该消息发布出去。
- 设备B侧的Ability订阅该事件,用来接收发布的消息并做最后的处理。
为了帮助大家更深入有效的学习到鸿蒙开发知识点,小编特意给大家准备了一份全套最新版的HarmonyOS NEXT学习资源,获取完整版方式请点击→《HarmonyOS教学视频》
HarmonyOS教学视频

鸿蒙语法ArkTS、TypeScript、ArkUI等.....视频教程

鸿蒙生态应用开发白皮书V2.0PDF:
获取白皮书完整版方式请点击→《鸿蒙生态应用开发白皮书V2.0PDF》

鸿蒙 (Harmony OS)开发学习手册
一、入门必看
- 应用开发导读(ArkTS)
- ……

二、HarmonyOS 概念
- 系统定义
- 技术架构
- 技术特性
- 系统安全
- ........

三、如何快速入门?《做鸿蒙应用开发到底学习些啥?》
- 基本概念
- 构建第一个ArkTS应用
- ……

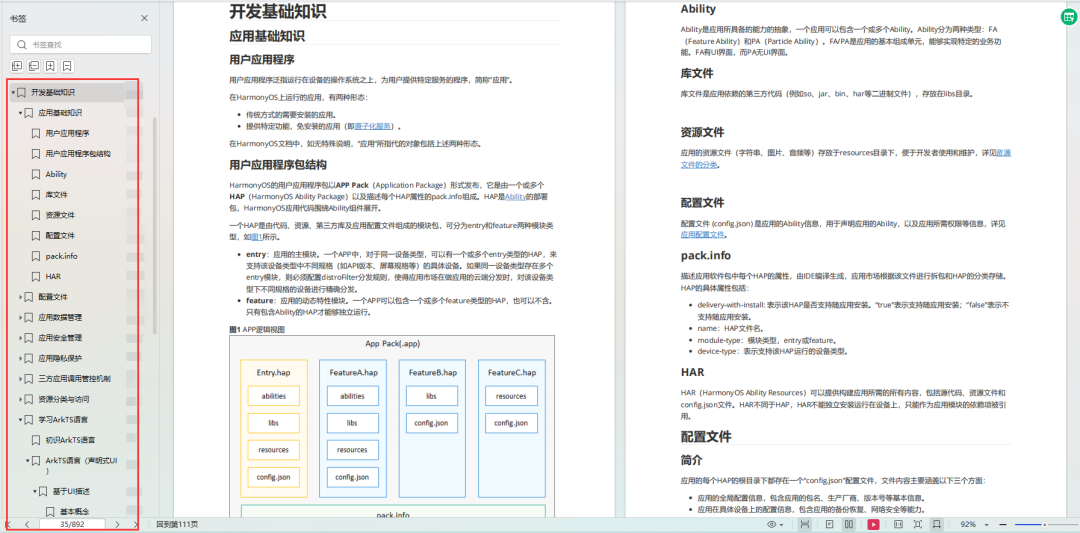
四、开发基础知识
- 应用基础知识
- 配置文件
- 应用数据管理
- 应用安全管理
- 应用隐私保护
- 三方应用调用管控机制
- 资源分类与访问
- 学习ArkTS语言
- ……
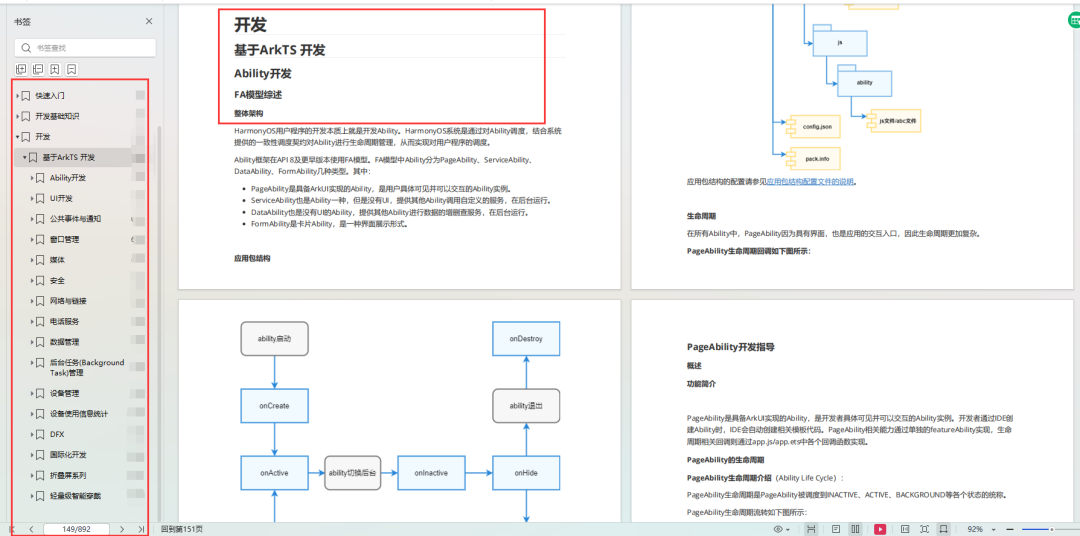
五、基于ArkTS 开发
- Ability开发
- UI开发
- 公共事件与通知
- 窗口管理
- 媒体
- 安全
- 网络与链接
- 电话服务
- 数据管理
- 后台任务(Background Task)管理
- 设备管理
- 设备使用信息统计
- DFX
- 国际化开发
- 折叠屏系列
- ……
更多了解更多鸿蒙开发的相关知识可以参考:《鸿蒙 (Harmony OS)开发学习手册》