Linux文件系列: 深入理解缓冲区和C标准库的简易模拟实现
- 一.缓冲区的概念和作用
- 二.一个样例
- 三.理解样例
- 1.样例解释
- 2.什么是刷新?
- 四.简易模拟实现C标准库
- 1.我们要实现的大致框架
- 2.mylib.h的实现
- 1.文件结构体的定义
- 2.myfopen等等函数的声明
- 3.完整mylib.h代码
- 3.myfopen函数的实现
- 4.myfwrite函数的实现
- 5.myfflush函数的实现
- 6.myfclose函数的实现
- 7.演示
- 8.完整代码
- 1.mylib.h
- 2.mylib.c
- 3.main.c
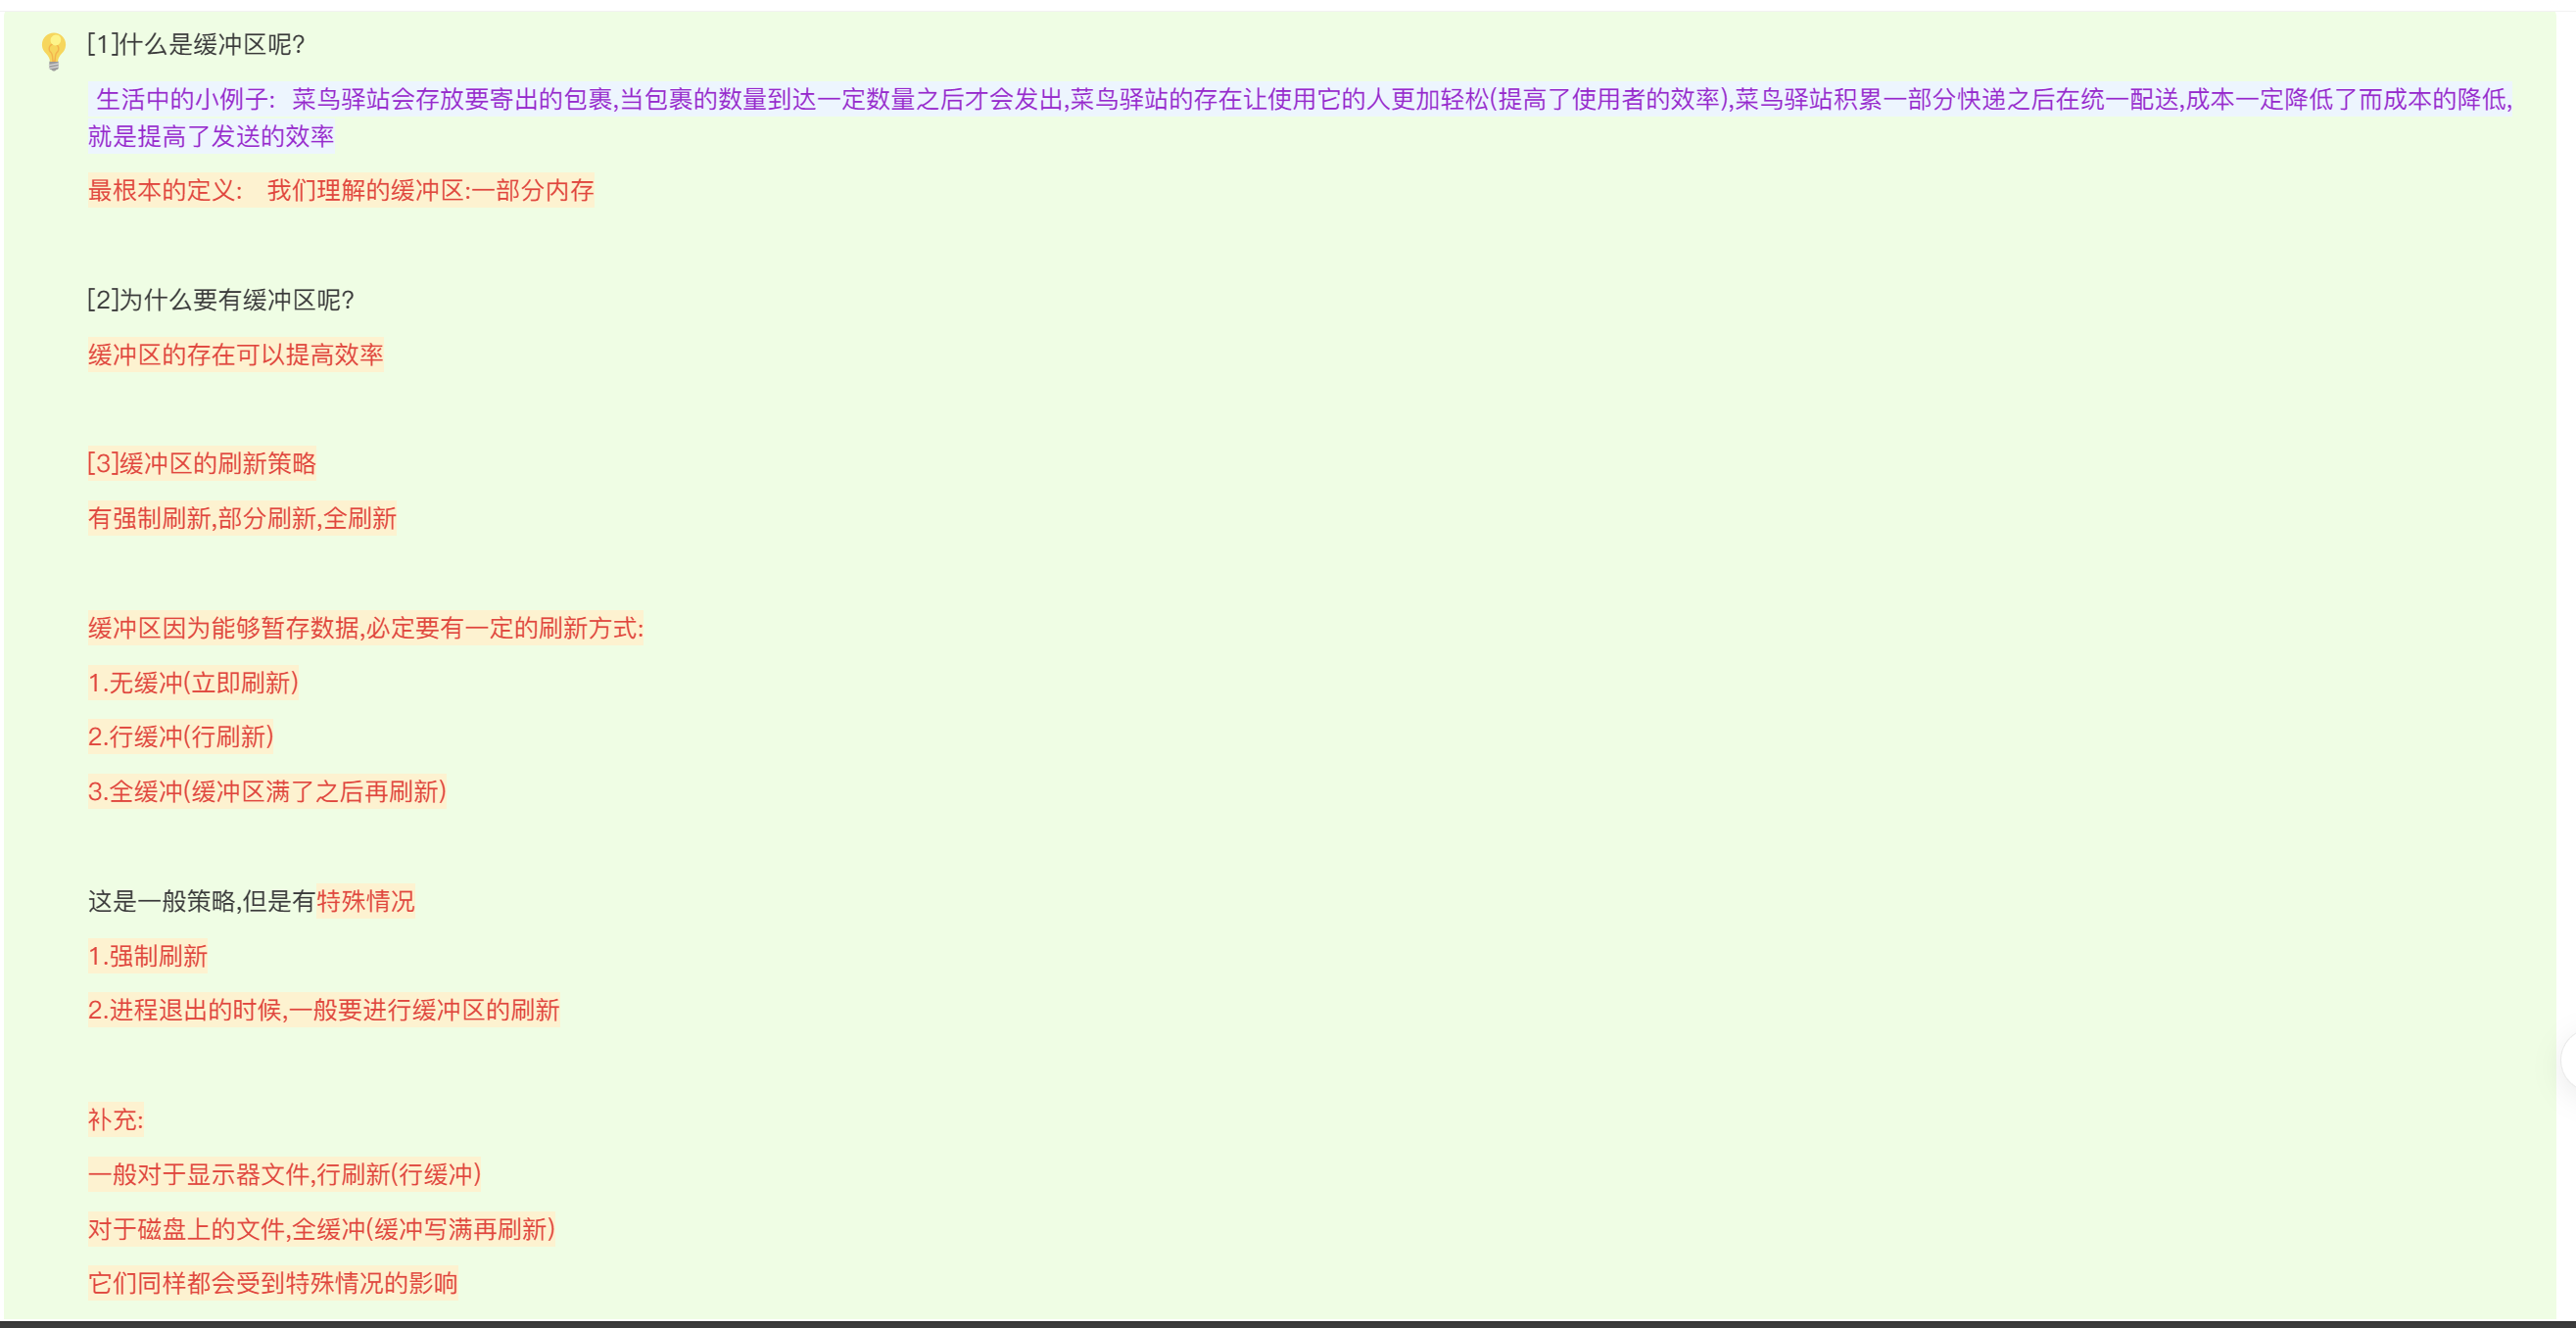
一.缓冲区的概念和作用
二.一个样例


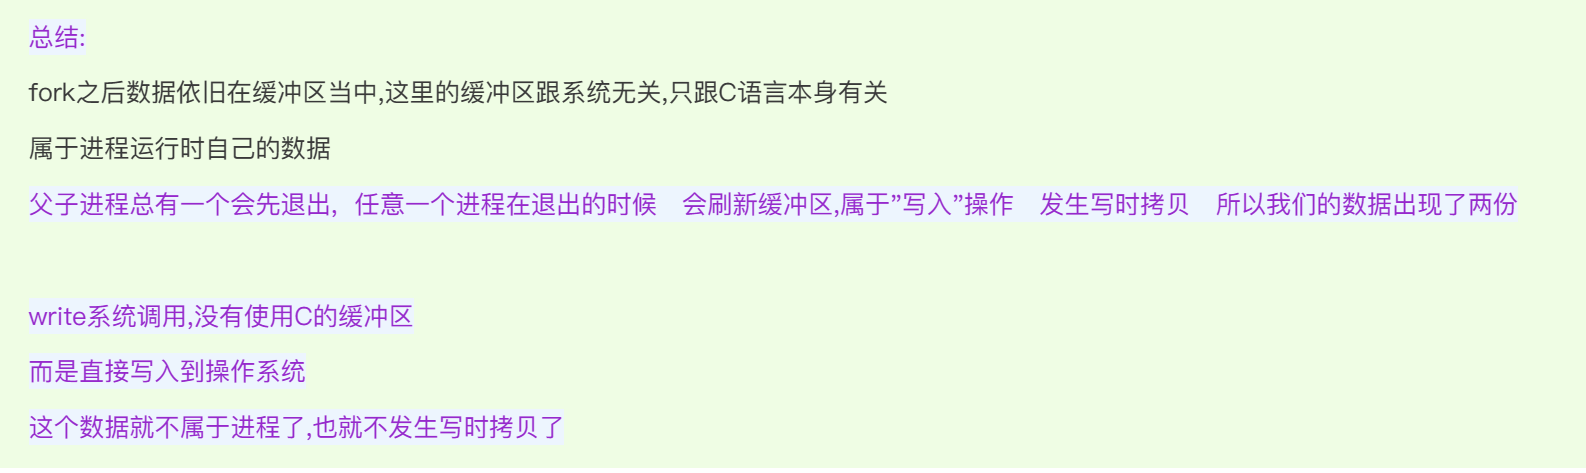
三.理解样例
1.样例解释

2.什么是刷新?

四.简易模拟实现C标准库
至此,我们理解了缓冲区的概念和作用,下面我们来简易模拟实现一下C标准库
1.我们要实现的大致框架
我们要实现的是:

2.mylib.h的实现
1.文件结构体的定义
1.首先要有一个文件结构体:
结构体当中
1.要封装文件描述符fd    设置成员变量fileno
2.用户级缓冲区buffer     大小宏定义为SIZE 4096
3.该文件所对应缓冲区的刷新策略 flag
刷新策略分别宏定义为
#define FLUSH_NONE 1        不刷新
#define FLUSH_LINE (1<<1)   行刷新
#define FLUSH_ALL (1<<2)    全刷新
4.缓冲区中有效数据的个数 end
#define SIZE 4096

#define FLUSH_NONE 1
#define FLUSH_LINE (1<<1)
#define FLUSH_ALL (1<<2)

typedef struct my_file
{
    int fileno;
    char buffer[SIZE];
    int end;//缓冲区中有效数据的个数(也就是最后一个有效数据的下一个位置)
    int flag;//缓冲区的刷新策略
}my_file;
2.myfopen等等函数的声明
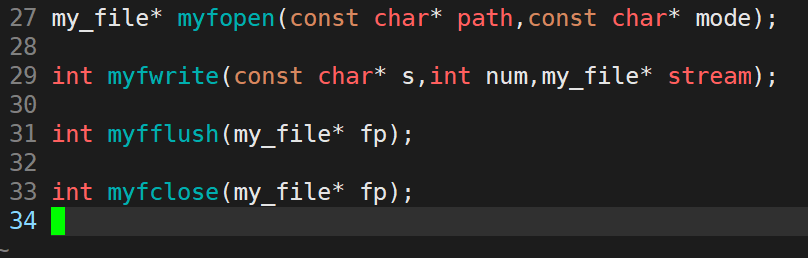
1.myfopen:以mode的方式打开path这个文件
path:文件路径+文件名
mode:打开文件的方式
“r”:只读
“w”:覆盖写
“a”:追加写
2.myfwrite当中:把s字符串中前num个数据写入stream文件中
stream:要往哪个文件当中写入数据,stream是对应文件的结构体指针
s:有数据的字符串
num:要写入的数据个数
3.myfflush:刷新文件缓冲区
4.myfclose:关闭该文件
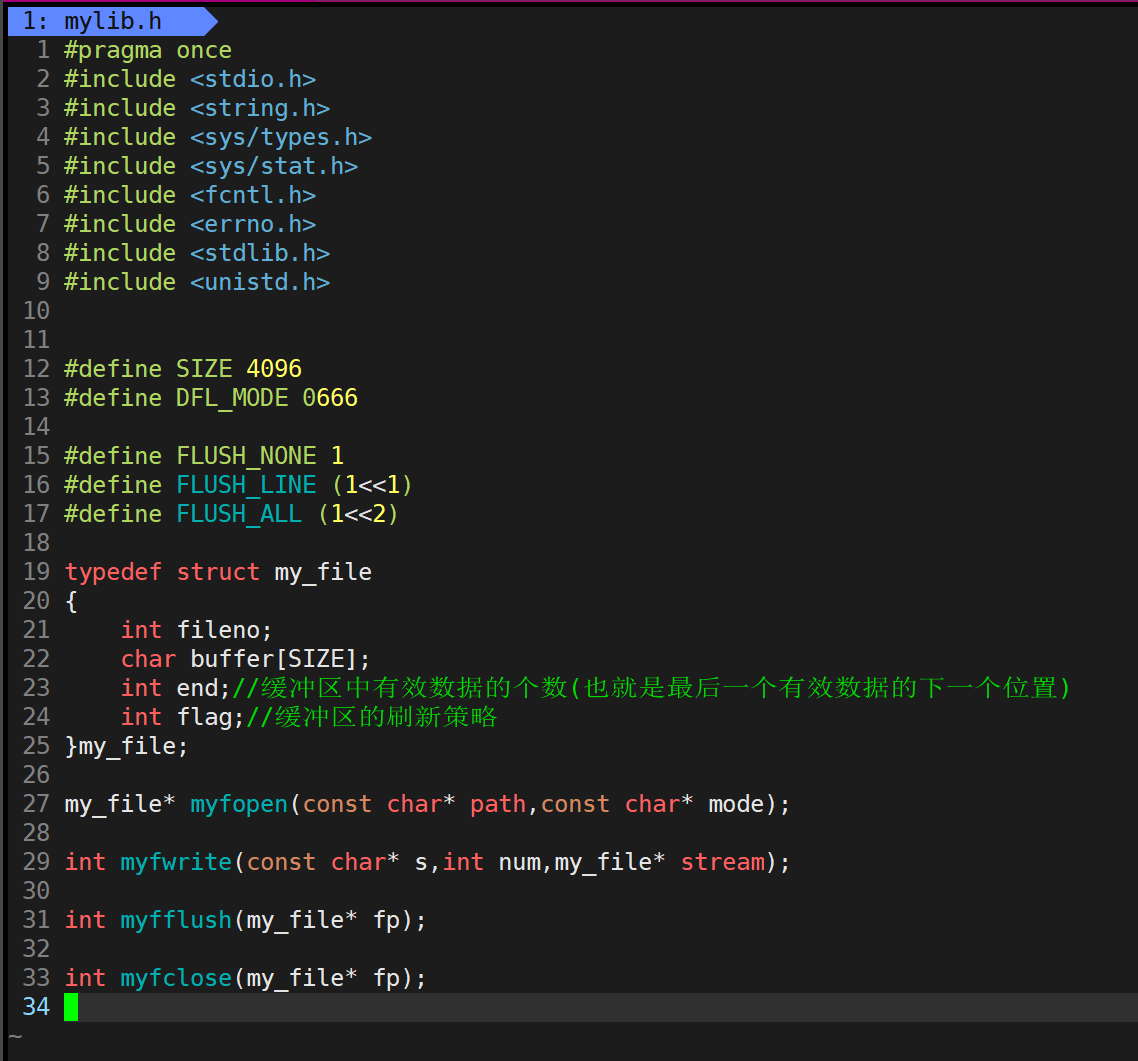
3.完整mylib.h代码
DFL_MODE : 打开文件的默认权限
3.myfopen函数的实现
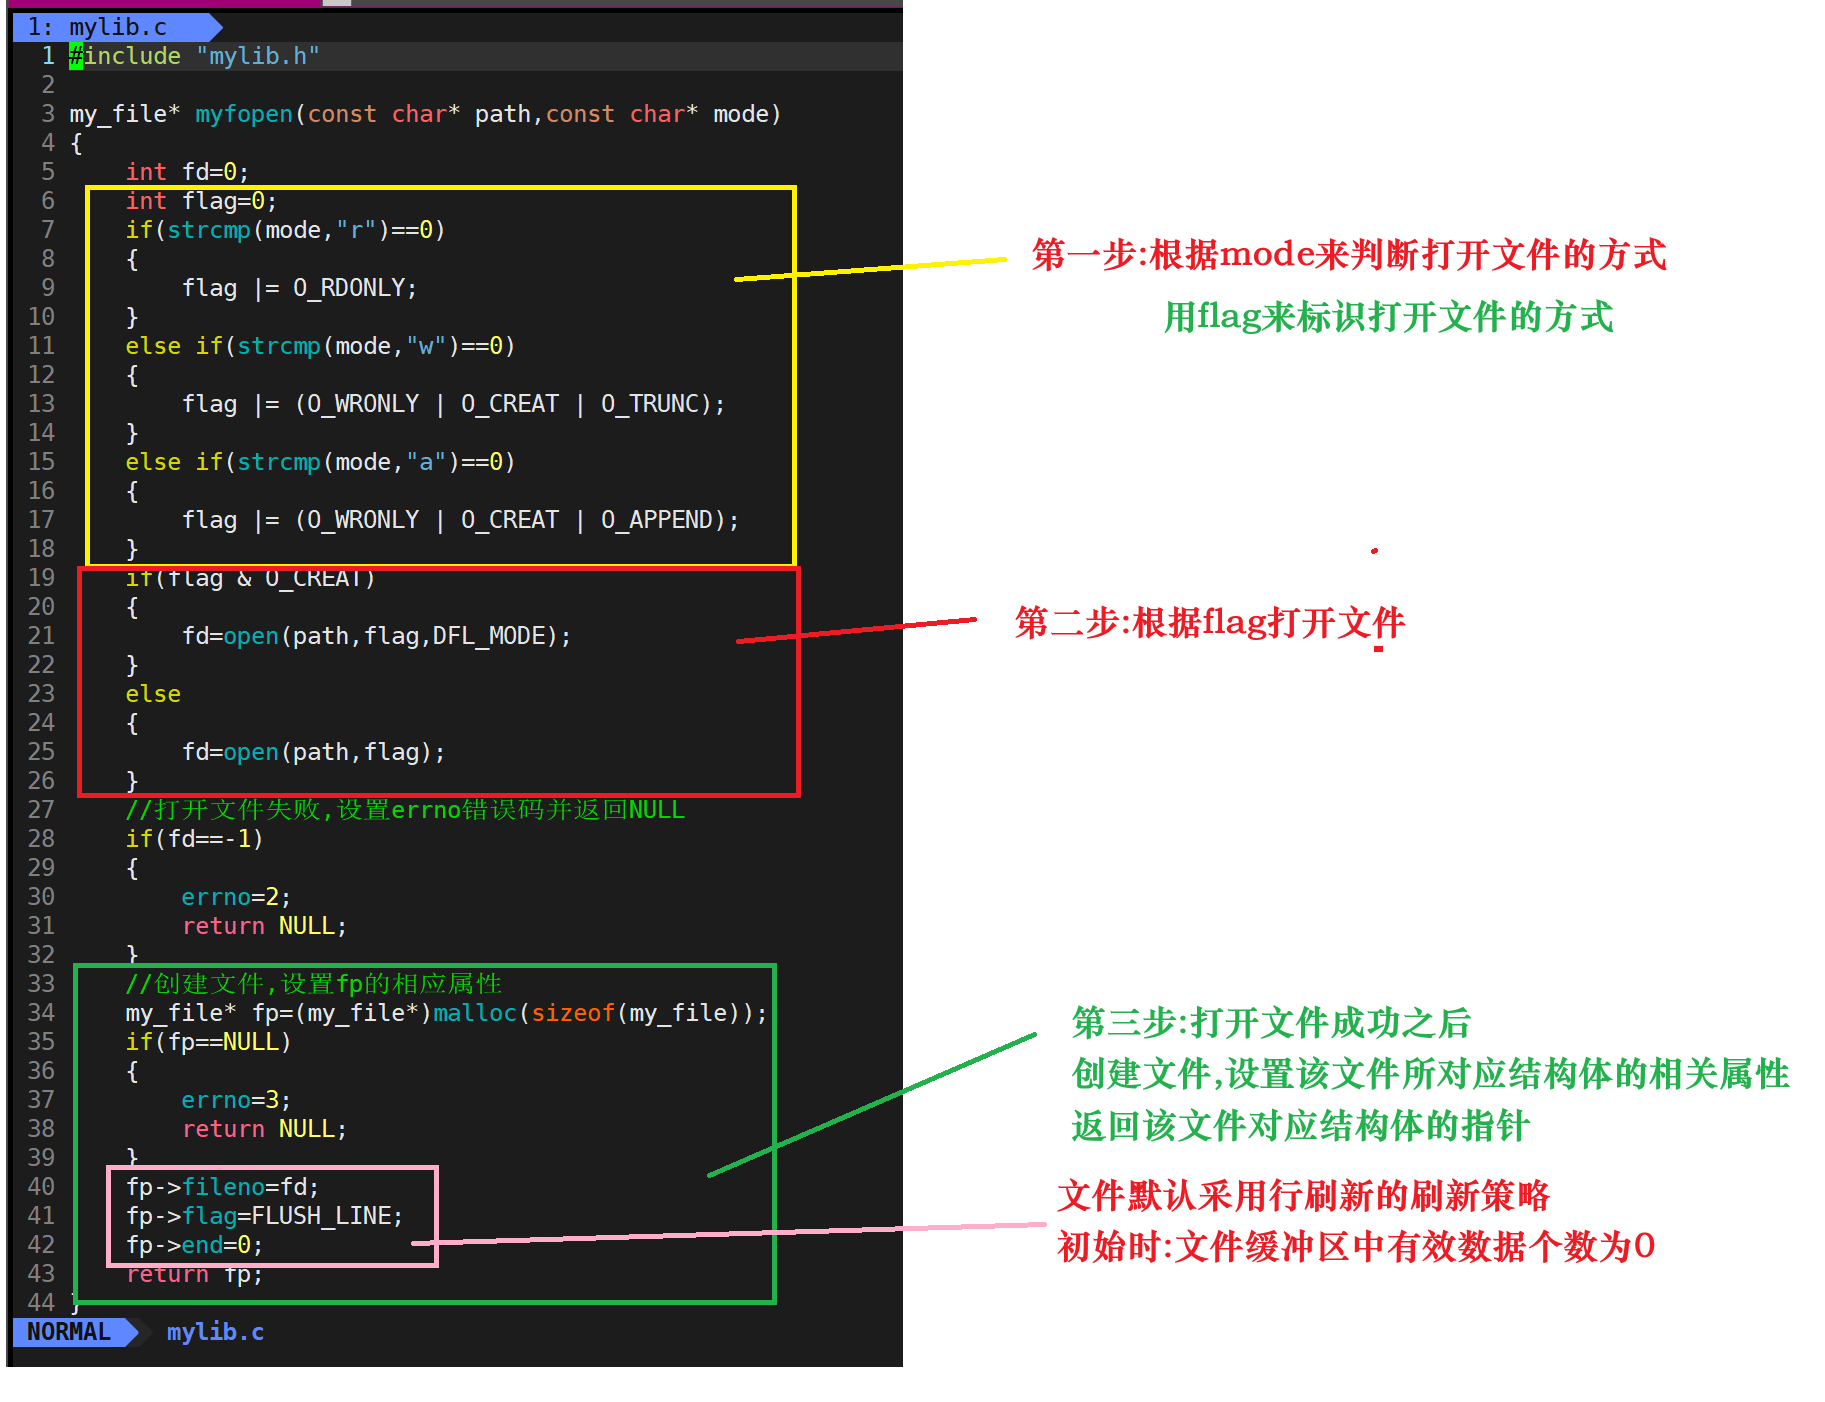
my_file* myfopen(const char* path,const char* mode)
{
    int fd=0;
    int flag=0;
    if(strcmp(mode,"r")==0)
    {
        flag |= O_RDONLY;
    }
    else if(strcmp(mode,"w")==0)
    {
        flag |= (O_WRONLY | O_CREAT | O_TRUNC);
    }
    else if(strcmp(mode,"a")==0)
    {
        flag |= (O_WRONLY | O_CREAT | O_APPEND);
    }
    if(flag & O_CREAT)
    {
        fd=open(path,flag,DFL_MODE);
    }
    else
    {
        fd=open(path,flag);
    }
    //打开文件失败,设置errno错误码并返回NULL
    if(fd==-1)
    {
        errno=2;
        return NULL;
    }
    //创建文件,设置fp的相应属性
    my_file* fp=(my_file*)malloc(sizeof(my_file));
    if(fp==NULL)
    {
        errno=3;
        return NULL;
    }
    fp->fileno=fd;
    fp->flag=FLUSH_LINE;
    fp->end=0;
    return fp;
}
4.myfwrite函数的实现

//把s中的数据写入stream中
int myfwrite(const char* s,int num,my_file* stream)
{
    //保存旧的缓冲区的大小
    int pos=stream->end;
    //1.先写入用户级缓冲区
    memcpy(stream->buffer+pos,s,num);
    stream->end += num;//更新缓冲区大小

    //刷新策略:按行刷新
    if(stream->flag & FLUSH_LINE)
    {
        //2.判断是否需要刷新缓冲区(判断是否有'\n')
        int flushit=0;
        while(pos < stream->end)
        {
            if((stream->buffer[pos])=='\n')
            {
                flushit=1;
                break;
            }
            pos++;
        }

        if(flushit == 1)
        {
            //3.刷新缓冲区:[0,pos]数据
            write(stream->fileno,stream->buffer,pos+1);
            //4.更新缓冲区 把[pos+1,count)的数据移动到[0,count-pos-2]当中
            //一共移动count-pos-1个数据
            //先求出要移动的最后一个数据的下标
            int count=stream->end;
            memmove(stream->buffer,stream->buffer+pos+1,count-pos-1);
            stream->buffer[count-pos-1]='\0';
            stream->end=count-pos-1;
        }
    }
    return num;
}
5.myfflush函数的实现

int myfflush(my_file* fp)
{
    if(fp->end > 0)
    {
        write(fp->fileno,fp->buffer,fp->end);
        fp->end=0;
    }
    return 0;
}
6.myfclose函数的实现
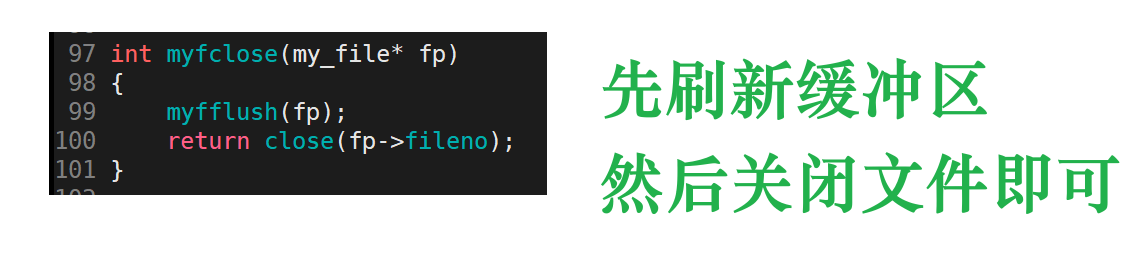
int myfclose(my_file* fp)
{
    myfflush(fp);
    return close(fp->fileno);
}
7.演示
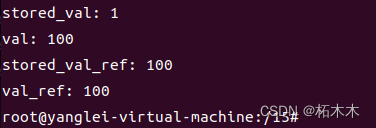
下面我们测试一下
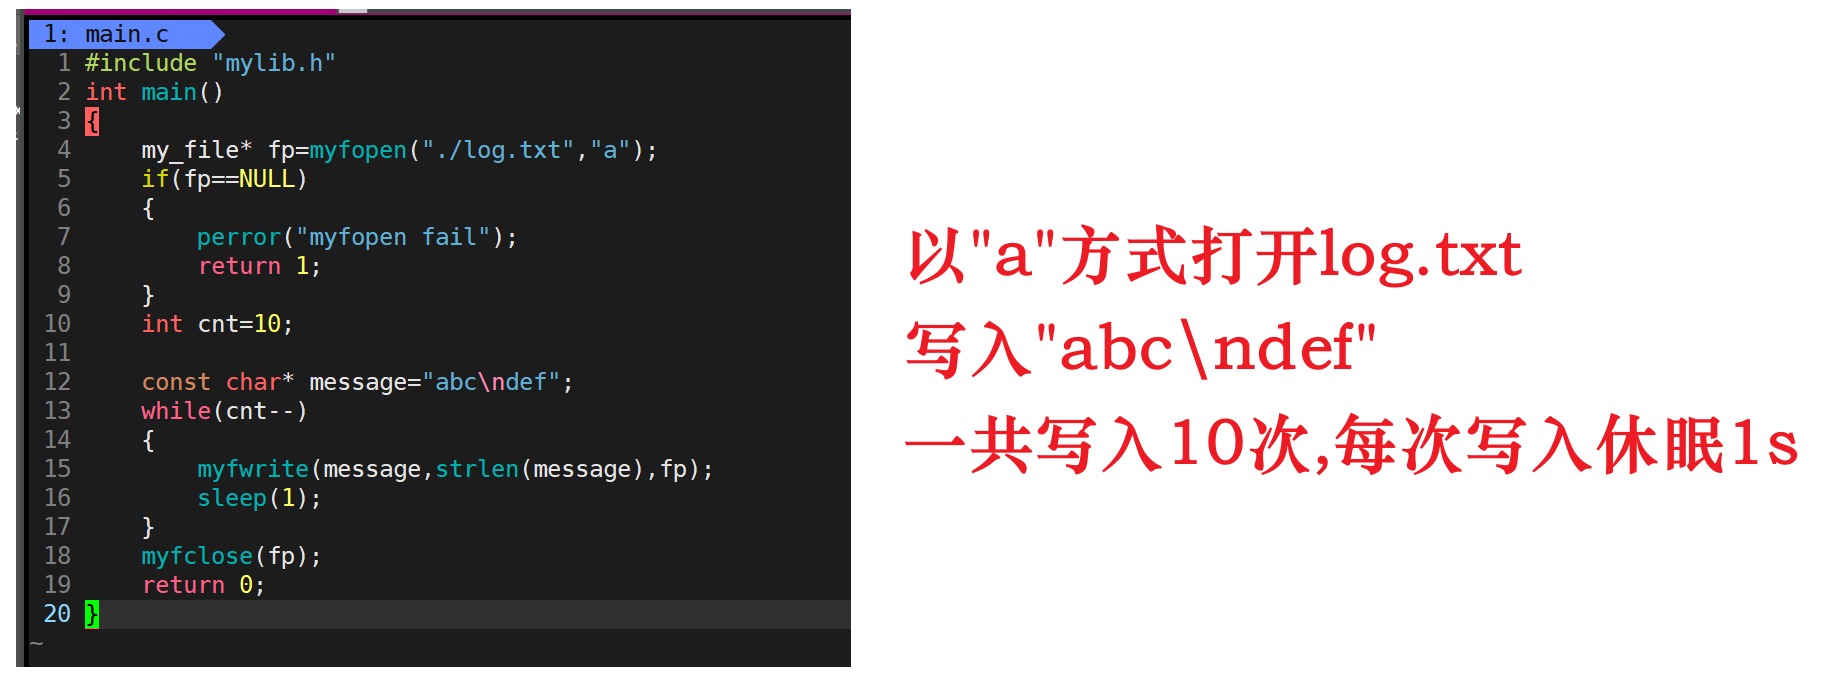

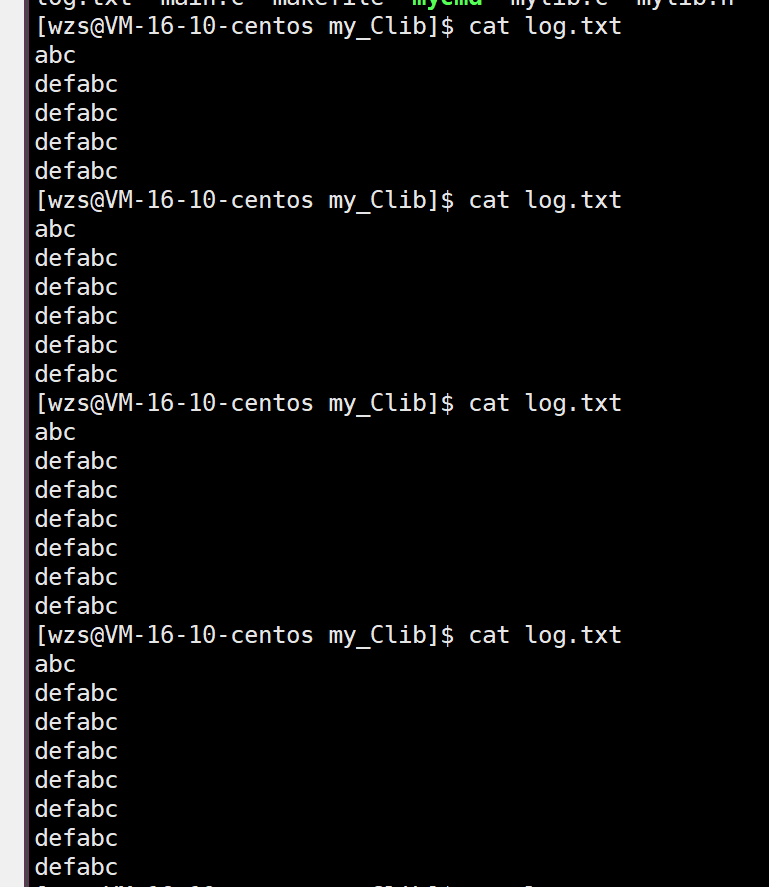
跟我们所预想的一样
8.完整代码
1.mylib.h
#pragma once
#include <stdio.h>
#include <string.h>
#include <sys/types.h>
#include <sys/stat.h>
#include <fcntl.h>
#include <errno.h>
#include <stdlib.h>
#include <unistd.h>

#define SIZE 4096
#define DFL_MODE 0666

#define FLUSH_NONE 1
#define FLUSH_LINE (1<<1)
#define FLUSH_ALL (1<<2)

typedef struct my_file
{
    int fileno;
    char buffer[SIZE];
    int end;//缓冲区中有效数据的个数(也就是最后一个有效数据的下一个位置)
    int flag;//缓冲区的刷新策略
}my_file;

my_file* myfopen(const char* path,const char* mode);

int myfwrite(const char* s,int num,my_file* stream);

int myfflush(my_file* fp);

int myfclose(my_file* fp);
2.mylib.c
#include "mylib.h"

my_file* myfopen(const char* path,const char* mode)
{
    int fd=0;
    int flag=0;
    if(strcmp(mode,"r")==0)
    {
        flag |= O_RDONLY;
    }
    else if(strcmp(mode,"w")==0)
    {
        flag |= (O_WRONLY | O_CREAT | O_TRUNC);
    }
    else if(strcmp(mode,"a")==0)
    {
        flag |= (O_WRONLY | O_CREAT | O_APPEND);
    }
    if(flag & O_CREAT)
    {
        fd=open(path,flag,DFL_MODE);
    }
    else
    {
        fd=open(path,flag);
    }
    //打开文件失败,设置errno错误码并返回NULL
    if(fd==-1)
    {
        errno=2;
        return NULL;
    }
    //创建文件,设置fp的相应属性
    my_file* fp=(my_file*)malloc(sizeof(my_file));
    if(fp==NULL)
    {
        errno=3;
        return NULL;
    }
    fp->fileno=fd;
    fp->flag=FLUSH_LINE;
    fp->end=0;
    return fp;
}


//把s中的数据写入stream中
int myfwrite(const char* s,int num,my_file* stream)
{
    //保存旧的缓冲区的大小
    int pos=stream->end;
    //1.先写入用户级缓冲区
    memcpy(stream->buffer+pos,s,num);
    stream->end += num;//更新缓冲区大小

    //刷新策略:按行刷新
    if(stream->flag & FLUSH_LINE)
    {
        //2.判断是否需要刷新缓冲区(判断是否有'\n')
        int flushit=0;
        while(pos < stream->end)
        {
            if((stream->buffer[pos])=='\n')
            {
                flushit=1;
                break;
            }
            pos++;
        }

        if(flushit == 1)
        {
            //3.刷新缓冲区:[0,pos]数据
            write(stream->fileno,stream->buffer,pos+1);
            //4.更新缓冲区 把[pos+1,count)的数据移动到[0,count-pos-2]当中
            //一共移动count-pos-1个数据
            //先求出要移动的最后一个数据的下标
            int count=stream->end;
            memmove(stream->buffer,stream->buffer+pos+1,count-pos-1);
            stream->buffer[count-pos-1]='\0';
            stream->end=count-pos-1;
        }
    }
    return num;
}

int myfflush(my_file* fp)
{
    if(fp->end > 0)
    {
        write(fp->fileno,fp->buffer,fp->end);
        fp->end=0;
    }
    return 0;
}

int myfclose(my_file* fp)
{
    myfflush(fp);
    return close(fp->fileno);
}
3.main.c
#include "mylib.h"
int main()
{
    my_file* fp=myfopen("./log.txt","a");
    if(fp==NULL)
    {
        perror("myfopen fail");
        return 1;
    }
    int cnt=10;

    const char* message="abc\ndef";
    while(cnt--)
    {
        mywrite(message,strlen(message),fp);
        sleep(1);
    }
    myfclose(fp);
    return 0;
}
以上就是Linux文件系列: 深入理解缓冲区和C标准库的简单模拟实现的全部内容,希望能对大家有所帮助!