ejs
- express渲染页面需要借助ejs
- 官网传送门
- 使用流程
- 安装ejs引擎
npm i ejs -S
- 在app.js入口文件里面设置模版引擎和目录
const path = require('path') // 设置项目里面模版存放位置 app.set('views', path.join(__dirname, 'views')) // 设置模版引擎 app.set('view engine', 'ejs') - 在项目根目录新建一个views文件夹,在里面创建ejs的模版引擎
- 创建一个home.ejs的文件
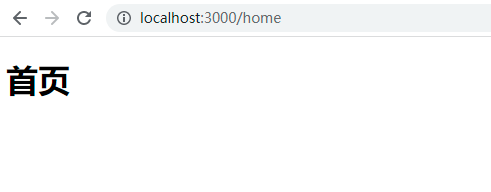
<!DOCTYPE html> <html lang="en"> <head> <meta charset="UTF-8"> <meta http-equiv="X-UA-Compatible" content="IE=edge"> <meta name="viewport" content="width=device-width, initial-scale=1.0"> <title>Document</title> </head> <body> <h1>首页</h1> </body> </html> - 新建一个路由文件
home.js,用来创建路由访问home.ejs模板const express = require('express') const router = express.Router() router.get('/', (req,res)=>{ res.render('home'); }) module.exports = router - 在app.js导入使用这个路由
const homeRouter = require('./home') app.use('/home', homeRouter) - 打开浏览器访问路由
- 安装ejs引擎
- ejs动态渲染数据
- 在views里面创建一个
list.ejs模版
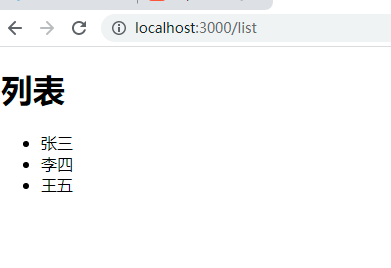
<!DOCTYPE html> <html lang="en"> <head> <meta charset="UTF-8"> <meta http-equiv="X-UA-Compatible" content="IE=edge"> <meta name="viewport" content="width=device-width, initial-scale=1.0"> <title>Document</title> </head> <body> <h1>列表</h1> <ul> <% userList.forEach(function(item){ %> <li><%= item.name %></li> <% }); %> </ul> </body> </html>- 新建一个路由文件
list.js,用来访问list.ejsconst express = require('express') const router = express.Router() router.get('/', (req,res)=>{ const userList = [ {name: '张三'}, {name: '李四'}, {name: '王五'}, ] res.render('list', {userList}); }) module.exports = router - 在app.js引入list路由
const listRouter = require('./list') app.use('/list', listRouter) - 在浏览器访问效果如下
- 查看源代码如下

.(img-M1danAmN-1710124207594)] - 查看源代码如下
[外链图片转存中…(img-To7VEYqG-1710124207594)]
- 在views里面创建一个


![[Mac软件]Adobe Illustrator 2024 28.3 intel/M1/M2/M3矢量图制作软件](https://img-blog.csdnimg.cn/img_convert/9fbdf02f4763f294ebb3e44b2d59ca0a.png)

![[gic]-linux和optee的中断处理流程举例(gicv3举例)](https://img-blog.csdnimg.cn/20200702112804594.png?x-oss-process=image/watermark,type_ZmFuZ3poZW5naGVpdGk,shadow_10,text_aHR0cHM6Ly9ibG9nLmNzZG4ubmV0L3dlaXhpbl80MjEzNTA4Nw==,size_16,color_FFFFFF,t_70)