官网
Download | Redis
wget https://github.com/redis/redis/archive/7.2.4.tar.gz编译安装
yum install gcc g++
tar -zxvf redis-7.2.4.tar.gz -C /usr/local

cd /usr/local/redis

make && make install
常见报错
zmalloc.h:50:10: fatal error: jemalloc/jemalloc.h: No such file or directory解决办法: 清理编译的残留 重新编译 make distclean && make
设置环境变量
vim ~/.bashrc
# Source global definitions
if [ -f /etc/bashrc ]; then
        . /etc/bashrc
fi
export PATH=/usr/local/bin:$PATH
source ~/.bashrc
基本应用设置
设置后台启动
daemonize yes

设置密码

requirepass 123456
启动
redis-server /usr/local/redis/redis.conf
测试
redis-cli

auth 12345

127.0.0.1:6379> set a b
OK
127.0.0.1:6379> get a
开机自启动
vim //usr/lib/systemd/system/redis.service
[Unit]
Description=redis-server
After=network.target

[Service]
Type=forking

ExecStart=/usr/local/bin/redis-server /usr/local/redis/redis.conf
PrivateTmp=true

[Install]
WantedBy=multi-user.target
启动系统服务
#重载系统服务
systemctl daemon-reload
#设置开机自启
systemctl enable redis.service
#取消开机自启
systemctl disable redis.service
#启动服务
systemctl start redis.service
#停止服务
systemctl stop redis.service
#查看服务状态
systemctl status redis.service
RabbitMQ 搭建
安装 erlang
yum -y install epel-release
yum -y install erlang socat
官网
Installing on RPM-based Linux (RHEL, CentOS Stream, Fedora, Amazon Linux 2023, openSUSE) — RabbitMQ
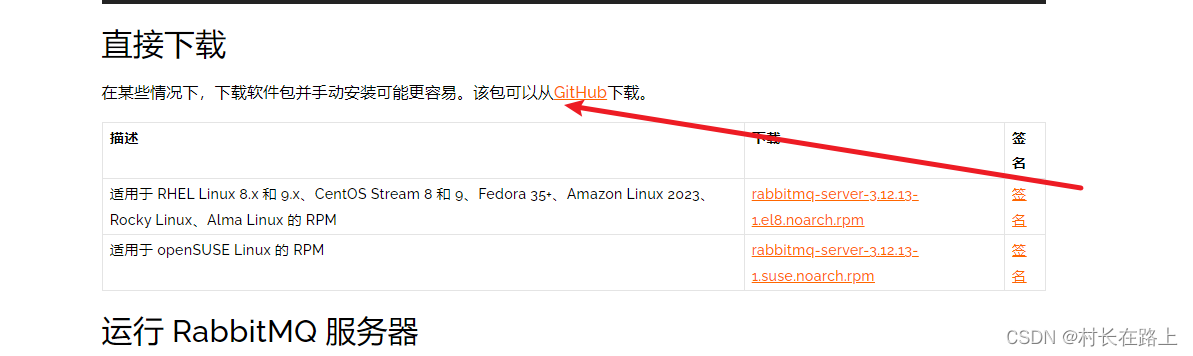
找到centos7 对应的版本 3.8.30
wget https://github.com/rabbitmq/rabbitmq-server/releases/tag/v3.8.30
rpm 安装
rpm -Uvh rabbitmq-server-3.8.30-1.el7.noarch.rpm启动
systemctl start rabbitmq-server

systemctl enable rabbitmq-server


systemctl status rabbitmq-server
添加防火墙规则
firewall-cmd –zone=public –permanent –add-port=4369/tcp
firewall-cmd –zone=public –permanent –add-port=25672/tcp
firewall-cmd –zone=public –permanent –add-port=5671-5672/tcp
firewall-cmd –zone=public –permanent –add-port=15672/tcp
firewall-cmd –zone=public –permanent –add-port=61613-61614/tcp
firewall-cmd –zone=public –permanent –add-port=1883/tcp
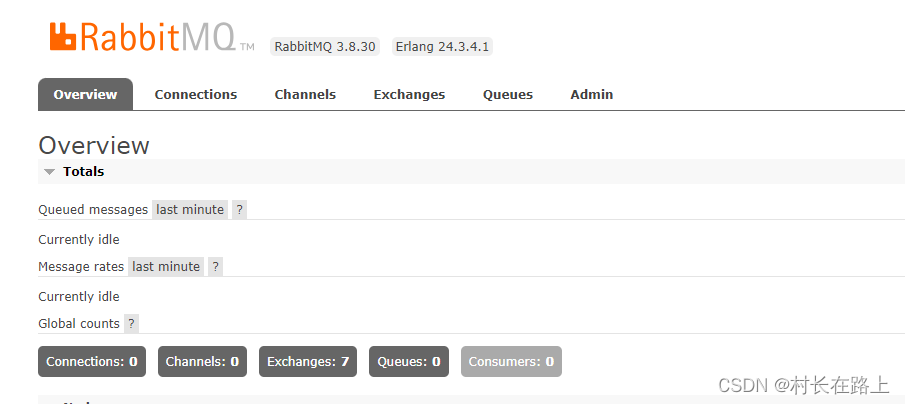
firewall-cmd –zone=public –permanent –add-port=8883/tcp访问web控制台
启动web 控制台
rabbitmq-plugins enable rabbitmq_management

设置权限
chown -R rabbitmq:rabbitmq /var/lib/rabbitmq/


设置admin用户权限   强密码
rabbitmqctl add_user admin 123456Strongpasswd
rabbitmqctl set_user_tags admin administrator
rabbitmqctl set_permissions -p / admin “.*” “.*” “.*”
修改admin 密码
rabbitmqctl  list_users

rabbitmqctl  change_password  Username  'Newpassword'
nginx端口转发
server {
        listen       80;
        server_name  localhost;

        #charset koi8-r;

        #access_log  logs/host.access.log  main;
        location / {
                proxy_pass  http://127.0.0.1:15672;
                proxy_set_header Host $proxy_host;
                proxy_set_header X-Real-IP $remote_addr;
                proxy_set_header X-Forwarded-For $proxy_add_x_forwarded_for;
        }
Elasticsearch 7.6 搭建 es
wget https://artifacts.elastic.co/downloads/elasticsearch/elasticsearch-7.6.2-linux-x86_64.tar.gz


tar -zxvf elasticsearch-7.6.2-linux-x86_64.tar.gz
官方禁止使用root用户启动 es
新建账户 给es 用户名 esadmin
adduser esadmin
passwd 123456
修改配置环境与系统设置
vim elasticsearch.yml
network.host: 0.0.0.0
cluster.name: es
node.name: node-1
cluster.initial_master_nodes: ["node-1"]
系统设置
vim /etc/sysctl.conf
vm.overcommit_memory = 1
vm.max_map_count = 655360
vim /etc/security/limits.conf
esadmin soft nofile 65535
esadmin hard nofile 65535
启动 && 后台启动
su esadmin
前台启动
./elasticsearch

后台启动
./elasticsearch -d 


![[力扣 Hot100]Day33 排序链表](https://img-blog.csdnimg.cn/direct/7b58508b39b248b98d490404718911b5.png)