目录:
- OpenID 与 OAuth2 基础知识
- Blazor wasm Google 登录
- Blazor wasm Gitee 码云登录
- Blazor SSR/WASM IDS/OIDC 单点登录授权实例1-建立和配置IDS身份验证服务
- Blazor SSR/WASM IDS/OIDC 单点登录授权实例2-登录信息组件wasm
- Blazor SSR/WASM IDS/OIDC 单点登录授权实例3-服务端管理组件
- Blazor SSR/WASM IDS/OIDC 单点登录授权实例4 - 部署服务端/独立WASM端授权
- Blazor SSR/WASM IDS/OIDC 单点登录授权实例5 - Blazor hybird app 端授权
- Blazor SSR/WASM IDS/OIDC 单点登录授权实例5 - Winform 端授权
源码
BlazorOIDC/Shared
1. 编辑 BlazorOIDC.Shared 项目配置文件
<Project Sdk="Microsoft.NET.Sdk.Razor">

    <PropertyGroup>
        <TargetFramework>net7.0</TargetFramework>
        <Nullable>enable</Nullable>
        <ImplicitUsings>enable</ImplicitUsings>
    </PropertyGroup>

    <ItemGroup>
        <PackageReference Include="Microsoft.AspNetCore.Components.Authorization" Version="7.*" />
        <PackageReference Include="Microsoft.AspNetCore.Components.Web" Version="7.*" />
        <PackageReference Include="Microsoft.Extensions.Http" Version="7.*" />
        <PackageReference Include="Microsoft.Extensions.Options.ConfigurationExtensions" Version="7.*" />
        <PackageReference Include="BootstrapBlazor" Version="8.*" />
        <PackageReference Include="FreeSql" Version="3.*" />
        <PackageReference Include="Newtonsoft.Json" Version="13.0.3" />
        <PackageReference Include="Microsoft.AspNetCore.Identity.EntityFrameworkCore" Version="7.0.2" />
    </ItemGroup>

    <ItemGroup>
        <Using Include="Microsoft.AspNetCore.Components" />
        <Using Include="Microsoft.Extensions.Options" />
        <Using Include="Microsoft.JSInterop" />
        <Using Include="System.ComponentModel.DataAnnotations" />
    </ItemGroup>

</Project>
2. 共享工程添加登录信息组件
Pages/LogInfo.razor
@page "/logInfo"
@namespace Densen.Identity.Shared
@using Microsoft.AspNetCore.Authorization
@using Microsoft.AspNetCore.Identity

@inject NavigationManager Navigation

<PageTitle>登录信息</PageTitle>

<h1>登录信息</h1>

<button @onclick="LogUsername">检查登录信息</button>

<p>@authMessage</p>

@code
{
    [Inject]
    [NotNull]
    protected IJSRuntime? jsRuntime { get; set; }

    private string LoginUrl = "Identity/Account/Login";
    private string LogoutUrl = "Identity/Account/Register";
    private string RegisterUrl = "Identity/Account/Register";

    private string? claimInfo;

    protected override void OnAfterRender(bool firstRender)
    {
        if (firstRender)
        {
            if (this.jsRuntime is IJSInProcessRuntime)
            {
                LoginUrl = "authentication/login";
                LogoutUrl= "authentication/logout";
                RegisterUrl = "authentication/register";
                StateHasChanged();
            }
        }
    }

    /// <summary>
    /// 级联参数获取身份验证状态数据
    /// </summary>
    [CascadingParameter]
    private Task<AuthenticationState>? authenticationStateTask { get; set; }

    private string? authMessage;

    private async Task LogUsername()
    {
        var authState = await authenticationStateTask!;
        var user = authState.User;

        if (user!.Identity!.IsAuthenticated)
        {
            authMessage = $"{user.Identity.Name} is authenticated.";
        }
        else
        {
            authMessage = "The user is NOT authenticated.";
        }
    }

    private void BeginLogOut()
    {
        Navigation.NavigateTo(LogoutUrl, forceLoad: true);
    }

}


<p>AuthorizeView 组件根据用户是否获得授权来选择性地显示 UI 内容。 如果只需要为用户显示数据,而不需要在过程逻辑中使用用户的标识,那么此方法很有用</p>

<AuthorizeView>
    <Authorized>

        你好, @context.User.Identity?.Name

        [
        @if (@context.User.IsInRole(AuthorizeRoles.Admin.ToString()))
        {
            <span>管理员 </span>
        }
        @if (@context.User.IsInRole(AuthorizeRoles.Superuser.ToString()))
        {
            <span>超级用户 </span>
        }
        @if (@context.User.IsInRole(AuthorizeRoles.User.ToString()))
        {
            <span>用户 </span>
        }
        @if (@context.User.IsInRole(AuthorizeRoles.R110.ToString()))
        {
            <span>R110用户 </span>
        }
        @if (@context.User.IsInRole(AuthorizeRoles.R120.ToString()))
        {
            <span>R120用户 </span>
        }
        @if (@context.User.IsInRole(AuthorizeRoles.R130.ToString()))
        {
            <span>R130用户 </span>
        }
        @if (@context.User.IsInRole(AuthorizeRoles.R140.ToString()))
        {
            <span>R140用户 </span>
        }
        ]

        <br /><br /><br />
        <h5>以下是用户的声明</h5><br />

        @foreach (var claim in context.User.Claims)
        {
            <p>@claim.Type: @claim.Value</p>
        }

        <p>@claimInfo</p>


        <button type="submit" class="nav-link btn btn-link" @onclick="BeginLogOut">注销</button>

    </Authorized>
    <NotAuthorized>
        <span>看起来你还没登录</span>
        <a href="@RegisterUrl">注册</a>
        <a href="@LoginUrl">登录</a>
    </NotAuthorized>

</AuthorizeView>


<p>以下是基于角色或基于策略的授权,未登录不显示 </p>

<AuthorizeView Roles="Admin, Superuser">
    <p>只有管理员或超级用户才能看到.</p>
</AuthorizeView>
3. 添加共享引用文件
_Imports.razor
@using System.Net.Http
@using Microsoft.AspNetCore.Authorization
@using Microsoft.AspNetCore.Components.Authorization
@using Microsoft.AspNetCore.Components.Forms
@using Microsoft.AspNetCore.Components.Routing
@using Microsoft.AspNetCore.Components.Web
@using Microsoft.AspNetCore.Components.Web.Virtualization
@using Microsoft.JSInterop
@using System.Diagnostics.CodeAnalysis
@using Densen.Identity
@using Densen.Identity.Shared
4. 编辑功能菜单
BlazorOIDC.Client 项目 Shared/NavMenu.razor 文件
源码
BlazorOIDC/Client
<div class="nav-item px-3">
  <NavLink class="nav-link" href="logInfo">
    <span class="oi oi-plus" aria-hidden="true"></span> 登录信息
  </NavLink>
</div>
5. 添加 Shared 工程的页面路由
BlazorOIDC.Client 项目 App.razor 文件
Router 添加 BlazorOIDC.Shared 工程的页面路由
<Router AppAssembly="@typeof(App).Assembly" AdditionalAssemblies="new[] { typeof(BlazorOIDC.Shared._Imports).Assembly }">
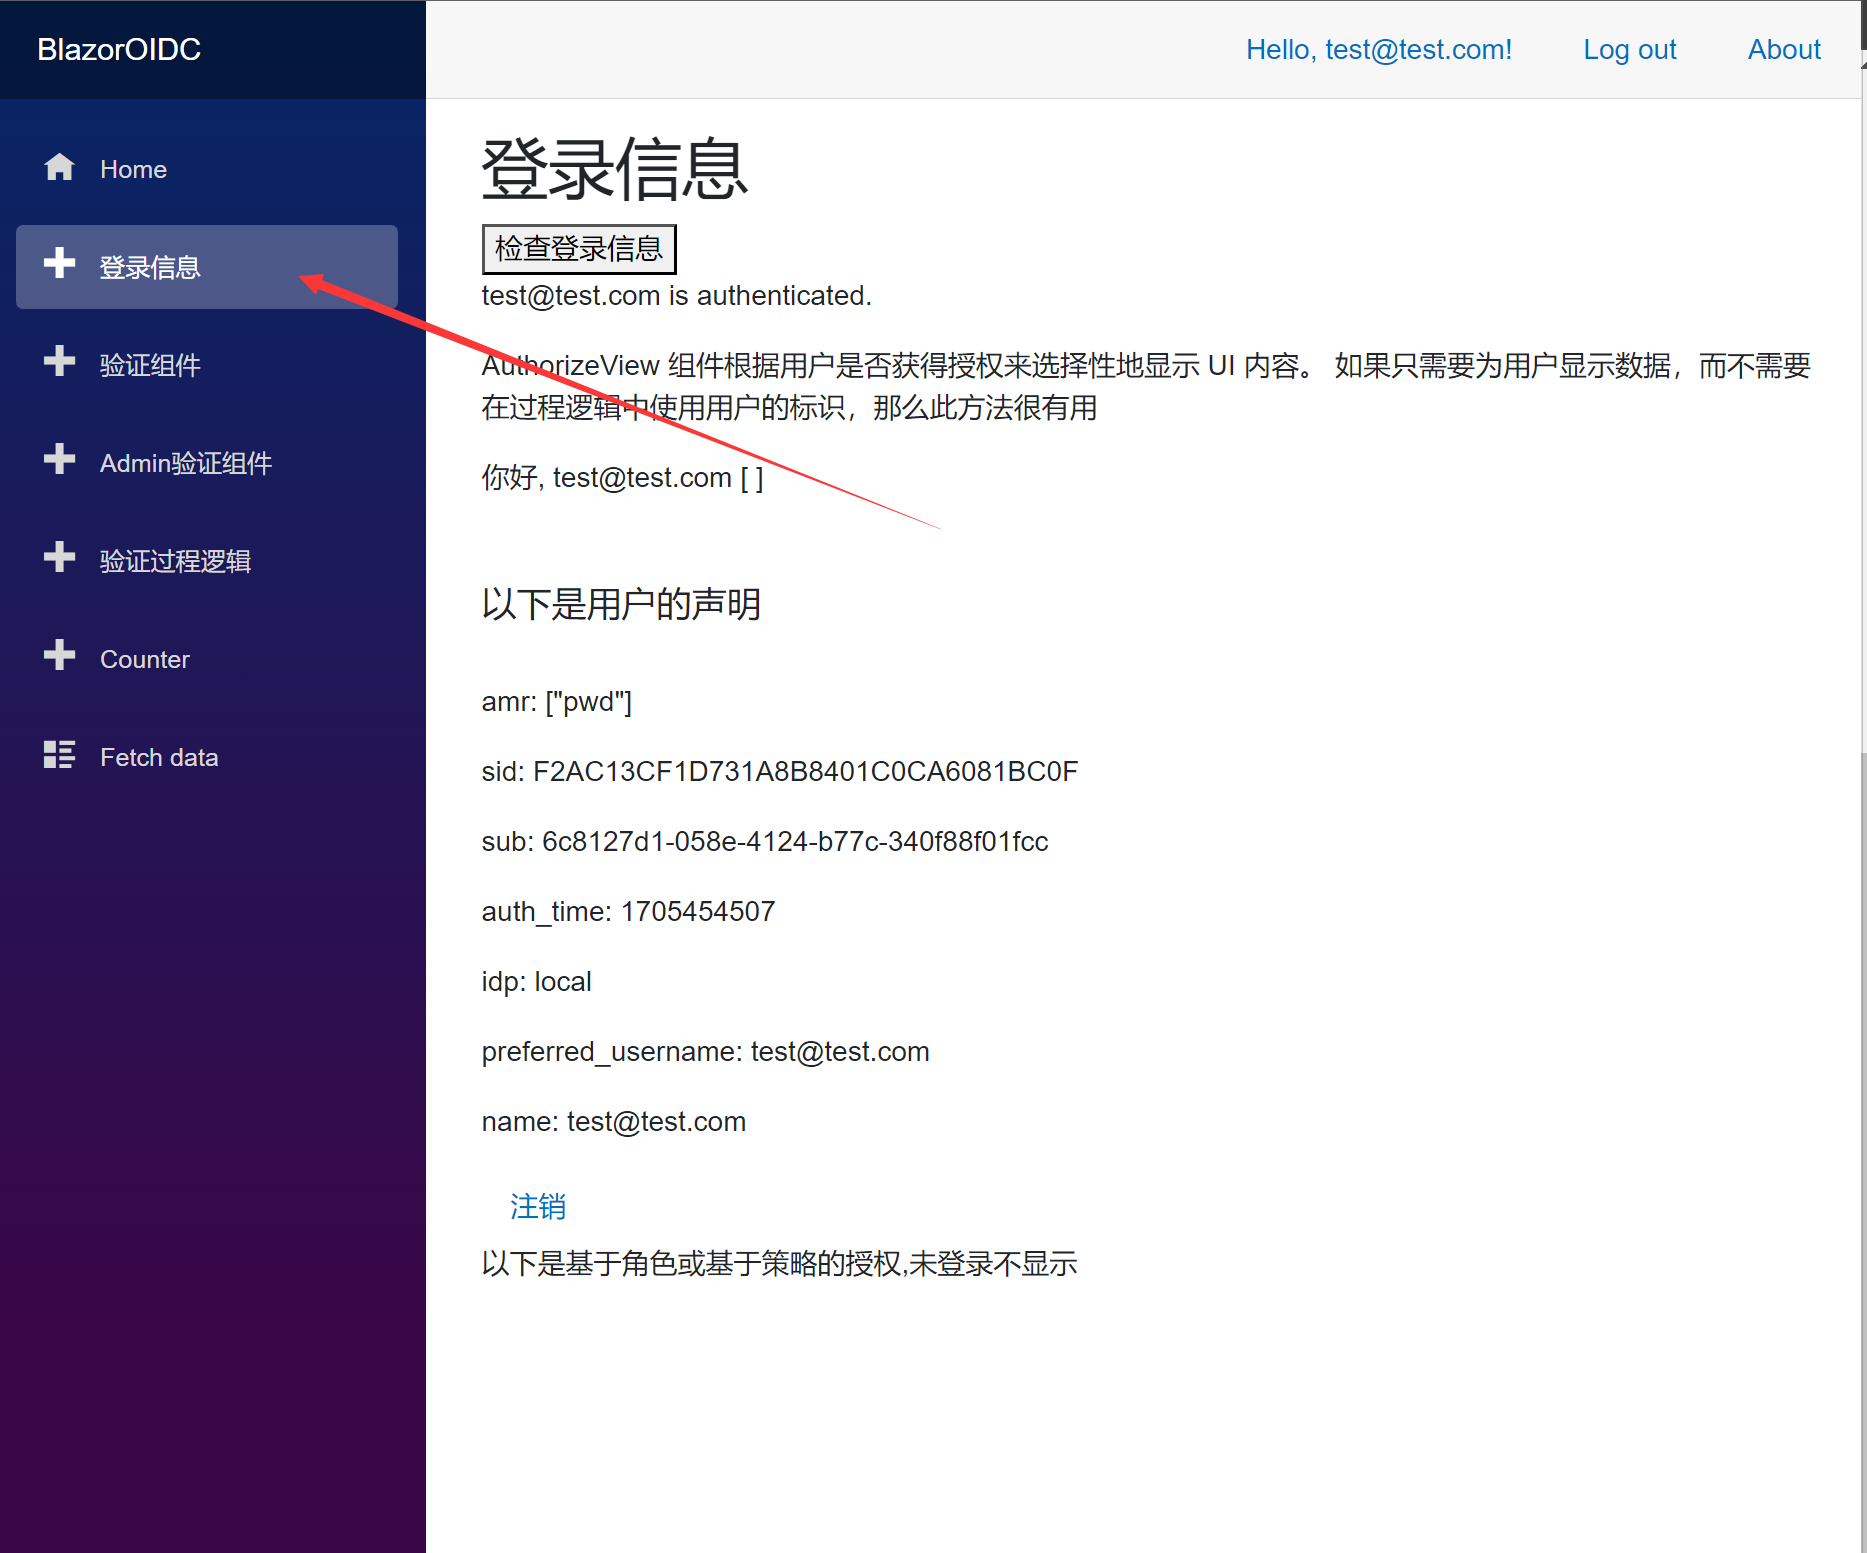
6. 运行项目
点击登录, 然后点击新添加的页面, 测试有效
7. 其他
其他页面参考以前文章或者源码
BlazorOIDC/Client