前言
写小程序写到登录页面的时候,发现官方文档中原来的wx.getUserInfo和wx.getUserProfile不太能用了,学习了相对比较新的方法,这种方法的文档链接如下:
https://developers.weixin.qq.com/miniprogram/dev/framework/open-ability/userProfile.html
下面演示它的简单使用
效果说明
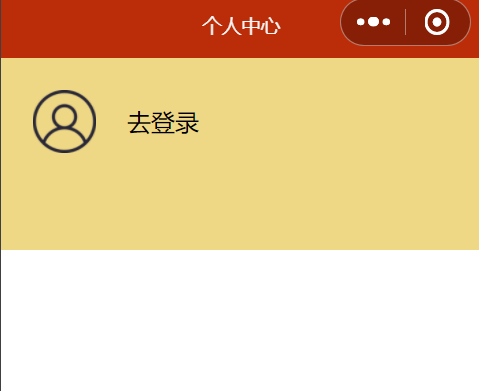
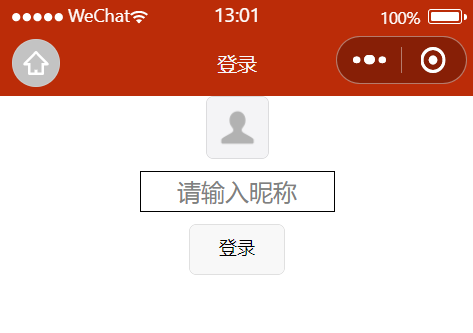
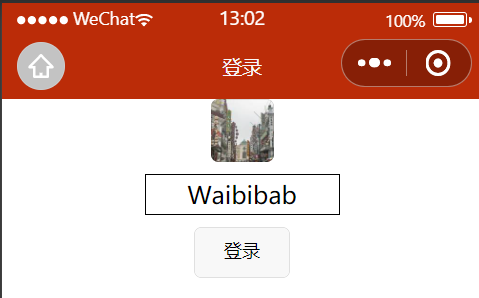
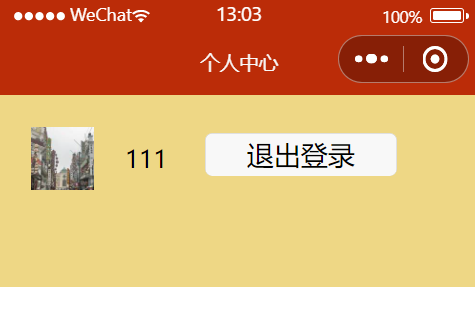
写两个页面page1和page2,达到的效果是:在pages1中点击“去登录”,跳转到page2中填写头像和昵称(可以获取微信的头像和昵称),点击登录之后,将用户信息保存在storage中,跳转到page1并显示头像和昵称,同时显示退出登录按钮,点击之后退出登录,效果如下:

代码及解释
page2的代码如下:
<template>
	<view class="container">
		<!-- 官网最新登录方法 -->
		<button class="imageButton" open-type="chooseAvatar" @chooseavatar="onChooseAvatar">
		  <image class="image" :src="avatarUrl"></image>
		</button>
		<input class="nameInput" type="nickname" v-model="username" placeholder="请输入昵称" />
		<!-- 确认登陆按钮 -->
		<button class="loginButton" @click="getUser">登录</button>
	</view>
</template>

<script>
	export default{
		data(){
			return{
				avatarUrl: 'https://mmbiz.qpic.cn/mmbiz/icTdbqWNOwNRna42FI242Lcia07jQodd2FJGIYQfG0LAJGFxM4FbnQP6yfMxBgJ0F3YRqJCJ1aPAK2dQagdusBZg/0',
				username:''
			};
		},
		methods:{
			onChooseAvatar(e) {
				//打印以查看详细数据
				// console.log(e.detail)
			    this.avatarUrl= e.detail.avatarUrl;
			},
			getUser(){
				//存储上述输入的信息
				wx.setStorage({
					key:"userinfo",
					data:JSON.stringify({
						userName:this.username,
						photoUrl:this.avatarUrl
					})
				})
				//页面跳转,回到个人中心,把其它页面关闭
				wx.reLaunch({
					url:'/pages/personal/personal'
				})
			}
		}
	}
</script>

<style lang="stylus">
	.container
		text-align: center
		.imageButton
			width: 100rpx
			height: 100rpx
			padding: 0
			.image
				margin: 0
				width: 100%
				height: 100%
		.nameInput
			width: 300rpx
			height: 60rpx
			border: 1rpx solid #000
			margin: 20rpx auto;
		.loginButton
			width: 150rpx
			height: 80rpx
			font-size: 30rpx
</style>
其中,第一个button的open-type可以提示获取微信用户头像,输入框input的type可以提示获取微信用户的昵称,v-model是将输入框中的内容和自定义变量绑定,最后填充到storage中
page1的代码如下
<template>
	<view class="personal">
		<view class="header">
			<!-- 登陆状态 -->
				<template v-if="userInfo.userName">
					<image class="img" :src="userInfo.photoUrl" mode=""></image>
					<text class="login">{{userInfo.userName}}</text>
					<button class="exit" @click="exit">退出登录</button>
				</template>
			<!-- 未登陆状态 -->
				<template v-else>
					<image class="img" src="/static/images/personal/personal.png" mode=""></image>
					<text class="login" @click="toLogin">去登录</text>
				</template>
		</view>
	</view>
</template>

<script>
	export default {
		data(){
			return {
				userInfo:{}
			};
		},
		mounted() {
			//从本地存储中读取数据
			wx.getStorage({
				key:'userinfo',
				//必须用箭头函数
				success:(res)=>{
					// console.log(res);
					if(res.data)
					{
						this.userInfo=JSON.parse(res.data);
						console.log(res);
					}
				}
			})
		},
		methods:{
			toLogin(){
				//用relaunch:登陆之后不能再返回到未登陆的状态
				wx.reLaunch({
					url:'/pages/login/login'
				})
			},
			exit(){
				//清空用户信息
				wx.setStorage({
					key:'userinfo',
					data:""
				})
				//导航登录页
				wx.reLaunch({
					url:'/pages/personal/personal'
				})
			}
		}
	}
</script>

<style lang="stylus">
	.personal
		.header
			height: 300rpx
			line-height: 200rpx
			background-color: #EED785
			display: flex
			.img
				width:100rpx
				height:100rpx
				vertical-align: middle
				margin:50rpx
			.exit
				height: 70rpx
				width:300rpx
				margin: 60rpx
				//让按钮内文字居中
				line-height: 70rpx


</style>
通过v-if判断是否登陆,从而显示不同的header
在mounted中获取storage数据,设置userInfo予以填充
点击退出登录直接清空storage再刷新page1即可