需求:做一个vue2的微前端,以vue2为主应用,其他技术栈为子应用,比如vue3,本文章只是做vue2一套的微前端应用实现,之后解决的一些问题。vue3子应用可以看我另一篇vue3+vite+ts实现qiankun微前端子应用-CSDN博客
1.什么是微前端(个人理解)
比如现在的vue项目,是一个整体之后包含了多个模块(路由),之后多人开发的时候合并代码可能会造成代码冲突,打包也是全部代码一起打包。
微前端解决了这个问题,由一个主应用程序(也就是基座)之后连接多个单独的子应用程序,每个子应用程序都是单独的,你用vue写商品管理,他用react写物流管理等都可以,不同的模块可以由不同的技术栈写。打包也是单独打包。比较方便。
2.主应用
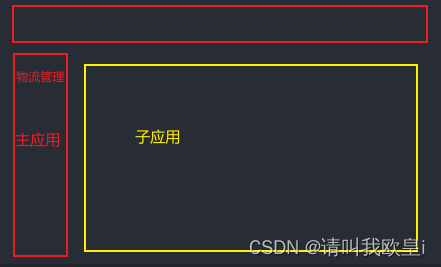
主应用就是写菜单组件的,之后再通过菜单跳转到子应用程序,差不多就这样,点击物流管理后就跳转到子应用页面了
1.创建个vue2的项目
这个我就不写了,网上一抓一大把,贴个项目创建命令
vue create main-app2.主应用下载qiankun
下最新版即可
npm install qiankun3.在main-app/src文件夹下创建main-app.js
这个micorApps就是子应用,可以配置多个子应用。但是子应用挂载的div是相同的,记住这个 container: '#test-web', // 子应用挂载的div
const microApps = [
    {
        name: 'test-web', // 子应用名称
        entry: 'http://localhost:7663/', //子应用运行地址
        activeRule: '/test-web',//匹配的路由
        sanbox: true //解决css冲突
    },
]

const apps = microApps.map(item => {
    return {
        ...item,
        container: '#test-web', // 子应用挂载的div
        props: {
            routerBase: item.activeRule // 下发基础路由
        }
    }
})

export default apps
4.在main.js中导入main-app.js
import Vue from 'vue'
import App from './App.vue'
import router from './router'
import store from './store'
Vue.config.productionTip = false
import { registerMicroApps, start } from 'qiankun';
import mainApp from './main-app'
registerMicroApps(mainApp, {
  beforeLoad: app => {
    console.log('before load app.name====>>>>>', app.name)
  },
  beforeMount: [
    app => {
      console.log('[LifeCycle] before mount %c%s', 'color: green;', app.name)
    }
  ],
  afterMount: [
    app => {
      console.log('[LifeCycle] after mount %c%s', 'color: green;', app.name)
    }
  ],
  afterUnmount: [
    app => {
      console.log('[LifeCycle] after unmount %c%s', 'color: green;', app.name)
    }
  ]
})
start()
new Vue({
  router,
  store,
  render: h => h(App)
}).$mount('#app')
5.配置主应用路由
在main-app/src文件夹下添加qiankun文件夹,并且添加index.vue文件作为入口文件
注意!!!这里的id:test-web要和 container: '#test-web', 名字一致,不然报错
<template>
  <div id="test-web"></div>
</template>

<script>
export default {
  mounted() {},
};
</script>
<style>
#test-web {
  width: 100%;
  height: 100%;
}
</style>
在router文件夹下注册qiankun路由
注意!!这边的路由模式一定要是history模式,不然获取不到子应用程序!!
path: "/test-web/*",路由的名字要和上面的 activeRule:名字一致
主要添加代码
import layout from '../views/qiankun/index.vue'
{
path: "/test-web/*",
meta: 'test-web',
component: layout
},
import Vue from "vue";
import VueRouter from "vue-router";
import HomeView from "../views/HomeView.vue";
import layout from '../views/qiankun/index.vue'
Vue.use(VueRouter);

const routes = [
  {
    path: "/",
    name: "home",
    component: HomeView,
  },
  {
    path: "/about",
    name: "about",
    // route level code-splitting
    // this generates a separate chunk (about.[hash].js) for this route
    // which is lazy-loaded when the route is visited.
    component: () =>
      import(/* webpackChunkName: "about" */ "../views/AboutView.vue"),
  },
  {
    path: "/test-web/*",
    meta: 'test-web',
    component: layout
  }
];

const router = new VueRouter({
  mode: "history",
  base: process.env.BASE_URL,
  routes,
});

export default router;
到此主应用程序配置完毕
2.子应用
1.同上,创建一个vue2的项目
名字叫sub-app
vue create sub-app2.在main.js文件添加如下代码
可以看到我注释了如下代码,并且添加了生命周期
// new Vue({
// router,
// store,
// render: h => h(App)
// }).$mount('#app')
import Vue from 'vue'
import App from './App.vue'
import router from './router'
import store from './store'
//引入public-path.js
// import "../public-path";

Vue.config.productionTip = false

// new Vue({
//   router,
//   store,
//   render: h => h(App)
// }).$mount('#app')


// 判断是否在qiankun的运行环境下,非qiankun运行环境下单独运行
if (window.__POWERED_BY_QIANKUN__) {
  // eslint-disable-next-line no-undef
  __webpack_public_path__ = window.__INJECTED_PUBLIC_PATH_BY_QIANKUN__;
}

let instance = null;
function render(props = {}) {
  const { container } = props;
  console.log(11111111111111, window.__POWERED_BY_QIANKUN__, '字段值')
  instance = new Vue({
    router,
    store,
    render: h => h(App),
  }).$mount(container ? container.querySelector('#app') : '#app', true); //开启沙箱
}

if (!window.__POWERED_BY_QIANKUN__) {
  console.log('独立运行')
  render();
}


function storeTest(props) {
  props.onGlobalStateChange &&
    props.onGlobalStateChange(
      (value, prev) => console.log(`[onGlobalStateChange - ${props.name}]:`, value, prev),
      true,
    );
  props.setGlobalState &&
    props.setGlobalState({
      ignore: props.name,
      user: {
        name: props.name,
      },
    });
}

// 各个生命周期,只会在微应用初始化的时候调用一次,下次进入微应用重新进入是会直接调用mount钩子,不会再重复调用bootstrap
export async function bootstrap() {
  console.log('111111111111 [vue] vue app bootstraped');
}
// 应用每次进入都会调用mount方法,通常在这里触发应用的渲染方法
export async function mount(props) {
  console.log('11111111111 [vue] props from main framework', props);
  storeTest(props);
  render(props);
}
// 应用每次切除/注销会调用的方法,在这里会注销微应用的应用实例
export async function unmount() {
  instance.$destroy();
  instance.$el.innerHTML = '';
  instance = null;
}
3.注册子应用路由(和平时写法一样)
添加了俩个路由页面

内容随意
<template>
  <div class="sub-app">我是子应用页面11</div>
</template>

<style lang="scss" scoped>
.sub-app {
  cursor: pointer;
  background-color: aqua;
}
</style>
在router中注册
这边基本路由地址是判断是否处在qiankun下
const router = new VueRouter({
mode: 'history',
base: window.__POWERED_BY_QIANKUN__ ? '/test-web/' : '/',
routes
})
import Vue from 'vue'
import VueRouter from 'vue-router'
import HomeView from '../views/HomeView.vue'

Vue.use(VueRouter)

const routes = [
  {
    path: '/',
    name: 'home',
    component: HomeView
  },
  {
    path: '/about',
    name: 'about',
    // route level code-splitting
    // this generates a separate chunk (about.[hash].js) for this route
    // which is lazy-loaded when the route is visited.
    component: () => import(/* webpackChunkName: "about" */ '../views/AboutView.vue')
  },
  {
    path: '/test',
    name: 'test',
    // route level code-splitting
    // this generates a separate chunk (about.[hash].js) for this route
    // which is lazy-loaded when the route is visited.
    component: () => import(/* webpackChunkName: "about" */ '../views/subapp/index.vue')
  },
  {
    path: '/testtwo',
    name: 'testtwo',
    // route level code-splitting
    // this generates a separate chunk (about.[hash].js) for this route
    // which is lazy-loaded when the route is visited.
    component: () => import(/* webpackChunkName: "about" */ '../views/subapp/two.vue')
  },
]

const router = new VueRouter({
  mode: 'history',
  base: window.__POWERED_BY_QIANKUN__ ? '/test-web/' : '/',
  routes
})

export default router
4.在vue.config.js文件添加内容(如果没有这个文件就自己在sub-app下添加一个)
这边需要注意!webpack版本5.0以下改为:jsonpFunction: `webpackJsonp_${name}`
webpack5.0以上: chunkLoadingGlobal: `webpackJsonp_${name}`
运行端口7663要和main.app.js的 entry: 'http://localhost:7663/', //子应用运行地址一致,不然获取不到子应用内容
const { name } = require('./package.json')

module.exports = {
  publicPath: '/', // 打包相对路径
  devServer: {
    port: 7663, // 运行端口号
    headers: {
      'Access-Control-Allow-Origin': '*' // 防止加载时跨域
    }
  },
  chainWebpack: config => config.resolve.symlinks(false),
  configureWebpack: {
    output: {
      library: `${name}-[name]`,
      libraryTarget: 'umd', // 把微应用打包成 umd 库格式
      // webpack5.0以上版本使用如下字段
      chunkLoadingGlobal: `webpackJsonp_${name}`
    }
  }
}
3.运行主应用和子应用
主应用的App.vue添加如下代码
<template>
  <div id="app">
    <div id="nav">
      <router-link to="/test-web/test">sub-vue1</router-link> |
      <router-link to="/test-web/testtwo">sub-testtwo</router-link> |
    </div>
    <router-view />
  </div>
</template>

<style lang="scss">
#app {
  font-family: Avenir, Helvetica, Arial, sans-serif;
  -webkit-font-smoothing: antialiased;
  -moz-osx-font-smoothing: grayscale;
  text-align: center;
  color: #2c3e50;
}

#nav {
  padding: 30px;

  a {
    font-weight: bold;
    color: #2c3e50;

    &.router-link-exact-active {
      color: #42b983;
    }
  }
}
</style>
4.效果
需要把子应用程序改为vue3+vite的可以看我另一篇vue3+vite+ts实现qiankun微前端子应用-CSDN博客
文章到此结束希望对你有所帮助~