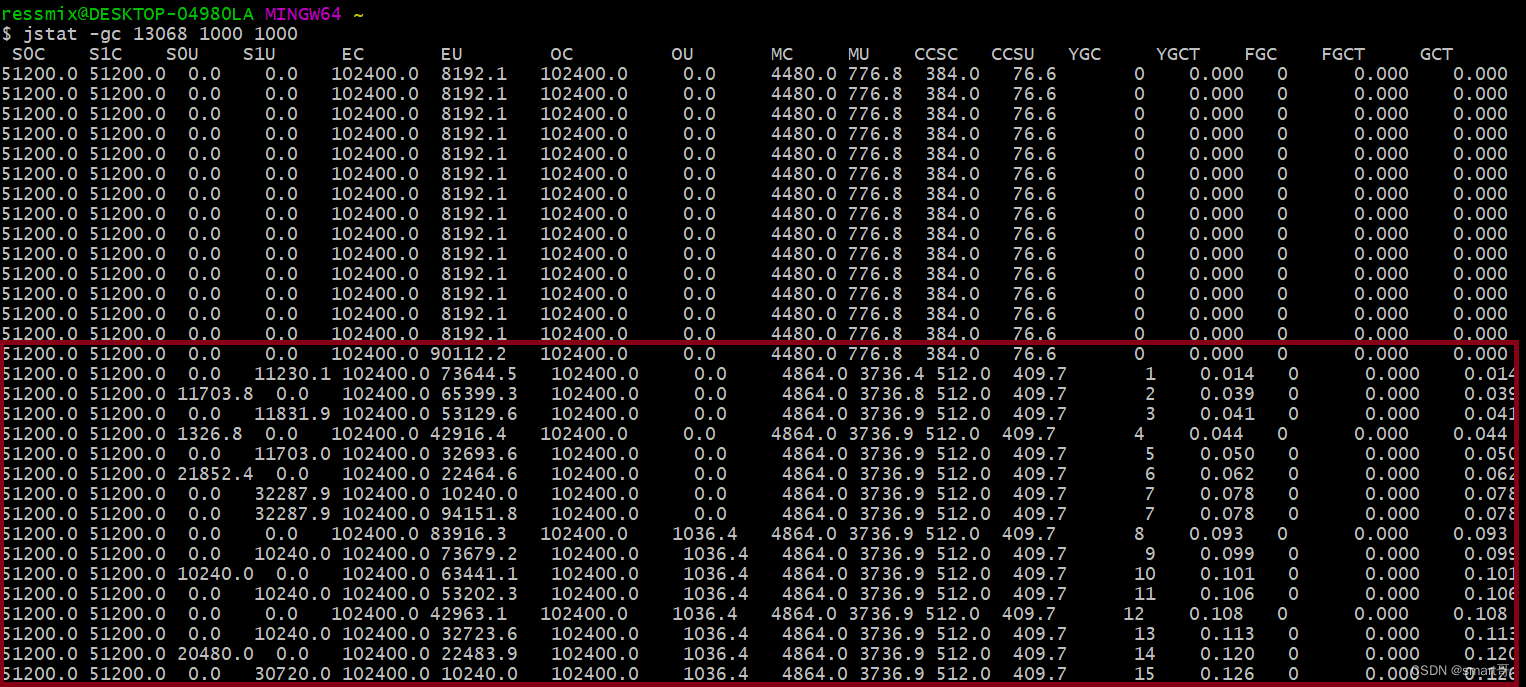
11.使用google官方提供的breakpad
地址:Android 捕获native异常
https://github.com/google/breakpad
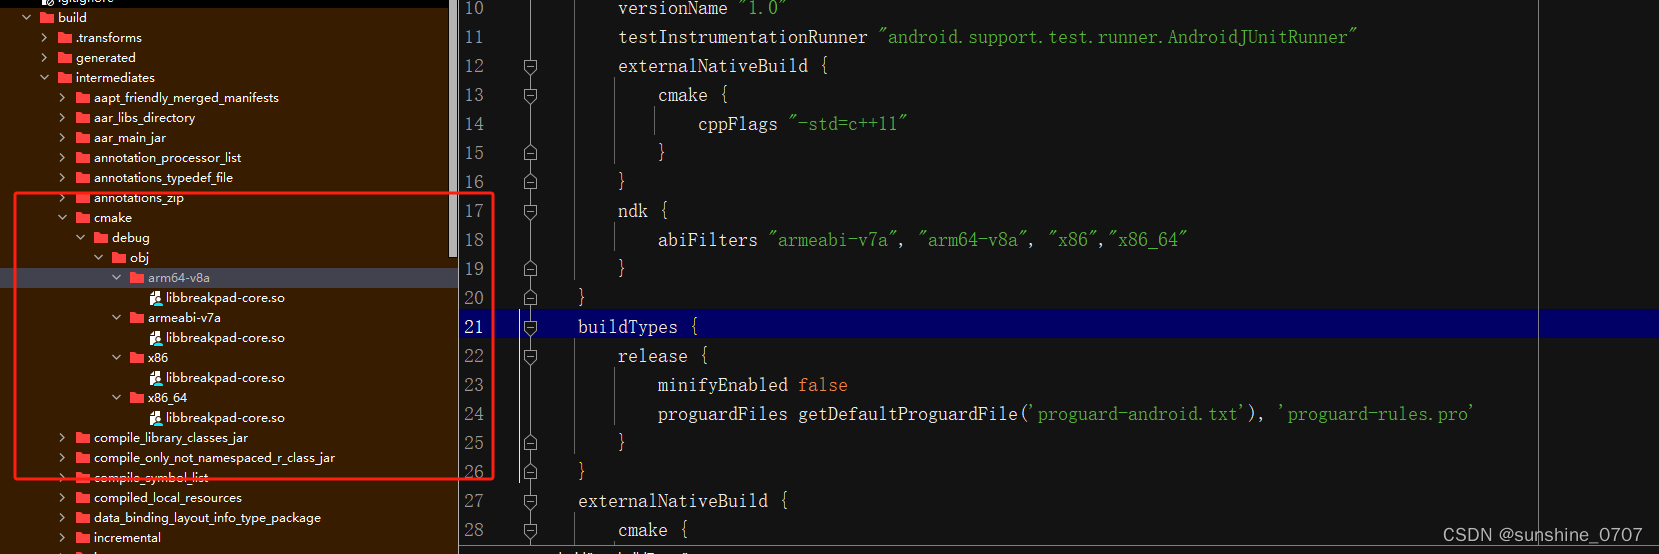
2.编译breakpad的so文件
2.1设置需要编译的架构

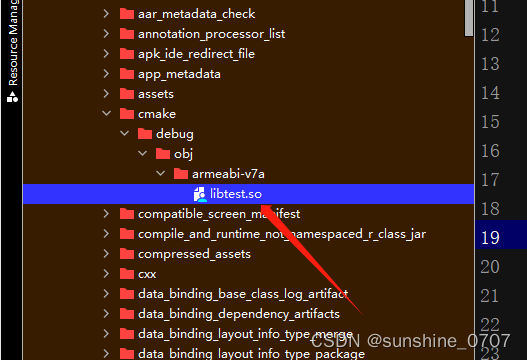
3.编译完,在build\intermediates\cmake\debug\obj目录下获取对应架构的so包
4.编译一个错误的so包,模拟native报错
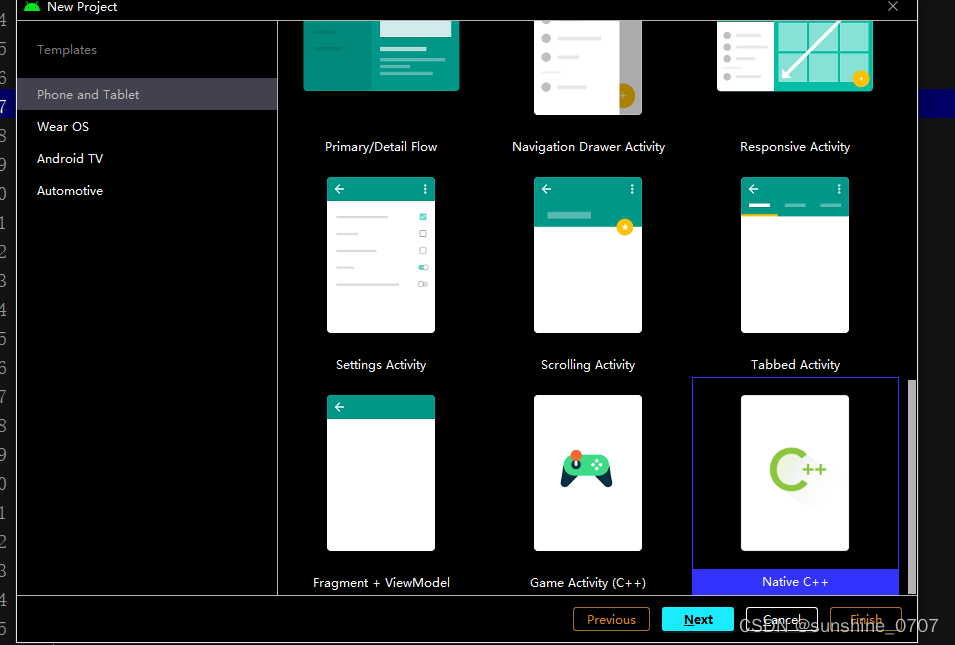
4.1 创建一个native c++项目
4.2CMakeLists.txt设置和native-lib.cpp代码
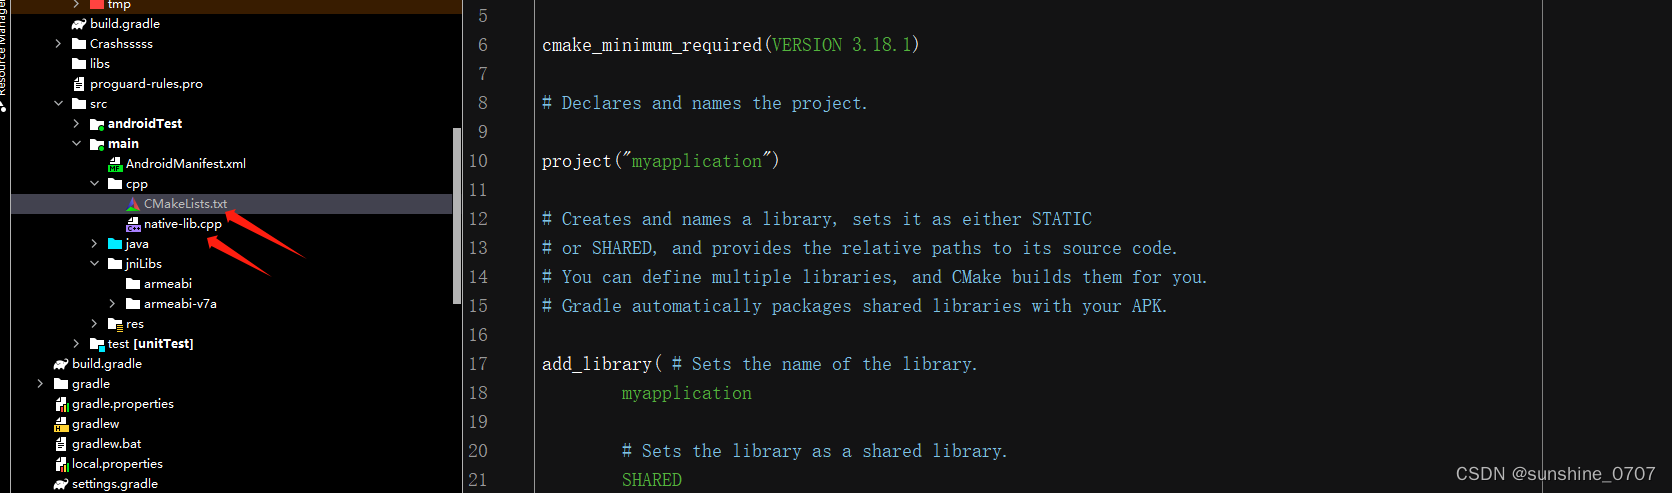
4.2.1CMakeLists.txt
# For more information about using CMake with Android Studio, read the
# documentation: https://d.android.com/studio/projects/add-native-code.html

# Sets the minimum version of CMake required to build the native library.

cmake_minimum_required(VERSION 3.18.1)

# Declares and names the project.

project("myapplication")

# Creates and names a library, sets it as either STATIC
# or SHARED, and provides the relative paths to its source code.
# You can define multiple libraries, and CMake builds them for you.
# Gradle automatically packages shared libraries with your APK.

add_library( # Sets the name of the library.
        myapplication

        # Sets the library as a shared library.
        SHARED

        # Provides a relative path to your source file(s).
        native-lib.cpp)

# Searches for a specified prebuilt library and stores the path as a
# variable. Because CMake includes system libraries in the search path by
# default, you only need to specify the name of the public NDK library
# you want to add. CMake verifies that the library exists before
# completing its build.

find_library( # Sets the name of the path variable.
        log-lib

        # Specifies the name of the NDK library that
        # you want CMake to locate.
        log)

# Specifies libraries CMake should link to your target library. You
# can link multiple libraries, such as libraries you define in this
# build script, prebuilt third-party libraries, or system libraries.

target_link_libraries( # Specifies the target library.
        myapplication

        # Links the target library to the log library
        # included in the NDK.
        ${log-lib})

set(CMAKE_C_FLAGS "${CMAKE_C_FLAGS} -m32") #设置为生成 32 位,个人demo设置
set(CMAKE_CXX_FLAGS "${CMAKE_CXX_FLAGS} -m32")#指示 C++ 编译器生成 32 位so包
set_target_properties(myapplication PROPERTIES OUTPUT_NAME "test") #设置生成so包名称
4.2.2native-lib.cpp代码
#include <jni.h>
#include <string>

extern "C" JNIEXPORT jstring JNICALL
Java_com_myapplication_MainActivity_stringFromJNI(
        JNIEnv* env,
        jobject /* this */) {
    // 人为引发一个错误
    int* ptr = nullptr;
    *ptr = 12; // 这里会导致空指针异常
    std::string hello = "Hello Word";
    return env->NewStringUTF(hello.c_str());
}
4.3设置架构
4.4编译,在\build\intermediates\cmake\debug\obj\目录下获取so库
5.测试出现native错误
5.1,将libbreakpad-core.so(google捕获native错误)和libtest.so(出现c++错误)集成到要运行的项目里
5.2初始化Breakpad
BreakpadInit.initBreakpad(File(instance.getExternalFilesDir(null), "CrashFiles").absolutePath)
public class BreakpadInit {
    static {
        System.loadLibrary("breakpad-core");
    }

    public static void initBreakpad(String path){
        initBreakpadNative(path);
    }

    private static native void initBreakpadNative(String path);
}
5.3加载错误代码
init {
    System.loadLibrary("test");
}

external fun stringFromJNI(): String?

Log.d("stringFromJNI","stringFromJNI="+stringFromJNI())
5.4在logcat,输入DEBUG可以知道具体错误

6.获取/storage/emulated/0/Android/data/包名/files/crashFiles下的dmp文件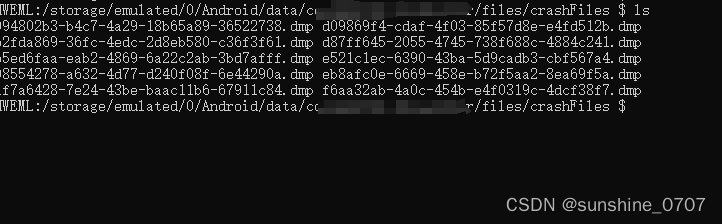
7.解析dmp文件,在breakpad源码下Breakpad-master\tools\mac获取minidump_stackwalk工具
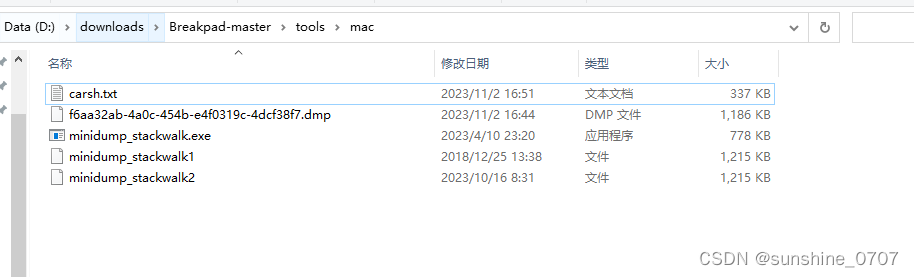
7.1切换到Breakpad-master\tools\mac目录下,运行命令minidump_stackwalk C:\Users\86138\Desktop\apk\crashFiles\d09869f4-cdaf-4f03-85f57d8e-e4fd512b.dmp >carsh.txt

会生成carsh.txt, 0 libtest.so + 0x125b8 发生的so库和寄存器信息

8.符号反解
8.1在Android SDK目录下,找到addr2line工具
8.2我测试的so库是32位的,选择是D:\android-ndk-r10e\toolchains\arm-linux-androideabi-4.8\prebuilt\windows-x86_64\bin下的addr2line工具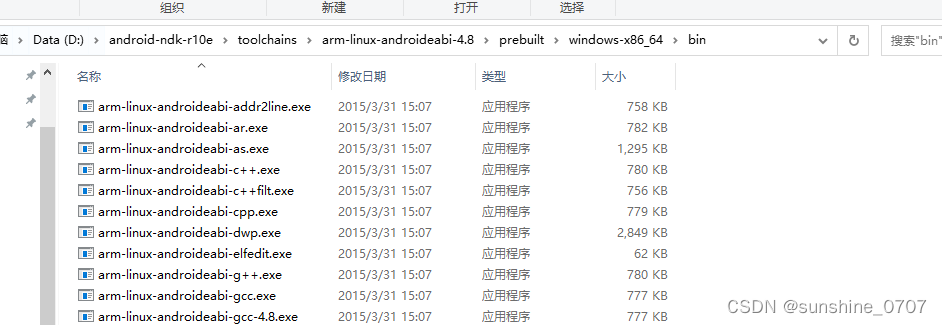
8.3 根据前面的位置和寄存器信息,反解
arm-linux-androideabi-addr2line.exe -f -C -e C:\Users\86138\Desktop\apk\crashFiles\libtest.so 0x125b8得到具体的代码位置