uni-app代码编写,基本语言包括js、vue、css。以及ts、scss等css预编译器。
新建项目等基础指路:
关于uni-app的下载及使用-CSDN博客
1.vue文件
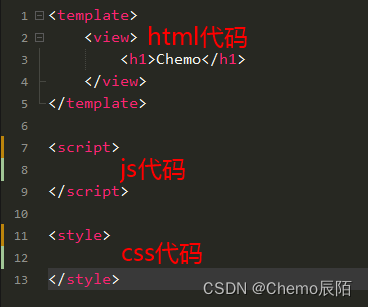
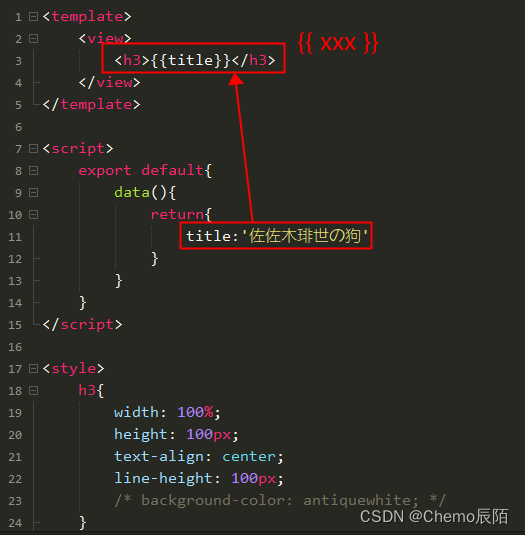
由三个一级节点组成,分别是template、script、style
<template>
</template>

<script>
</script>

<style>
</style>
简单理解就如下图所示
2. 插值
用 {{ }} 进行文本插值。 就是将数据展示到模板(template)中。
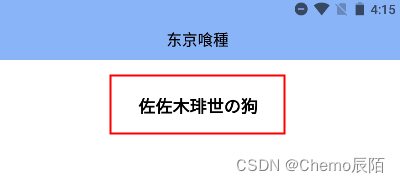
运行结果 ---> 浏览器&手机模拟器

3.指令
带有 v- 前缀的特殊 attribute。指令 attribute 的值预期是单个 JavaScript 表达式 。指令的职责是,当表达式的值改变时,将其产生的连带影响,响应式地作用于 DOM。
常用的举例说明一下
- v-bind,缩写为“ :”,用于响应式地更新 HTML attribute
<!-- 完整语法 -->
<a v-bind:href="url">...</a>

<!-- 缩写 -->
<a :href="url">...</a>

<!-- 动态参数的缩写 (2.6.0+) -->
<a :[key]="url"> ... </a>
可以用修饰符指定不同的绑定类型。比如 class和style,可以实现动态的切换状态。


参考代码
<template>
	<view class="con">
		<h3 v-bind:class="{active:isActive}">教堂的白鸽不会亲吻乌鸦</h3>
	</view>
</template>

<script>
	export default{
		data(){
			return{
				isActive:false,
			}
		}
	}
</script>

<style>
	.con{
		width: 100%;
		height: 100px;
		text-align: center;
		line-height: 100px;
		margin: 20px 0;

	}
	.active{
		background-color: antiquewhite;
	}
</style>- v-on指令,缩写为“ @ ”,它用于监听 DOM 事件
<!-- 完整语法 -->
<a v-on:click="doSomething">...</a>

<!-- 缩写 -->
<a @click="doSomething">...</a>

<!-- 动态参数的缩写 (2.6.0+) -->
<a @[event]="doSomething"> ... </a> 

参考代码
<template>
<view class="con">
<h3 v-bind:class="{active:isActive}">教堂的白鸽不会亲吻乌鸦</h3>
<button v-on:click="add">点击</button>
</view>
</template>
<script>
export default{
data(){
return{
isActive:false,
}
},
methods:{
add(){
console.log("触发click事件")
this.isActive=true
}
}
}
</script>
<style>
.con{
width: 100%;
height: 100px;
text-align: center;
line-height: 100px;
margin: 20px 0;
}
button{
width: 100px;
}
.active{
background-color: antiquewhite;
}
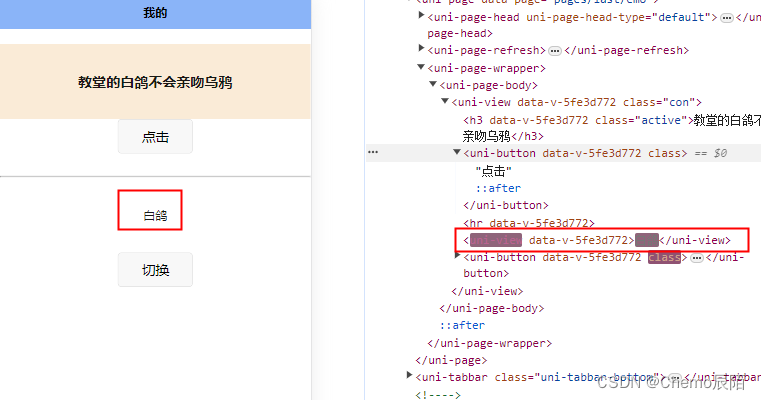
</style>4.条件渲染
v - if 指令用于条件性地渲染一块内容。这块内容只会在指令的表达式返回真值的时候被渲染。 也可以用 v - else 添加一个“else 块”。


参考代码
<template>
	<view class="con">
		<h3 v-bind:class="{active:isActive}">教堂的白鸽不会亲吻乌鸦</h3>
		<button v-on:click="add">点击</button>

		<hr />

		<view v-if="see">白鸽</view>
		<view v-else>乌鸦</view>
		<button @click="change">切换</button>
	</view>
</template>

<script>
	export default{
		data(){
			return{
				isActive:false,
				see:true
			}
		},
		methods:{
			add(){
				console.log("触发click事件")
				this.isActive=true
			},
			change(){
				this.see = !this.see
			}
		}
	}
</script>

<style>
	.con{
		width: 100%;
		height: 100px;
		text-align: center;
		line-height: 100px;
		margin: 20px 0;

	}
	button{
		width: 100px;
		margin-bottom: 30px;
	}
	.active{
		background-color: antiquewhite;
	}
</style>
v - else 元素必须紧跟在带 v - if 或者 v-else-if 的元素的后面,否则它将不会被识别。
如果想切换多个元素,可以把一个 template 元素当做不可见的包裹元素,并在上面使用 v-if。
5.列表渲染
v - for 基于一个数组来渲染一个列表。
v - for指令需要使用 item,index in items 形式的特殊语法,其中 items 是源数据数组,而 item 则是被迭代的数组元素的别名。
index 当前项的索引(从0开始)。
渲染列表

参考代码
<template>
	<view>
		<h1>19870504</h1>
		<view v-for="item,index in array" class="num1">
			 {{index + 1}} : {{item}}
		</view>
	</view>
</template>

<script>
	export default {
		data(){
			return{
				array:[1987,123,234,345,456,567,678,789]
			}
		}
	}
</script>

<style scoped>
	h1{
		width: 100%;
		height: 300px;
		text-align: center;
		line-height: 300px;
		color: #5ccf66;
	}

	.num1{
		margin: 30px 50px;
	}
</style>
渲染数组

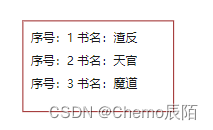
参考代码
<template>
	<view>
		<view class="box">
			<view v-for="item,index in list" class="num2">
				序号:{{item.id}}
				书名:{{item.name}}
			</view>
		</view>
	</view>
</template>

<script>
	export default {
		data(){
			return{
				list:[
					{id:1,name:"渣反"},
					{id:2,name:"天官"},
					{id:3,name:"魔道"}
				],
			}
		}
	}
</script>

<style scoped>
	.box{
		width: 200px;
		height: 120px;
		margin: 20px 50px;
		border: 1px solid darkred;
	}
	.num2{
		margin: 10px;
	}
</style>
渲染对象
语法是 v - for = “(value, name, index) in object”
value是属性值;name是属性名;index是索引(从0开始)
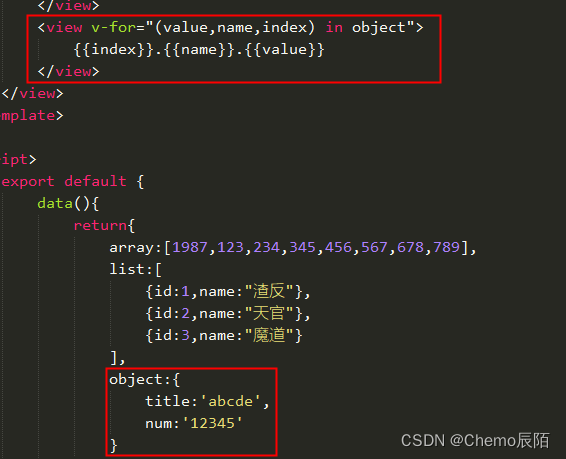
参考代码
<template>
<view>
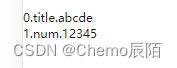
<view v-for="(value,name,index) in object">
{{index}}.{{name}}.{{value}}
</view>
</view>
</template>
<script>
export default {
data(){
return{
object:{
title:'abcde',
num:'12345'
}
}
}
}
</script>
在组件上使用 v - for 时,key是必须有的
这是完整代码及效果图
<template>
	<view>
		<h1>19870504</h1>
		<view v-for="item,index in array" class="num1">
			 {{index + 1}} : {{item}}
		</view>
		<view class="box">
			<view v-for="item,index in list" class="num2" :key="item.id">
				序号:{{item.id}}
				书名:{{item.name}}
			</view>
		</view>
		<view v-for="(value,name,index) in object">
			{{index}}.{{name}}.{{value}}
		</view>
	</view>
</template>

<script>
	export default {
		data(){
			return{
				array:[1987,123,234,345,456,567,678,789],
				list:[
					{id:1,name:"渣反"},
					{id:2,name:"天官"},
					{id:3,name:"魔道"}
				],
				object:{
					title:'abcde',
					num:'12345'
				}
			}
		}
	}
</script>

<style scoped>
	h1{
		width: 100%;
		height: 120px;
		text-align: center;
		line-height: 120px;
		color: #5ccf66;
	}

	.num1{
		margin: 30px 50px;
	}
	.box{
		width: 200px;
		height: 120px;
		margin: 20px 50px;
		border: 1px solid darkred;
	}
	.num2{
		margin: 10px;
	}
</style>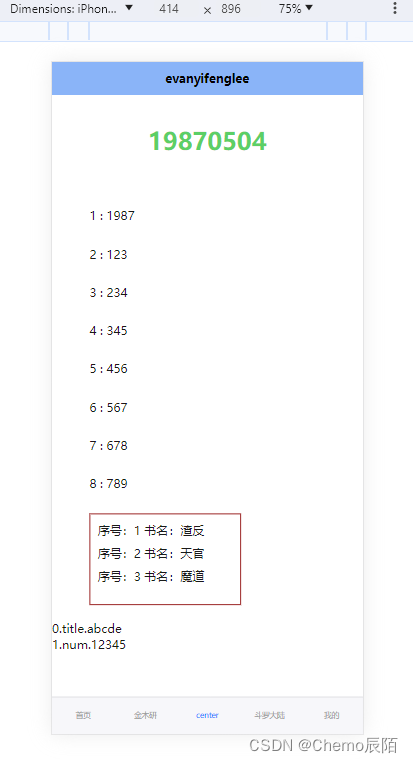
组件及组件库使用会后续更新,欢迎指正


![Spring MVC框架支持RESTful,设计URL时可以使用{自定义名称}的占位符@Get(“/{id:[0-9]+}/delete“)](https://img-blog.csdnimg.cn/direct/2ee1008dffda49108d2bc419a2865341.png)