学习使用html2canvas生成渐变色背景图片
- 全部代码
- html2canvas官网
- 生成图片的下载
全部代码
<!DOCTYPE html>
<html>
<head>
<meta charset="utf-8">
<title>生成渐变色背景图片</title>
</head>
<style>
#grad1 {
width: 750px;
padding: 32px;
margin: 50px auto;
background: linear-gradient(180deg, #D24A3C 0%, #B52A61 100%);
}
p {
margin: 0px;
}
h2 {
color: #ffffff;
font-size: 40px;
line-height: 80px;
margin: 0px;
}
h3 {
color: #ffffff;
font-size: 35px;
line-height: 70px;
margin: 0px;
}
.bill_content {
border: 1px solid;
border-color: #E8E5DC;
color: #ffffff;
font-size: 30px;
padding-left: 32px;
padding-right: 32px;
line-height: 60px;
margin: 0px;
}
</style>
<script src="./js/html2canvas1.4.1.js"></script>
<script>
function taskScreenshort() {
html2canvas(document.getElementById("grad1"), {
allowTaint: true
}).then(canvas => {
document.getElementById("item").setAttribute('src', canvas.toDataURL());
})
}
</script>
<body>
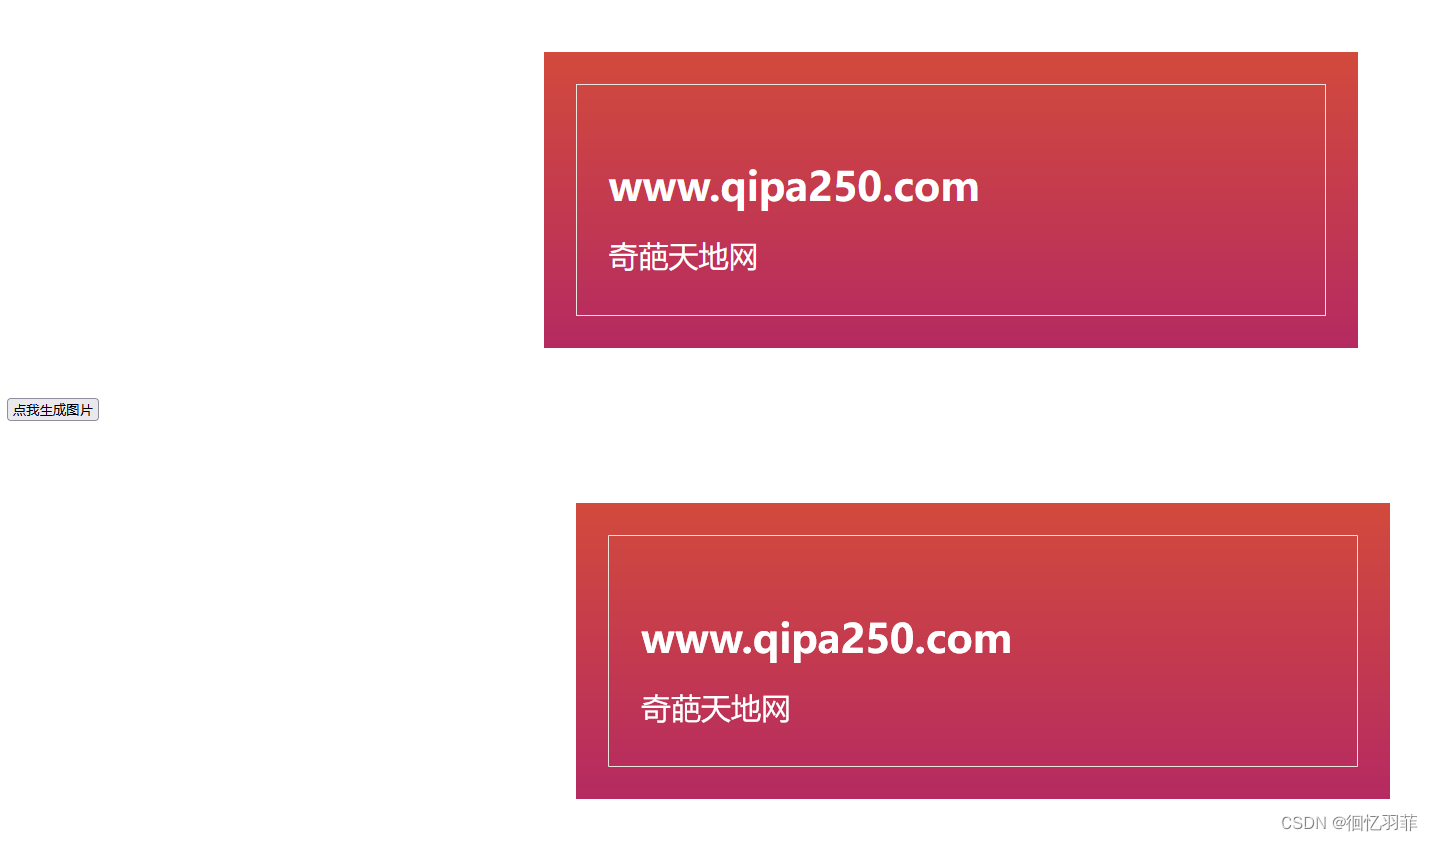
<div id="grad1">
<div class="bill_content">
<div style="height: 60px"></div>
<h2>www.qipa250.com</h2>
<p>奇葩天地网</p>
<div style="height: 30px"></div>
</div>
</div>
<input type="button" value="点我生成图片" onclick="taskScreenshort()"/>
<div style=" width: 750px;
padding: 32px;
margin: 50px auto;">
<img id="item"/>
</div>
</body>
</html>
html2canvas官网
html2canvas官网http://html2canvas.hertzen.com/
js文件下载下来保存就好了
生成图片的下载
点击截图按钮,会在按钮下方显示一张图片,右键另存为本地即可


![2022-12-29 [整理]flex弹性布局](https://img-blog.csdnimg.cn/8298c8d279fa4e6790f3693dc064d942.png#pic_center)
![[年终总结]满意但不满足](https://img-blog.csdnimg.cn/0197bbc7def241d9bf419e34f8402a3a.jpeg#pic_center)