这里是weihubeats,觉得文章不错可以关注公众号小奏技术,文章首发。拒绝营销号,拒绝标题党
背景
最近在研究缓存框架,打算写一个多级缓存框架的sdk。所以想借鉴(抄袭)下spring的缓存框架的实现
spring cache reids
spring cache对各种缓存进行了整合抽象。核心的接口是CacheManager
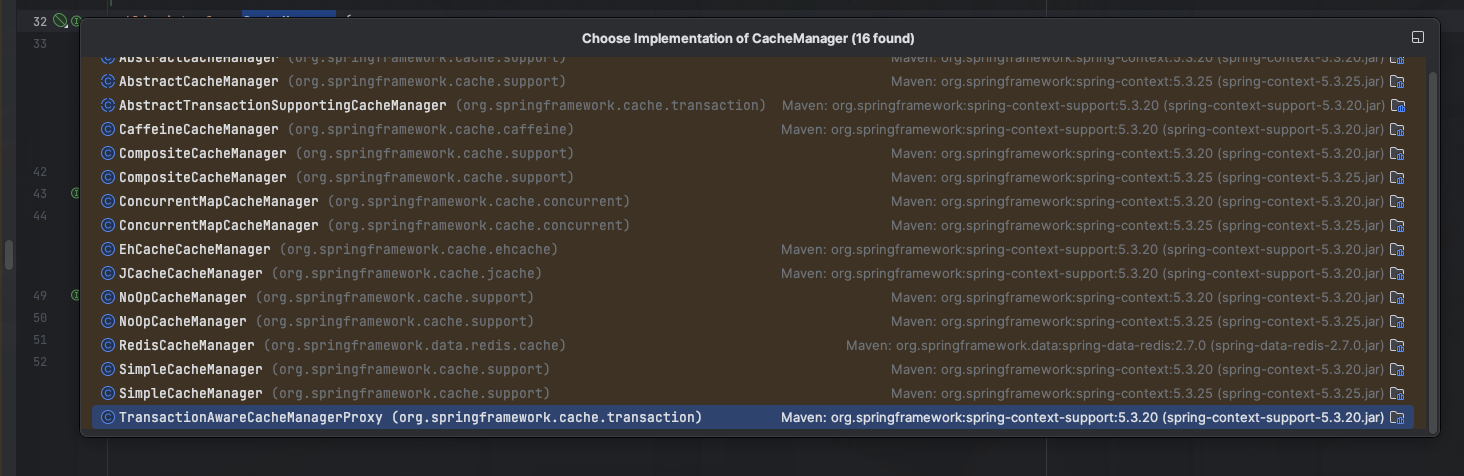
可以看到有很多CacheManager的实现,之前写过本地缓存Caffeine的分布式扩展。其中使用的就是SimpleCacheManager
今天来看看spring boot是如何自动整合装配redis实现缓存的
整合实战
- spring boot version: 2.7.0
- 引入依赖
         <dependency>
            <groupId>org.springframework.boot</groupId>
            <artifactId>spring-boot-starter-data-redis</artifactId>
        </dependency>
- 添加CacheConfig配置
@Configuration(proxyBeanMethods = false)
public class CacheConfig {

    @Bean
    public RedisCacheConfiguration cacheConfiguration() {
        return RedisCacheConfiguration.defaultCacheConfig()
            .entryTtl(Duration.ofMinutes(60))
            .disableCachingNullValues()
            .serializeValuesWith(RedisSerializationContext.SerializationPair.fromSerializer(new GenericJackson2JsonRedisSerializer()));
    }

    @Bean
    public RedisCacheManagerBuilderCustomizer redisCacheManagerBuilderCustomizer() {
        return (builder) -> builder
            .withCacheConfiguration("student",
                RedisCacheConfiguration.defaultCacheConfig().entryTtl(Duration.ofMinutes(10)))
            .withCacheConfiguration("customerCache",
                RedisCacheConfiguration.defaultCacheConfig().entryTtl(Duration.ofMinutes(5)));
    }


}
- 添加redis配置
spring:
  redis:
    host: 127.0.0.1
    port: 6379
    password: 123456
    database: 1
这里随便配置了两个缓存,一个名字叫student,一个叫customerCache
- 使用
@RestController
@Slf4j
@RequiredArgsConstructor
public class TestController {

    @GetMapping("/test")
    @Cacheable(value = "student")
    public  List<StudentVO> test(String name) {
        return mockSelectSql();
    }

    private List<StudentVO> mockSelectSql() {
        log.info("开始查询数据");
        List<StudentVO> studentVOS = Lists.newArrayList(new StudentVO(1L, "小奏技术", 18), new StudentVO(2L, "小奏技术1", 19));
        return studentVOS;
    }

}
可以看到使用spring cache提供的@Cacheable就自动整合上了。是不是非常简单
我们来简单看一下源码吧
实现原理
我们来探究下引入spring-boot-starter-data-redis是如何完成自动装配的
我们首先看看CacheManager的实现吧
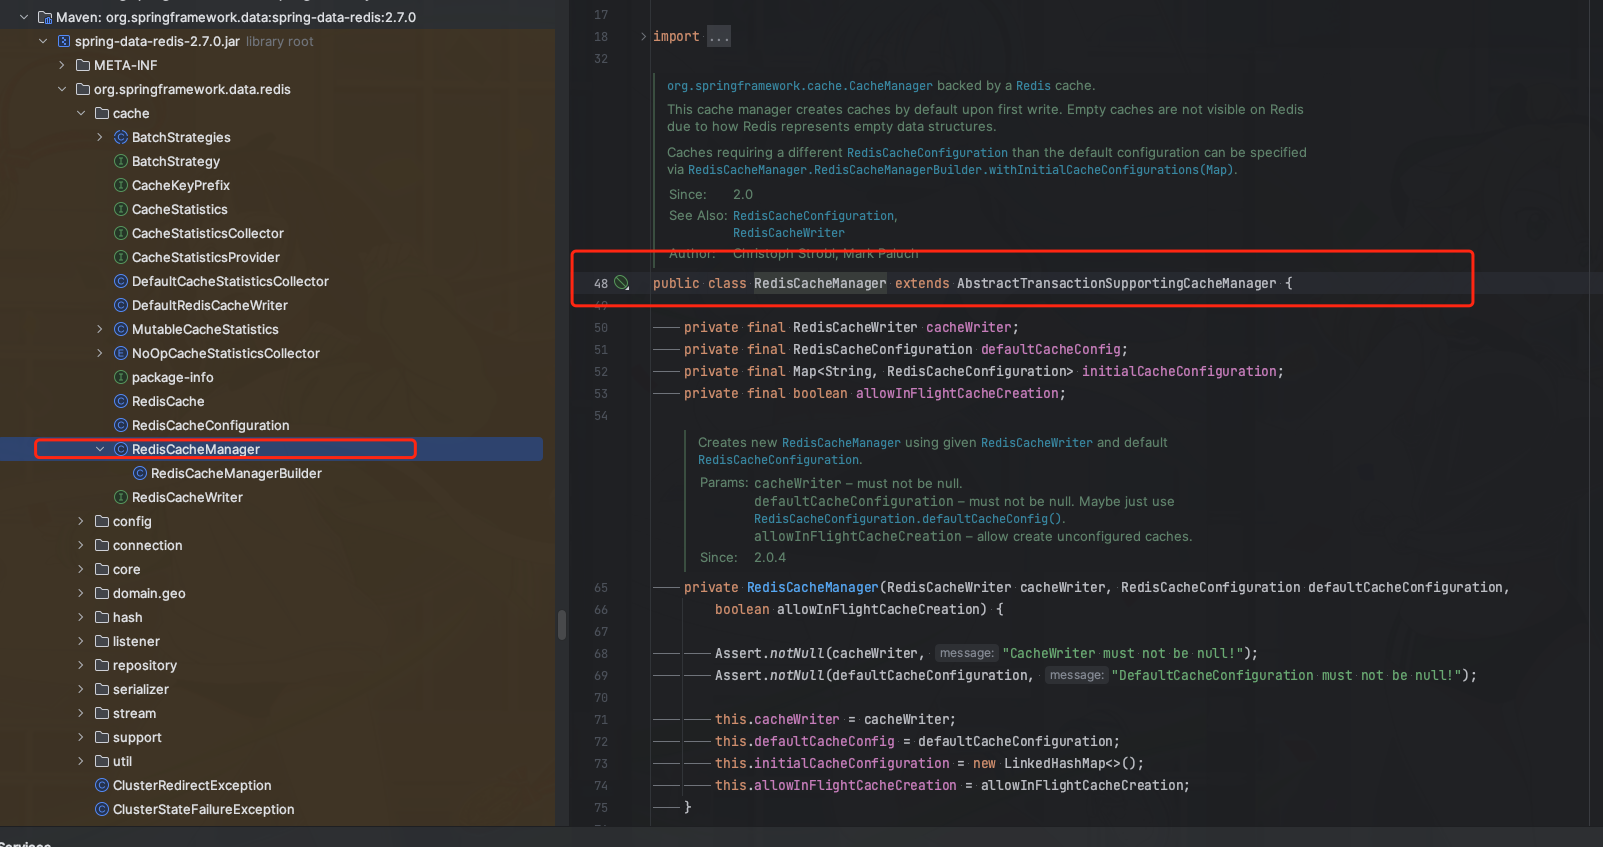
可以看到spring-boot-starter-data-redis中有一个RedisCacheManager
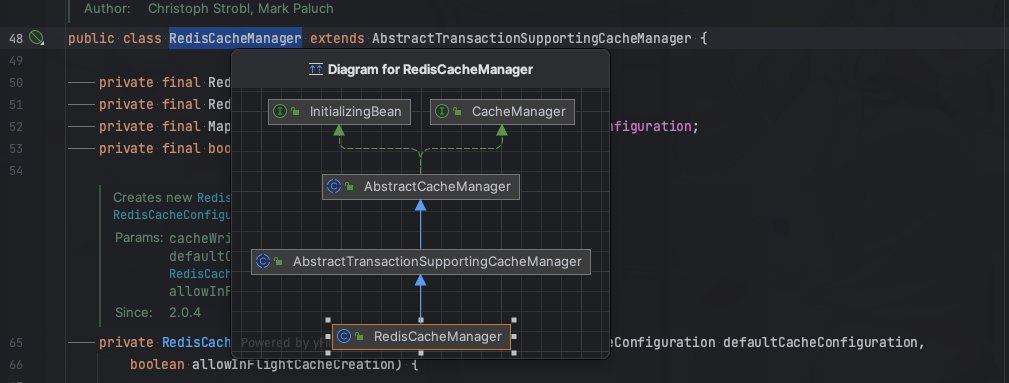
RedisCacheManager实现了CacheManager,那么RedisCacheManager是如何自动装配的呢
在spring-boot-autoconfigure中存在RedisCacheConfiguration这个类
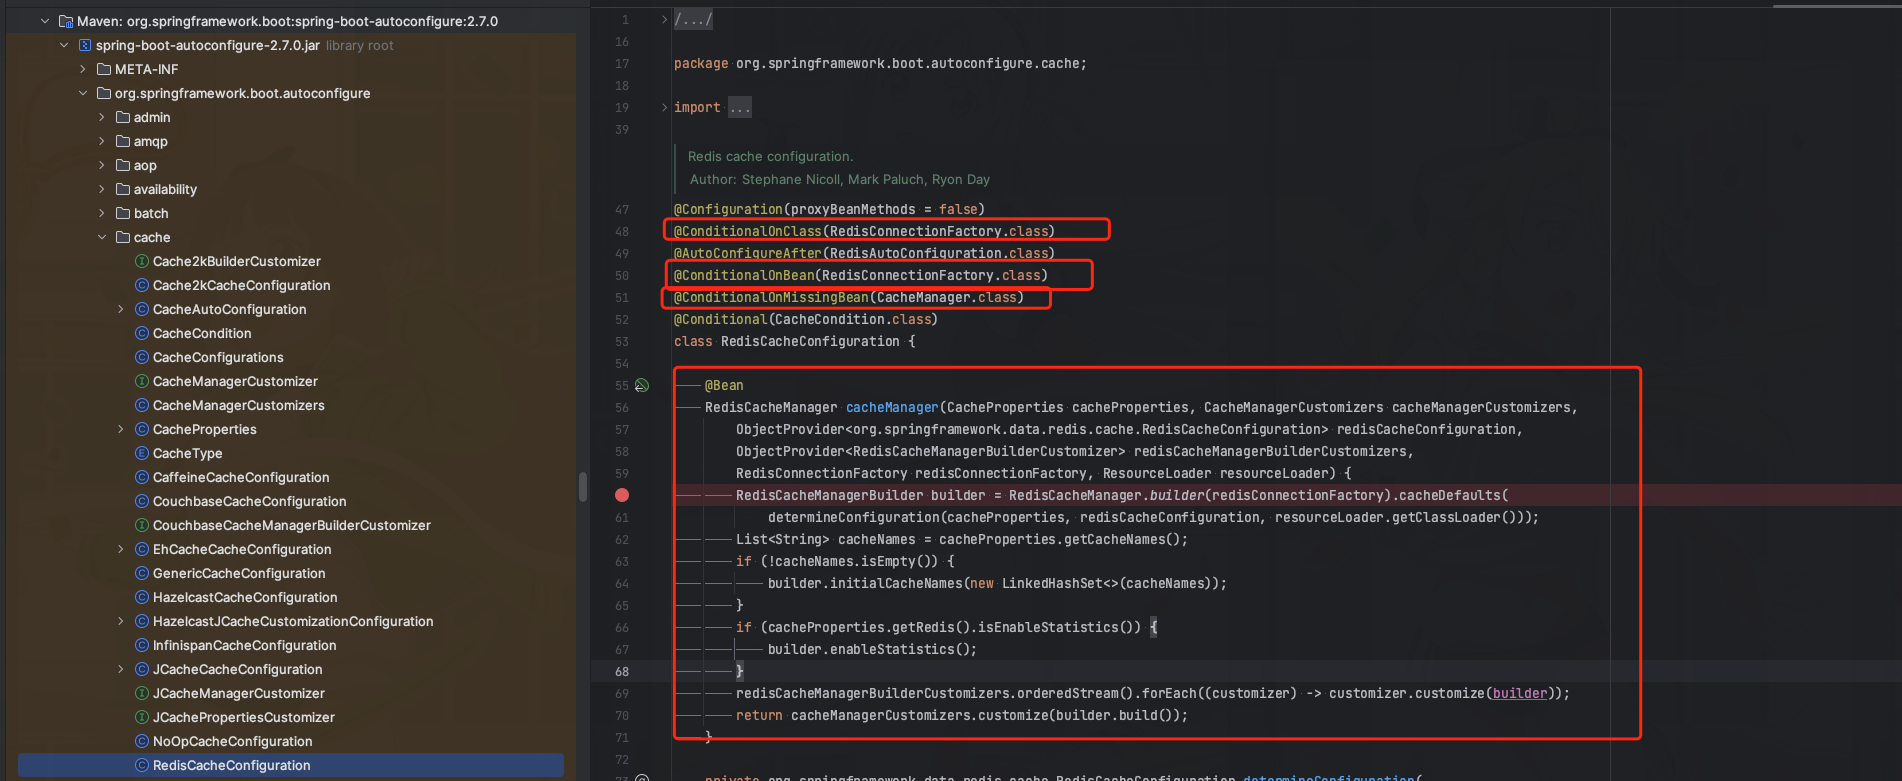
如果你没有配置CacheManager这个bean,并且存在RedisConnectionFactory这个bean和class就会出发RedisCacheConfiguration的自动装配
而RedisConnectionFactory则存在于spring-boot-starter-data-redis中
有两个实现

这里我们就不继续深入追踪了,已经可以看到RedisCacheManager是如何自动装配的
而spring cache中对CacheManager进行了封装。所有的缓存操作都由CacheManager去实现。
所以底层你要实现自己的cache逻辑或者说各种不同的cache,核心是实现自己的CacheManager
至于缓存的维护,还记得我们配置的缓存吗
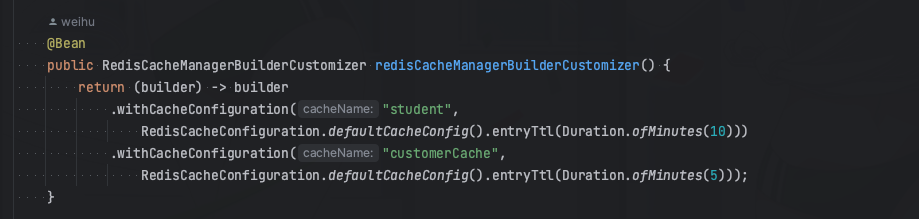
这里的RedisCacheManagerBuilderCustomizer实际是一个函数式接口。
真正的执行逻辑还是在withCacheConfiguration

都丢在一个map里面
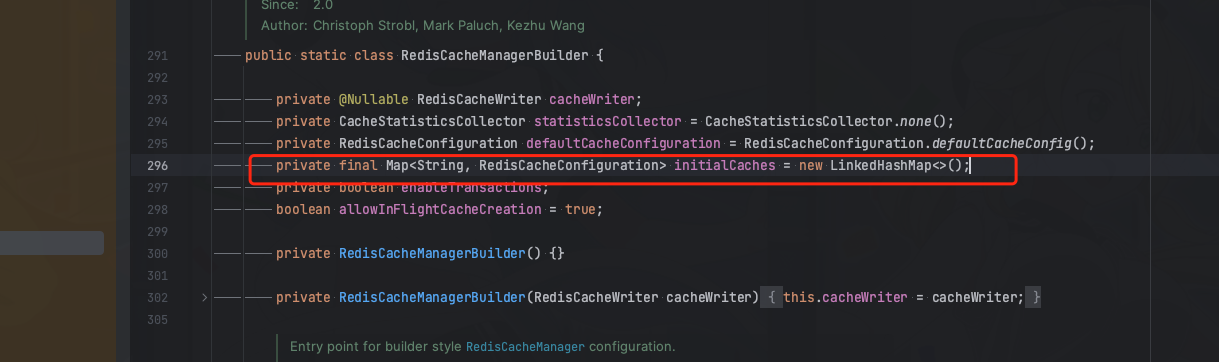
最终将这个map传入到RedisCacheManager中
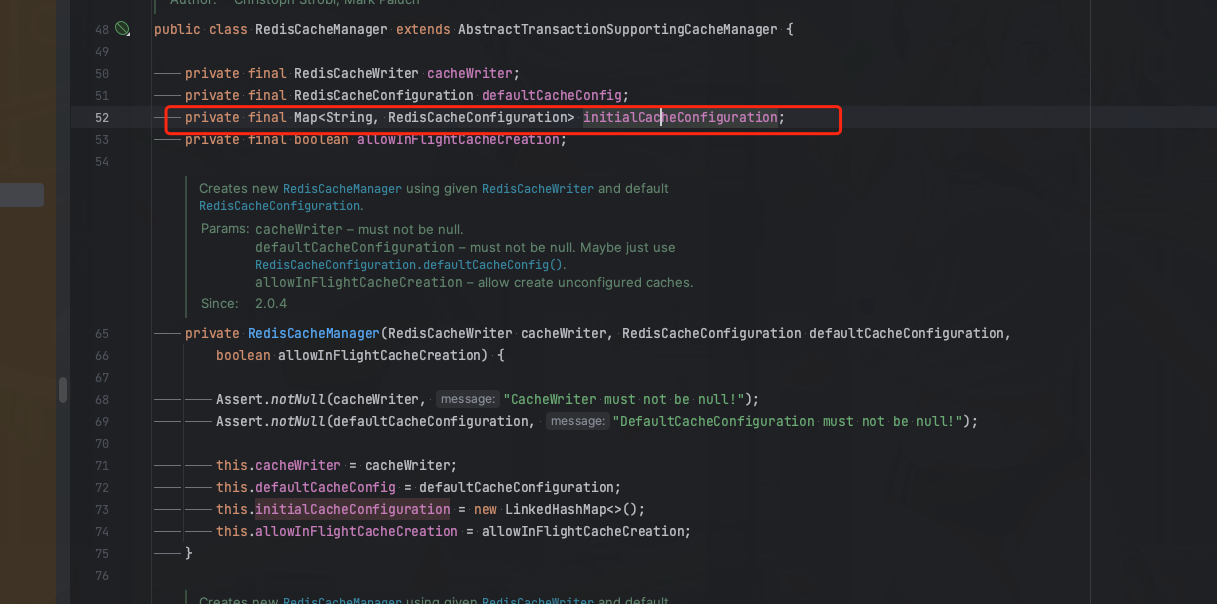
而Spring中缓存的抽象类AbstractCacheManager就有一个抽象方法loadCaches
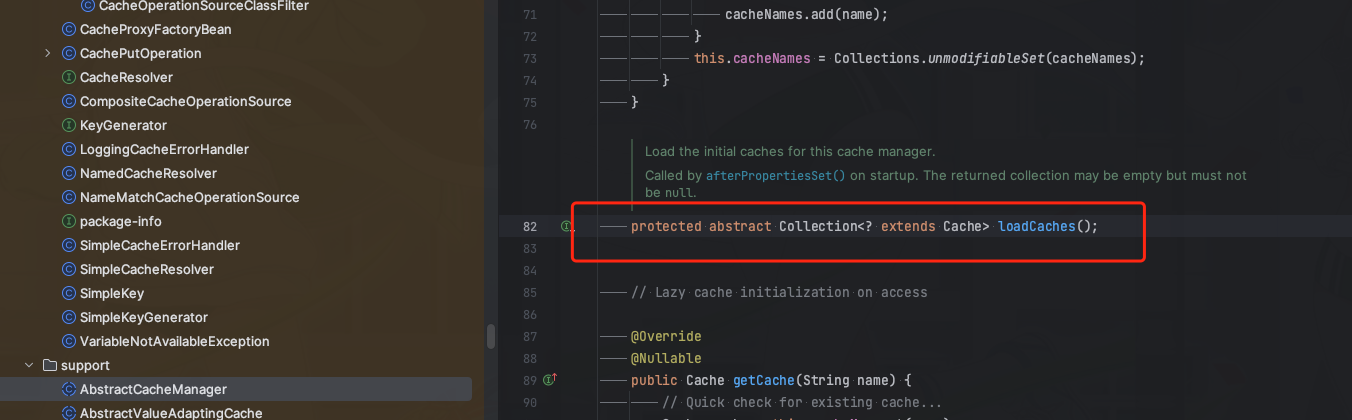
用来实现缓存的加载的,最终reids的缓存配置加载就是通过重写loadCaches
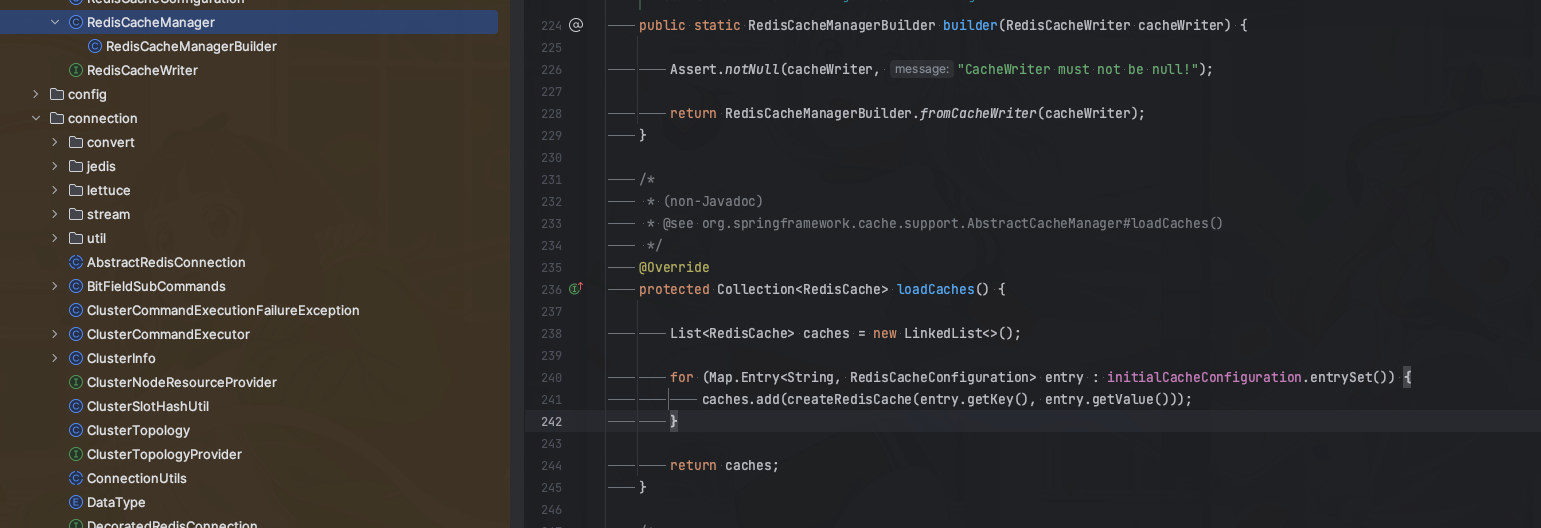
而RedisCache则实现了Cache接口
从而实现redis的各种缓存操作。spring cache就是操作Cache
自此大致分析了spring-boot-starter-data-redis是如何自动整合spring cache的
源码
- spring-boot-cache-redis:https://github.com/weihubeats/weihubeats_demos/blob/master/spring-boot-demos/spring-boot-cache-redis/pom.xml


![[译]原生CSS嵌套使用](https://img-blog.csdnimg.cn/img_convert/82d266d164422ea295dc71be04f179e7.png)