之前分享过一篇vue3+ts+vite构建工程化项目的文章,针对小的开发团队追求开发速度,不想使用ts想继续使用js,所以就记录一下从0搭建一个vite+vue3+js的前端项目,做记录分享。
技术栈
-
Vite 3 - 构建工具
-
Vue 3
-
Vue Router - 官方路由管理器
-
Pinia - Vue Store你也可以选择vuex
-
element-plus - UI组件库
-
Sass - CSS 预处理器
-
Axios - 一个基于 promise 的网络请求库,可以用于浏览器和 node.js
-
Vscode - 一个还挺好用的开发工具
一、项目的基础搭建
1、构建有多种方式,本次示例选择vue 官方脚手架工具create-vue 构建的
(1)使用vite的方式,构建一个基础模板
# npm 6.x
npm create vite@latest my-vue-app --template vue

# npm 7+, extra double-dash is needed:
npm create vite@latest my-vue-app -- --template vue

# yarn
yarn create vite my-vue-app --template vue

# pnpm
pnpm create vite my-vue-app --template vue
(2)使用vue官方脚手架,本教程使用此方式
npm init vue@latest
二、安装UI组件库
安装css预处理器sass
npm install -D sass
或
npm add -D sass
1、在项目中安装element-plus
# NPM
$ npm install element-plus --save

# Yarn
$ yarn add element-plus

# pnpm
$ pnpm install element-plus2、在mian.ts中引入并配置element-plus(完整引入)element-plus连接
import { createApp } from "vue";
import { createPinia } from "pinia";
import ElementPlus from "element-plus";
import "element-plus/dist/index.css";
import App from "./App.vue";
import router from "./router";

import "./assets/main.css";

const app = createApp(App);

app.use(createPinia());
app.use(router);

app.use(ElementPlus);

app.mount("#app");
3、按需导入,自动导入(推荐,此教程使用此方法)以下摘自element
首先你需要安装unplugin-vue-components 和 unplugin-auto-import这两款插件
npm install -D unplugin-vue-components unplugin-auto-import然后把下列代码插入到你的 Vite 或 Webpack 的配置文件中
Vite
// vite.config.ts
import { defineConfig } from 'vite'
import AutoImport from 'unplugin-auto-import/vite'
import Components from 'unplugin-vue-components/vite'
import { ElementPlusResolver } from 'unplugin-vue-components/resolvers'
export default defineConfig({
// ...
plugins: [
// ...
AutoImport({
resolvers: [ElementPlusResolver()],
}),
Components({
resolvers: [ElementPlusResolver()],
}),
],
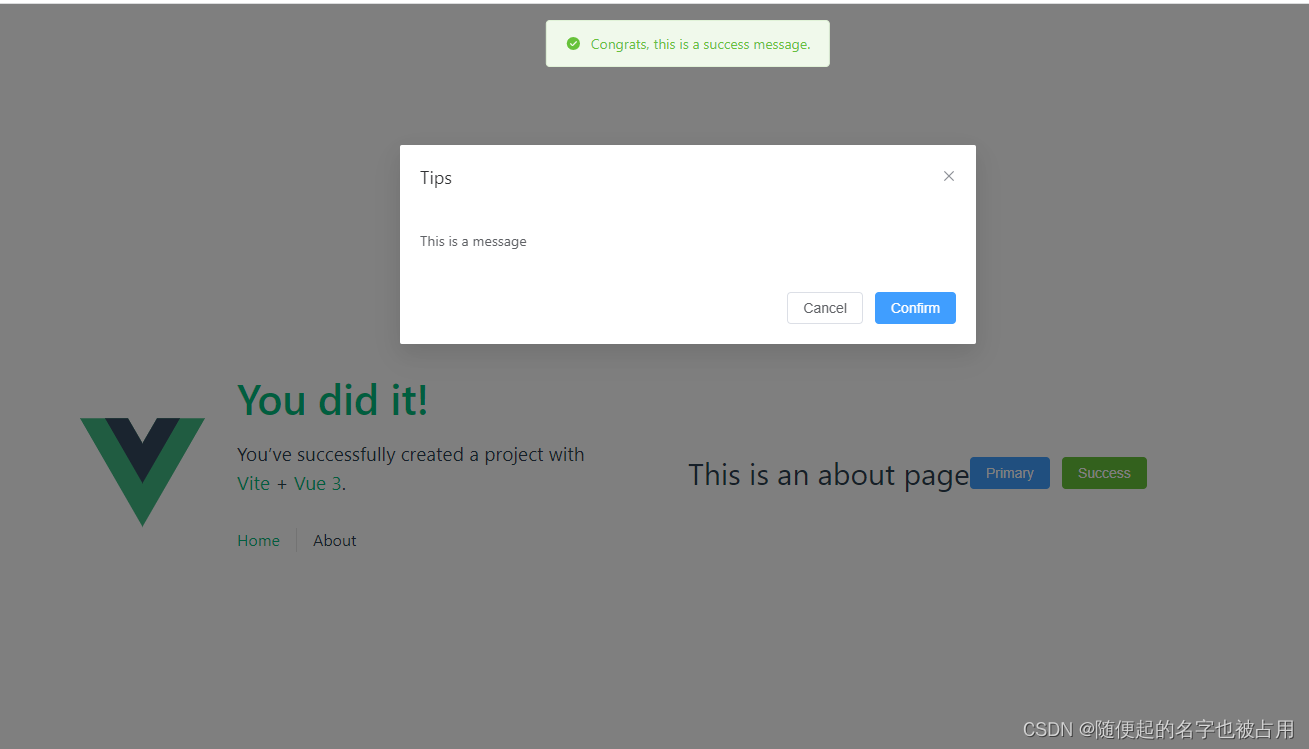
})4、在组件中使用
<template>
  <div class="about">
    <h1>This is an about page</h1>
    <el-button type="primary" @click="alertFun">Primary</el-button>
    <el-button type="success">Success</el-button>
  </div>

  <el-dialog v-model="dialogVisible" title="Tips" width="30%" :before-close="handleClose">
    <span>This is a message</span>
    <template #footer>
      <span class="dialog-footer">
        <el-button @click="dialogVisible = false">Cancel</el-button>
        <el-button type="primary" @click="dialogVisible = false">
          Confirm
        </el-button>
      </span>
    </template>
  </el-dialog>
</template>
<script setup>
let dialogVisible = ref(false)
const handleClose = () => {
  ElMessageBox.confirm('Are you sure to close this dialog?')
    .then(() => {
      done()
    })
    .catch(() => {
      // catch error
    })
}
const alertFun = () => {
  ElMessage({
    message: 'Congrats, this is a success message.',
    type: 'success',
  })
  dialogVisible.value = true
}
</script>
<style>
@media (min-width: 1024px) {
  .about {
    min-height: 100vh;
    display: flex;
    align-items: center;
  }
}
</style>
效果:
5、全局配置elementPlus size 和 zIndex 语言等
<template>
  <!-- 汉化 element -->
  <el-config-provider :locale="zhCn" :size="elSize" :z-index="zIndex">
    <RouterView />
  </el-config-provider>
</template>

<script setup>
import zhCn from "element-plus/es/locale/lang/zh-cn";
const zIndex = 3000, elSize = 'default';

</script>
<style scoped></style>