python-opencv划痕检测
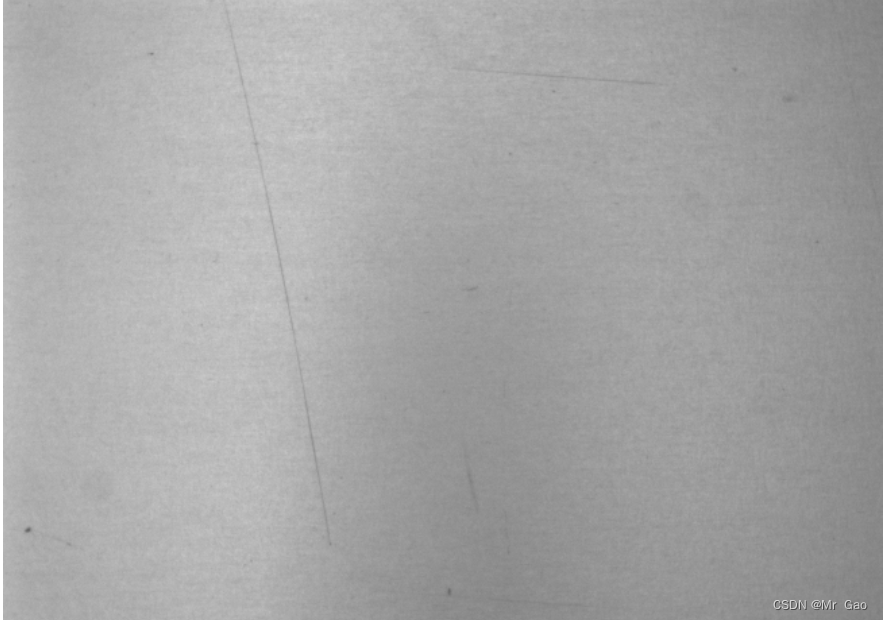
这次实验,我们将对如下图片进行划痕检测,其实这个比较有难度,因为清晰度太差了。
我们做法如下:
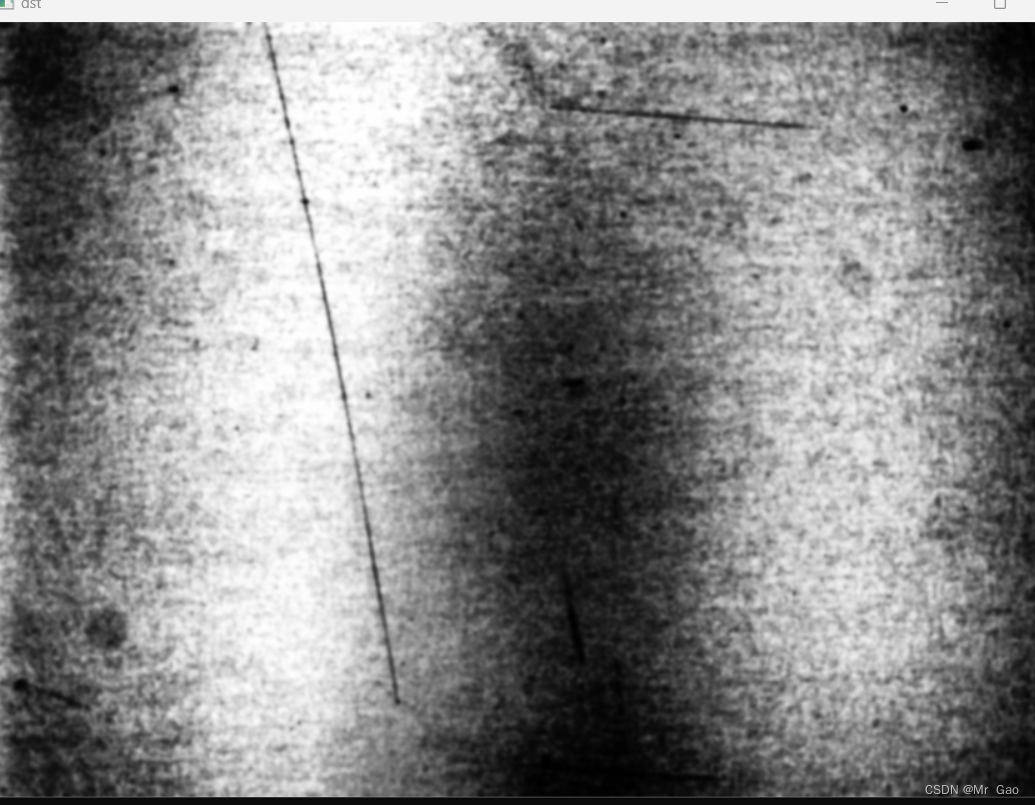
(1)读取图像为灰度图像,进行自适应直方图均衡化处理,增强图片对比度
(2)然后进行三次图像去噪 - 高斯滤波
(3)然后我们再进行一次直方图均衡操作增强图片
(4)然后使用canny进行边缘检测
(5)最后使用霍夫曼直线检测,检测划痕线段并绘制
代码实现如下:
import cv2
import copy
import math
import matplotlib.pyplot as plt
import matplotlib as mpl
import numpy as np
import os


path=r'sta.bmp'

img=cv2.imread(path)

def cv_show(name,img):
    cv2.imshow(name,img)
    #cv2.waitKey(0),接收0,表示窗口暂停
    cv2.waitKey(0)
    #销毁所有窗口
    cv2.destroyAllWindows()


def histogram_equalization(image):
    gray = image
    equalized = cv2.equalizeHist(gray)
    return equalized

cv_show('img',img)
# 图像去噪 - 高斯滤波
def gaussian_filtering(image):
    blurred = cv2.GaussianBlur(image, (3, 3), 0)
    return blurred


#img=gaussian_filtering(img)

#img = histogram_equalization(img)
img_gray=cv2.cvtColor(img,cv2.COLOR_BGR2GRAY)

kernel=np.ones((3,3),np.uint8)

rows = img_gray.shape[0]  # rows、cols 行列数,rows 也就是高度
cols = img_gray.shape[1]

#for i in range(rows):
#    for j in range(cols):
#        print(img_gray[i][j])
#dilate_img=cv2.dilate(img_gray,kernel=kernel,iterations=1)
#ret,dst1=cv2.threshold(img_gray,135,255,cv2.THRESH_BINARY)

clahe = cv2.createCLAHE(5,(3,3))
dst = clahe.apply(img_gray)
for i in range(3):

    dst=gaussian_filtering(dst)
dst=histogram_equalization(dst)
cv_show('dst',dst)

kernel=np.ones((3,3),np.uint8)


kernel=np.ones((3,3),np.uint8)
kernel=kernel+5


img_gray=dst


# 转换成灰度图
gray = img_gray
# 边缘检测, Sobel算子大小为3
edges = cv2.Canny(gray, 150, 185, apertureSize=3)
orgb = cv2.cvtColor(img, cv2.COLOR_BGR2RGB)
oShow = orgb.copy()
# 霍夫曼直线检测
lines= cv2.HoughLinesP(edges,1,np.pi/180,10,

                     minLineLength=60,maxLineGap=6
                     )
#遍历
l = lines[:,0,:]
for x1,y1,x2,y2 in l [:]:
    cv2.line(orgb,(x1,y1),(x2,y2),(0,0,255),1)
#展示
plt.subplot(121)
plt.imshow(gray,'gray')
plt.axis('off')
plt.subplot(122)
plt.imshow(orgb,'gray')
plt.axis('off')

plt.show()

os.system("pause")
检测结果如下:
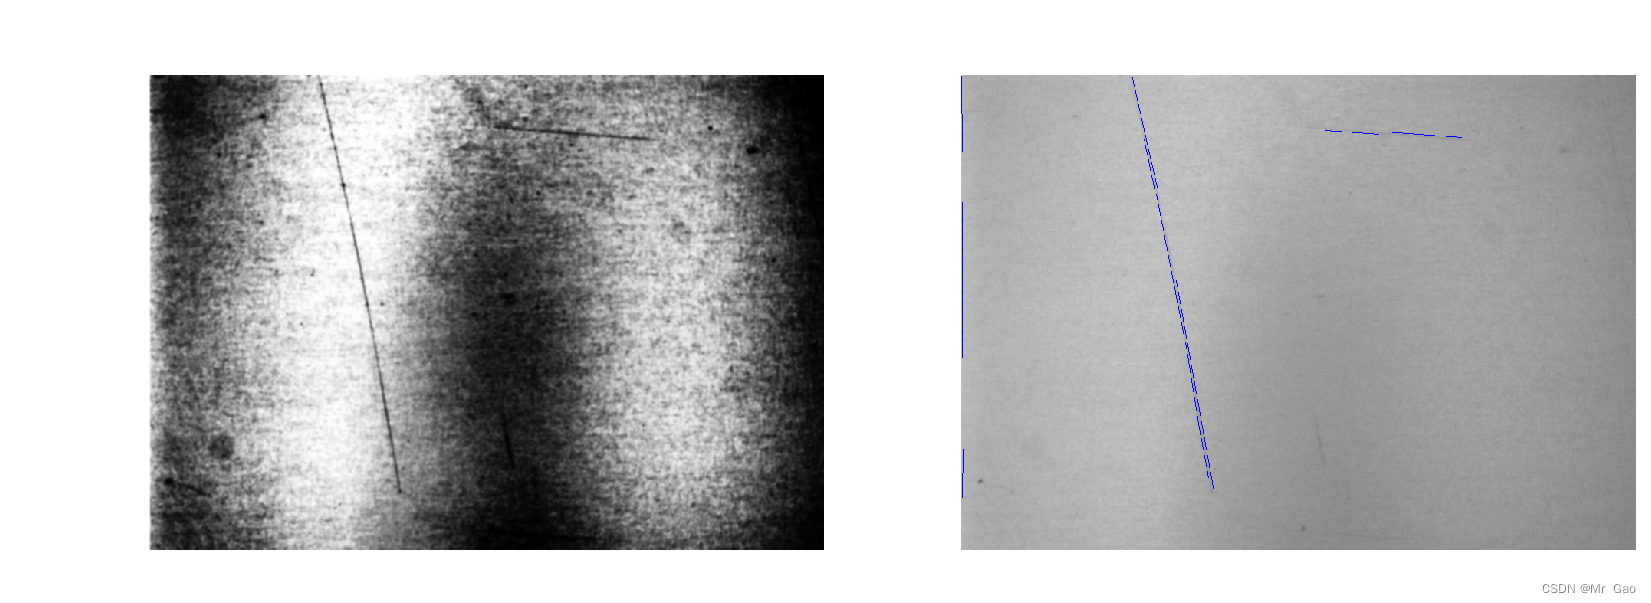
有一点效果,但不多。