一disruptor介绍
Disruptor是一个高性能的消息框架,其核心是基于环形缓冲区实现的。Disruptor的设计目标是尽可能地减少线程之间的竞争和同步,从而提高系统的吞吐量和响应速度。下面让我来介绍一下在使用Disruptor中如何优雅地使用环形队列。
首先,需要明确的是,Disruptor中的环形队列与普通的环形队列有所不同。Disruptor的环形队列并不是用于存储数据,而是用于协调读写操作的顺序。具体来说,当有多个消费者同时读取队列中的元素时,Disruptor会保证每个消费者只读取到它前面的元素,这样就避免了不必要的竞争和同步。
二场景应用定义不同类
1.公共的生产者CommonPublishEvent
@Component
public class CommonPublishEvent {

   /**
    * 发布
    *
    * @param event
    */
   public void publishEvent(MyApplicationEvent event, RingBuffer<DisruptorEvent> ringBuffer) {
      // 发布事件
      long sequence = ringBuffer.next();
      try {
         DisruptorEvent disruptorEvent = ringBuffer.get(sequence);
         disruptorEvent.setEvent(event);
      } finally {
         ringBuffer.publish(sequence);
      }
   }

}
2.父消费者CommonEventProcessor
public class CommonEventProcessor implements WorkHandler<DisruptorEvent> {

   @Override
   public void onEvent(DisruptorEvent event) throws Exception {
      // 判断不同类型--不同的类的名称,进行处理
      HandleEventProcessor handleEventProcessor = SpringUtil.getBean(event.getEvent().getEventType());
      handleEventProcessor.execute(event);
   }
}
3.消费者实现的接口HandleEventProcessor
public interface HandleEventProcessor {
   /**
    * 事件处理
    *
    * @param event
    */
   void execute(DisruptorEvent event);
}
4.消息事件类DisruptorEvent(用于disruptor传递的信息)
@Data
public class DisruptorEvent {
   private MyApplicationEvent event;

}
5.消息工厂MyEventFactory
public class MyEventFactory implements EventFactory<DisruptorEvent> {
   @Override
   public DisruptorEvent newInstance() {
      return new DisruptorEvent();
   }
}
6.配置类DisruptorConfiguration
@Configuration
@ConditionalOnWebApplication
@AutoConfigureAfter({WebServerTpAutoConfiguration.class})
public class DisruptorConfiguration {
   /**
    * 默认环形缓冲器容量
    */
   public static final int DEFAULT_RING_BUFFER_SIZE = 1048576;
   /**
    * 默认工作处理程序数量
    */
   public static final int DEFAULT_WORK_HANDLER_SIZE = 4;
   /**
    * 环形缓冲器容量
    * the size of the ring buffer, must be power of 2.
    * 必须是2的幂
    * 默认:2的20次方:1048576
    */
   @Value("${disruptor.ringBufferSize}")
   private String ringBufferSize;
   /**
    * 工作处理程序数量
    * 仿照环形队列设置为2的幂,
    * 默认:4
    */
   @Value("${disruptor.workHandlerSize}")
   private String workHandlerSize;
   /**
    * dynamicTP-线程池
    */
   @Resource
   private ThreadPoolExecutor disruptorExecutor;

   /**
    * Disruptor实例
    */
   @Bean
   @ConditionalOnBean({ThreadPoolExecutor.class})
   public Disruptor<DisruptorEvent> disruptor() {
      int ringSize = StringUtils.isBlank(ringBufferSize) ? DEFAULT_RING_BUFFER_SIZE : Integer.valueOf(ringBufferSize);
      Disruptor<DisruptorEvent> disruptor = new Disruptor<>(new MyEventFactory(), ringSize, disruptorExecutor, ProducerType.SINGLE, new BlockingWaitStrategy());
      log.info("Disruptor 已初始化");
      return disruptor;
   }

   /**
    * Disruptor事件队列—环形缓冲器
    *
    * @param disruptor Disruptor实例
    * @return
    */
   @Bean
   @ConditionalOnBean({Disruptor.class})
   public RingBuffer<DisruptorEvent> ringBuffer(Disruptor<DisruptorEvent> disruptor) {
      RingBuffer<DisruptorEvent> ringBuffer;

      try {
         int workSize = StringUtils.isBlank(workHandlerSize) ? DEFAULT_WORK_HANDLER_SIZE : Integer.valueOf(workHandlerSize);
         CommonEventProcessor[] processors = new CommonEventProcessor[workSize];
         for (int i = 0; i < workSize; i++) {
            processors[i] = new CommonEventProcessor();
         }
         // 注册工作处理程序
         disruptor.handleEventsWithWorkerPool(processors);

         // 启动队列,仅启动一次
         ringBuffer = disruptor.start();
         log.info("Disruptor 队列已开启");
         return ringBuffer;
      } catch (Exception ex) {
         log.error("Disruptor 队列开启异常", ex);
      }

      return null;
   }

}
7.监听器DisruptorEventListener
@Component
public class DisruptorEventListener implements ApplicationListener<MyApplicationEvent> {
   @Resource
   private RingBuffer<DisruptorEvent> ringBuffer;

   /**
    * 事件处理类
    */
   @Resource
   private CommonPublishEvent commonPublishEvent;

   /**
    * 事件监听
    *
    * @param event
    */
   @Override
   public void onApplicationEvent(MyApplicationEvent event) {
      commonPublishEvent.publishEvent(event, ringBuffer);
   }

}
监听器的使用:https://blog.csdn.net/m0_54355172/article/details/128592476
8应用实例

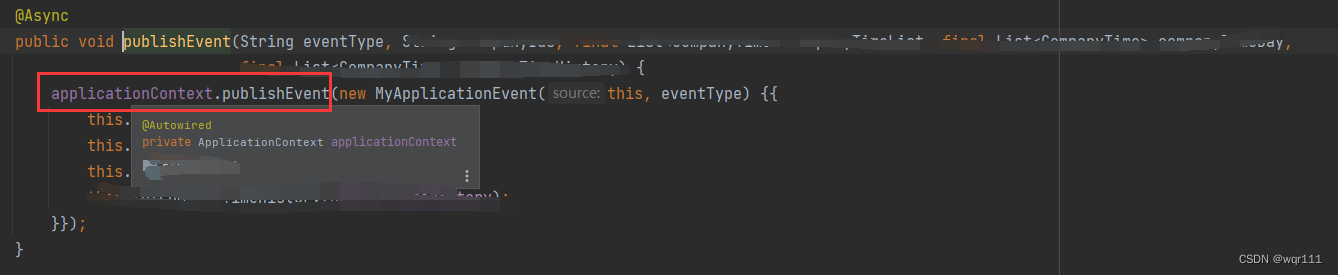 系统启动后 监听器开始监听环形队列里的事件,一旦从系统别处生产触发时,放入环形队列中,然后监听器监听到后从队列中拿出,最后根据事件传过来的EventType(类名)执行不同的业务逻辑(消费者)。
9相关依赖
disruptor
<dependency>
    <groupId>com.lmax</groupId>
    <artifactId>disruptor</artifactId>
    <version>3.4.4</version>
</dependency>
dynamicTP-线程池
<dependency>
    <groupId>org.dromara.dynamictp</groupId>
    <artifactId>dynamic-tp-spring-boot-starter-adapter-webserver</artifactId>
    <version>1.1.5</version>
</dependency>