原理说明:
WebGPU提供了绘制基本线条非机制,只要render pipeline primitive对应的 topology属性指定为line-list或者line-strip即可绘制对应的线条。
当前示例源码github地址:
https://github.com/vilyLei/voxwebgpu/blob/feature/rendering/src/voxgpu/sample/LineEntityTest.ts
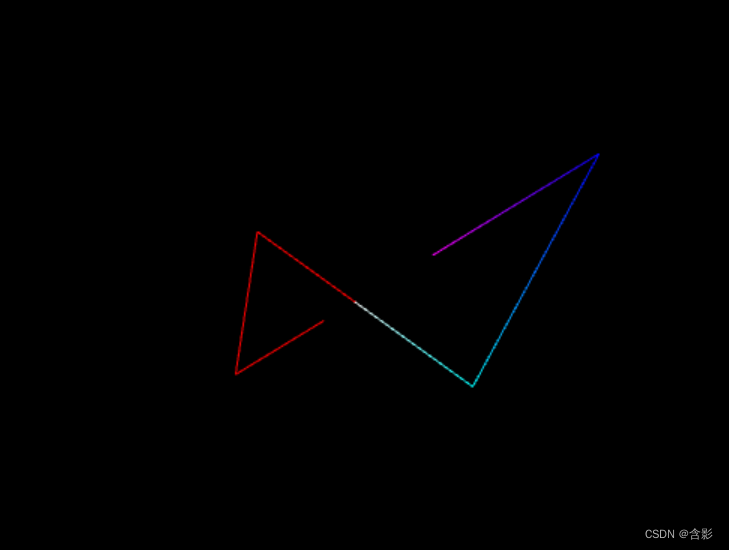
当前示例运行效果:
WGSL顶点着色器代码:
@group(0) @binding(0) var<uniform> objMat : mat4x4<f32>;
@group(0) @binding(1) var<uniform> viewMat : mat4x4<f32>;
@group(0) @binding(2) var<uniform> projMat : mat4x4<f32>;

struct VertexOutput {
  @builtin(position) Position : vec4<f32>,
  @location(0) vertColor : vec4<f32>
}
@vertex
fn main(
  @location(0) position : vec3<f32>,
  @location(1) color : vec3<f32>,
) -> VertexOutput {

  let wpos = objMat * vec4(position.xyz, 1.0);
  var output : VertexOutput;
  output.Position = projMat * viewMat * wpos;
  output.vertColor = vec4f(color.xyz, 1.0);
  return output;
}
WGSL片段着色器代码:
@group(0) @binding(3) var<uniform> color: vec4f;
@fragment
fn main(
  @location(0) vertColor: vec4<f32>
) -> @location(0) vec4<f32> {
  var color4 = vertColor * color;
  return color4;
}
此示例基于此渲染系统实现,当前示例TypeScript源码如下:
export class LineEntityTest {
	private mRscene = new RendererScene();
	initialize(): void {

		this.initEvent();
		this.initScene();
	}
	private initEvent(): void {
		const rc = this.mRscene;
		new MouseInteraction().initialize(rc, 0, false).setAutoRunning(true);
	}
	private initScene(): void {
		const rsc = this.mRscene;

		let linePositions = [new Vector3(), new Vector3(-100), new Vector3(-150, -180), new Vector3(-150, -180, -100)];
		let line = new Line3DEntity({linePositions});
		line.setColor([1.0,0.0,0.0]);
		rsc.addEntity( line );

		linePositions = [new Vector3(), new Vector3(100), new Vector3(150, 180), new Vector3(150, 180, 100)];
		let lineColors = [new Color4(1.0), new Color4(0.0,1.0), new Color4(0.0,0.0,1.0), new Color4(1.0,0.0,1.0)];
		let colorLine = new Line3DEntity({linePositions, lineColors});
		rsc.addEntity( colorLine );
	}

	run(): void {
		this.mRscene.run();
	}
}