索引文档的语法curl用法
CURL:
简单认为是可以在命令行下访问url的一个工具
curl是利用URL语法在命令行方式下工作的开源文件传输工具,使用curl可以简单实现常见的get/post请求。
curl
-X 指定http请求的方法
GET POST PUT DELETE restful
-d 指定要传输的数据
新增一条ID是10的用户信息
curl -XPOST http://localhost:8080/user/10 -d 报文体查询ID是10的用户信息
curl -XGET http://localhost:8080/user/10修改ID是10的用户信息
curl -XPUT http://localhost:8080/user/10 -d 报文体删除ID是10的用户信息
curl -XDELETE http://localhost:8080/user/10
索引操作
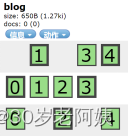
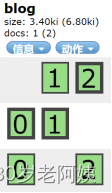
创建索引blog,默认分片5个,每个分片一个副本分片
# curl -XPOST node3:9200/blog
索引名称不能包含大写字母
# curl -XPUT node3:9200/ABc?pretty
{
  "error" : {
    "root_cause" : [ {
      "type" : "invalid_index_name_exception",
      "reason" : "Invalid index name [ABc], must be lowercase",
      "index" : "ABc"
    } ],
    "type" : "invalid_index_name_exception",
    "reason" : "Invalid index name [ABc], must be lowercase",
    "index" : "ABc"
  },
  "status" : 400
}
不能创建同名索引
# curl -XPUT node3:9200/blog?pretty
{
"error" : {
"root_cause" : [ {
"type" : "index_already_exists_exception",
"reason" : "already exists",
"index" : "blog"
} ],
"type" : "index_already_exists_exception",
"reason" : "already exists",
"index" : "blog"
},
"status" : 400
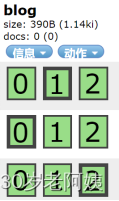
}在创建索引的时候指定分片的个数以及副本的个数,分片的个数创建索引后不能修改。
# curl -XPOST node3:9200/blog -d '
{
"settings":{
"number_of_replicas":2,
"number_of_shards":3
}
} '
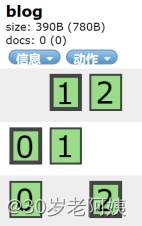
修改blog的副本个数
# curl -XPUT node3:9200/blog/_settings -d '{
"number_of_replicas":1
}'
读写限制:
- blocks.read_only:true 设置当前索引只允许读不允许写或者更新
- blocks.read:true 禁止对当前索引进行读操作
blocks.write:true 禁止对当前索引进行写操作
# curl -XPUT node3:9200/blog/_settings -d '{
"blocks.write":true
}'
已经禁止写入了:
# curl -XPOST node3:9200/blog/article/1?pretty -d '{
"title":"java 虚拟机"
}'
{
  "error" : {
    "root_cause" : [ {
      "type" : "cluster_block_exception",
      "reason" : "blocked by: [FORBIDDEN/8/index write (api)];"
    } ],
    "type" : "cluster_block_exception",
    "reason" : "blocked by: [FORBIDDEN/8/index write (api)];"
  },
  "status" : 403
}
恢复写的权限:
# curl -XPUT node3:9200/blog/_settings -d '{
"blocks.write":false
}'
写入数据成功:
# curl -XPUT node3:9200/blog/article/1?pretty -d '{
"title":"java 虚拟机"
}'
{
  "_index" : "blog",
  "_type" : "article",
  "_id" : "1",
  "_version" : 1,
  "_shards" : {
    "total" : 2,
    "successful" : 2,
    "failed" : 0
  },
  "created" : true
}
查看索引:
# curl node3:9200/blog/_settings?pretty
{
  "blog" : {
    "settings" : {
      "index" : {
        "creation_date" : "1569625739362",
        "number_of_shards" : "3",
        "number_of_replicas" : "1",
        "uuid" : "o4eS-bgoQN2U3u8dohF7zw",
        "version" : {
          "created" : "2020199"
        },
        "blocks" : {
          "write" : "false"
        }
      }
    }
  }
}
创建一个测试索引:
# curl -XPOST node3:9200/myblog?pretty
{
  "acknowledged" : true
}
同时查看多个索引的settings信息:
# curl node3:9200/blog,myblog/_settings?pretty
{
  "blog" : {
    "settings" : {
      "index" : {
        "creation_date" : "1569625739362",
        "number_of_shards" : "3",
        "number_of_replicas" : "1",
        "uuid" : "o4eS-bgoQN2U3u8dohF7zw",
        "version" : {
          "created" : "2020199"
        },
        "blocks" : {
          "write" : "false"
        }
      }
    }
  },
  "myblog" : {
    "settings" : {
      "index" : {
        "creation_date" : "1569626498025",
        "number_of_shards" : "5",
        "number_of_replicas" : "1",
        "uuid" : "EKfVkmbFTEWDR94KaCYb1w",
        "version" : {
          "created" : "2020199"
        }
      }
    }
  }
}查看集群中所有索引的settings信息:
# curl node3:9200/_all/_settings?pretty
{
  "blog" : {
    "settings" : {
      "index" : {
        "creation_date" : "1569625739362",
        "number_of_shards" : "3",
        "number_of_replicas" : "1",
        "uuid" : "o4eS-bgoQN2U3u8dohF7zw",
        "version" : {
          "created" : "2020199"
        },
        "blocks" : {
          "write" : "false"
        }
      }
    }
  },
  "myblog" : {
    "settings" : {
      "index" : {
        "creation_date" : "1569626498025",
        "number_of_shards" : "5",
        "number_of_replicas" : "1",
        "uuid" : "EKfVkmbFTEWDR94KaCYb1w",
        "version" : {
          "created" : "2020199"
        }
      }
    }
  }
}
删除索引,注意备份数据
# curl -XDELETE node3:9200/myblog?pretty
{
  "acknowledged" : true
}
删除不存在的索引
# curl -XDELETE node3:9200/myblog?pretty
{
"error" : {
"root_cause" : [ {
"type" : "index_not_found_exception",
"reason" : "no such index",
"resource.type" : "index_or_alias",
"resource.id" : "myblog",
"index" : "myblog"
} ],
"type" : "index_not_found_exception",
"reason" : "no such index",
"resource.type" : "index_or_alias",
"resource.id" : "myblog",
"index" : "myblog"
},
"status" : 404
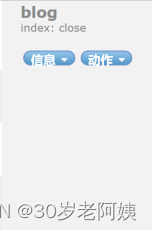
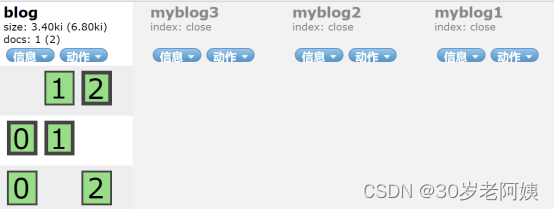
}索引的打开和关闭
ES索引关闭之后几乎不占用系统资源:关闭后索引就不能索引文档和检索文档了
# curl -XPOST node2:9200/blog/_close?pretty
{
  "acknowledged" : true
}
打开索引
# curl -XPOST node2:9200/blog/_open?pretty
{
  "acknowledged" : true
}
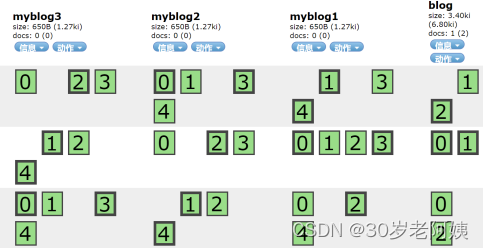
创建示例索引
# curl -XPOST node2:9200/myblog1?pretty
{
  "acknowledged" : true
}
# curl -XPOST node2:9200/myblog2?pretty
{
  "acknowledged" : true
}
# curl -XPOST node2:9200/myblog3?pretty
{
  "acknowledged" : true
}
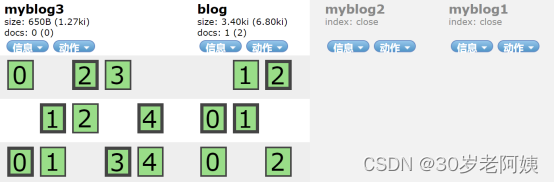
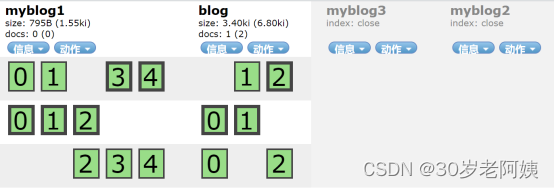
同时关闭多个索引
# curl -XPOST node3:9200/myblog1,myblog2/_close?pretty
{
  "acknowledged" : true
}
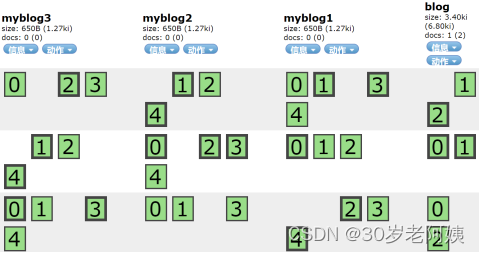
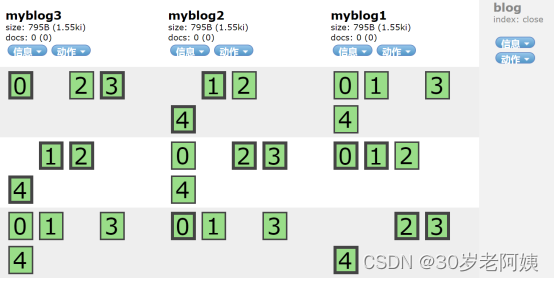
同时打开多个索引:
# curl -XPOST node3:9200/myblog1,myblog2/_open?pretty
{
  "acknowledged" : true
}
如果ES集群中不存在开启或关闭请求中的全部索引会报异常:
# curl -XPOST node3:9200/myblog1,myblogx/_open?pretty
{
  "error" : {
    "root_cause" : [ {
      "type" : "index_not_found_exception",
      "reason" : "no such index",
      "resource.type" : "index_or_alias",
      "resource.id" : "myblogx",
      "index" : "myblogx"
    } ],
    "type" : "index_not_found_exception",
    "reason" : "no such index",
    "resource.type" : "index_or_alias",
    "resource.id" : "myblogx",
    "index" : "myblogx"
  },
  "status" : 404
}
# curl -XPOST node3:9200/myblog1,myblog2,myblog3/_close?pretty
{
"acknowledged" : true
}
可以通过ignore_unavailable参数只操作存在的索引(反斜杠转义&符号)
# curl -XPOST node3:9200/myblog1,myblogx/_open?pretty\&ignore_unavailable=true
{
  "acknowledged" : true
}
关闭所有索引:
# curl -XPOST node3:9200/_all/_close?pretty
{
  "acknowledged" : true
}
打开my开头的索引:
# curl -XPOST node3:9200/my*/_open?pretty
{
  "acknowledged" : true
}
索引别名
就是给一个索引或者多个索引起的一个另一个名字。为名为test1的索引创建别名alias1,命令格式如下:
# curl -XPOST node3:9200/_aliases -d '{
"actions":[
{"add":{"index":"myblog1", "alias":"alias1"}}
]
}'
{"acknowledged":true}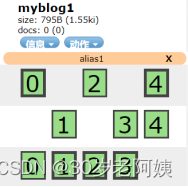
移除别名:
# curl -XPOST node3:9200/_aliases -d '{
"actions":[
{"remove":{"index":"myblog1", "alias":"alias1"}}
]
}'
{"acknowledged":true}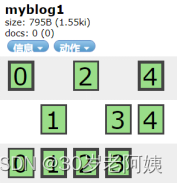
同时给多个index取别名:
# curl -XPOST node3:9200/_aliases -d '{
"actions":[
{"add":{"index":"blog", "alias":"indexok"}},
{"add":{"index":"myblog1", "alias":"indexm"}}
]
}'
{"acknowledged":true}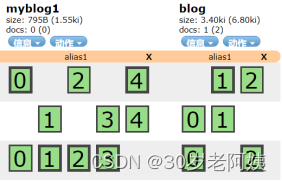
简写形式:
# curl -XPOST node3:9200/_aliases -d '{
"actions":[
{"add":{"indices":["blog", "myblog1"], "alias":"alias2"}}
]
}'
{"acknowledged":true}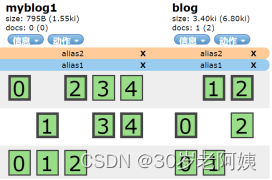
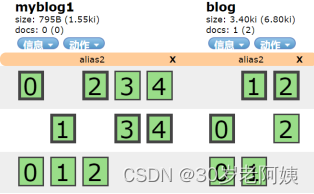
# curl -XPOST node3:9200/_aliases?pretty -d '{
> "actions":[
> {"remove":{"indices":["blog", "myblog1"], "alias":"alias1"}}
> ]
> }'
{
  "acknowledged" : true
}
增加别名和移除别名混合使用:
# curl -XPOST node3:9200/_aliases?pretty -d '{
"actions":[
{"remove":{"index":"blog", "alias":"alias2"}},
{"add":{"index":"myblog1", "alias":"alias3"}}
]
}'
{
  "acknowledged" : true
}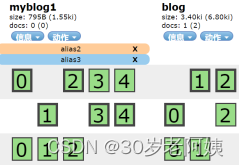
别名和索引是一对一的,使用别名索引文档或者根据ID查询文档是可以的,但是如果别名和索引是一对多,使用别名会发生错误,以为ES不知道把文档写入哪个索引中或者从哪个索引读取文档。
ES支持通过通配符同时给多个索引设置别名:
# curl -XPOST node3:9200/_aliases -d '{
> "actions":[
> {"add":{"index":"mybl*", "alias":"a1"}}
> ]
> }'
{"acknowledged":true}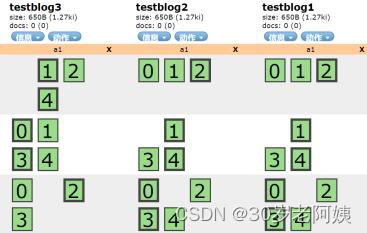
查看别名信息:
# curl node3:9200/myblog1/_aliases?pretty
{
  "testblog1" : {
    "aliases" : {
      "a1" : { }
    }
  }
}
查看所有别名信息:
# curl node2:9200/_aliases?pretty
{
  "testblog3" : {
    "aliases" : {
      "a1" : { }
    }
  },
  "testblog2" : {
    "aliases" : {
      "a1" : { }
    }
  },
  "testblog1" : {
    "aliases" : {
      "a1" : { }
    }
  },
  "testok2" : {
    "aliases" : { }
  },
  "testok1" : {
    "aliases" : { }
  }
}
![[GDOUCTF 2023]<ez_ze> SSTI 过滤数字 大括号{等](https://img-blog.csdnimg.cn/30f4f5ad10ce4733a8a068ccfe2d348f.png)