文章目录
- 一、什么是Coil
- 二、引入Coil
- 1、ImageView加载图片
- 1.1、普通加载
- 1.2、crossfade(淡入淡出)加载
- 1.3、crossfade的动画时间
- 1.4、placeholder
- 1.5、error
- 1.6、高斯模糊
- 1.7、灰度变换
- 1.8、圆形
- 1.9、圆角
- 2、Gif加载
- 3、SVG加载(不存在)
- 4、视频帧加载
- 5、监听下载过程
- 6、取消下载
- 7、替换 okhttp 实例
- 8、自定义
一、什么是Coil
Coil是一个Android开源的图片加载库,使用Kotlin协程来加载图片,Coil在 2020 年 10 月 22 日才发布了 1.0.0 版本,但却受到了 Android官方的推广,Coil有以下几个特点:
- 更快:
Coil在性能上做了很多优化,包括内存缓存和磁盘缓存、对内存中的图片进行采样、复用Bitmap、支持根据生命周期变化自动暂停和取消图片请求等 - 更轻量级:
Coil大约会给你的App增加两千个方法(前提是你的App已经集成了OkHttp和Coroutines),Coil的方法数和Picasso相当,相比Glide和Fresco要轻量级很多 - 更容易使用:
Coil’sAPI充分利用了Kotlin语言的新特性,简化并减少了很多重复代码 - 更流行:
Coil首选Kotlin语言开发,并且使用包含Coroutines、OkHttp、Okio和AndroidXLifecycles在内的更现代化的开源库
Coil的首字母由来:Coroutine,Image 和Loader 得到 Coil
Coil开源库github地址:https://github.com/coil-kt/coil
Coil官方文档:https://coil-kt.github.io/coil
二、引入Coil
Coil要求AndroidX与Java 8+环境
在app/build.gradle中Coil依赖包
implementation("io.coil-kt:coil:1.2.1")
AndroidManifest.xml中加上网络权限
<uses-permission android:name="android.permission.INTERNET" />
1、ImageView加载图片
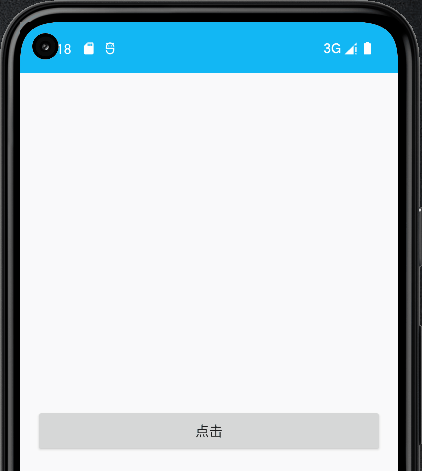
在activity_main.xml中声明ImageView,并使用Coil为ImageView加载图片:
<?xml version="1.0" encoding="utf-8"?>
<LinearLayout xmlns:android="http://schemas.android.com/apk/res/android"
    xmlns:tools="http://schemas.android.com/tools"
    android:layout_width="match_parent"
    android:layout_height="match_parent"
    android:orientation="vertical"
    tools:context=".MainActivity">

    <ImageView
        android:id="@+id/imageView"
        android:layout_width="match_parent"
        android:layout_height="wrap_content"
        android:layout_margin="16dp" />

    <Button
        android:id="@+id/button"
        android:layout_width="match_parent"
        android:layout_height="wrap_content"
        android:layout_margin="16dp"
        android:text="点击" />
</LinearLayout>
1.1、普通加载
	val url = "https://img-blog.csdnimg.cn/20210124002108308.png"
    ......
        button.setOnClickListener {
            imageView.load(url)
        }
- 通过扩展方法
load加载url - 除了
String以外,还支持HttpUrl、Url、File、DrawableRes Int、Drawable、Bitmap等各种类型的加载
举例子:
// Resource
imageView.load(R.drawable.image)

// File
imageView.load(File("/path/to/image.jpg"))
1.2、crossfade(淡入淡出)加载
	val url = "https://img-blog.csdnimg.cn/20210124002108308.png"
    ......
        reloadButton.setOnClickListener {
            imageView.load(url) {
                crossfade(true)
            }
        }

1.3、crossfade的动画时间
	val url = "https://img-blog.csdnimg.cn/20210124002108308.png"
    ......
        reloadButton.setOnClickListener {
            imageView.load(url) {
                crossfade(3000)
            }
        }
1.4、placeholder
placeholder预置展位图
	val url = "https://img-blog.csdnimg.cn/20210124002108308.png"
    ......
        button.setOnClickListener {
            imageView.load(url) {
                placeholder(R.drawable.placeholder)
                crossfade(3000)
            }
        }
1.5、error
加载失败时的错误占位图片
	val url = "https://notfound.png"
    ......
        button.setOnClickListener {
            imageView.load(url) {
                error(R.drawable.error)
            }
        }
1.6、高斯模糊
BlurTransformation: 高斯模糊变换
activity_main.xml代码中把ImageView的高度设置成300dp
	val url = "https://img-blog.csdnimg.cn/20210124002108308.png"
    ......
        button.setOnClickListener {
            imageView.load(url) {
                transformations(BlurTransformation(context = applicationContext, radius = 5f, sampling = 5f))
            }
        }

1.7、灰度变换
GrayscaleTransformation:灰度变换
	val url = "https://img-blog.csdnimg.cn/20210124002108308.png"
    ......
        button.setOnClickListener {
            imageView.load(url) {
                transformations(GrayscaleTransformation())
            }
        }

1.8、圆形
CircleCropTransformation:圆形变换
	val url = "https://img-blog.csdnimg.cn/20210124002108308.png"
    ......
        button.setOnClickListener {
            imageView.load(url) {
                transformations(CircleCropTransformation())
            }
        }

1.9、圆角
RoundedCornersTransformation:圆角矩形变换
	val url = "https://img-blog.csdnimg.cn/20210124002108308.png"
    ......
        button.setOnClickListener {
            imageView.load(url) {
                transformations(
                    RoundedCornersTransformation(
                        topLeft = 10f,
                        topRight = 10f,
                        bottomLeft = 10f,
                        bottomRight = 10f
                    )
                )
            }
        }

上面左右可以设置圆角:topLeft = 10f,topRight = 10f,bottomLeft = 0f,bottomRight = 0f

下面左右可以设置圆角:topLeft = 0f,topRight = 0f,bottomLeft = 10f,bottomRight = 10f

2、Gif加载
添加依赖包:
implementation("io.coil-kt:coil-gif:1.4.0")
官方文档:https://coil-kt.github.io/coil/gifs/
创建 gif ImageLoader 实例
	private val gifUrl = "https://img.zcool.cn/community/01ca905aebe350a801219b7f53a0e4.gif"
    ......
        button.setOnClickListener {

            val imageLoader = ImageLoader.Builder(this)
                .componentRegistry {
                    if (SDK_INT >= 28) {
                        add(ImageDecoderDecoder())
                    } else {
                        add(GifDecoder())
                    }
                }
                .build()

            //设置全局唯一实例
            Coil.setImageLoader(imageLoader)

            imageView.load(gifUrl) //加载gif图片
        }
    }
效果图如下:
3、SVG加载(不存在)
Coil也可以进行SVG加载的,同gif一样,也是需要添加extend包的:
implementation("io.coil-kt:coil-svg:1.2.2")//支持SVG
代码不存在了
4、视频帧加载
implementation("io.coil-kt:coil-video:1.2.2")//支持Video
private val videoUrl = "https://vd4.bdstatic.com/mda-jbppbefbbztvws50/sc/mda-jbppbefbbztvws50.mp4"
    ......
        button.setOnClickListener {

            //创建 gif ImageLoader 实例
            val imageLoader = ImageLoader.Builder(applicationContext)
                .componentRegistry {
                    add(VideoFrameDecoder(this@MainActivity))
                }.build()

            //设置全局唯一实例
            Coil.setImageLoader(imageLoader)

            imageView.load(videoUrl)
        }
    }
5、监听下载过程
	private val imageUrl = "https://img-blog.csdnimg.cn/20210124002108308.png"
    ......
        button.setOnClickListener {
            imageView.load(imageUrl) {
                listener(
                    onStart = { request ->
                        Log.d("coil-", "onStart")
                    },
                    onError = { request, throwable ->
                        Log.d("coil-", "onError")
                    },
                    onCancel = { request ->
                        Log.d("coil-", "onCancel")
                    },
                    onSuccess = { request, metadata ->
                        Log.d("coil-", "onSuccess")
                    }
                )
            }
        }
点击“点击”按钮后图片加载成功,可以看Logcat窗口中打印:

6、取消下载
	private val imageUrl = "https://img-blog.csdnimg.cn/20210124002108308.png"
    ......
        button.setOnClickListener {
            val disposable = imageView.load(imageUrl)
            //取消加载
            disposable.dispose()
        }
7、替换 okhttp 实例
coil 底层是使用 okhttp 作为网络请求工具,可以设置 okHttpClient 实例
	private val imageUrl = "https://img-blog.csdnimg.cn/20210124002108308.png"
    ......
        button.setOnClickListener {

            val okHttpClient = OkHttpClient.Builder()
                .cache(CoilUtils.createDefaultCache(this))
                .build()

            val imageLoader = ImageLoader.Builder(this).okHttpClient {
                okHttpClient
            }.build()

            Coil.setImageLoader(imageLoader)

            imageView.load(imageUrl)
        }

8、自定义
	private val imageUrl = "https://img-blog.csdnimg.cn/20210124002108308.png"
    ......
        button.setOnClickListener {

            val okHttpClient = OkHttpClient.Builder()
                .cache(CoilUtils.createDefaultCache(this))
                .build()

            val imageLoader = ImageLoader.Builder(this)
                .availableMemoryPercentage(0.2)
                .diskCachePolicy(CachePolicy.ENABLED)  //磁盘缓策略 ENABLED、READ_ONLY、WRITE_ONLY、DISABLED
                .crossfade(true) //淡入淡出
                .crossfade(1000)  //淡入淡出时间
                .okHttpClient {  //设置okhttpClient实例
                    okHttpClient
                }.build()

            Coil.setImageLoader(imageLoader)
            imageView.load(imageUrl)

        }