一、前言
本文基于 springboot、maven、jdk1.8、mysql 开发,所以开始前我们需要准备好这套环境。
1.1 依赖准备
想要什么依赖版本的去 maven 仓库查看:https://mvnrepository.com/
引入 mybatis-plus 依赖:
<dependency>
    <groupId>com.baomidou</groupId>
    <artifactId>mybatis-plus-boot-starter</artifactId>
    <version>3.5.0</version>
</dependency>
引入 mysql 依赖:
<dependency>
    <groupId>mysql</groupId>
    <artifactId>mysql-connector-java</artifactId>
    <version>8.0.27</version>
</dependency>
目前,多数项目会有多数据源的要求,或者是主从部署的要求,所以我们还需要引入 mybatis-plus 关于多数据源的依赖:
<!-- mybatis-plus 多数据源 -->
<dependency>
    <groupId>com.baomidou</groupId>
    <artifactId>dynamic-datasource-spring-boot-starter</artifactId>
    <version>3.5.0</version>
</dependency>
1.2 配置准备
springboot 启动类。配置@MapperScan 注解,用于扫描 Mapper 文件位置:
import org.mybatis.spring.annotation.MapperScan;
import org.springframework.boot.SpringApplication;
import org.springframework.boot.autoconfigure.SpringBootApplication;
import org.springframework.cloud.client.discovery.EnableDiscoveryClient;

@EnableDiscoveryClient
@MapperScan("com.wjbgn.user.mapper")
@SpringBootApplication
public class RobNecessitiesUserApplication {

    public static void main(String[] args) {
        SpringApplication.run(RobNecessitiesUserApplication.class, args);
    }

}
数据源配置,此处配置一主一从的环境,当前我只有一台,所以此处配置一样的:
spring:
  datasource:
    dynamic:
      primary: master #设置默认的数据源或者数据源组,默认值即为master
      strict: false #严格匹配数据源,默认false. true未匹配到指定数据源时抛异常,false使用默认数据源
      datasource:
        master:
          url: jdbc:mysql://127.0.0.1:3306/adb_test?useUnicode=true&characterEncoding=utf-8&useSSL=false&serverTimezone =Asia/Shanghai
          username: root
          password: 123456
        slave_1:
          url: jdbc:mysql://127.0.0.1:3306/adb_test?useUnicode=true&characterEncoding=utf-8&useSSL=false&serverTimezone =Asia/Shanghai
          username: root
          password: 123456
补充 :这里面因为默认使用的是HikariCP数据源,目前也推荐使用这个,相比于druid有更高的性能,但是不能忽略下面的配置,否则服务会不断抛出异常,原因是数据库的连接时常和连接池的配置没有做好。
spring:
  datasource:
    dynamic:
      hikari:
        max-lifetime: 1800000
        connection-timeout: 5000
        idle-timeout: 3600000
        max-pool-size: 12
        min-idle: 4
        connection-test-query: /**ping*/
1.3 启动服务
下面直接启动服务:
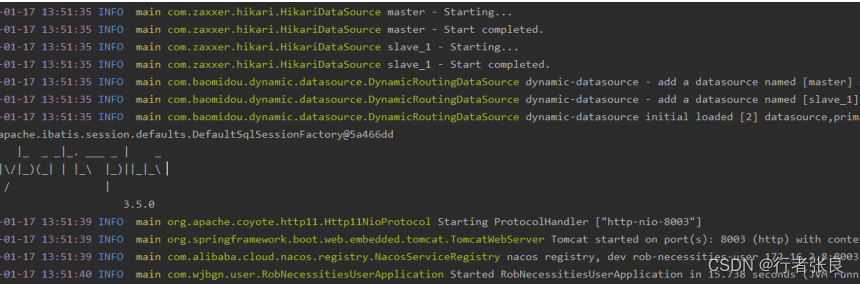
得到如上结果表示启动成功了。
二、使用
前面我们成功的集成进来了 mybatis-plus,下面我们看看如何使用它来操作我们的数据库。介绍一下常规的用法。
2.1 实体类注解
mybatis-plus 为使用者封装了很多的注解,方便我们使用,我们首先看下实体类中有哪些注解。有如下的实体类:
@TableName(value = "user")
public class UserDO {

    /**
     * 主键
     */
    @TableId(value = "id", type = IdType.AUTO)
    private Long id;

    /**
     * 昵称
     */
    @TableField("nickname")
    private String nickname;

    /**
     * 真实姓名
     */
    private String realName;
}
@TableName 表名注解
用于标识实体类对应的表。其说明如下:
@Documented
@Retention(RetentionPolicy.RUNTIME)
@Target({ElementType.TYPE, ElementType.ANNOTATION_TYPE})
public @interface TableName {

    /**
     * 实体对应的表名
     */
    String value() default "";

    /**
     * schema
     *
     * @since 3.1.1
     */
    String schema() default "";

    /**
     * 是否保持使用全局的 tablePrefix 的值
     * <p> 只生效于 既设置了全局的 tablePrefix 也设置了上面 {@link #value()} 的值 </p>
     * <li> 如果是 false , 全局的 tablePrefix 不生效 </li>
     *
     * @since 3.1.1
     */
    boolean keepGlobalPrefix() default false;

    /**
     * 实体映射结果集,
     * 只生效与 mp 自动注入的 method
     */
    String resultMap() default "";

    /**
     * 是否自动构建 resultMap 并使用,
     * 只生效与 mp 自动注入的 method,
     * 如果设置 resultMap 则不会进行 resultMap 的自动构建并注入,
     * 只适合个别字段 设置了 typeHandler 或 jdbcType 的情况
     *
     * @since 3.1.2
     */
    boolean autoResultMap() default false;

    /**
     * 需要排除的属性名
     *
     * @since 3.3.1
     */
    String[] excludeProperty() default {};
}
@TableId 主键注解
看看其源码:
@Documented
@Retention(RetentionPolicy.RUNTIME)
@Target({ElementType.FIELD, ElementType.ANNOTATION_TYPE})
public @interface TableId {

    /**
     * 字段值(驼峰命名方式,该值可无)
     */
    String value() default "";

    /**
     * 主键ID
     * {@link IdType}
     */
    IdType type() default IdType.NONE;
}
IdType 很重要:
| 名称 | 描述 |
|---|---|
| AUTO | 数据库自增 ID |
| NONE | 该类型为未设置主键类型(注解里等于跟随全局,全局里约等于 INPUT) |
| INPUT | 用户自己设置的 ID |
| ASSIGN_ID | 当用户传入为空时,自动分配类型为 Number 或 String 的主键(雪花算法) |
| ASSIGN_UUID | 当用户传入为空时,自动分配类型为 String 的主键 |
@TableFiled 表字段标识
下面看看其主要常用属性:
| 名称 | 描述 |
|---|---|
| value | 数据库字段名 |
| condition | 字段 where 实体查询比较条件,通过SqlCondition设置 如果未设置条件,则按照正常相等来查询 若设置则按照以下规则:等于:EQUAL = “%s=#{%s}”; 不等于:NOT_EQUAL = “%s<>#{%s}”; 左右模糊:LIKE = “%s LIKE CONCAT(‘%%’,#{%s},‘%%’)”; oracle 左右模糊 ORACLE_LIKE = “%s LIKE CONCAT(CONCAT(‘%%’,#{%s}),‘%%’)”; 左模糊:LIKE_LEFT = “%s LIKE CONCAT(‘%%’,#{%s})”; 右模糊:LIKE_RIGHT = “%s LIKE CONCAT(#{%s},‘%%’)”; |
| fill | 自动填充策略,通过FieldFill设置 不处理:FieldFill.DEFAULT 插入时填充字段:FieldFill.INSERT 更新时填充字段:FieldFill.UPDATE 插入或新增时填充字段:FieldFill.INSERT_UPDATE |
其他属性,不太推荐使用,用得越多,越容易蒙圈。可以通过 wapper 查询去设置。
2.2 CRUD
2.2.1 Service 层 CRUD
使用的时候,需要在自己定义的 service 接口当中继承IService接口:
import com.baomidou.mybatisplus.extension.service.IService;
import com.wjbgn.user.entity.UserDO;

/**
 * @description: 用户服务接口
 * @author:iwf
 * @date:2022/11/20
 * @version:3.0
 */
public interface IUserService extends IService<UserDO> {
}
同时要在我们的接口实现 impl 当中继承ServiceImpl,实现自己的接口:
import com.baomidou.mybatisplus.extension.service.impl.ServiceImpl;
import com.wjbgn.user.entity.UserDO;
import com.wjbgn.user.mapper.UserMapper;
import com.wjbgn.user.service.IUserService;

/**
 * @description: 用户接口实现
 * @author:iwf
 * @date:2022/11/20
 * @version:3.0
 */
public class UserServiceImpl extends ServiceImpl<UserMapper, UserDO> implements IUserService {

}
2.2.2 Mapper 层 CRUD
mybatis-plus 将常用的 CRUD 接口封装成了BaseMapper接口,我们只需要在自己的 Mapper 中继承它就可以了:
/**
 * @description: 用户mapper
 * @author:iwf
 * @date:2022/11/20
 * @version:3.0
 */
@Mapper
public interface UserMapper extends BaseMapper<UserDO> {
}
2.3 分页
使用分页话需要增加分页插件的配置:
import com.baomidou.mybatisplus.annotation.DbType;
import com.baomidou.mybatisplus.extension.plugins.MybatisPlusInterceptor;
import com.baomidou.mybatisplus.extension.plugins.inner.PaginationInnerInterceptor;
import org.mybatis.spring.annotation.MapperScan;
import org.springframework.context.annotation.Bean;
import org.springframework.context.annotation.Configuration;

@Configuration
@MapperScan("com.wjbgn.*.mapper*")
public class MybatisPlusConfig {

    @Bean
    public MybatisPlusInterceptor mybatisPlusInterceptor() {
        MybatisPlusInterceptor interceptor = new MybatisPlusInterceptor();
        interceptor.addInnerInterceptor(new PaginationInnerInterceptor(DbType.MYSQL));
        return interceptor;
    }

}
如上配置后,直接使用分页方法就行。
2.4 逻辑删除配置
很多情况下我们的系统都需要逻辑删除,方便恢复查找误删除的数据。
通过 mybatis-plus 可以通过全局配置的方式,而不需要再去手动处理。针对更新和查询操作有效,新增不做限制。
通常以我的习惯逻辑删除字段通常定义为is_delete,在实体类当中就是isDelete。那么在配置文件中就可以有如下的配置:
mybatis-plus:
  global-config:
    db-config:
      logic-delete-field: isDelete # 全局逻辑删除的实体字段名(since 3.3.0,配置后可以忽略不配置步骤2)
      logic-delete-value: 1 # 逻辑已删除值(默认为 1)
      logic-not-delete-value: 0 # 逻辑未删除值(默认为 0)
或者通过注解@TableLogic
@TableLogic
private Integer isDelete;
2.5 通用枚举配置
相信后端的同学都经历过一个情况,比如性别这个字段,分别值和名称对应1男、2女,这个字段在数据库时是数值类型,而前端展示则是展示字符串的名称。有几种常见实现方案呢?
- 数据库查询 sql 通过 case 判断,返回名称。
- 数据库返回的值,重新遍历赋值进去,这时候还需要判断这个值到底是男是女。
- 前端写死,返回 1 就是男,返回 2 就是女。
相信无论哪种方法都有其缺点,使用 mybatis-plus 提供的方式。我们在返回给前端时:
- 只需要在遍历时 get 这个枚举,直接赋值其名称,不需要再次判断。
- 直接返回给前端,让前端去去枚举的 name
这样大家都不需要写死这个值。下面看看如何实现这个功能:
兴义枚举,实现 IEnum 接口:
import com.baomidou.mybatisplus.annotation.IEnum;
import com.fasterxml.jackson.annotation.JsonFormat;

/**
 * @description: 性别枚举
 * @author:iwf
 * @date:2022/11/20
 * @version:3.0
 */
@JsonFormat(shape = JsonFormat.Shape.OBJECT)
public enum SexEnum implements IEnum<Integer> {
    MAN(1, "男"),
    WOMAN(2, "女");
    private Integer code;
    private String name;

    SexEnum(Integer code, String name) {
        this.code = code;
        this.name = name;
    }

    @Override
    public Integer getValue() {
        return code;
    }

    public String getName() {
        return name;
    }

}
@JsonFormat 注解为解决枚举类返回前端只展示构造器名称的问题。
- 实体类性别字段
 @TableName(value = "user")
public class UserDO {
    /**
     * 主键
     */
    @TableId(value = "id", type = IdType.AUTO)
    private Long id;

    /**
     * 昵称
     */
    @TableField(value = "nickname", condition = SqlCondition.EQUAL)
    private String nickname;

    /**
     * 性别
     */
    @TableField(value = "sex")
    private SexEnum sex;

    /**
     * 版本
     */
    @TableField(value = "version",update = "%s+1")
    private Integer version;

    /**
     * 时间字段,自动添加
     */
    @TableField(value = "create_time",fill = FieldFill.INSERT)
    private LocalDateTime createTime;
}
- 配置文件扫描枚举
mybatis-plus:
  # 支持统配符 * 或者 ; 分割
  typeEnumsPackage: com.wjbgn.*.enums
- 定义配置文件
@Bean
public MybatisPlusPropertiesCustomizer mybatisPlusPropertiesCustomizer() {
    return properties -> {
        GlobalConfig globalConfig = properties.getGlobalConfig();
        globalConfig.setBanner(false);
        MybatisConfiguration configuration = new MybatisConfiguration();
        configuration.setDefaultEnumTypeHandler(MybatisEnumTypeHandler.class);
        properties.setConfiguration(configuration);
    };
}
- 序列化枚举值为数据库值
以下我是使用的 fastjson:
1)全局(添加在前面的配置文件中):
@Bean
 public MybatisPlusPropertiesCustomizer mybatisPlusPropertiesCustomizer() {
     // 序列化枚举值为数据库存储值
     FastJsonConfig config = new FastJsonConfig();
     config.setSerializerFeatures(SerializerFeature.WriteEnumUsingToString);

     return properties -> {
         GlobalConfig globalConfig = properties.getGlobalConfig();
         globalConfig.setBanner(false);
         MybatisConfiguration configuration = new MybatisConfiguration();
         configuration.setDefaultEnumTypeHandler(MybatisEnumTypeHandler.class);
         properties.setConfiguration(configuration);
     };
 }
2)局部
 @JSONField(serialzeFeatures= SerializerFeature.WriteEnumUsingToString)
 private SexEnum sex;
2.6 自动填充
还记得前面提到的实体类当中的注解@TableFeild吗?当中有个属性叫做 fill,通过FieldFill设置属性,这个就是做自动填充用的。但是这个直接是不能使用的,需要通过实现 mybatis-plus 提供的接口,增加如下配置:
import com.baomidou.mybatisplus.core.handlers.MetaObjectHandler;
import org.apache.ibatis.reflection.MetaObject;
import org.springframework.stereotype.Component;
import java.time.LocalDateTime;

/**
 * description: 启动自动填充功能
 * @return:
 * @author: iwf
 * @time: 2022/11/20
 */
@Component
public class MyMetaObjectHandler implements MetaObjectHandler {
    @Override
    public void insertFill(MetaObject metaObject) {
        // 起始版本 3.3.0(推荐使用)
        this.strictInsertFill(metaObject, "createTime", LocalDateTime.class, LocalDateTime.now());
    }

    @Override
    public void updateFill(MetaObject metaObject) {
        // 起始版本 3.3.0(推荐)
        this.strictUpdateFill(metaObject, "updateTime", LocalDateTime.class, LocalDateTime.now());
    }
}
字段配置如下:
/**
 * 时间字段,自动添加
 */
@TableField(value = "create_time",fill = FieldFill.INSERT)
private LocalDateTime createTime;
2.7 多数据源
前面提到过,配置文件当中配置了主从的方式,其实 mybatis-plus 还支持更多的方式:
- 多主多从
spring:
  datasource:
    dynamic:
      primary: master #设置默认的数据源或者数据源组,默认值即为master
      strict: false #严格匹配数据源,默认false. true未匹配到指定数据源时抛异常,false使用默认数据源
      datasource:
        master_1:
        master_2:
        slave_1:
        slave_2:
        slave_3:
- 多种数据库
spring:
  datasource:
    dynamic:
      primary: mysql #设置默认的数据源或者数据源组,默认值即为master
      strict: false #严格匹配数据源,默认false. true未匹配到指定数据源时抛异常,false使用默认数据源
      datasource:
        mysql:
        oracle:
        postgresql:
        h2:
        sqlserver:
- 混合配置
spring:
  datasource:
    dynamic:
      primary: master #设置默认的数据源或者数据源组,默认值即为master
      strict: false #严格匹配数据源,默认false. true未匹配到指定数据源时抛异常,false使用默认数据源
      datasource:
        master_1:
        slave_1:
        slave_2:
        oracle_1:
        oracle_2:
@DS 注解
可以注解在方法上或类上,同时存在就近原则 【方法上注解】 优先于 【类上注解】 :
@DS("slave_1")
public class UserServiceImpl extends ServiceImpl<UserMapper, UserDO> implements IUserService {


    @DS("salve_1")
    @Override
    public List<UserDO> getList() {
        return this.getList();
    }

    @DS("master")
    @Override
    public int saveUser(UserDO userDO) {
        boolean save = this.save(userDO);
        if (save){
            return 1;
        }else{
            return 0;
        }
    }
}


![[SHCTF 2023 校外赛道] pwn](https://img-blog.csdnimg.cn/3b5b5fce45cb44eca575cc5923e42f4c.png)