MySQL双主一从高可用
文章目录
- MySQL双主一从高可用
- 环境说明
- 1.配置前的准备工作
- 2.配置yum源
- 1.在部署NFS服务
- 2.安装主数据库的数据库服务,并挂载nfs
- 3.初始化数据库
- 4.配置两台master主机数据库
- 5.配置m1和m2成为主数据库
- 6.安装、配置keepalived
- 7.安装部署从数据库
- 8.测试
- 1.在高可用集群中,当master1主机为主时,master2主机为备
- 2.模拟master1主机发生故障,导致服务宕机,master1主机上的keepalived服务则会自动关闭,释放资源,vip则会跳转到master2主机上,从而使得master2主机接替主数据库位置,开启mysql服务
环境说明
nfs服务器用于同步两台主服务器的数据,确保一致。
| 主机名称 | IP地址 | 充当角色 | 所需软件 | 操作系统 |
|---|---|---|---|---|
| nfs | 192.168.195.133 | NFS服务器 | nfs | centos 8 |
| master1 | 192.168.195.134 | mysql主服务器(主节点) | mysql、keepalived | centos 8 |
| master2 | 192.168.195.135 | mysql主服务器(备节点) | mysql、keepalived | centos 8 |
| slave | 192.168.195.136 | mysql从服务器 | mysql | centos 8 |
1.配置前的准备工作
永久关闭所有主机的防火墙和selinux
//nfs主机
[root@nfs ~]# systemctl disable --now firewalld.service
Removed /etc/systemd/system/multi-user.target.wants/firewalld.service.
Removed /etc/systemd/system/dbus-org.fedoraproject.FirewallD1.service.
[root@nfs ~]# sed -i 's/SELINUX=enforcing/SELINUX=disabled/g' /etc/selinux/config
[root@nfs ~]# reboot

//master1主机
[root@master1 ~]# systemctl disable --now firewalld.service
Removed /etc/systemd/system/multi-user.target.wants/firewalld.service.
Removed /etc/systemd/system/dbus-org.fedoraproject.FirewallD1.service.
[root@master1 ~]# sed -i 's/SELINUX=enforcing/SELINUX=disabled/g' /etc/selinux/config
[root@master1 ~]# reboot

//master2主机
[root@master2 ~]# systemctl disable --now firewalld.service
Removed /etc/systemd/system/multi-user.target.wants/firewalld.service.
Removed /etc/systemd/system/dbus-org.fedoraproject.FirewallD1.service.
[root@master2 ~]# sed -i 's/SELINUX=enforcing/SELINUX=disabled/g' /etc/selinux/config
[root@master2 ~]# reboot

//slave主机
[root@slave ~]# systemctl disable --now firewalld.service
Removed /etc/systemd/system/multi-user.target.wants/firewalld.service.
Removed /etc/systemd/system/dbus-org.fedoraproject.FirewallD1.service.
[root@slave ~]# sed -i 's/SELINUX=enforcing/SELINUX=disabled/g' /etc/selinux/config
[root@slave ~]# reboot
2.配置yum源
master主机加上epel源
推荐使用阿里云源
//nfs主机
[root@nfs ~]# rm -rf /etc/yum.repos.d/*
[root@nfs ~]# curl -o /etc/yum.repos.d/CentOS-Base.repo https://mirrors.aliyun.com/repo/Centos-vault-8.5.2111.repo
[root@nfs ~]# yum clean all
[root@nfs ~]# yum makecache

//master1主机
[root@master1 ~]# rm -rf /etc/yum.repos.d/*
[root@master1 ~]# curl -o /etc/yum.repos.d/CentOS-Base.repo https://mirrors.aliyun.com/repo/Centos-vault-8.5.2111.repo
[root@master1 ~]# yum -y install epel-release wget vim
[root@master1 ~]# yum clean all
[root@master1 ~]# yum makecache

//master2主机
[root@master2 ~]# rm -rf /etc/yum.repos.d/*
[root@master2 ~]# curl -o /etc/yum.repos.d/CentOS-Base.repo https://mirrors.aliyun.com/repo/Centos-vault-8.5.2111.repo
[root@master2 ~]# yum -y install epel-release wget vim
[root@master2 ~]# yum clean all
[root@master2 ~]# yum makecache

//slave主机
[root@slave ~]# rm -rf /etc/yum.repos.d/*
[root@slave ~]# curl -o /etc/yum.repos.d/CentOS-Base.repo https://mirrors.aliyun.com/repo/Centos-vault-8.5.2111.repo
[root@slave ~]# yum clean all
[root@slave ~]# yum makecache
1.在部署NFS服务
在nfs主机上部署nfs服务
//安装nfs服务
[root@nfs ~]# yum -y install nfs-utils.x86_64

//创建一个共享目录
[root@nfs ~]# mkdir /opt/data
[root@nfs ~]# vim /etc/exports
[root@nfs ~]# cat /etc/exports
/opt/data 192.168.195.133(rw,sync,no_root_squash)
/opt/data 192.168.195.134(rw,sync,no_root_squash)

//启动服务
[root@nfs ~]# systemctl restart rpcbind.service
[root@nfs ~]# systemctl restart nfs-server.service
[root@nfs ~]# systemctl enable --now nfs-server.service
Created symlink /etc/systemd/system/multi-user.target.wants/nfs-server.service → /usr/lib/systemd/system/nfs-server.service.
2.安装主数据库的数据库服务,并挂载nfs
在master1和master2上安装mysql数据库
在master1主机上:
//创建mysql用户
[root@master1 ~]# groupadd -r -g 306 mysql
[root@master1 ~]# useradd -r -M -s /sbin/nologin -g 306 -u 306 mysql
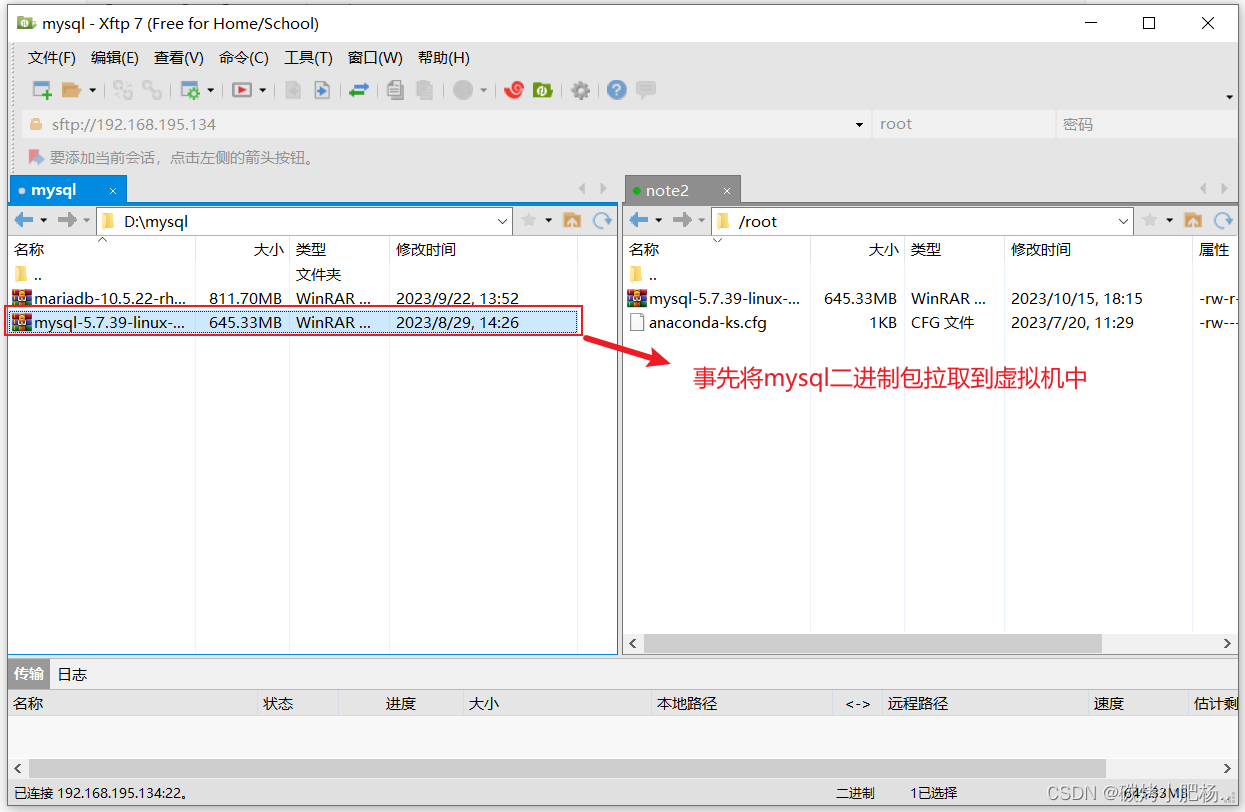
//解压mysql二进制包
[root@master1 ~]# ls
anaconda-ks.cfg mysql-5.7.39-linux-glibc2.12-x86_64.tar.gz
[root@master1 ~]# tar xf mysql-5.7.39-linux-glibc2.12-x86_64.tar.gz -C /usr/local/
[root@master1 ~]# ln -sv /usr/local/mysql-5.7.39-linux-glibc2.12-x86_64/ /usr/local/mysql
'/usr/local/mysql' -> '/usr/local/mysql-5.7.39-linux-glibc2.12-x86_64/'
//修改mysql目录属主属组,并添加环境变量
[root@master1 ~]# chown mysql:mysql /usr/local/mysql
[root@master1 ~]# echo 'export PATH=/usr/local/mysql/bin:$PATH' > /etc/profile.d/mysql.sh
[root@master1 ~]# source /etc/profile.d/mysql.sh
[root@master1 ~]# echo $PATH
/usr/local/mysql/bin:/usr/local/sbin:/usr/local/bin:/usr/sbin:/usr/bin:/root/bin
//建立数据存放目录
[root@master1 ~]# mkdir /opt/data
[root@master1 ~]# chown -R mysql:mysql /opt/data/
//挂载nfs上的/opt/data目录,以便同步
[root@master1 ~]# yum -y install nfs-utils.x86_64
[root@master1 ~]# systemctl enable --now nfs-server.service
Created symlink /etc/systemd/system/multi-user.target.wants/nfs-server.service → /usr/lib/systemd/system/nfs-server.service.
[root@master1 ~]# mount -t nfs 192.168.195.133:/opt/data /opt/data
//配置头文件和lib库文件路径
[root@master1 ~]# ln -sv /usr/local/mysql/include/ /usr/local/include/mysql
'/usr/local/include/mysql' -> '/usr/local/mysql/include/'
[root@master1 ~]# echo '/usr/local/mysql/lib' > /etc/ld.so.conf.d/mysql.conf
[root@master1 ~]# ldconfig
//生成mysql配置文件/etc/my.cnf
[root@master1 ~]# vim /etc/my.cnf
[root@master1 ~]# cat /etc/my.cnf
[mysqld]
basedir = /usr/local/mysql
datadir = /opt/data
socket = /tmp/mysql.sock
port = 3306
pid-file = /opt/data/mysql.pid
user = mysql
skip-name-resolve
[root@master1 ~]#
//配置服务启动脚本
[root@master1 ~]# cp -a /usr/local/mysql/support-files/mysql.server /etc/init.d/mysqld
[root@master1 ~]# sed -ri 's#^(basedir=).*#\1/usr/local/mysql#g' /etc/init.d/mysqld
[root@master1 ~]# sed -ri 's#^(datadir=).*#\1/opt/data#g' /etc/init.d/mysqld
在master2主机上:
//创建mysql用户
[root@master2 ~]# groupadd -r -g 306 mysql
[root@master2 ~]# useradd -r -M -s /sbin/nologin -g 306 -u 306 mysql

//解压mysql二进制包(将master1主机上的mysql二进制包用scp命令传送过来)
[root@master1 ~]# scp mysql-5.7.39-linux-glibc2.12-x86_64.tar.gz root@192.168.195.135:/root/
The authenticity of host '192.168.195.135 (192.168.195.135)' can't be established.
ECDSA key fingerprint is SHA256:rX8qo9h9J++q89dUg33ZnWDL7KT30i/It603EM37Mic.
Are you sure you want to continue connecting (yes/no/[fingerprint])? yes
Warning: Permanently added '192.168.195.135' (ECDSA) to the list of known hosts.
root@192.168.195.135's password:
mysql-5.7.39-linux-glibc2.12-x86_64.tar.gz                                   100%  645MB 127.1MB/s   00:05
[root@master2 ~]# ls
anaconda-ks.cfg  mysql-5.7.39-linux-glibc2.12-x86_64.tar.gz
[root@master2 ~]# tar xf mysql-5.7.39-linux-glibc2.12-x86_64.tar.gz -C /usr/local/
[root@master2 ~]# ln -sv /usr/local/mysql-5.7.39-linux-glibc2.12-x86_64/ /usr/local/mysql
'/usr/local/mysql' -> '/usr/local/mysql-5.7.39-linux-glibc2.12-x86_64/'
[root@master2 ~]# ll /usr/local/
total 0
drwxr-xr-x. 2 root root   6 Aug 12  2018 bin
drwxr-xr-x. 2 root root   6 Aug 12  2018 etc
drwxr-xr-x. 2 root root   6 Aug 12  2018 games
drwxr-xr-x. 2 root root   6 Aug 12  2018 include
drwxr-xr-x. 2 root root   6 Aug 12  2018 lib
drwxr-xr-x. 2 root root   6 Aug 12  2018 lib64
drwxr-xr-x. 2 root root   6 Aug 12  2018 libexec
lrwxrwxrwx  1 root root  47 Oct 15 18:50 mysql -> /usr/local/mysql-5.7.39-linux-glibc2.12-x86_64/
drwxr-xr-x  9 root root 129 Oct 15 18:50 mysql-5.7.39-linux-glibc2.12-x86_64
drwxr-xr-x. 2 root root   6 Aug 12  2018 sbin
drwxr-xr-x. 5 root root  49 Jul 20 11:33 share
drwxr-xr-x. 2 root root   6 Aug 12  2018 src

//修改mysql目录的属主属组,并添加环境变量
[root@master2 ~]# chown -R mysql:mysql /usr/local/mysql
[root@master2 ~]# echo 'export PATH=/usr/local/mysql/bin:$PATH' > /etc/profile.d/mysql.sh
[root@master2 ~]# source /etc/profile.d/mysql.sh
[root@master2 ~]# echo $PATH
/usr/local/mysql/bin:/usr/local/sbin:/usr/local/bin:/usr/sbin:/usr/bin:/root/bin

//建立数据存放目录
[root@master2 ~]# mkdir /opt/data
[root@master2 ~]# chown -R mysql:mysql /opt/data/

//挂载nfs上的/opt/data目录,以便同步
[root@master2 ~]# yum -y install nfs-utils.x86_64
[root@master2 ~]# systemctl enable --now nfs-server.service
Created symlink /etc/systemd/system/multi-user.target.wants/nfs-server.service → /usr/lib/systemd/system/nfs-server.service.
[root@master2 ~]# mount -t nfs 192.168.195.133:/opt/data /opt/data

//配置头文件和lib库文件路径
[root@master2 ~]# ln -sv /usr/local/mysql/include/ /usr/local/include/mysql
'/usr/local/include/mysql' -> '/usr/local/mysql/include/'
[root@master2 ~]# echo '/usr/local/mysql/lib' > /etc/ld.so.conf.d/mysql.conf
[root@master2 ~]# ldconfig

//生成配置文件
[root@master2 ~]# vim /etc/my.cnf
[root@master2 ~]# cat /etc/my.cnf
[mysqld]
basedir = /usr/local/mysql
datadir = /opt/data
socket = /tmp/mysql.sock
port = 3306
pid-file = /opt/data/mysql.pid
user = mysql
skip-name-resolve

//配置脚本启动服务
[root@master2 ~]# cp -a /usr/local/mysql/support-files/mysql.server /etc/init.d/mysqld
[root@master2 ~]# sed -ri 's#^(basedir=).*#\1/usr/local/mysql#g' /etc/init.d/mysqld
[root@master2 ~]# sed -ri 's#^(datadir=).*#\1/opt/data#g' /etc/init.d/mysqld
3.初始化数据库
由于我们配置了nfs同步两台主机的/opt/data目录,所以只需在其中一台上初始化数据库即可,另一台会
自动同步/opt/data目录下的文件
在master1主机上初始化数据库
[root@master1 ~]# /usr/local/mysql/bin/mysqld --initialize --user=mysql --datadir=/opt/data/
2023-10-15T13:09:26.800119Z 0 [Warning] TIMESTAMP with implicit DEFAULT value is deprecated. Please use --explicit_defaults_for_timestamp server option (see documentation for more details).
2023-10-15T13:09:27.203177Z 0 [Warning] InnoDB: New log files created, LSN=45790
2023-10-15T13:09:27.264266Z 0 [Warning] InnoDB: Creating foreign key constraint system tables.
2023-10-15T13:09:27.322831Z 0 [Warning] No existing UUID has been found, so we assume that this is the first time that this server has been started. Generating a new UUID: 11b3dfb4-6b5c-11ee-9bf0-000c298b9baf.
2023-10-15T13:09:27.325547Z 0 [Warning] Gtid table is not ready to be used. Table 'mysql.gtid_executed' cannot be opened.
2023-10-15T13:09:27.589254Z 0 [Warning] A deprecated TLS version TLSv1 is enabled. Please use TLSv1.2 or higher.
2023-10-15T13:09:27.589289Z 0 [Warning] A deprecated TLS version TLSv1.1 is enabled. Please use TLSv1.2 or higher.
2023-10-15T13:09:27.593109Z 0 [Warning] CA certificate ca.pem is self signed.
2023-10-15T13:09:27.644471Z 1 [Note] A temporary password is generated for root@localhost: gyOij-dGi0K#   //最后一行随机生成一个密码(“gyOij-dGi0K#”)

//查看nfs主机和两台master主机的/opt/data目录的内容
nfs主机
[root@nfs ~]# ls /opt/data/
auto.cnf    client-cert.pem  ibdata1      mysql               public_key.pem   sys
ca-key.pem  client-key.pem   ib_logfile0  performance_schema  server-cert.pem
ca.pem      ib_buffer_pool   ib_logfile1  private_key.pem     server-key.pem

master1主机
[root@master1 ~]# ls /opt/data/
auto.cnf    client-cert.pem  ibdata1      mysql               public_key.pem   sys
ca-key.pem  client-key.pem   ib_logfile0  performance_schema  server-cert.pem
ca.pem      ib_buffer_pool   ib_logfile1  private_key.pem     server-key.pem

master2主机
[root@master2 ~]# ls /opt/data/
auto.cnf    client-cert.pem  ibdata1      mysql               public_key.pem   sys
ca-key.pem  client-key.pem   ib_logfile0  performance_schema  server-cert.pem
ca.pem      ib_buffer_pool   ib_logfile1  private_key.pem     server-key.pem
4.配置两台master主机数据库
//先在两台主机上安装一个库文件包
[root@master1 ~]# yum -y install ncurses-compat-libs

[root@master2 ~]# yum -y install ncurses-compat-libs

//首先启动master1主机的数据库服务,由于两个数据库完全一模一样,所以只可以启动一台,不可以同时启动
[root@master1 ~]# service mysqld start
Starting MySQL.Logging to '/opt/data/master1.err'.
SUCCESS!
[root@master1 ~]#

//使用初始密码登录,设置密码
[root@master1 ~]# mysql -uroot -p"gyOij-dGi0K#"
mysql: [Warning] Using a password on the command line interface can be insecure.
Welcome to the MySQL monitor.  Commands end with ; or \g.
Your MySQL connection id is 2
Server version: 5.7.39

Copyright (c) 2000, 2022, Oracle and/or its affiliates.

Oracle is a registered trademark of Oracle Corporation and/or its
affiliates. Other names may be trademarks of their respective
owners.

Type 'help;' or '\h' for help. Type '\c' to clear the current input statement.

mysql> set password = password('12345678');
Query OK, 0 rows affected, 1 warning (0.00 sec)

mysql> quit
Bye
[root@master1 ~]#
在master2主机上通过在master1给mysql设置的密码登录数据库
//首先需要关闭master1主机上的mysql服务
[root@master1 ~]# service mysqld stop
Shutting down MySQL.. SUCCESS!
[root@master1 ~]#

//启动m2的数据库服务
[root@master2 ~]# service mysqld start
Starting MySQL.Logging to '/opt/data/master2.err'.
 SUCCESS!
[root@master2 ~]#

//尝试使用修改过后的密码登录m2的数据库
[root@master2 ~]# mysql -uroot -p12345678
mysql: [Warning] Using a password on the command line interface can be insecure.
Welcome to the MySQL monitor.  Commands end with ; or \g.
Your MySQL connection id is 2
Server version: 5.7.39 MySQL Community Server (GPL)

Copyright (c) 2000, 2022, Oracle and/or its affiliates.

Oracle is a registered trademark of Oracle Corporation and/or its
affiliates. Other names may be trademarks of their respective
owners.

Type 'help;' or '\h' for help. Type '\c' to clear the current input statement.

mysql> quit
Bye                   //可以登录
[root@master2 ~]#

//测试完后,关闭m2的数据库服务
[root@master2 ~]# service mysqld stop
Shutting down MySQL.. SUCCESS!
[root@master2 ~]#
5.配置m1和m2成为主数据库
master1主机
[root@master1 ~]# mysql -uroot -p12345678
mysql: [Warning] Using a password on the command line interface can be insecure.
Welcome to the MySQL monitor.  Commands end with ; or \g.
Your MySQL connection id is 2
Server version: 5.7.39 MySQL Community Server (GPL)

Copyright (c) 2000, 2022, Oracle and/or its affiliates.

Oracle is a registered trademark of Oracle Corporation and/or its
affiliates. Other names may be trademarks of their respective
owners.

Type 'help;' or '\h' for help. Type '\c' to clear the current input statement.

mysql> grant replication slave on *.* to 'ftx'@'192.168.195.136' identified by '12345678';                    //创建一个同步账号授权给从数据库使用
Query OK, 0 rows affected, 1 warning (0.01 sec)

mysql> flush privileges;   //重读授权表
Query OK, 0 rows affected (0.00 sec)

mysql> quit
Bye
[root@master1 ~]#

//修改配置文件
[root@master1 ~]# vim /etc/my.cnf
[root@master1 ~]# cat /etc/my.cnf
[mysqld]
basedir = /usr/local/mysql
datadir = /opt/data
socket = /tmp/mysql.sock
port = 3306
pid-file = /opt/data/mysql.pid
user = mysql
skip-name-resolve
log-bin=mysql_bin   //添加此行
server-id=10        //添加此行,id全局唯一,不可重复

//重启服务
[root@master1 ~]# service mysqld stop
Shutting down MySQL.. SUCCESS!
[root@master1 ~]# service mysqld start
Starting MySQL. SUCCESS!
[root@master1 ~]#

//然后关闭服务,确保两台master主机只启动一台
[root@master1 ~]# service mysqld stop
Shutting down MySQL.. SUCCESS!
[root@master1 ~]#

//配置master2主机,由于/opt/data的是同步的,所以不需要再创建用户授权,只用改配置文件
[root@master2 ~]# vim /etc/my.cnf
[root@master2 ~]# cat /etc/my.cnf
[mysqld]
basedir = /usr/local/mysql
datadir = /opt/data
socket = /tmp/mysql.sock
port = 3306
pid-file = /opt/data/mysql.pid
user = mysql
skip-name-resolve
log-bin=mysql_bin      //添加此行
server-id=11           //添加此行,id全局唯一,不可重复

//重启服务,然后关闭服务
[root@master2 ~]# service mysqld start
Starting MySQL. SUCCESS!
[root@master2 ~]# service mysqld stop
Shutting down MySQL.. SUCCESS!
[root@master2 ~]#
6.安装、配置keepalived
master1主机
//在master1主机上安装keepalived服务
[root@master1 ~]# yum -y install keepalived.x86_64

//在master1主机上配置keepalived所需脚本
[root@master1 ~]# mkdir /scripts && cd /scripts
[root@master1 scripts]# vim check_mysql.sh
[root@master1 scripts]# chmod +x check_mysql.sh
[root@master1 scripts]# cat check_mysql.sh  //该脚本得出是否存在mysql服务进程,若没有,则进入判断,执行关闭keepalived服务的命令
#!/bin/bash

mysql_status=$(ps -ef | grep -Ev "grep|$0" | grep '\bmysql\b'|wc -l)

if [ $mysql_status -lt 1 ];then
systemctl stop keepalived
fi

[root@master1 scripts]# ll
total 4
-rwxr-xr-x 1 root root 145 Oct 15 22:25 check_mysql.sh

//先将原配置文件备份一下,然后修改,生成一个新的配置文件
[root@master1 ~]# cp /etc/keepalived/keepalived.conf /opt/
[root@master1 ~]# vim /etc/keepalived/keepalived.conf
[root@master1 ~]# cat /etc/keepalived/keepalived.conf
! Configuration File for keepalived

global_defs {
     router_id mysql1                   //路由器id,两台主机要不一样
}

vrrp_script check_mysql {
    script "/scripts/check_mysql.sh"    //脚本的路径
    interval 1
    fall 3
    weight -40
}

vrrp_instance VI_1 {
    state MASTER                      //初始状态MASTER或BACKUP
    interface ens160                  //vrrp示例绑定的网卡接口,和真实网卡一致
    virtual_router_id 80              //虚拟路由器id,两台主机要一样
    priority 100                      //优先级,优先级越大就是主服务器
    advert_int 1
    authentication {
        auth_type PASS
        auth_pass 12345678           //密码,可以自定义
    }
    virtual_ipaddress {
        192.168.195.100              //vip
    }
    track_script {
        check_mysql                 //追踪的脚本
    }
}

virtual_server 192.168.195.100 80 {             //配置虚拟服务器
    delay_loop 6                                //健康检查时间间隔
    lb_algo rr                                  //lvs调度算法
    lb_kind NAT                                 //lvs模式
    persistence_timeout 50                      //持久化超时时间,单位为秒
    protocol TCP

    real_server 192.168.195.134 80 {            //指向第1台主数据库的ip(master1主机)
        weight 1
        TCP_CHECK {
            connect_port 3306
            connect_timeout 3
            nb_get_retry 3
            delay_before_retry 3
        }
    }
    real_server 192.168.195.135 80 {           //指向第2台主数据库的ip(master2主机)
        weight 1
        TCP_CHECK {
            connect_port 3306
            connect_timeout 3
            nb_get_retry 3
            delay_before_retry 3
        }
    }
}
[root@master1 ~]#

//重启keepalived服务,以重读keepalived配置文件
[root@master1 ~]# systemctl restart keepalived.service
master2主机
//在master2主机上安装keepalived服务
[root@master2 ~]# yum -y install keepalived.x86_64

//在master2主机上配置keepalived所需脚本
[root@master2 ~]# mkdir /scripts && cd /scripts
[root@master2 scripts]# vim notify.sh
[root@master2 scripts]# chmod +x notify.sh
[root@master2 scripts]# cat notify.sh
#!/bin/bash

case "$1" in
  master)
        mysql_status=$(ps -ef|grep -Ev "grep|$0"|grep '\bmysql\b'|wc -l)
        if [ $mysql_status -lt 1 ];then
            service mysqld start
        fi
  ;;
  backup)
        mysql_status=$(ps -ef|grep -Ev "grep|$0"|grep '\bmysql\b'|wc -l)
        if [ $mysql_status -gt 0 ];then
        service mysqld stop
        fi
  ;;
  *)
        echo "Usage:$0 master|backup"
  ;;
esac

[root@master2 scripts]# ll
total 4
-rwxr-xr-x 1 root root 419 Oct 15 22:48 notify.sh

//先将原配置文件备份一下,然后修改,生成一个新的配置文件
[root@master2 ~]# cp /etc/keepalived/keepalived.conf /opt/
[root@master2 ~]# vim /etc/keepalived/keepalived.conf
[root@master2 ~]# cat /etc/keepalived/keepalived.conf
! Configuration File for keepalived

global_defs {
   router_id mysql2
}

vrrp_instance VI_1 {
    state BACKUP
    interface ens160
    virtual_router_id 80
    priority 80
    advert_int 1
    authentication {
        auth_type PASS
        auth_pass 12345678
    }
    virtual_ipaddress {
        192.168.195.100
    }
    notify_master "/scripts/notify.sh master"
    notify_backup "/scripts/notify.sh backup"
}

virtual_server 192.168.195.100 80 {
    delay_loop 6
    lb_algo rr
    lb_kind NAT
    persistence_timeout 50
    protocol TCP

    real_server 192.168.195.134 80 {
        weight 1
        TCP_CHECK {
            connect_port 80
            connect_timeout 3
            nb_get_retry 3
            delay_before_retry 3
          }
        }
    real_server 192.168.195.135 80 {
        weight 1
        TCP_CHECK {
            connect_port 80
            connect_timeout 3
            nb_get_retry 3
            delay_before_retry 3
          }
        }
}
[root@master2 ~]#

//重启服务,以重读配置文件
[root@master2 ~]# systemctl restart keepalived.service
查看vip
我们先手动开启master1主机的mysql服务和keepalived服务,开启master1主机上的mysql服务之前需关闭master2主机上的mysql服务
//当前在我们的mysql服务和keepalived服务都开启的状态下,存在vip
[root@master1 ~]# systemctl is-active keepalived.service
active
[root@master1 ~]# ss -antl | grep 3306
LISTEN    0         80                       *:3306                   *:*
[root@master1 ~]# ip a show ens160 | grep 192.168.195.100
    inet 192.168.195.100/32 scope global ens160
[root@master1 ~]# ip a show ens160 | grep 192.168.195.100 | wc -l
1

//查看master2主机上的服务状态,应该是keepalived启动,mysql未启动,没有vip
[root@master2 ~]# systemctl is-active keepalived.service
active
[root@master2 ~]# ss -antl | grep 3306
[root@master2 ~]# ss -antl | grep 3306 | wc -l
0
[root@master2 ~]# ip a show ens160 | grep 192.168.195.100
[root@master2 ~]# ip a show ens160 | grep 192.168.195.100 | wc -l
0
7.安装部署从数据库
在slave主机上
//安装一个库文件包
[root@slave ~]# yum -y install ncurses-compat-libs

//创建mysql用户和组
[root@slave ~]# groupadd -r -g 306 mysql
[root@slave ~]#  useradd -r -M -s /sbin/nologin -g 306 -u 306 mysql

//解压二进制包到/usr/local/
[root@master1 ~]# scp mysql-5.7.39-linux-glibc2.12-x86_64.tar.gz  root@192.168.195.136:/root/
root@192.168.195.136's password:
mysql-5.7.39-linux-glibc2.12-x86_64.tar.gz                                   100%  645MB 122.6MB/s   00:05
[root@slave ~]# ls
anaconda-ks.cfg  mysql-5.7.39-linux-glibc2.12-x86_64.tar.gz
[root@slave ~]# tar xf mysql-5.7.39-linux-glibc2.12-x86_64.tar.gz -C /usr/local/

//创建目录链接,并修改目录/usr/local/mysql的属主属组
[root@slave ~]# ln -sv /usr/local/mysql-5.7.39-linux-glibc2.12-x86_64/ /usr/local/mysql
'/usr/local/mysql' -> '/usr/local/mysql-5.7.39-linux-glibc2.12-x86_64/'
[root@slave ~]# chown -R mysql:mysql /usr/local/mysql
[root@slave ~]# ll -d /usr/local/mysql
lrwxrwxrwx 1 mysql mysql 47 Oct 15 23:16 /usr/local/mysql -> /usr/local/mysql-5.7.39-linux-glibc2.12-x86_64/

//添加环境变量
[root@slave ~]# echo 'export PATH=/usr/local/mysql/bin:$PATH' > /etc/profile.d/mysql.sh
[root@slave ~]# source /etc/profile.d/mysql.sh
[root@slave ~]# echo $PATH
/usr/local/mysql/bin:/usr/local/sbin:/usr/local/bin:/usr/sbin:/usr/bin:/root/bin

//建立数据存放目录
[root@slave ~]# mkdir /opt/data
[root@slave ~]# chown -R mysql:mysql /opt/data/

//初始化数据库
[root@slave ~]# /usr/local/mysql/bin/mysqld --initialize --user=mysql --datadir=/opt/data/
2023-10-15T15:19:37.491589Z 0 [Warning] TIMESTAMP with implicit DEFAULT value is deprecated. Please use --explicit_defaults_for_timestamp server option (see documentation for more details).
2023-10-15T15:19:37.612968Z 0 [Warning] InnoDB: New log files created, LSN=45790
2023-10-15T15:19:37.634355Z 0 [Warning] InnoDB: Creating foreign key constraint system tables.
2023-10-15T15:19:37.688134Z 0 [Warning] No existing UUID has been found, so we assume that this is the first time that this server has been started. Generating a new UUID: 410b0a73-6b6e-11ee-8f2f-000c29d9f7e8.
2023-10-15T15:19:37.688743Z 0 [Warning] Gtid table is not ready to be used. Table 'mysql.gtid_executed' cannot be opened.
2023-10-15T15:19:38.020453Z 0 [Warning] A deprecated TLS version TLSv1 is enabled. Please use TLSv1.2 or higher.
2023-10-15T15:19:38.020499Z 0 [Warning] A deprecated TLS version TLSv1.1 is enabled. Please use TLSv1.2 or higher.
2023-10-15T15:19:38.020906Z 0 [Warning] CA certificate ca.pem is self signed.
2023-10-15T15:19:38.127308Z 1 [Note] A temporary password is generated for root@localhost: ZKyqhRghv0/Y   //最后一行随机生成一个登录mysql数据库密码:(“ZKyqhRghv0/Y”)

//配置头文件和lib库文件路径
[root@slave ~]# ln -sv /usr/local/mysql/include/ /usr/local/include/mysql
'/usr/local/include/mysql' -> '/usr/local/mysql/include/'
[root@slave ~]# echo '/usr/local/mysql/lib' > /etc/ld.so.conf.d/mysql.conf
[root@slave ~]# ldconfig

//生成mysql配置文件
[root@slave ~]# vim /etc/my.cnf
[root@slave ~]# cat /etc/my.cnf
[mysqld]
basedir = /usr/local/mysql
datadir = /opt/data
socket = /tmp/mysql.sock
port = 3306
pid-file = /opt/data/mysql.pid
user = mysql
skip-name-resolve
server-id=20
relay-log=mysql_relay_bin
[root@slave ~]#

//配置服务启动脚本
[root@slave ~]# cp -a /usr/local/mysql/support-files/mysql.server /etc/init.d/mysqld
[root@slave ~]# sed -ri 's#^(basedir=).*#\1/usr/local/mysql#g' /etc/init.d/mysqld
[root@slave ~]# sed -ri 's#^(datadir=).*#\1/opt/data#g' /etc/init.d/mysqld

//重新设置mysql数据库密码
[root@slave ~]# mysql -uroot -p"ZKyqhRghv0/Y"
mysql: [Warning] Using a password on the command line interface can be insecure.
Welcome to the MySQL monitor.  Commands end with ; or \g.
Your MySQL connection id is 2
Server version: 5.7.39

Copyright (c) 2000, 2022, Oracle and/or its affiliates.

Oracle is a registered trademark of Oracle Corporation and/or its
affiliates. Other names may be trademarks of their respective
owners.

Type 'help;' or '\h' for help. Type '\c' to clear the current input statement.

mysql> set password = password('12345678');
Query OK, 0 rows affected, 1 warning (0.00 sec)

mysql> quit
Bye
[root@slave ~]#
配置从库slave模式
查看master1主机上的master状态
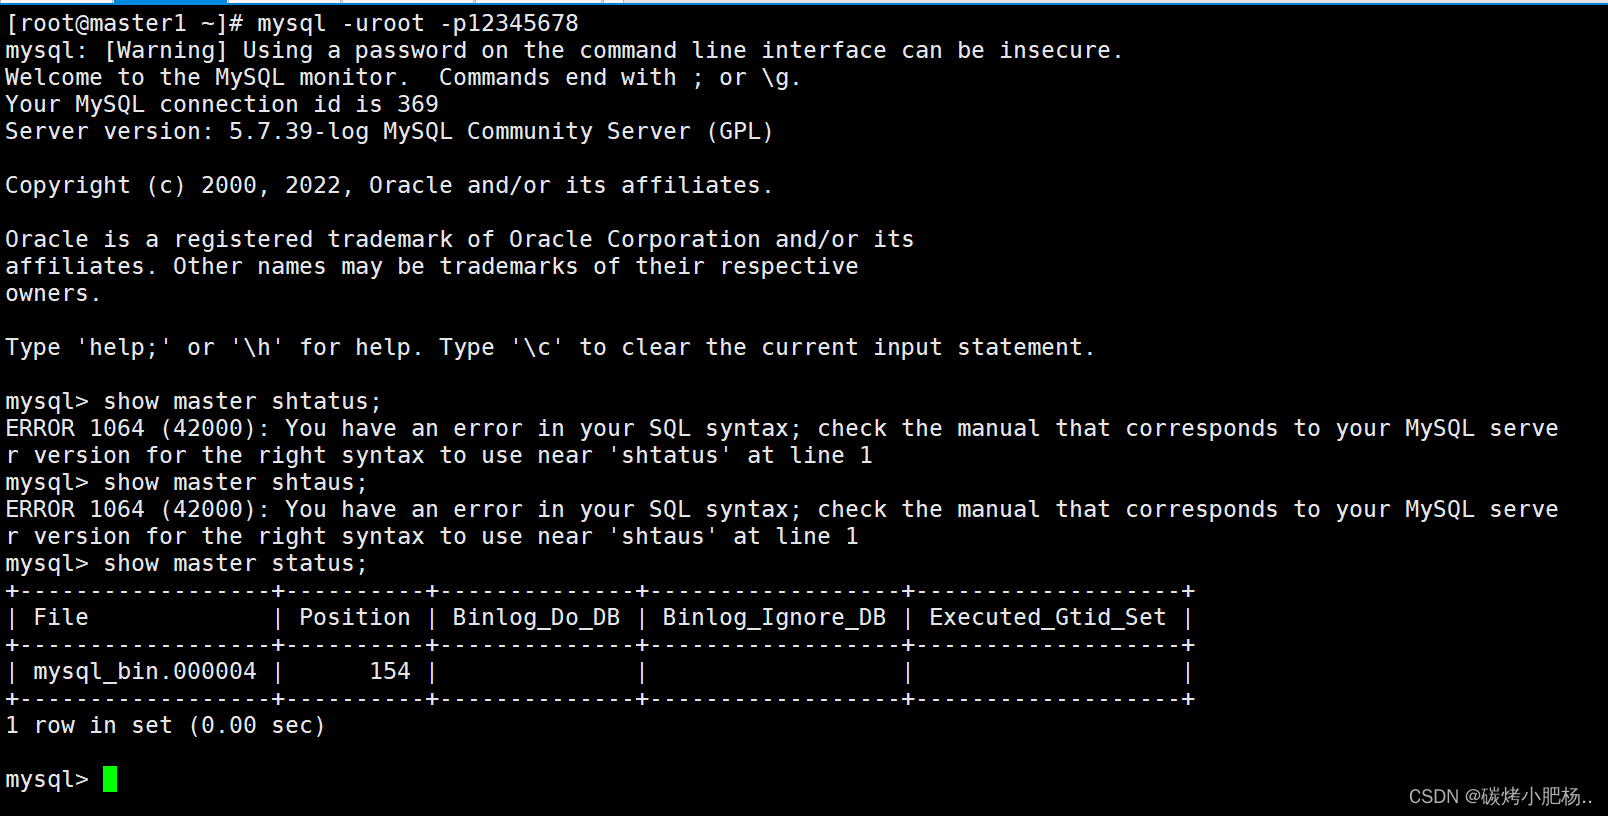
//认vip为主(192.168.195.100)
[root@slave ~]# mysql -uroot -p12345678
mysql: [Warning] Using a password on the command line interface can be insecure.
Welcome to the MySQL monitor.  Commands end with ; or \g.
Your MySQL connection id is 3
Server version: 5.7.39 MySQL Community Server (GPL)

Copyright (c) 2000, 2022, Oracle and/or its affiliates.

Oracle is a registered trademark of Oracle Corporation and/or its
affiliates. Other names may be trademarks of their respective
owners.

Type 'help;' or '\h' for help. Type '\c' to clear the current input statement.

mysql> change master to master_host='192.168.195.100',
    -> master_user='ftx',
    -> master_password='12345678',
    -> master_log_file='mysql_bin.000004',
    -> master_log_pos=154;
Query OK, 0 rows affected, 2 warnings (0.01 sec)

mysql> start slave;          //启动主从复制
Query OK, 0 rows affected (0.00 sec)

//查看从数据库的状态
mysql> show slave status\G
*************************** 1. row ***************************
               Slave_IO_State: Waiting for master to send event
                  Master_Host: 192.168.195.100
                  Master_User: ftx
                  Master_Port: 3306
                Connect_Retry: 60
              Master_Log_File: mysql_bin.000004
          Read_Master_Log_Pos: 154
               Relay_Log_File: mysql_relay_bin.000002
                Relay_Log_Pos: 320
        Relay_Master_Log_File: mysql_bin.000004
             Slave_IO_Running: Yes
            Slave_SQL_Running: Yes
              Replicate_Do_DB:
          Replicate_Ignore_DB:
           Replicate_Do_Table:
       Replicate_Ignore_Table:
      Replicate_Wild_Do_Table:
  Replicate_Wild_Ignore_Table:
                   Last_Errno: 0
                   Last_Error:
                 Skip_Counter: 0
          Exec_Master_Log_Pos: 154
              Relay_Log_Space: 527
              Until_Condition: None
               Until_Log_File:
                Until_Log_Pos: 0
           Master_SSL_Allowed: No
           Master_SSL_CA_File:
           Master_SSL_CA_Path:
              Master_SSL_Cert:
            Master_SSL_Cipher:
               Master_SSL_Key:
        Seconds_Behind_Master: 0
Master_SSL_Verify_Server_Cert: No
                Last_IO_Errno: 0
                Last_IO_Error:
               Last_SQL_Errno: 0
               Last_SQL_Error:
  Replicate_Ignore_Server_Ids:
             Master_Server_Id: 10
                  Master_UUID: 11b3dfb4-6b5c-11ee-9bf0-000c298b9baf
             Master_Info_File: /opt/data/master.info
                    SQL_Delay: 0
          SQL_Remaining_Delay: NULL
      Slave_SQL_Running_State: Slave has read all relay log; waiting for more updates
           Master_Retry_Count: 86400
                  Master_Bind:
      Last_IO_Error_Timestamp:
     Last_SQL_Error_Timestamp:
               Master_SSL_Crl:
           Master_SSL_Crlpath:
           Retrieved_Gtid_Set:
            Executed_Gtid_Set:
                Auto_Position: 0
         Replicate_Rewrite_DB:
                 Channel_Name:
           Master_TLS_Version:
1 row in set (0.00 sec)

mysql>
8.测试
1.在高可用集群中,当master1主机为主时,master2主机为备
//master1主机上的keepalived服务和mysql是启动的,有vip
[root@master1 ~]# systemctl is-active keepalived.service
active
[root@master1 ~]# ss -antl | grep 3306
LISTEN    0         80                       *:3306                   *:*
[root@master1 ~]# ip a show ens160 | grep 192.168.195.100
    inet 192.168.195.100/32 scope global ens160
[root@master1 ~]# ip a show ens160 | grep 192.168.195.100 | wc -l
1

//而此时master2主机上的则是keepalived服务开启,mysql服务关闭,没有vip
[root@master2 ~]# systemctl is-active keepalived.service
active
[root@master2 ~]# ss -antl | grep 3306
[root@master2 ~]# ss -antl | grep 3306 | wc -l
0
[root@master2 ~]# ip a show ens160 | grep 192.168.195.100
[root@master2 ~]# ip a show ens160 | grep 192.168.195.100 | wc -l
0

//在master1主机上的mysql数据库中,创建一个数据库,然后查看从服务器是否同步
[root@master1 ~]# mysql -uroot -p12345678 -e "create database ftx;"
mysql: [Warning] Using a password on the command line interface can be insecure.
[root@master1 ~]# mysql -uroot -p12345678 -e "show databases;"
mysql: [Warning] Using a password on the command line interface can be insecure.
+--------------------+
| Database           |
+--------------------+
| information_schema |
| ftx                |
| mysql              |
| performance_schema |
| sys                |
+--------------------+
上述告警是告诉我们在命令行界面输入密码不安全,此此实验我们不用考虑这个问题

//前往slave主机上查看
[root@slave ~]# mysql -uroot -p12345678 -e "show databases;"
mysql: [Warning] Using a password on the command line interface can be insecure.
+--------------------+
| Database           |
+--------------------+
| information_schema |
| ftx                |    //成功创建
| mysql              |
| performance_schema |
| sys                |
+--------------------+
2.模拟master1主机发生故障,导致服务宕机,master1主机上的keepalived服务则会自动关闭,释放资源,vip则会跳转到master2主机上,从而使得master2主机接替主数据库位置,开启mysql服务
//手动关闭master1主机上的mysql服务,从而使得keepalived服务自动关闭释放资源
[root@master1 ~]# service mysqld stop
Shutting down MySQL............ SUCCESS!
[root@master1 ~]# systemctl is-active keepalived.service
inactive
[root@master1 ~]# ss -antl | grep 3306
[root@master1 ~]# ss -antl | grep 3306 | wc -l
0
[root@master1 ~]# ip a show ens160 | grep 192.168.195.100
[root@master1 ~]# ip a show ens160 | grep 192.168.195.100 | wc -l
0

//再次查看master2主机上mysql和keepalived服务状态,以及vip位置
[root@master2 ~]# systemctl is-active keepalived.service
active
[root@master2 ~]# ss -antl | grep 3306
LISTEN    0         80                       *:3306                   *:*
[root@master2 ~]# ss -antl | grep 3306 | wc -l
1
[root@master2 ~]# ip a show ens160 | grep 192.168.195.100
    inet 192.168.195.100/32 scope global ens160
[root@master2 ~]# ip a show ens160 | grep 192.168.195.100 | wc -l
1

//在master2主机上登录mysql数据库,创建一个数据库,查看从服务器是否同步
[root@master2 ~]# mysql -uroot -p12345678 -e "create database yyr;"
mysql: [Warning] Using a password on the command line interface can be insecure.
[root@master2 ~]# mysql -uroot -p12345678 -e "show databases;"
mysql: [Warning] Using a password on the command line interface can be insecure.
+--------------------+
| Database           |
+--------------------+
| information_schema |
| ftx                |
| mysql              |
| performance_schema |
| sys                |
| yyr                |
+--------------------+

//前往slave主机上查看
[root@slave ~]# mysql -uroot -p12345678 -e "show databases;"
mysql: [Warning] Using a password on the command line interface can be insecure.
+--------------------+
| Database           |
+--------------------+
| information_schema |
| ftx                |
| mysql              |
| performance_schema |
| sys                |
| yyr                |       //成功创建
+--------------------+
部署完成