任务要求
- 一个作为ContentProvider提供联系人数据
- 另一个作为Observer监听联系人数据的变化:
1、创建ContactProvider项目;
2、在ContactProvider项目中用Sqlite数据库实现联系人的读写功能;
3、在ContactProvider项目中通过ContentProvider提供联系人数据;
4、创建ContactObserver项目;
5、在ContactObserver项目中注册ContentObserver,监听联系人数据库的变化。
当创建一个 Android 联系人应用,包括 ContactProvider 项目和 ContactObserver 项目,你需要实现增删改查方法以及两个页面的布局文件。以下是更详细的步骤:
步骤 1: 创建 ContactProvider 项目
-
创建一个新的 Android 项目,命名为 ContactProvider。
-
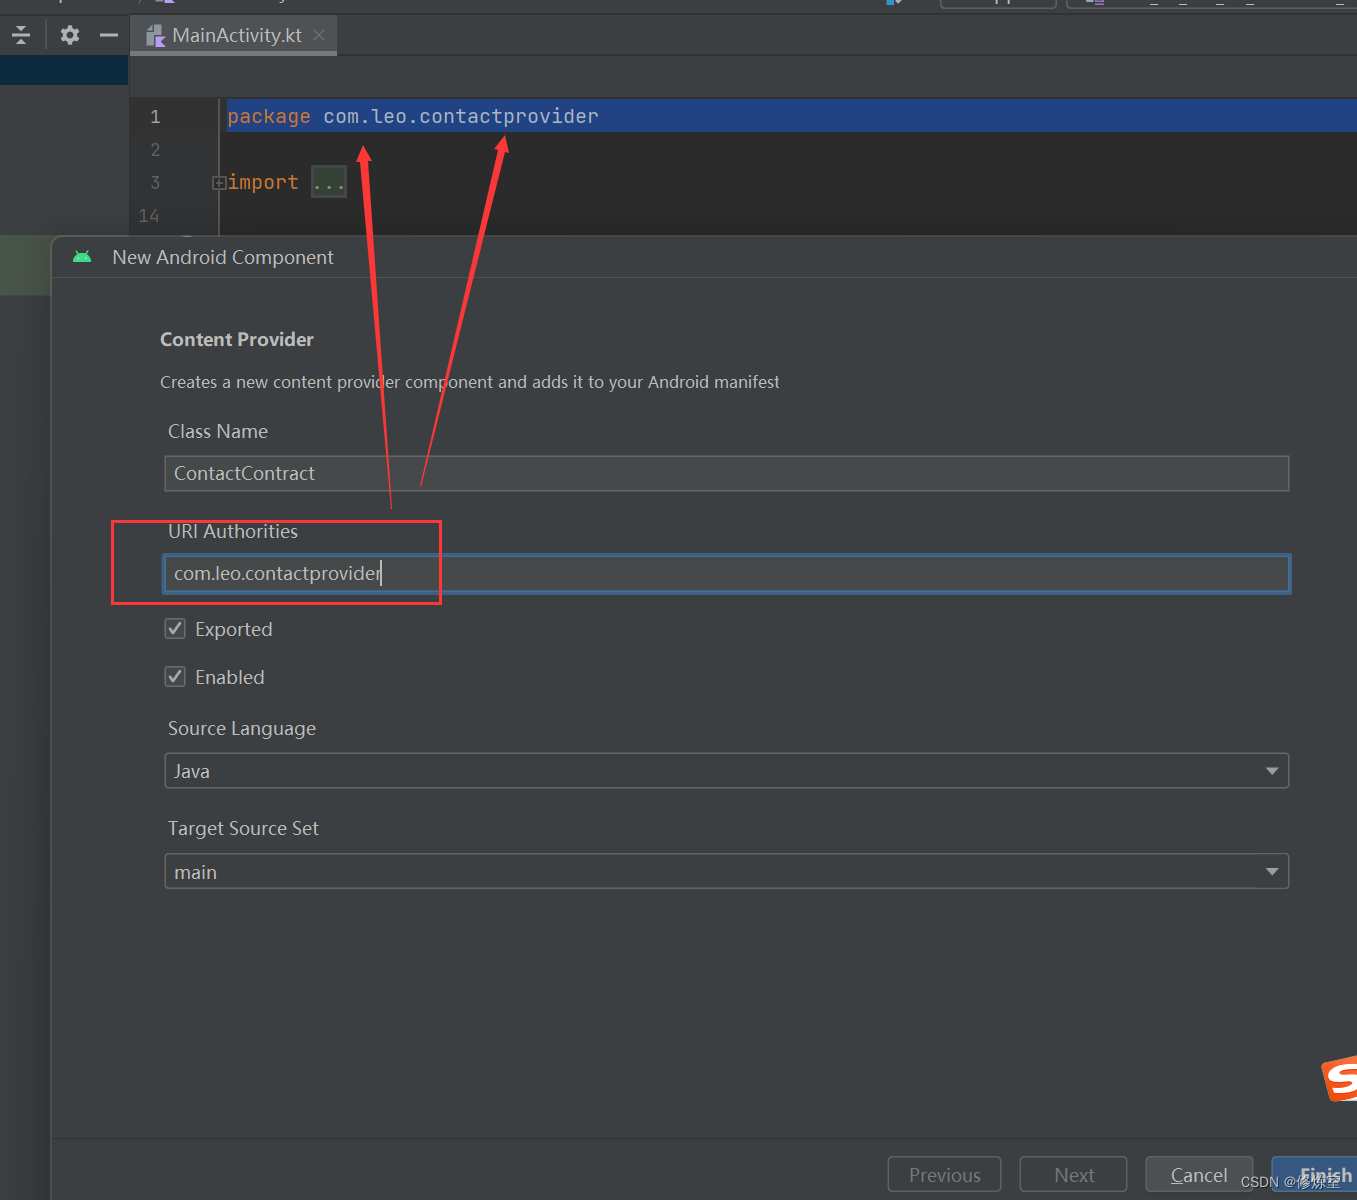
在 ContactProvider 项目中,创建一个名为 ContactContract 的 Java 类,用于定义数据库表结构和内容提供者的 URI。
package com.leo.contactprovider;

import android.net.Uri;
import android.provider.BaseColumns;

public class ContactContract {
    public static final String AUTHORITY = "com.leo.contactprovider";
    public static final Uri BASE_CONTENT_URI = Uri.parse("content://" + AUTHORITY);

    public static final String PATH_CONTACTS = "contacts";

    public static final class ContactEntry implements BaseColumns {
        public static final Uri CONTENT_URI = BASE_CONTENT_URI.buildUpon().appendPath(PATH_CONTACTS).build();

        public static final String TABLE_NAME = "contacts";
        public static final String COLUMN_NAME = "name";
        public static final String COLUMN_PHONE = "phone";
    }
}}
- 创建一个名为 ContactDbHelper 的数据库帮助类,用于创建和管理联系人数据库。
package com.example.contactprovider;
package com.leo.contactprovider;

import android.content.Context;
import android.database.sqlite.SQLiteDatabase;
import android.database.sqlite.SQLiteOpenHelper;

public class ContactDbHelper extends SQLiteOpenHelper {
    private static final String DATABASE_NAME = "contacts.db";
    private static final int DATABASE_VERSION = 1;

    public ContactDbHelper(Context context) {
        super(context, DATABASE_NAME, null, DATABASE_VERSION);
    }

    @Override
    public void onCreate(SQLiteDatabase db) {
        final String SQL_CREATE_CONTACTS_TABLE = "CREATE TABLE " +
                ContactContract.ContactEntry.TABLE_NAME + " (" +
                ContactContract.ContactEntry._ID + " INTEGER PRIMARY KEY AUTOINCREMENT, " +
                ContactContract.ContactEntry.COLUMN_NAME + " TEXT NOT NULL, " +
                ContactContract.ContactEntry.COLUMN_PHONE + " TEXT NOT NULL" +
                ");";

        db.execSQL(SQL_CREATE_CONTACTS_TABLE);
    }

    @Override
    public void onUpgrade(SQLiteDatabase db, int oldVersion, int newVersion) {
        db.execSQL("DROP TABLE IF EXISTS " + ContactContract.ContactEntry.TABLE_NAME);
        onCreate(db);
    }
}
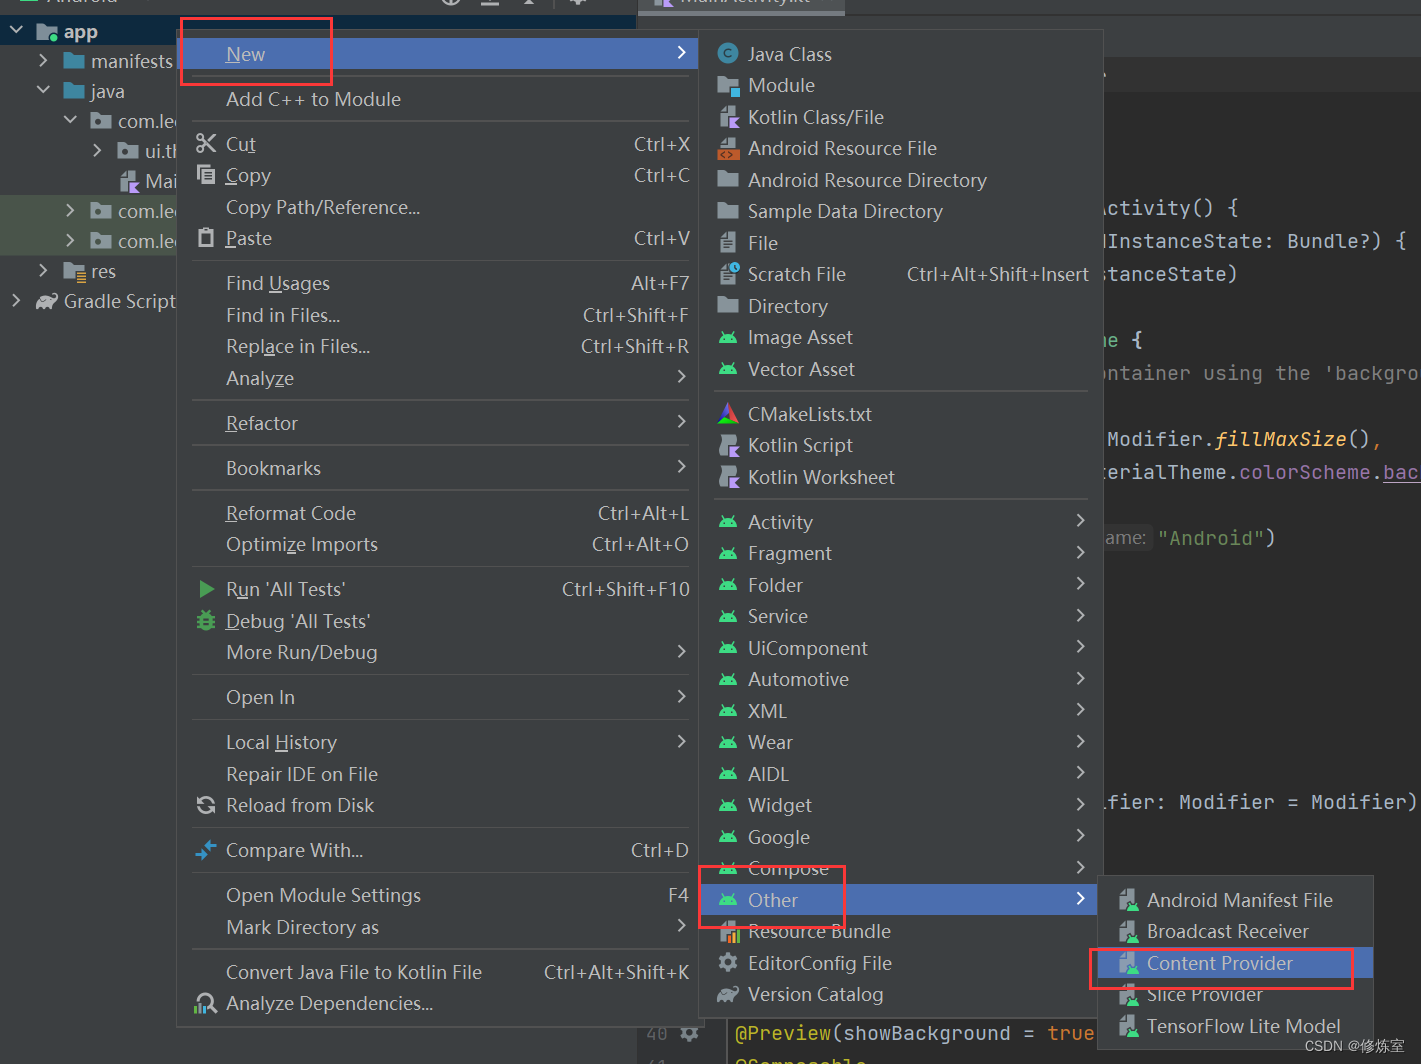
- 创建一个名为 ContactProvider 的内容提供者类,实现联系人数据的增删改查功能。
“New” —> “Other” —> “Cotent Provider”
package com.leo.contactprovider;

import static com.leo.contactprovider.ContactContract.AUTHORITY;

import android.content.ContentProvider;
import android.content.ContentValues;
import android.content.UriMatcher;
import android.database.Cursor;
import android.database.sqlite.SQLiteDatabase;
import android.net.Uri;

import androidx.annotation.NonNull;
import androidx.annotation.Nullable;

public class ContactProvider extends ContentProvider {
    private static final UriMatcher uriMatcher = new UriMatcher(UriMatcher.NO_MATCH);
    // Define integer constants for the URIs
    private static final int CONTACTS = 100;
    private static final int CONTACT_ID = 101;

    static {
        uriMatcher.addURI(AUTHORITY, "contacts", CONTACTS);
        uriMatcher.addURI(AUTHORITY, "contacts/#", CONTACT_ID);
    }
    private ContactDbHelper dbHelper;

    @Override
    public boolean onCreate() {
        dbHelper = new ContactDbHelper(getContext());
        return true;
    }

    // 实现数据的增删改查方法
    @Override
    public Uri insert(Uri uri, ContentValues values) {
        SQLiteDatabase db = dbHelper.getWritableDatabase();
        long id = db.insert(ContactContract.ContactEntry.TABLE_NAME, null, values);
        if (id > 0) {
            getContext().getContentResolver().notifyChange(uri, null);
            return ContactContract.ContactEntry.CONTENT_URI.buildUpon().appendPath(String.valueOf(id)).build();
        }
        return null;
    }

    @Override
    public int delete(Uri uri, String selection, String[] selectionArgs) {
        SQLiteDatabase db = dbHelper.getWritableDatabase();
        int rowsDeleted;

        switch (uriMatcher.match(uri)) {
            case CONTACTS:
                rowsDeleted = db.delete(ContactContract.ContactEntry.TABLE_NAME, selection, selectionArgs);
                break;
            case CONTACT_ID:
                String contactId = uri.getLastPathSegment();
                rowsDeleted = db.delete(ContactContract.ContactEntry.TABLE_NAME,
                        ContactContract.ContactEntry._ID + "=?", new String[]{contactId});
                break;
            default:
                throw new IllegalArgumentException("Unknown URI: " + uri);
        }

        if (rowsDeleted > 0) {
            getContext().getContentResolver().notifyChange(uri, null);
        }
        return rowsDeleted;
    }

    @Override
    public int update(Uri uri, ContentValues values, String selection, String[] selectionArgs) {
        SQLiteDatabase db = dbHelper.getWritableDatabase();
        int rowsUpdated;

        switch (uriMatcher.match(uri)) {
            case CONTACTS:
                rowsUpdated = db.update(ContactContract.ContactEntry.TABLE_NAME, values, selection, selectionArgs);
                break;
            case CONTACT_ID:
                String contactId = uri.getLastPathSegment();
                rowsUpdated = db.update(ContactContract.ContactEntry.TABLE_NAME, values,
                        ContactContract.ContactEntry._ID + "=?", new String[]{contactId});
                break;
            default:
                throw new IllegalArgumentException("Unknown URI: " + uri);
        }

        if (rowsUpdated > 0) {
            getContext().getContentResolver().notifyChange(uri, null);
        }
        return rowsUpdated;
    }

    @Override
    public Cursor query(Uri uri, String[] projection, String selection, String[] selectionArgs, String sortOrder) {
        SQLiteDatabase db = dbHelper.getReadableDatabase();
        Cursor cursor;

        switch (uriMatcher.match(uri)) {
            case CONTACTS:
                cursor = db.query(ContactContract.ContactEntry.TABLE_NAME, projection, selection, selectionArgs, null, null, sortOrder);
                break;
            case CONTACT_ID:
                String contactId = uri.getLastPathSegment();
                cursor = db.query(ContactContract.ContactEntry.TABLE_NAME, projection,
                        ContactContract.ContactEntry._ID + "=?", new String[]{contactId}, null, null, sortOrder);
                break;
            default:
                throw new IllegalArgumentException("Unknown URI: " + uri);
        }

        // Set notification URI on the cursor
        cursor.setNotificationUri(getContext().getContentResolver(), uri); // 添加这行代码

        return cursor;
    }


    @Nullable
    @Override
    public String getType(@NonNull Uri uri) {
        return null;
    }

    // ...
}
-
UriMatcher:
UriMatcher用于匹配传入的URI,以确定执行哪种操作(例如,查询、插入、删除或更新)。你的代码使用静态初始化块初始化了uriMatcher,并为两种不同类型的URI(“contacts” 和 “contacts/#”)分配了常量整数。 -
onCreate方法: 这是内容提供者的初始化方法。在这里,你初始化了数据库帮助类(
ContactDbHelper)以及将其与内容提供者关联。内容提供者的初始化是在应用启动时完成的。 -
insert方法: 这是用于插入数据的方法。当应用通过内容提供者插入新数据时,
insert方法会打开数据库,执行插入操作,并使用notifyChange通知任何对数据感兴趣的内容观察者。 -
delete方法: 此方法用于删除数据。它会检查URI,然后根据URI的类型执行删除操作。如果成功删除了一些行,它会使用
notifyChange通知内容观察者。 -
update方法: 用于更新数据。与
delete方法类似,它检查URI,执行相应的更新操作,并使用notifyChange通知内容观察者。 -
query方法: 用于查询数据。这是内容提供者最常见的方法,用于检索数据。它根据传入的URI执行查询,然后使用
setNotificationUri通知关联的内容观察者。 -
setNotificationUri: 此方法将查询结果与特定URI关联起来,以便在数据更改时通知观察者。
这段代码涵盖了内容提供者的核心功能,包括处理插入、删除、更新和查询操作,以及在这些操作完成后通知相关内容观察者。内容提供者允许应用之间共享数据,并通过内容观察者模式实现实时数据更新。
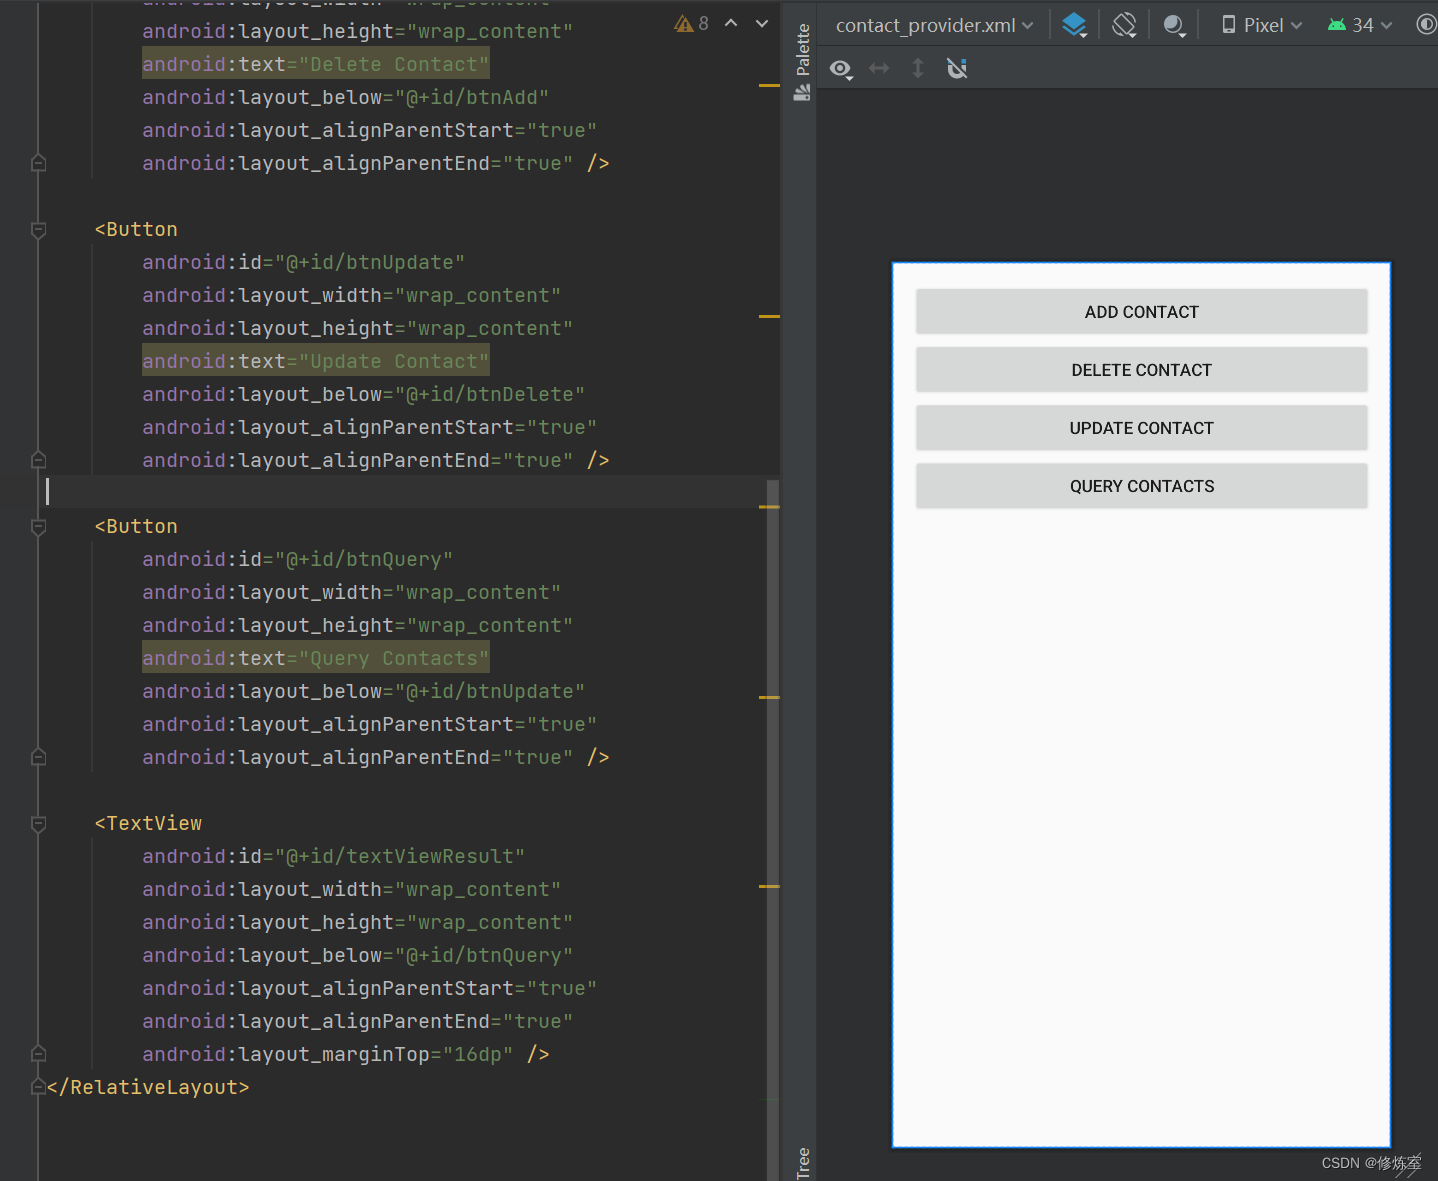
- 创建布局文件-
contact_provider

<?xml version="1.0" encoding="utf-8"?>
<RelativeLayout xmlns:android="http://schemas.android.com/apk/res/android"
    xmlns:app="http://schemas.android.com/apk/res-auto"
    xmlns:tools="http://schemas.android.com/tools"
    android:layout_width="match_parent"
    android:layout_height="match_parent"
    android:padding="16dp"
    tools:context=".MainActivity">

    <Button
        android:id="@+id/btnAdd"
        android:layout_width="wrap_content"
        android:layout_height="wrap_content"
        android:text="Add Contact"
        android:layout_alignParentTop="true"
        android:layout_alignParentStart="true"
        android:layout_alignParentEnd="true" />

    <Button
        android:id="@+id/btnDelete"
        android:layout_width="wrap_content"
        android:layout_height="wrap_content"
        android:text="Delete Contact"
        android:layout_below="@+id/btnAdd"
        android:layout_alignParentStart="true"
        android:layout_alignParentEnd="true" />

    <Button
        android:id="@+id/btnUpdate"
        android:layout_width="wrap_content"
        android:layout_height="wrap_content"
        android:text="Update Contact"
        android:layout_below="@+id/btnDelete"
        android:layout_alignParentStart="true"
        android:layout_alignParentEnd="true" />

    <Button
        android:id="@+id/btnQuery"
        android:layout_width="wrap_content"
        android:layout_height="wrap_content"
        android:text="Query Contacts"
        android:layout_below="@+id/btnUpdate"
        android:layout_alignParentStart="true"
        android:layout_alignParentEnd="true" />

    <TextView
        android:id="@+id/textViewResult"
        android:layout_width="wrap_content"
        android:layout_height="wrap_content"
        android:layout_below="@+id/btnQuery"
        android:layout_alignParentStart="true"
        android:layout_alignParentEnd="true"
        android:layout_marginTop="16dp"
        android:textSize="20sp"
 />
</RelativeLayout>
实现效果
在 ContactProvider 项目中为每个按钮添加相应的功能。
package com.leo.contactprovider;

import android.content.ContentValues;
import android.database.Cursor;
import android.net.Uri;
import android.os.Bundle;
import android.view.View;
import android.widget.Button;
import android.widget.TextView;

import androidx.appcompat.app.AppCompatActivity;

public class MainActivity extends AppCompatActivity {
    private TextView textViewResult;

    @Override
    protected void onCreate(Bundle savedInstanceState) {
        super.onCreate(savedInstanceState);
        setContentView(R.layout.contact_provider);

        textViewResult = findViewById(R.id.textViewResult);

        Button btnAdd = findViewById(R.id.btnAdd);
        Button btnDelete = findViewById(R.id.btnDelete);
        Button btnUpdate = findViewById(R.id.btnUpdate);
        Button btnQuery = findViewById(R.id.btnQuery);

        btnAdd.setOnClickListener(new View.OnClickListener() {
            @Override
            public void onClick(View view) {
                // 添加联系人示例
                ContentValues values = new ContentValues();
                values.put(ContactContract.ContactEntry.COLUMN_NAME, "John Doe");
                values.put(ContactContract.ContactEntry.COLUMN_PHONE, "123-456-7890");
                Uri insertUri = getContentResolver().insert(ContactContract.ContactEntry.CONTENT_URI, values);
                textViewResult.setText("Contact added with URI: " + insertUri.toString());
            }
        });

        btnDelete.setOnClickListener(new View.OnClickListener() {
            @Override
            public void onClick(View view) {
                // 删除联系人示例
                String selection = ContactContract.ContactEntry.COLUMN_NAME + " = ?";
                String[] selectionArgs = {"John Doe"};
                int deletedRows = getContentResolver().delete(ContactContract.ContactEntry.CONTENT_URI, selection, selectionArgs);
                textViewResult.setText("Deleted " + deletedRows + " contacts.");
            }
        });

        btnUpdate.setOnClickListener(new View.OnClickListener() {
            @Override
            public void onClick(View view) {
                // 更新联系人示例
                ContentValues values = new ContentValues();
                values.put(ContactContract.ContactEntry.COLUMN_PHONE, "987-654-3210");
                String selection = ContactContract.ContactEntry.COLUMN_NAME + " = ?";
                String[] selectionArgs = {"John Doe"};
                int updatedRows = getContentResolver().update(ContactContract.ContactEntry.CONTENT_URI, values, selection, selectionArgs);
                textViewResult.setText("Updated " + updatedRows + " contacts.");
            }
        });

        btnQuery.setOnClickListener(new View.OnClickListener() {
            @Override
            public void onClick(View view) {
                // 查询联系人示例
                String[] projection = {
                        ContactContract.ContactEntry._ID,
                        ContactContract.ContactEntry.COLUMN_NAME,
                        ContactContract.ContactEntry.COLUMN_PHONE
                };
                Cursor cursor = getContentResolver().query(ContactContract.ContactEntry.CONTENT_URI, projection, null, null, null);

                StringBuilder result = new StringBuilder();
                while (cursor.moveToNext()) {
                    String name = cursor.getString(cursor.getColumnIndexOrThrow(ContactContract.ContactEntry.COLUMN_NAME));
                    String phone = cursor.getString(cursor.getColumnIndexOrThrow(ContactContract.ContactEntry.COLUMN_PHONE));
                    result.append("Name: ").append(name).append(", Phone: ").append(phone).append("\n");
                }

                cursor.close();
                textViewResult.setText(result.toString());
            }
        });
    }
}
整体实现效果
步骤 2: 创建 ContactObserver 项目
-
创建一个新的 Android 项目,命名为 ContactObserver。
-
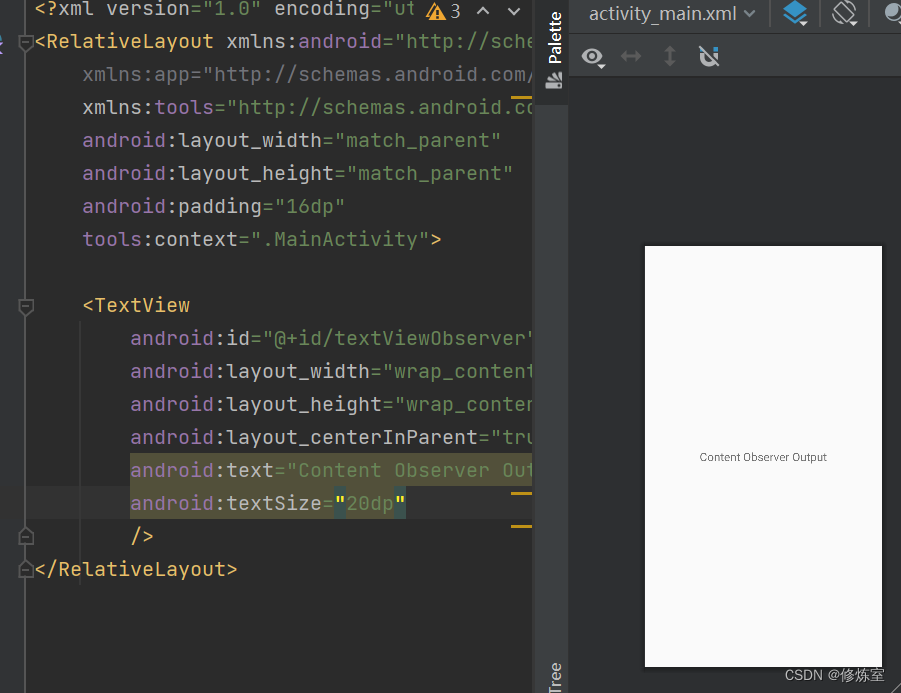
创建
activity_main.xml布局文件,用于显示监听到的内容。
<?xml version="1.0" encoding="utf-8"?>
<RelativeLayout xmlns:android="http://schemas.android.com/apk/res/android"
    xmlns:app="http://schemas.android.com/apk/res-auto"
    xmlns:tools="http://schemas.android.com/tools"
    android:layout_width="match_parent"
    android:layout_height="match_parent"
    android:padding="16dp"
    tools:context=".MainActivity">

    <TextView
        android:id="@+id/textViewObserver"
        android:layout_width="wrap_content"
        android:layout_height="wrap_content"
        android:layout_centerInParent="true"
        android:text="Content Observer Output" />
</RelativeLayout>
- 创建
MainActivity.java,用于显示监听到的内容。
package com.leo.contactobserver;

import android.database.ContentObserver;
import android.net.Uri;
import android.os.Bundle;
import android.os.Handler;
import android.util.Log;
import android.widget.TextView;

import androidx.appcompat.app.AppCompatActivity;

public class ContactObserverActivity extends AppCompatActivity {
    private TextView textViewObserver;
    private ContentObserver contentObserver;

    @Override
    protected void onCreate(Bundle savedInstanceState) {
        super.onCreate(savedInstanceState);
        setContentView(R.layout.activity_main);

        textViewObserver = findViewById(R.id.textViewObserver);

        // 创建 ContentObserver 实例
        contentObserver = new ContentObserver(new Handler()) {
            @Override
            public void onChange(boolean selfChange, Uri uri) {
                super.onChange(selfChange, uri);
                // 处理内容变化时的逻辑
                Log.i("Content Changed: ", "URI: " + uri.toString());
                Log.i("Content Changed: ", "Self Change: " + selfChange);

                // 你可以在这里更新 textViewObserver 中的内容
                textViewObserver.setText("Content Changed: " + uri.toString());
            }

        };
    }

    @Override
    protected void onResume() {
        super.onResume();
        // 注册 ContentObserver 监听内容变化
        getContentResolver().registerContentObserver(
                Uri.parse("content://com.leo.contactprovider/contacts"),
                true, contentObserver);
    }

    @Override
    protected void onDestroy() {
        super.onDestroy();
        // 在活动销毁时取消注册 ContentObserver
        getContentResolver().unregisterContentObserver(contentObserver);
    }

}
下面是关键部分的解释和强调:
-
ContentObserver:
ContentObserver是一个用于监听特定URI上数据变化的类。在代码中,我们创建了一个ContentObserver的实例,用于监听特定内容提供者的数据变化。 -
onChange方法:
onChange方法是ContentObserver的回调方法,当所监听的URI的数据发生变化时被调用。在这个方法内,你可以处理数据变化的逻辑。在代码中,通过Log记录了URI的变化以及selfChange的值。 -
onResume方法:在
onResume方法中,注册了ContentObserver,以监听特定URI上的内容变化。这样,只有当活动处于前台时,ContentObserver才会生效。 -
onDestroy方法:在
onDestroy方法中,取消了ContentObserver的注册。因为在活动被销毁时不再需要监听内容变化。通过取消注册,可以避免潜在的内存泄漏。
工作原理:
- 当内容提供者的数据发生变化时,内容提供者内部会调用
ContentResolver的notifyChange方法,并通知所有注册了监听的ContentObserver。 ContentObserver会触发onChange回调方法,其中包括了变化的URI和一个标志,指示是否是自身发起的变化 (selfChange)。- 你可以在
onChange方法中处理数据的变化,例如更新UI或记录日志。
- 修改配置文件
添加查询监听的authorities
<?xml version="1.0" encoding="utf-8"?>
<manifest xmlns:android="http://schemas.android.com/apk/res/android"
    xmlns:tools="http://schemas.android.com/tools">

    <application
        android:allowBackup="true"
        android:dataExtractionRules="@xml/data_extraction_rules"
        android:fullBackupContent="@xml/backup_rules"
        android:icon="@mipmap/ic_launcher"
        android:label="@string/app_name"
        android:roundIcon="@mipmap/ic_launcher_round"
        android:supportsRtl="true"
        android:theme="@style/Theme.AppCompat.DayNight"
        tools:targetApi="31">

        <activity
            android:name=".ContactObserverActivity"
            android:exported="true"
            android:label="@string/app_name"
            android:theme="@style/Theme.AppCompat.DayNight">
            <intent-filter>
                <action android:name="android.intent.action.MAIN" />

                <category android:name="android.intent.category.LAUNCHER" />
            </intent-filter>
        </activity>
    </application>

    <queries>
        <provider android:authorities="com.leo.contactprovider"
            android:exported="true" />
    </queries>


</manifest>
确保你的 ContactObserverService 正确注册和注销 ContentObserver,以及广播消息的发送和接收。
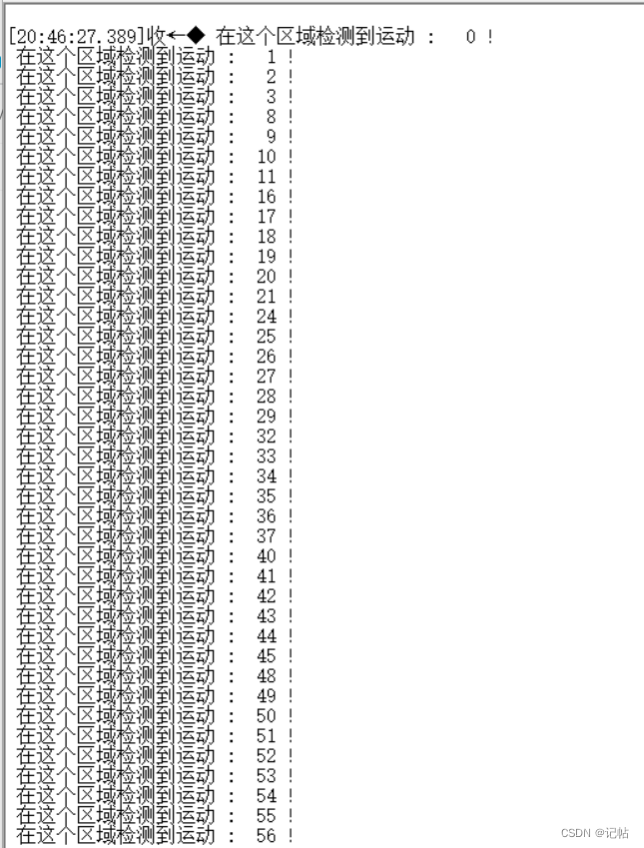
实现效果
provider对数据进行修改,observe监听到数据修改