背景
说明:本文章是介绍,在一张背景图片中嵌入生成的二维码和中文文字。
用处:比如活动分享二维码的时候,提供一张背景图,然后在背景图中嵌入二维码等。
注意:二维码和文字的位置需要你自行调整。

一、依赖引入
        <!-- https://mvnrepository.com/artifact/com.google.zxing/zxing-parent -->
        <dependency>
            <groupId>com.google.zxing</groupId>
            <artifactId>zxing-parent</artifactId>
            <version>3.5.0</version>
            <type>pom</type>
        </dependency>
二、创建工具类
生成工具类:ImageFileUtils
1、导入包
import com.google.zxing.BarcodeFormat;
import com.google.zxing.EncodeHintType;
import com.google.zxing.WriterException;
import com.google.zxing.common.BitMatrix;
import com.google.zxing.qrcode.QRCodeWriter;
import com.google.zxing.qrcode.decoder.ErrorCorrectionLevel;
import com.hvit.user.yst.request.CreateQrcodeRequest;
import org.apache.commons.lang3.StringUtils;

import javax.imageio.ImageIO;
import javax.servlet.http.HttpServletResponse;
import java.awt.*;
import java.awt.image.BufferedImage;
import java.io.*;
import java.net.URL;
import java.util.HashMap;
import java.util.Map;
import java.util.UUID;
2、生成二维码
    // 生成二维码图片
    // text:二维码内容
    // size: 二维码尺寸
    private static BufferedImage generateQRCode(String text, int size) {
        Map<EncodeHintType, Object> hints = new HashMap<>();
        hints.put(EncodeHintType.ERROR_CORRECTION, ErrorCorrectionLevel.H);
        hints.put(EncodeHintType.CHARACTER_SET, "UTF-8");
        try {
            QRCodeWriter writer = new QRCodeWriter();
            BitMatrix bitMatrix = writer.encode(text, BarcodeFormat.QR_CODE, size, size, hints);
            int width = bitMatrix.getWidth();
            int height = bitMatrix.getHeight();
            BufferedImage qrImage = new BufferedImage(width, height, BufferedImage.TYPE_INT_ARGB);
            Graphics2D graphics = qrImage.createGraphics();
            graphics.setColor(Color.WHITE);
            graphics.fillRect(0, 0, size, size);
            graphics.setColor(Color.BLACK);

            for (int x = 0; x < size; x++) {
                for (int y = 0; y < size; y++) {
                    if (bitMatrix.get(x, y)) {
                        graphics.fillRect(x, y, 1, 1);
                    }
                }
            }

            // 渲染二维码
            Graphics2D graphics1 = qrImage.createGraphics();
            // 添加蓝色边框
            int borderSize = 10; // 边框大小
            Color myColor = new Color(0x19, 0x76, 0xFF); // 红色
            graphics1.setColor(myColor);
            graphics1.fillRect(0, 0, size, borderSize); // 上边框
            graphics1.fillRect(0, 0, borderSize, size); // 左边框
            graphics1.fillRect(size - borderSize, 0, borderSize, size); // 右边框
            graphics1.fillRect(0, size - borderSize, size, borderSize); // 下边框

            return qrImage;
        } catch (WriterException e) {
            e.printStackTrace();
            return null;
        }
    }
说明:以上生成的二维码是带有蓝色边框的二维码!如图:

3、在背景图片上加入文字,并且居中支持\n换行
    // 在图片上添加图片
    private static void addImageToImage(BufferedImage baseImage, BufferedImage overlayImage, int x, int y) {
        Graphics2D g2d = baseImage.createGraphics();
        g2d.drawImage(overlayImage, x, y, null);
        g2d.dispose();
    }

    // 在图片上添加文本,支持手动换行,文本水平居中
    private static void addTextToImage(BufferedImage baseImage, String text, Font font, Color color, int maxWidth, int y) {
        Graphics2D g2d = baseImage.createGraphics();
        g2d.setFont(font);
        g2d.setColor(color);

        FontMetrics fm = g2d.getFontMetrics();
        int lineHeight = fm.getHeight();
        int currentY = y;
        String[] lines = text.split("\n");

        for (String line : lines) {
            int lineWidth = fm.stringWidth(line);
            int lineX = (maxWidth - lineWidth) / 2; // 居中
            g2d.drawString(line, lineX, currentY);
            currentY += lineHeight;
        }

        g2d.dispose();
    }
4、调用方法
public static void main(String[] args) throws Exception {
// 1. 读取原始图片
BufferedImage image = null;
try {
image = ImageIO.read(new File("C:\\Users\\caozhen\\Desktop\\图片素材\\1.png")); // 替换成您的图片路径
} catch (IOException e) {
e.printStackTrace();
}
if (image == null) {
System.err.println("无法读取图片");
return;
}
// 2. 在图片上添加透明的二维码
String qrText = "https://qhdm.mzt.zj.gov.cn:9090/szmp/#/wait?code=b20267e5298948a2bca5de8d4a8081a4&type=dz&timeStrap=1694503662057"; // 替换成您的二维码文本
int qrSize = 500; // 二维码尺寸
BufferedImage qrCodeImage = generateQRCode(qrText, qrSize);
int qrX = (image.getWidth() - qrSize) / 2;
int qrY = 1050; // 设置二维码的垂直位置
addImageToImage(image, qrCodeImage, qrX, qrY);
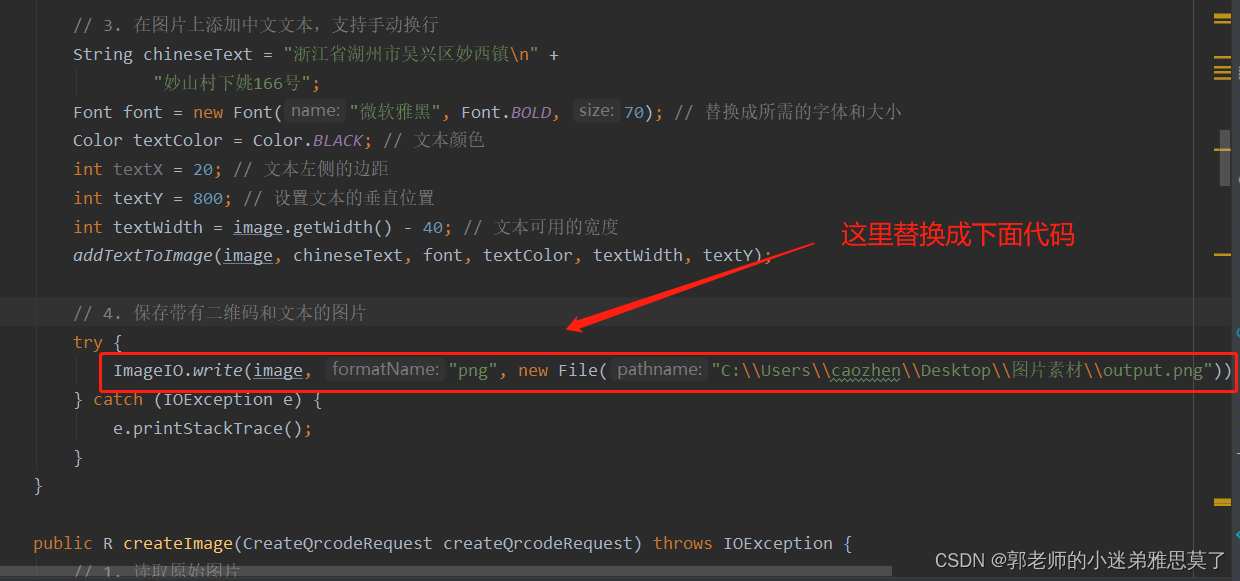
// 3. 在图片上添加中文文本,支持手动换行
String chineseText = "浙江省湖州市吴兴区妙西镇\n" +
"妙山村下姚166号";
Font font = new Font("微软雅黑", Font.BOLD, 70); // 替换成所需的字体和大小
Color textColor = Color.BLACK; // 文本颜色
int textX = 20; // 文本左侧的边距
int textY = 800; // 设置文本的垂直位置
int textWidth = image.getWidth() - 40; // 文本可用的宽度
addTextToImage(image, chineseText, font, textColor, textWidth, textY);
// 4. 保存带有二维码和文本的图片
try {
ImageIO.write(image, "png", new File("C:\\Users\\caozhen\\Desktop\\图片素材\\output.png")); // 替换成保存的文件路径
} catch (IOException e) {
e.printStackTrace();
}
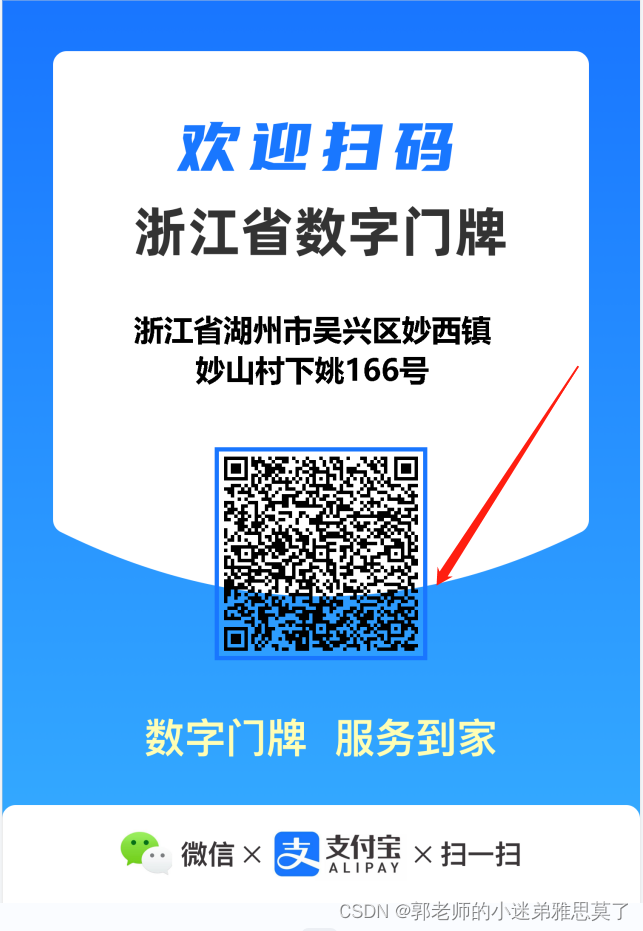
}5、最终生成的图片成功

三、如何生成透明的二维码?
1、生成二维码
    // 生成透明的二维码图片
    private static BufferedImage generateQRCode(String text, int size) {
        Map<EncodeHintType, Object> hints = new HashMap<>();
        hints.put(EncodeHintType.ERROR_CORRECTION, ErrorCorrectionLevel.H);
        hints.put(EncodeHintType.CHARACTER_SET, "UTF-8");
        hints.put(EncodeHintType.MARGIN, 0); // 无边距
        try {
            QRCodeWriter writer = new QRCodeWriter();
            BitMatrix bitMatrix = writer.encode(text, BarcodeFormat.QR_CODE, size, size, hints);
            int width = bitMatrix.getWidth();
            int height = bitMatrix.getHeight();
            BufferedImage qrImage = new BufferedImage(width, height, BufferedImage.TYPE_INT_ARGB);
            // 这里就是生成透明二维码关键之处
            for (int x = 0; x < width; x++) {
                for (int y = 0; y < height; y++) {
                    qrImage.setRGB(x, y, bitMatrix.get(x, y) ? Color.BLACK.getRGB() : new Color(0, 0, 0, 0).getRGB());
                }
            }
            // 渲染二维码
            Graphics2D graphics1 = qrImage.createGraphics();
            // 添加蓝色边框
            int borderSize = 10; // 边框大小
            Color myColor = new Color(0x19, 0x76, 0xFF); // 红色
            graphics1.setColor(myColor);
            graphics1.fillRect(0, 0, size, borderSize); // 上边框
            graphics1.fillRect(0, 0, borderSize, size); // 左边框
            graphics1.fillRect(size - borderSize, 0, borderSize, size); // 右边框
            graphics1.fillRect(0, size - borderSize, size, borderSize); // 下边框

            return qrImage;
        } catch (WriterException e) {
            e.printStackTrace();
            return null;
        }
    }
2、看看透明二维码结果
四、如何希望生成的是浏览器下载图片
1、 代码调整
1.在方法入参的时候加上HttpServletResponse response

  // 保存带有二维码和文本的图片
  // 将图片发送到浏览器
     response.setContentType("image/png");
     response.setHeader("Content-Disposition", "attachment; filename=\"output.png\"");
     OutputStream os = response.getOutputStream();
     ImageIO.write(image, "png", os);
     os.close();
五、完整接口调用流程
1.controller层
@RestController
@RequestMapping("/xxx/user/")
@Api(value = "生成二维码", description = "生成二维码")
public class QrcodeController {


    @RequestMapping(value = "/createAddressQrcode", method = RequestMethod.POST)
    public void createAddressQrcode(HttpServletResponse response) throws IOException {
        ImageFileUtils imageFileUtils = new ImageFileUtils();
        imageFileUtils.createImage(response);
    }

}
2、工具类ImageFileUtils
public class ImageFileUtils {


    public void createImage(HttpServletResponse response) throws IOException {
        // 1. 读取原始图片
        BufferedImage image = null;
        try {
            //这里是读取网络图片
            URL url = new URL("https:xxxxxxxxxxxxxxxxxxxxxxxxxx");
            image = ImageIO.read(url);
        } catch (IOException e) {
            e.printStackTrace();
        }

        if (image == null) {
            return R.error("无法读取图片");
        }
        // 2. 在图片上添加透明的二维码
        String qrText = "https:xxxxxxxxxxxxxxxx"; // 替换成您的二维码文本
        int qrSize = 500; // 二维码尺寸
        BufferedImage qrCodeImage = generateQRCode(qrText, qrSize);
        int qrX = (image.getWidth() - qrSize) / 2;
        int qrY = 1050; // 设置二维码的垂直位置
        addImageToImage(image, qrCodeImage, qrX, qrY);

        // 3. 在图片上添加中文文本,支持手动换行
        String chineseText = createQrcodeRequest.getAddress();
        Font font = new Font("微软雅黑", Font.BOLD, 90); // 替换成所需的字体和大小
        Color textColor = Color.BLACK; // 文本颜色
        int textX = 20; // 文本左侧的边距
        int textY = 800; // 设置文本的垂直位置
        int textWidth = image.getWidth() - 40; // 文本可用的宽度
        addTextToImage(image, chineseText, font, textColor, textWidth, textY);

        // 4. 保存带有二维码和文本的图片
        // 将图片发送到浏览器
        response.setContentType("image/png");
        response.setHeader("Content-Disposition", "attachment; filename=\"output.png\"");
        OutputStream os = response.getOutputStream();
        ImageIO.write(image, "png", os);
        os.close();

    }

    // 生成二维码图片
    private static BufferedImage generateQRCode(String text, int size) {
        Map<EncodeHintType, Object> hints = new HashMap<>();
        hints.put(EncodeHintType.ERROR_CORRECTION, ErrorCorrectionLevel.H);
        hints.put(EncodeHintType.CHARACTER_SET, "UTF-8");
        try {
            QRCodeWriter writer = new QRCodeWriter();
            BitMatrix bitMatrix = writer.encode(text, BarcodeFormat.QR_CODE, size, size, hints);
            int width = bitMatrix.getWidth();
            int height = bitMatrix.getHeight();
            BufferedImage qrImage = new BufferedImage(width, height, BufferedImage.TYPE_INT_ARGB);
            Graphics2D graphics = qrImage.createGraphics();
            graphics.setColor(Color.WHITE);
            graphics.fillRect(0, 0, size, size);
            graphics.setColor(Color.BLACK);

            for (int x = 0; x < size; x++) {
                for (int y = 0; y < size; y++) {
                    if (bitMatrix.get(x, y)) {
                        graphics.fillRect(x, y, 1, 1);
                    }
                }
            }

            // 渲染二维码
            Graphics2D graphics1 = qrImage.createGraphics();
            // 添加蓝色边框
            int borderSize = 10; // 边框大小
            Color myColor = new Color(0x19, 0x76, 0xFF); // 红色
            graphics1.setColor(myColor);
            graphics1.fillRect(0, 0, size, borderSize); // 上边框
            graphics1.fillRect(0, 0, borderSize, size); // 左边框
            graphics1.fillRect(size - borderSize, 0, borderSize, size); // 右边框
            graphics1.fillRect(0, size - borderSize, size, borderSize); // 下边框

            return qrImage;
        } catch (WriterException e) {
            e.printStackTrace();
            return null;
        }
    }

    // 在图片上添加图片
    private static void addImageToImage(BufferedImage baseImage, BufferedImage overlayImage, int x, int y) {
        Graphics2D g2d = baseImage.createGraphics();
        g2d.drawImage(overlayImage, x, y, null);
        g2d.dispose();
    }

    // 在图片上添加文本,支持手动换行,文本水平居中
    private static void addTextToImage(BufferedImage baseImage, String text, Font font, Color color, int maxWidth, int y) {
        Graphics2D g2d = baseImage.createGraphics();
        g2d.setFont(font);
        g2d.setColor(color);

        FontMetrics fm = g2d.getFontMetrics();
        int lineHeight = fm.getHeight();
        int currentY = y;
        String[] lines = text.split("\n");

        for (String line : lines) {
            int lineWidth = fm.stringWidth(line);
            int lineX = (maxWidth - lineWidth) / 2; // 居中
            g2d.drawString(line, lineX, currentY);
            currentY += lineHeight;
        }

        g2d.dispose();
    }
}
六、注意事项
就是当程序部署到linux服务器时,文字格式没有变化的处理方案!
原因:就是linux服务器没有微软雅黑字体,所以导致没有效果。
解决方案是将windows中微软雅黑字体放到linux服务器下即可。
1、到 C:\windows\fonts 复制对应字体库,微软雅黑、宋体、黑体等,各文件后缀可能不一样,有的为ttf,有的为ttc,不影响使用。
2、上传刚才复制的字体库到/usr/share/fonts/zh_CN目录下,如果没有该目录,用命令:mkdir /usr/share/fonts/zh_CN 来创建,然后再上传。
3、修改字体权限,使root以外的用户可以使用这些字体:chmod -R 777 /usr/share/fonts/zh_CN,使用777 赋予全部权限
4、重启springboot项目即可。
总结
好了,以上就是在图片上嵌入二维码和加入文字的代码了!
有问题可以在评论区留言或者私信我,看到会回复你。